Sausage Cheese Butter Swim Biscuits: Ultimate Comfort Food

The scent of breakfast wafting through the house brings an undeniable sense of comfort, doesn’t it? One of my go-to recipes for those cozy mornings is Sausage Cheese Butter Swim Biscuits.
These delightful biscuits are flaky, buttery pillows filled with savory sausage and sharp cheddar, making them an instant crowd-pleaser for brunch gatherings or a quick weeknight dinner. The best part? They come together in a flash with just a handful of ingredients, giving you that homemade touch without the fuss.
Why You Will Love This Recipe
- Quick Preparation: Dinner or brunch is on the table in under an hour, perfect for busy mornings or weeknights.
- Incredibly Flavorful: The savory sausage and sharp cheddar cheese create a delightful taste explosion in every bite.
- Superior Flakiness: Achieved through the perfect balance of cold butter and gentle handling, these biscuits are exceptionally tender.
- Versatile & Customizable: Easily adapt the recipe with different cheeses, herbs, or even a spicy kick to suit your preferences.
- Comfort Food at its Finest: These biscuits embody warmth and coziness, making them ideal for any occasion that calls for a hug in food form.
Ingredients You Need
Gathering high-quality ingredients is the first step to achieving truly exceptional Sausage Cheese Butter Swim Biscuits. Using fresh, good-quality components ensures the best possible flavor and texture in your final baked goods. Even simple additions like fresh herbs can elevate the overall taste profile significantly, transforming a good biscuit into an extraordinary one.
Sausage Cheese Butter Swim Biscuits

Flaky, buttery pillows filled with savory sausage and sharp cheddar cheese. These biscuits are perfect for a comforting brunch or a quick weeknight dinner, and they come together with just a few simple ingredients. Easily adaptable to be gluten-free.
- 1 pound Breakfast Sausage (can substitute with turkey or chicken sausage)
- 1/2 cup Unsalted Butter (divided into melted and cold)
- 2 cups All-Purpose Flour (can swap with gluten-free flour blend)
- 1 tbsp Baking Powder
- 1 tsp Baking Soda
- 1 tsp Salt
- 1 tsp Garlic Powder
- 1/2 tsp Black Pepper (optional)
- 1 cup Buttermilk
- 1 cup Sharp Cheddar Cheese
- 1 tbsp Heavy Cream
- 1In a skillet over medium heat, brown the breakfast sausage for 5-7 minutes, breaking it into small pieces. Drain excess grease and set aside.
- 2In a mixing bowl, combine the cooled sausage with shredded sharp cheddar cheese. Toss to combine.
- 3In a large bowl, whisk together the all-purpose flour, baking powder, baking soda, salt, garlic powder, and optional black pepper.
- 4Work the cold unsalted butter into the dry mixture using a pastry cutter or your fingertips until it resembles coarse crumbs.
- 5Make a well in the center of the dry mixture and pour in the buttermilk. Stir until just combined. Do not overmix.
- 6Carefully fold the sausage and cheese mixture into the biscuit dough.
- 7On a floured surface, pat the dough into a 1-inch thick rectangle. Cut out biscuits using a biscuit cutter without twisting.
- 8Place the cut biscuits on a parchment-lined baking sheet, making sure they are touching slightly. Brush the tops with melted butter or heavy cream.
- 9Preheat your oven to 425°F (220°C). Bake for 15-20 minutes, or until golden brown.
- 10Remove from the oven and let cool on a wire rack for about 5 minutes before serving.
Keywords: Sausage, Cheese, Biscuits, Comfort Food, Brunch, Quick Meal, Dinner, Savory
- breakfast sausage: provides savory flavor and protein; you can substitute with turkey or chicken sausage for a lighter option.
- unsalted butter: adds richness; divide into melted and cold to achieve the perfect flaky texture.
- all-purpose flour: creates structure; can be swapped with a gluten-free flour blend for a gluten-free version.
- baking powder: essential for leavening; avoid direct swaps with baking soda without adjusting other acids.
- baking soda: works alongside baking powder to ensure a nice rise in your biscuits.
- salt: enhances overall flavor; consider using a low-sodium alternative if preferred.
- garlic powder: adds a subtle yet lovely depth of flavor; fresh garlic may change the texture, so choose wisely.
- black pepper: optional for those who enjoy a slight kick to their biscuits.
- buttermilk: provides moisture and tang; can be substituted with regular milk mixed with vinegar for a similar effect.
- sharp cheddar cheese: adds creamy, savory flavor; feel free to use Gruyere or pepper jack for a twist.
- heavy cream: use for brushing your biscuits before baking; milk can be used if heavy cream is unavailable.
The precise quantities for each ingredient are conveniently listed within the recipe card above.
Variations
Embrace your inner chef and experiment with these delightful variations that can transform your Sausage Cheese Butter Swim Biscuits into something truly unique and personalized.
For those who love a little heat, consider adding finely diced jalapeños or a pinch of cayenne pepper to the sausage and cheese mixture. This creates a delightful spicy kick that complements the richness of the cheese and sausage beautifully, offering a tantalizing warmth with every bite.
Herb lovers will adore incorporating fresh chopped chives, parsley, or even a hint of rosemary into the dough. These aromatic additions bring a fresh, earthy dimension that elevates the biscuits, making them perfect for a sophisticated brunch or a light dinner.
If you’re looking for a healthier twist, try folding in some finely chopped spinach or grated zucchini into the dough along with the sausage and cheese. These vegetables add moisture, a vibrant color, and a boost of nutrients without overwhelming the classic biscuit flavor.
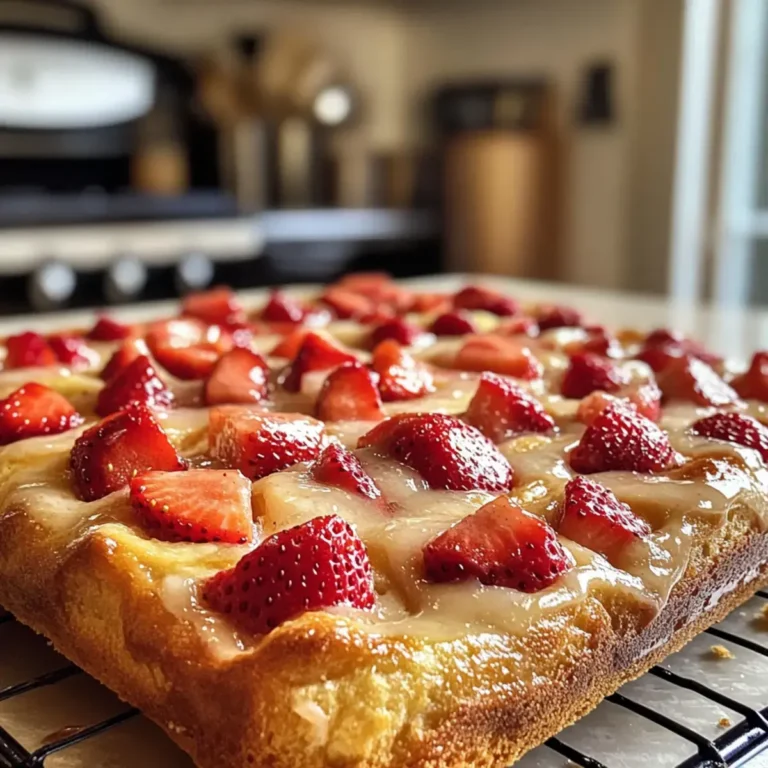
To explore more creative flavor combinations, you might find inspiration in recipes such as a delightful berry tart or even a rich and decadent funfetti cookie, showcasing the versatility of simple ingredients.
How to Prepare Sausage Cheese Butter Swim Biscuits
Step 1: Cook the Sausage
Begin by placing your breakfast sausage in a skillet over medium heat. Allow it to brown thoroughly, which typically takes about 5 to 7 minutes, breaking it apart into small, manageable pieces as it cooks. You’ll know the sausage is perfectly cooked when it loses its pink hue and develops a rich, golden-brown color.
Once the sausage has reached this ideal state, carefully drain away any excess grease that has accumulated in the skillet. Set the cooked sausage aside on a plate lined with paper towels to allow it to cool slightly before you proceed to the next step. This cooling period is important to prevent the cheese from melting prematurely when combined.
The quality of your sausage can greatly influence the final flavor of your biscuits. Opting for a well-seasoned, good-quality breakfast sausage will impart a more robust and satisfying taste to your final dish. Consider different types of sausage, such as mild, spicy, or even Italian sausage, to add your own unique spin.
Step 2: Mix the Filling
In a medium-sized mixing bowl, combine the slightly cooled, cooked breakfast sausage with the shredded sharp cheddar cheese. Gently toss these ingredients together with a spoon or spatula until the cheese is evenly distributed throughout the sausage crumbles. This creates the flavorful core of your biscuits.
The goal here is to ensure that each bite of your biscuit will contain a delightful morsel of sausage and cheese. Proper mixing ensures this distribution is uniform, so no biscuit is left wanting for its signature filling. This simple combination is the heart of what makes these biscuits so irresistible and comforting.
Take a moment to appreciate the aroma; the savory sausage mingled with the sharp cheese is already a promise of deliciousness. This filling is robust enough to stand on its own but also pairs wonderfully with the buttery biscuit dough, creating a harmonious balance of flavors and textures.
Step 3: Prepare the Dry Ingredients
In a large mixing bowl, add your all-purpose flour, baking powder, baking soda, salt, garlic powder, and any optional black pepper you might be using. Use a whisk to thoroughly combine these dry ingredients, ensuring there are no clumps and that all components are evenly distributed. This foundational step is crucial for achieving a light and airy biscuit structure.
Whisking the dry ingredients together effectively aerates the flour and ensures that the leavening agents are dispersed uniformly throughout the mixture. This uniformity is key to preventing pockets of baking powder or soda, which can lead to uneven rising or a metallic taste in the final product. A well-mixed dry base guarantees consistent results.
This mixture forms the backbone of your biscuit dough. Ensuring the salt and seasonings are evenly incorporated means that every part of the biscuit will be seasoned appropriately, enhancing the overall flavor profile without any surprising bland spots. The garlic powder, in particular, adds a subtle savory note that complements the sausage and cheese beautifully.
Step 4: Incorporate the Butter
Now, it’s time to incorporate the cold unsalted butter into your dry ingredient mixture. You can use a pastry blender, two forks, or even your fingertips for this task. Work the butter into the flour mixture until it resembles coarse crumbs, with some pea-sized pieces of butter still visible. This process should take approximately 2 to 3 minutes.
The key to achieving flaky biscuits lies in these visible pieces of cold butter. As the biscuits bake, the butter melts, creating steam that separates the layers of dough, resulting in that sought-after flaky texture. Keeping the butter cold is paramount for this process to work effectively. You can find more on the science of baking, including fat incorporation, on Wikipedia.
Resist the urge to overwork the mixture; you want distinct pieces of butter remaining. These pockets of fat are what will create the glorious layers in your finished biscuits. The texture should look somewhat sandy, with larger butter fragments interspersed throughout.
Step 5: Add the Buttermilk
Create a well in the center of your dry mixture, making a small crater with your hands or a spoon. Pour the cold buttermilk into this well. Using a wooden spoon or a sturdy spatula, gently stir the ingredients together until they are just combined. The dough should be slightly sticky but still cohesive; avoid overmixing at this stage, as it can result in tough biscuits.
Buttermilk is crucial here, as its acidity reacts with the baking soda to provide lift and a tender crumb. The tanginess of buttermilk also adds a subtle depth of flavor that complements the savory fillings. If you don’t have buttermilk, a simple substitute is to add 1 tablespoon of white vinegar or lemon juice to regular milk and let it sit for 5-10 minutes.
When stirring, aim for a shaggy dough. It’s perfectly fine if there are still some dry bits of flour visible. Overmixing will develop the gluten in the flour too much, leading to a dense and chewy biscuit rather than a light and tender one. Gentle is the operative word here.
Step 6: Fold in Sausage and Cheese
Carefully add the prepared sausage and cheese mixture to the biscuit dough. Using your spatula or hands, gently fold the filling into the dough. Be very delicate to ensure the filling is distributed throughout the dough without overworking it. This step is about incorporating the flavor without compromising the texture of the biscuit.
The aim is to evenly distribute the savory sausage and cheese chunks without deflating the dough or creating a dense mass. Think of it as tucking the delicious filling into the biscuit layers rather than aggressively mixing it in. This gentle folding ensures you get pockets of deliciousness in every bite.
This is where the magic truly happens, transforming a simple biscuit dough into a hearty and satisfying meal component. The visual appeal of the red sausage and white cheese peeking through the dough is a promising sign of the deliciousness to come. Handle the dough with care to preserve the air pockets created in the previous steps.
Step 7: Shape and Cut the Biscuits
Turn the dough out onto a lightly floured surface. Gently pat the dough into a rectangle that is approximately 1 inch thick. Avoid pressing down too firmly, as you want to preserve as much air as possible within the dough. The dough might be a bit sticky, so feel free to use a little extra flour on your hands and the surface.
Using a biscuit cutter (about 2.5 to 3 inches in diameter), cut out the biscuits. It’s crucial not to twist the cutter when pressing down; instead, press straight down and lift straight up. Twisting the cutter seals the edges of the dough, which can prevent the biscuits from rising evenly and achieving their full height.
If you have dough scraps, gently gather them together and pat them down to 1-inch thickness again to cut out any remaining biscuits. While these might not be as perfectly shaped as the first batch, they will still taste just as delicious. Minimizing the handling of the scraps will help maintain their tenderness.
Step 8: Prepare for Baking
Arrange the cut biscuits on a baking sheet lined with parchment paper. For softer sides, ensure the biscuits are touching each other slightly. If you prefer crispier edges, you can leave a small gap between each biscuit on the baking sheet. This arrangement plays a role in how the biscuits bake and brown.
Once the biscuits are positioned on the baking sheet, brush the tops of each biscuit with a bit of melted butter or heavy cream. This optional step adds a lovely golden-brown color to the crust and imparts an extra layer of richness and flavor. It’s a small detail that makes a big difference in presentation and taste.
The parchment paper not only prevents sticking but also makes for easier cleanup. Ensuring the baking sheet is ready before preheating the oven helps maintain an even oven temperature, crucial for consistent baking. Your biscuits are now poised for their transformation in the heat.
Step 9: Bake to Golden Perfection
Preheat your oven to 425°F (220°C). Once the oven has reached the correct temperature, carefully place the baking sheet with the biscuits inside. Bake for approximately 15 to 20 minutes, or until the biscuits have puffed up beautifully and developed a rich golden-brown color on top and around the edges. The aroma filling your kitchen will be irresistible.
Keep a close eye on the biscuits during the last few minutes of baking, as oven temperatures can vary. You want them to be cooked through but not overbaked, which can lead to a dry texture. The golden hue indicates that the crust is perfectly caramelized and the interior is tender and cooked.
This is the moment of truth! The heat of the oven works its magic, transforming the dough into fluffy, flavorful biscuits. The interaction of the leavening agents, the fat, and the heat creates the delightful rise and texture that are characteristic of a well-made biscuit.
Step 10: Cool and Serve
Once the biscuits are golden brown and fragrant, remove them from the oven. Carefully transfer the biscuits from the baking sheet to a wire rack. Allow them to cool for about 5 minutes before serving. This brief cooling period allows the biscuits to finish setting and makes them easier to handle.
Serve your Sausage Cheese Butter Swim Biscuits warm, perhaps with a pat of butter or a drizzle of honey. They are perfect on their own or as a delicious accompaniment to a variety of breakfast and brunch dishes. Enjoy the fruits of your labor with every savory, cheesy, and buttery bite!
The warmth of these biscuits is when their flavors and textures are most vibrant. They are designed to be enjoyed fresh, offering that ultimate comfort food experience. Don’t hesitate to savor them immediately after they’ve had their short rest.
Pro Tips for Sausage Cheese Butter Swim Biscuits
Keep Ingredients Cold: For the ultimate flaky texture, ensure your butter is very cold (cubed and chilled) and your buttermilk is also ice-cold. This separation of butter in the dough is what creates those airy layers during baking.
Gentle Handling is Key: Avoid overmixing the dough at any stage, especially after adding the buttermilk. Overworking develops gluten, leading to tough, dense biscuits. Fold ingredients gently and handle the dough minimally.
Don’t Twist the Cutter: When cutting out your biscuits, press the cutter straight down and lift it straight up without twisting. Twisting seals the edges and can inhibit the biscuits’ ability to rise evenly, resulting in a less lofty final product.
Bake Immediately: Once you’ve cut your biscuits, bake them as soon as possible. Letting the shaped biscuits sit for too long on the baking sheet can cause them to lose their airiness and result in flatter biscuits.
Customize with Flavor: Don’t be afraid to add your personal touch! Consider adding a pinch of red pepper flakes for heat, fresh herbs like chives or rosemary, or even a different type of cheese like pepper jack or Gruyere for a unique flavor profile.
Serving Suggestions for Sausage Cheese Butter Swim Biscuits
Decoration
While these biscuits are wonderfully rustic on their own, a few thoughtful touches can elevate their presentation. A light dusting of finely chopped fresh parsley or chives over the top just before serving adds a burst of color and a hint of fresh herbaceousness.
For an extra decadent touch, you could drizzle a tiny bit of melted butter infused with garlic or a hint of smoked paprika over the biscuits just before they hit the table. This not only adds visual appeal but also an extra layer of savory aroma and flavor.
Consider a small garnish of crumbled cooked bacon bits sprinkled around the platter. This reinforces the savory theme and adds a delightful textural contrast that complements the soft, fluffy biscuit.
Side Dishes
These biscuits are fantastic alongside a plate of fluffy scrambled eggs or a perfectly fried egg, their richness complementing the creamy eggs beautifully. The classic pairing of crispy bacon or savory breakfast sausage patties also makes for a complete and satisfying meal.
For a lighter contrast, a fresh fruit salad brimming with seasonal berries, melon, and citrus can provide a refreshing balance to the hearty biscuits. The sweetness of the fruit cuts through the richness, offering a well-rounded dining experience. You can find great inspiration for fruit preparations at easycookfeed.com/easy-berry-tart-2/.
A hearty bowl of homemade tomato soup or a warming chicken noodle soup can turn these biscuits into a comforting lunch or light dinner. Their absorbent texture makes them ideal for soaking up delicious broths and sauces.
Creative Serving Ideas
Transform your biscuits into mini sandwich bases for a breakfast or lunch slider. Simply split them horizontally and fill with more scrambled eggs, a slice of ham, or even a slice of avocado for a delightful handheld meal. They are also excellent served alongside a vibrant baked lemon chicken, offering a comforting carb to soak up any delicious pan juices.
Consider serving them as a topping for a savory stew or chili. The biscuits would soak up the flavorful liquids beautifully, creating a deconstructed shepherd’s pie or a rustic casserole topping that’s both comforting and delicious. This adaptability makes them a true kitchen workhorse.
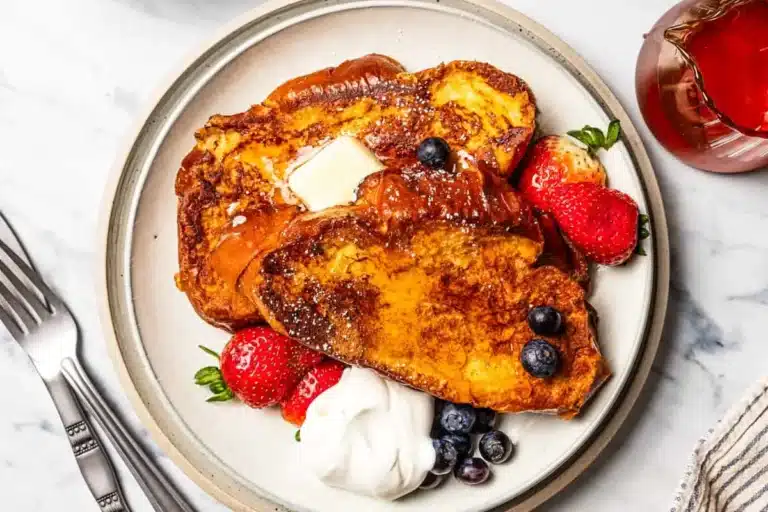
For a brunch spread, arrange them in a basket lined with a checkered cloth, alongside other brunch favorites like pancakes or waffles. This classic presentation evokes a sense of homemade comfort and abundance, making your meal feel truly special.
Preparation & Storage
Storing Leftovers
To keep your leftover Sausage Cheese Butter Swim Biscuits fresh and delicious, store them in an airtight container at room temperature for up to 2 days. Ensure the container is well-sealed to prevent the biscuits from drying out. They will retain their lovely texture for a short period this way.
If you plan to store them for longer than two days, it’s best to refrigerate them. Place the cooled biscuits in an airtight container or wrap them tightly in plastic wrap and then foil. Refrigerated biscuits can last for up to 5 days.
When storing, it’s a good idea to place a piece of parchment paper between layers of biscuits to prevent them from sticking together, especially if they have a slightly sticky exterior from butter or cream.
Freezing
These biscuits freeze exceptionally well, making them perfect for advance preparation. After the biscuits have cooled completely, wrap each one individually and tightly in plastic wrap. Then, place the individually wrapped biscuits into a freezer-safe bag or container, removing as much air as possible before sealing.
Properly wrapped, Sausage Cheese Butter Swim Biscuits can be stored in the freezer for up to 2 months. This allows you to have delicious, homemade biscuits ready whenever the craving strikes, without the need for last-minute preparation. The double-wrapping method is crucial for preventing freezer burn.
Ensure they are completely cool before freezing; wrapping warm biscuits can lead to condensation and ice crystals forming, affecting their texture. Labeling the bag with the date of freezing is also a helpful practice.
Reheating
To reheat, whether from the refrigerator or freezer, the oven is your best friend for restoring that fresh-baked quality. For chilled biscuits, preheat your oven to 350°F (175°C) and bake for about 5-8 minutes, or until warmed through. The parchment paper can be used again here if desired.
For frozen biscuits, you can reheat them directly from frozen, without thawing. Place them on a baking sheet and bake in a preheated 350°F (175°C) oven for about 10-15 minutes, or until they are heated through and slightly crisped. Keep an eye on them to prevent over-baking.
A quick option for single servings is the microwave, but be cautious as this can sometimes result in a slightly chewier texture compared to oven reheating. Microwave on 50% power for 20-30 second intervals until just warm.
Frequently Asked Questions
-
How do I ensure my biscuits are extra flaky and buttery?
To achieve maximum flakiness, it’s crucial to use very cold butter and buttermilk. Cube your butter and keep it chilled until ready to incorporate into the dry ingredients. Similarly, ensure your buttermilk is ice-cold. When cutting the butter into the flour, leave some pea-sized pieces of butter visible; these pockets of fat create steam during baking, which separates the dough layers and results in a wonderfully flaky texture. Avoid overmixing the dough once the liquid is added, as this develops gluten and can make the biscuits tough rather than tender and flaky.
-
Can I make these biscuits ahead of time, and if so, how should I store and reheat them?
Yes, Sausage Cheese Butter Swim Biscuits are excellent candidates for making ahead! You can prepare the dough up to the point of cutting the biscuits, then place them on a baking sheet, cover them tightly with plastic wrap, and refrigerate for up to 24 hours. Bake them directly from the refrigerator, adding a few extra minutes to the baking time as needed. For longer storage, cool baked biscuits completely, then wrap them individually in plastic wrap and foil and freeze for up to two months. Reheat chilled biscuits at 350°F (175°C) for 5-8 minutes, and frozen biscuits from the freezer at the same temperature for 10-15 minutes until heated through.
-
What are the best ways to customize these biscuits with different flavors or dietary needs?
These biscuits are incredibly versatile. For added flavor, consider incorporating finely chopped fresh herbs like chives, rosemary, or thyme into the dough. You can also experiment with different cheeses, such as Gruyere, pepper jack, or even a sharp white cheddar. For a spicy kick, add finely diced jalapeños or a pinch of cayenne pepper. To make them gluten-free, simply substitute the all-purpose flour with a good quality gluten-free all-purpose flour blend that contains xanthan gum, and ensure your baking powder is also gluten-free. You can also substitute some of the butter with a plant-based alternative for a dairy-free option, though this might slightly alter the texture.