Chocolate Covered Strawberry Cheesecake Bites: Easy No-Bake Treats
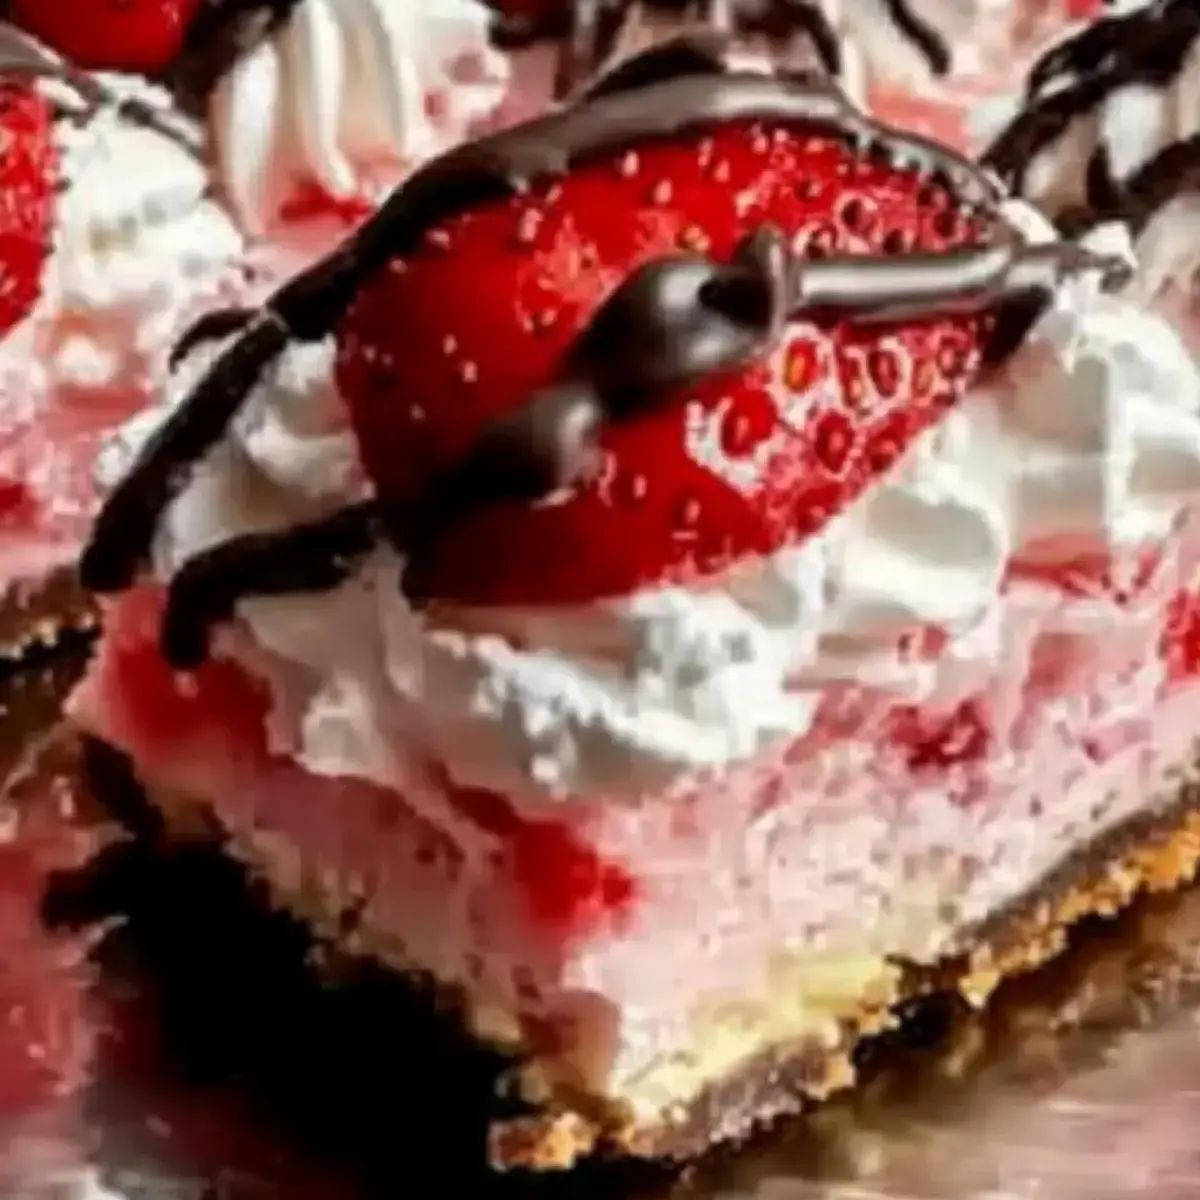
The sweet aroma of fresh strawberries can transport you to sun-drenched summer days, even in the middle of a busy week. This delightful scent inspired a creation that’s both elegant and incredibly easy to prepare: No-Bake Chocolate Covered Strawberry Cheesecake Bites. These miniature masterpieces perfectly encapsulate the joy of ripe strawberries, the smooth richness of cheesecake, and the satisfying snap of chocolate, all in one perfect bite.
What makes these bites truly special is their accessibility; they require absolutely no baking, making them a dream for novice bakers and busy individuals alike. They offer a sophisticated dessert experience without the fuss, proving that impressive treats can be both simple and delicious. Get ready to discover a recipe that’s poised to become a favorite for any occasion.
Why You Will Love This Recipe
- Effortless Preparation: These bites are completely no-bake, meaning you can skip the oven and enjoy a fantastic dessert with minimal effort and time commitment.
- Decadent Flavor Combination: The classic pairing of sweet strawberries, creamy cheesecake, and rich chocolate creates a harmonious explosion of flavors that is universally adored.
- Perfectly Portionable: Their small size makes them ideal for parties, gatherings, or simply enjoying as a guilt-free indulgence.
- Visually Appealing: The vibrant red of the strawberries peeking through or embedded in the cheesecake, all enrobed in chocolate, makes for a stunning presentation.
- Make-Ahead Friendly: You can prepare these bites in advance, making them a perfect option for stress-free entertaining or a ready treat whenever a craving strikes.
Ingredients You Need
Crafting these exquisite Chocolate Covered Strawberry Cheesecake Bites begins with selecting high-quality ingredients that will ensure the best possible flavor and texture. Using fresh, ripe strawberries is paramount for that burst of natural sweetness and vibrant color that defines this dessert. Similarly, ensuring your cream cheese is softened to room temperature is crucial for achieving a luxuriously smooth and lump-free cheesecake filling. The quality of your chocolate for the coating will also significantly impact the final taste, so opt for a good quality semi-sweet or your preferred chocolate.
No-Bake Chocolate Covered Strawberry Cheesecake Bites

Delightful no-bake cheesecake bites featuring a graham cracker crust, creamy cheesecake filling, fresh strawberries, and a rich chocolate coating. These easy-to-make treats are perfect for any occasion and can be customized to be gluten-free.
- For the Crust:
- 1.5 cups graham cracker crumbs (Substitution: Use digestive biscuits or gluten-free cookie crumbs for a gluten-free version.)
- 0.5 cups granulated sugar
- 0.5 cups unsalted butter, melted
- For the Cheesecake Filling:
- 8 oz cream cheese, softened
- 1 teaspoon vanilla extract
- 1 cup fresh strawberries, chopped (Substitution: Swap with raspberries or blueberries for different flavors.)
- For the Chocolate Coating:
- 8 oz semi-sweet chocolate (Substitution: Use milk chocolate for a sweeter taste, or dark chocolate for less sweetness.)
- 1Prepare the crust: In a mixing bowl, combine graham cracker crumbs, granulated sugar, and melted unsalted butter until the mixture resembles wet sand. Press this crumb mixture firmly into the bottom of an 8x8-inch baking dish to create a flat, even layer.
- 2Make cheesecake filling: In a separate large bowl, beat softened cream cheese until smooth and creamy. Gradually add granulated sugar and vanilla extract, mixing until fully incorporated. Carefully fold in chopped fresh strawberries, ensuring they are evenly distributed without overmixing.
- 3Layer the dessert: Spread the prepared cheesecake filling evenly over the crust using a spatula, smoothing the top to create a flat surface. Gently press down to ensure the cheesecake adheres well to the crust below.
- 4Chill: Cover the baking dish with plastic wrap and place it in the freezer for at least 2 hours, or until fully firm.
- 5Cut and dip: Once fully chilled, remove the cheesecake from the freezer and lift it out of the dish. Cut into uniform squares (approximately 16 bites). Melt semi-sweet chocolate in a microwave-safe bowl in 30-second intervals, stirring in between, until completely melted and smooth.
- 6Set: Dip each square in the melted chocolate, ensuring it’s coated on all sides. Allow excess chocolate to drip back into the bowl. Place each chocolate-covered bite on a parchment-lined baking sheet. Refrigerate for about 20-30 minutes, or until the chocolate sets and hardens.
Keywords: no-bake, cheesecake, chocolate covered strawberries, dessert, easy, vegetarian, summer
- graham cracker crumbs: provides a buttery, crunchy foundation that holds everything together beautifully.
- granulated sugar: adds a touch of sweetness to both the crust and the creamy cheesecake filling.
- unsalted butter: binds the graham cracker crumbs to create a firm, cohesive crust.
- cream cheese: the star of the filling, offering a rich, tangy, and wonderfully creamy texture.
- vanilla extract: a classic flavoring that enhances the overall sweetness and adds a warm, comforting depth to the cheesecake.
- fresh strawberries: contribute natural sweetness, a delightful tartness, and a beautiful visual element.
- semi-sweet chocolate: forms a smooth, decadent coating that perfectly complements the cheesecake and strawberry flavors.
You’ll find the precise quantities for each ingredient detailed within the recipe card, ensuring perfect results every time.
Variations
One of the most exciting aspects of these Chocolate Covered Strawberry Cheesecake Bites is their inherent versatility. You can easily transform them to suit specific dietary needs or to explore a wider spectrum of flavors and textures. For instance, a dessert that caters to those avoiding gluten can be achieved by simply swapping the graham cracker crumbs for a gluten-free cookie or biscuit base, ensuring everyone can indulge.
For individuals seeking a lower-carbohydrate option, you can experiment with a crust made from almond flour and a sugar substitute, while the cheesecake filling can be sweetened with erythritol or stevia. The possibilities extend beyond dietary adjustments, allowing for creative flavor infusions. Consider adding a hint of lemon zest to the cheesecake mixture for a brighter, more refreshing taste, or perhaps incorporating a touch of espresso powder for a subtle mocha note.
Beyond ingredient swaps, consider enhancing the chocolate coating itself. A sprinkle of sea salt over the melted chocolate before it sets can add a delightful sweet-and-salty contrast, or you could even incorporate a dash of cayenne pepper for an unexpected and thrilling spicy kick. These little adjustments can turn a beloved recipe into a completely new and personalized creation, perfect for surprising your guests or satisfying a specific craving. Don’t forget to explore delightful combinations in recipes like our easy berry tart for more inspiration on fruit and dessert pairings.
How to Prepare Chocolate Covered Strawberry Cheesecake Bites
Step 1: Prepare the Crust
Begin by crafting the foundation of your delicious cheesecake bites. In a medium-sized mixing bowl, combine the graham cracker crumbs with the granulated sugar. This ensures an even distribution of sweetness throughout the crust layer.
Next, pour in the melted unsalted butter, and using a fork or your fingertips, mix until the ingredients are thoroughly combined and the mixture resembles wet sand. The butter will bind the crumbs together, creating a cohesive base. It’s important to press this crumb mixture firmly and evenly into the bottom of an 8×8-inch baking dish. A compact crust is key to ensuring your bites hold their shape once cut and served, preventing any crumbling issues.
Step 2: Make the Cheesecake Filling
In a separate, larger mixing bowl, place your softened cream cheese. Using an electric mixer on medium speed, beat the cream cheese until it is exceptionally smooth and creamy, free from any lumps. This usually takes about 2 to 3 minutes of continuous beating and is a critical step for a velvety texture. Gradually add the granulated sugar to the beaten cream cheese, continuing to mix until it is fully incorporated and the mixture is light and fluffy.
Now, gently fold in the chopped fresh strawberries. Be careful not to overmix at this stage; you want the strawberries to be distributed evenly throughout the filling but still retain some of their fresh texture. This creamy, luscious cheesecake filling is now ready to be layered over your prepared crust, promising a delightful contrast of textures and flavors in every bite.
Step 3: Layer the Dessert
With your crust perfectly pressed and your cheesecake filling wonderfully smooth, it’s time to bring them together. Carefully spoon the prepared cheesecake filling onto the top of the graham cracker crust. Use a spatula or the back of a spoon to spread the filling evenly across the entire surface of the crust, ensuring you reach all the edges and corners.
Take your time to create a flat, smooth top layer. Gently press down the cheesecake mixture to ensure it adheres well to the crust below. This step is vital for the structural integrity of your Chocolate Covered Strawberry Cheesecake Bites, guaranteeing that the cheesecake filling and crust remain united when you cut and serve them. A well-adhered layer prevents any separation and ensures a pleasing eating experience.
Step 4: Chill
Proper chilling is essential for achieving the perfect consistency that allows these bites to be easily cut and coated. Once your cheesecake is layered evenly in the baking dish, cover it securely with plastic wrap or a lid. Place the covered dish into the freezer for a minimum of 2 hours. This extended chilling period is crucial for firming up the cheesecake mixture significantly.
The goal is for the cheesecake to become solid and firm to the touch, making it much easier to cut into precise, uniform squares without any smudging or deformation. Ensure it is fully set before you proceed to the next step, as this will greatly impact the neatness and overall presentation of your finished dessert. A well-chilled cheesecake is the key to clean cuts.
Step 5: Cut and Dip
After the crucial chilling period in the freezer, it’s time to transform the solid cheesecake block into individual bites. Carefully remove the baking dish from the freezer. If you lined the dish with parchment paper (which is highly recommended for easy removal), gently lift the entire cheesecake slab out of the dish by the edges of the parchment paper. This prevents any sticking and preserves the shape.
Using a sharp knife, cut the cheesecake into uniform squares. Aim for approximately 16 equally sized bites, depending on your desired portion size. Next, prepare your chocolate coating. Place the semi-sweet chocolate in a microwave-safe bowl and melt it in 30-second intervals, stirring well after each interval. Continue this process until the chocolate is completely melted, smooth, and glossy, ensuring it doesn’t burn. A smooth, liquid chocolate is perfect for coating.
Step 6: Set
Now for the final, delightful step: coating your cheesecake squares in melted chocolate. Using a fork or a dipping tool, carefully dip each cheesecake square into the melted chocolate. Ensure that each bite is fully coated on all sides, creating a smooth, even shell. Allow any excess chocolate to drip back into the bowl before placing the coated bite onto a baking sheet lined with parchment paper.
Arrange the chocolate-covered bites on the parchment-lined sheet, making sure they are not touching each other. Once all the bites have been dipped and coated, place the baking sheet into the refrigerator. Allow them to chill for approximately 20 to 30 minutes, or until the chocolate coating has fully set and hardened, creating a beautiful, crisp shell that contrasts wonderfully with the creamy interior.
Pro Tips for Chocolate Covered Strawberry Cheesecake Bites
Softened Cream Cheese is Key: Always ensure your cream cheese is fully softened to room temperature before you begin mixing the filling. This is the secret to a velvety smooth, lump-free cheesecake texture, as it incorporates more easily and creates a superior consistency. Take it out of the refrigerator at least 30-60 minutes prior to starting.
Perfect Chocolate Melting Technique: When melting chocolate, whether in a microwave or using a double boiler, proceed with caution. Microwave in short, 30-second intervals, stirring thoroughly between each burst to prevent scorching. A double boiler offers more gentle, even heat for a perfectly fluid and glossy chocolate coating every time.
The Importance of Chill Time: Do not rush the chilling process. Allowing the cheesecake to firm up completely in the freezer before cutting is paramount. This ensures clean, sharp edges when you slice the bites, preventing them from becoming misshapen or messy when you proceed to dip them in chocolate. A well-chilled base makes the entire dipping process far more manageable and results in a neater final product.
Embrace Flavor Variations: Don’t be afraid to experiment with different fruits or chocolate types. Substituting strawberries with fresh raspberries, blueberries, or even a mix of berries can offer exciting new color and flavor profiles. Similarly, using dark or white chocolate for the coating provides distinct taste experiences that can cater to varied preferences, enhancing the overall appeal of your Chocolate Covered Strawberry Cheesecake Bites.
Proper Storage for Freshness: For optimal enjoyment, store any leftover bites in an airtight container. Keep them refrigerated for up to 3 days to maintain their texture and flavor. If you plan to store them for longer, freezing is an excellent option, as they can last for up to a month, offering a convenient, ready-to-enjoy treat whenever the mood strikes.
Serving Suggestions for Chocolate Covered Strawberry Cheesecake Bites
Decoration
Elevate the visual appeal of your Chocolate Covered Strawberry Cheesecake Bites with simple yet striking decorations. A delicate drizzle of contrasting chocolate—white chocolate over semi-sweet, or dark chocolate over milk chocolate—can add an artistic touch. You could also sprinkle a few finely chopped nuts, like pistachios or almonds, onto the wet chocolate for added texture and visual interest.
For a burst of color and freshness, consider topping each bite with a tiny mint leaf or a single small fresh strawberry slice just before serving, especially if the chocolate is still slightly soft. Even a dusting of edible glitter or gold leaf can transform these bites into a truly festive and luxurious treat, perfect for special occasions or elegant dessert tables.
Side Dishes
While these cheesecake bites are delightful on their own, pairing them with complementary side dishes can create a more complete and satisfying dessert experience. A small bowl of fresh, mixed berries—such as raspberries, blueberries, and blackberries—provides a refreshing counterpoint to the richness of the cheesecake and chocolate.
A dollop of lightly sweetened whipped cream or a scoop of high-quality vanilla bean ice cream offers a classic and comforting accompaniment. For those who appreciate a contrast in textures and flavors, a few crunchy biscotti or some chocolate-covered pretzels can add an exciting dimension to the dessert spread. The subtle bitterness of a well-brewed coffee or a rich espresso can also beautifully balance the sweetness.
Creative Serving Ideas
Think beyond the traditional plate for a truly memorable presentation. Arrange the Chocolate Covered Strawberry Cheesecake Bites on a tiered stand for a visually stunning dessert display at parties or gatherings. You could also serve them in miniature cupcake liners or small decorative cups for individual portions that are easy for guests to grab and enjoy.
For a fun, interactive dessert station, consider setting up a mini fondue with additional dipping options like fresh fruit pieces, marshmallows, or even pretzel rods, allowing guests to customize their own sweet creations. Serve them alongside a pitcher of sangria or a sparkling wine for a sophisticated pairing that enhances the overall celebratory feel of the occasion. These ideas transform a simple treat into an event.
Preparation & Storage
Storing Leftovers
Should you be fortunate enough to have any Chocolate Covered Strawberry Cheesecake Bites left, storing them properly is key to maintaining their deliciousness. Place any uneaten bites in an airtight container. Ensure the container is sealed tightly to prevent air exposure, which can lead to the bites drying out or absorbing unwanted odors from the refrigerator.
Ideally, layer the bites with parchment paper between each layer to prevent them from sticking together once chilled. Refrigerate them for up to 3 days. This method ensures that they retain their delightful texture and flavor, ready for you to enjoy as a sweet treat whenever the craving strikes, offering a convenient indulgence without any further preparation.
Freezing
For longer-term storage, freezing is an excellent option that preserves the quality of these delectable bites. Arrange the fully set Chocolate Covered Strawberry Cheesecake Bites in a single layer on a parchment-lined baking sheet. This initial freezing step, known as flash freezing, ensures that the bites do not clump together once placed in a larger container.
Once they are firm and solid, transfer the frozen bites to a freezer-safe airtight container or a heavy-duty resealable freezer bag. Layer with additional parchment paper if storing multiple layers. Properly packaged, these cheesecake bites can be stored in the freezer for up to 1 month, providing a fantastic make-ahead option for future enjoyment.
Reheating
The beauty of these Chocolate Covered Strawberry Cheesecake Bites is that they are best enjoyed chilled and do not require any reheating. Whether they have been stored in the refrigerator or thawed from the freezer, their texture and flavor are optimal when served cold. The firm cheesecake and crisp chocolate coating are designed to be savored at a cool temperature.
If you’ve frozen your bites, simply remove them from the freezer and allow them to thaw in the refrigerator for about an hour before serving. This gentle thawing process ensures that the texture remains consistent and prevents the chocolate from sweating or becoming soft. Enjoy them directly from the fridge or after their brief thawing period for the most delightful experience.
Frequently Asked Questions
- How do I choose ripe strawberries for this recipe?
Selecting the perfect strawberries is fundamental for the vibrant flavor and appearance of your cheesecake bites. Look for berries that are bright, deep red all over, with no significant white or green areas near the stem. They should feel firm to the touch, indicating freshness and a good texture for incorporation into the filling. A sweet, fragrant aroma is another excellent sign of ripeness and deliciousness.
Avoid strawberries that show signs of bruising, soft spots, or mold, as these will compromise both the taste and shelf life of your dessert. If some strawberries are slightly larger, simply chop them into smaller, more manageable pieces to ensure even distribution within the cheesecake mixture. Using the freshest, most flavorful strawberries will undoubtedly result in the most delightful finished product.
- What is the best way to store leftover Chocolate Covered Strawberry Cheesecake Bites?
To keep your delightful cheesecake bites fresh and delicious after the initial indulgence, proper storage is essential. The most effective method is to place the leftover bites in an airtight container. This prevents them from drying out and protects them from absorbing any other aromas present in your refrigerator, which can alter their intended flavor.
For optimal results, consider lining the container with parchment paper, especially if you’re stacking the bites. This prevents them from sticking to each other once they’ve been refrigerated. Stored this way, they will maintain their ideal texture and taste for up to 3 days, ensuring you can enjoy a little bit of sweetness whenever the mood strikes.
- Can I freeze Chocolate Covered Strawberry Cheesecake Bites? If so, how?
Absolutely, freezing is a fantastic way to preserve these delightful treats for future enjoyment. To freeze them effectively, begin by placing the fully set cheesecake bites in a single layer on a baking sheet lined with parchment paper. This initial freeze, often called flash freezing, ensures that the individual bites solidify without sticking to one another, maintaining their distinct shape.
Once they are firm, transfer these frozen bites into a freezer-safe airtight container or a heavy-duty resealable freezer bag. Adding layers of parchment paper between rows of bites can further prevent sticking. When stored correctly, these Chocolate Covered Strawberry Cheesecake Bites can remain delicious in your freezer for up to one month. To enjoy, simply thaw them in the refrigerator for about an hour to achieve the perfect texture before serving.