Classic Mimosa Recipe – Made In a Pitcher!
No Sunday brunch is truly complete without the invigorating sparkle of a perfectly crafted mimosa. This classic cocktail, a harmonious blend of effervescent Prosecco and vibrant orange juice, is synonymous with relaxed mornings and celebratory gatherings. My personal favorite rendition is designed for sharing, transforming a simple drink into a delightful centerpiece for any occasion, especially when made in a generous pitcher.
This recipe elevates the traditional mimosa by incorporating fresh citrus slices directly into the pitcher, infusing every glass with an extra layer of bright flavor and visual appeal. It’s a straightforward yet sophisticated way to impress your guests and ensure everyone can easily serve themselves. Join me in exploring how to create this delightful beverage that’s perfect for everything from casual weekend brunches to more elaborate parties.
Why You Will Love This Recipe
- Effortless Elegance: Creating this mimosa recipe in a pitcher makes serving a large group incredibly simple, allowing you to enjoy your guests rather than mixing individual drinks.
- Customizable Citrus Notes: The addition of fresh citrus slices directly into the pitcher infuses the drink with subtle yet distinct fruity undertones that complement the orange juice and sparkling wine beautifully.
- Budget-Friendly Bubbly: While Champagne is traditional, this recipe embraces accessible sparkling wines like Prosecco or Cava, proving that exquisite taste doesn’t require an extravagant price tag.
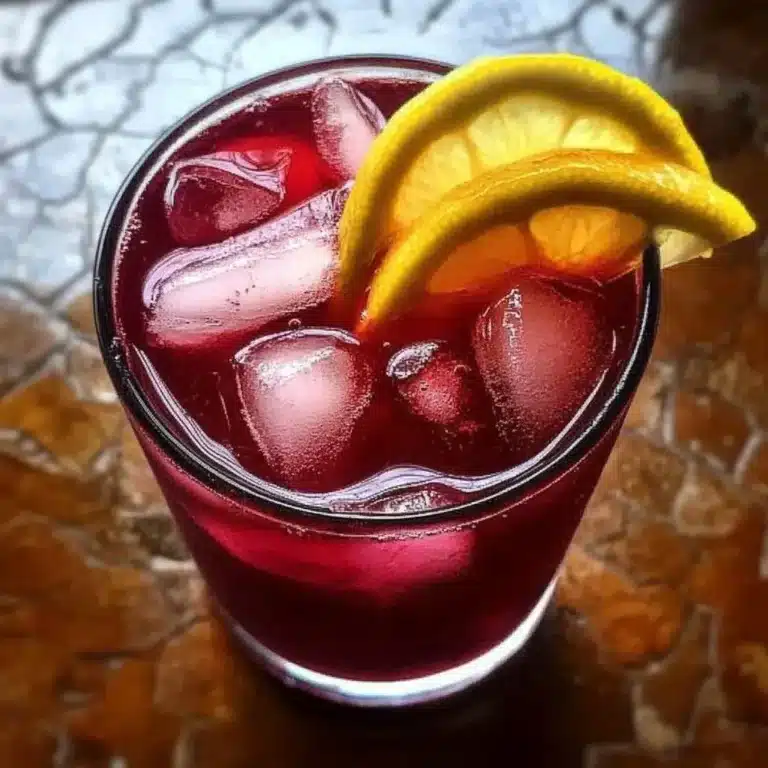
- Visually Stunning Presentation: The vibrant orange hue, enhanced by the fresh fruit slices and an optional splash of cranberry juice, makes this mimosa a feast for the eyes as well as the palate.
- Quick Assembly: With minimal preparation time, you can have a pitcher of delightful mimosas ready to serve in just minutes, perfect for spontaneous get-togethers or busy brunch mornings.
Ingredients You Need
The beauty of a mimosa lies in its simplicity, requiring just a few high-quality ingredients to shine. Choosing the freshest components will significantly enhance the final taste and overall drinking experience. When selecting your sparkling wine and orange juice, opt for chilled options to maintain the cocktail’s refreshing effervescence. The inclusion of fresh citrus slices adds a delightful aroma and a nuanced fruity depth that store-bought juices alone cannot provide.
Mimosa Recipe
This classic mimosa recipe is made for a brunch crowd! It's a simple cocktail made with orange juice and Prosecco. Mix it in a pitcher with fresh citrus for your next party!
- 1 bottle (750 mL) Prosecco
- 3-4 cups orange juice (I use 50% less sugar, or you can use freshly squeezed)
- citrus slices (grapefruits, oranges, lemons, limes)
- cranberry Juice (for serving)
- 1Add citrus slices. Fill a pitcher with your choice of sliced citrus.
- 2Add sparkle. Pour the bottle of Prosecco over the fruit.
- 3Add orange juice. Slowly pour in the orange juice to combine with the Prosecco.
- 4Serve. Pour the mimosas into champagne flutes and add a splash of cranberry juice to each. Cheers!
Keywords: mimosa, brunch, cocktail, orange juice, prosecco, champagne, party drink
Quantities for all ingredients can be found in the recipe card above. Feel free to adjust the citrus assortment to your personal preference.
Variations
For those seeking an alcohol-free alternative that still delivers on festive flavor, substitute the Prosecco with sparkling cider, a high-quality ginger ale, or even plain soda water. The orange juice and fresh citrus will still provide a refreshing base, creating a delightful mocktail perfect for all ages to enjoy during brunch or any celebration.
A fantastic low-carb option can be achieved by using a dry, brut-style sparkling wine, which has minimal residual sugar. Pair this with freshly squeezed orange juice, or for an even lower sugar content, use a mix of orange juice and a sugar-free citrus sparkling water. Garnish with lime or lemon slices for a sophisticated touch.
To inject some seasonal cheer, consider a festive Yuletide variation by adding pomegranate seeds and a splash of pomegranate juice to the pitcher, alongside the orange juice and Prosecco. This not only adds a beautiful ruby hue but also a tart-sweet flavor profile that is particularly delightful during the holiday season.
How to Prepare mimosa recipe
Step 1: Prepare Your Pitcher with Citrus
Begin by selecting a beautiful, clean pitcher. The size of your pitcher will depend on how many servings you intend to make, but a standard 1-liter or 1.5-liter pitcher usually suffices for a small gathering. Wash and thoroughly dry your chosen citrus fruits. Common choices include oranges, lemons, limes, and grapefruits, but you can also experiment with mandarins or blood oranges for added color and flavor.
Thinly slice these fruits. The goal is to create rounds or half-moons that will gracefully float in the pitcher and release their juices and aromatic oils into the liquid. Remove any large seeds to prevent them from ending up in your guests’ glasses. Arrange these citrus slices attractively at the bottom of the pitcher; this initial step is not just functional but also adds to the visual appeal of your finished drink, making it look more artisanal and inviting even before any liquid is added.
The choice of citrus can significantly alter the mimosa’s flavor profile. Oranges provide sweetness and the classic mimosa taste, while lemons and limes add a sharp, palate-cleansing tang. Grapefruits introduce a hint of bitterness that can balance the sweetness of the orange juice and the bubbles. Combining a few different types creates a more complex and nuanced flavor. Ensure the slices are not too thick, as this could make them difficult to strain out if guests prefer to avoid them in their glasses, though many enjoy the visual of floating fruit.
Step 2: Add the Sparkling Wine
Once your pitcher is adorned with citrus slices, it’s time to add the effervescent component. Carefully open a bottle of chilled sparkling wine. Prosecco is an excellent choice for its crispness and delightful fruit notes, and it’s often more budget-friendly than Champagne, making it ideal for a pitcher-sized recipe. However, any dry sparkling wine, such as Cava or a good quality American sparkling wine, will work wonderfully.
Slowly and steadily pour the entire bottle of sparkling wine over the citrus slices in the pitcher. The gentle cascade of bubbles will begin to interact with the citrus, releasing its essence and creating a beautiful visual as the liquid starts to effervesce. Avoid pouring too quickly, as this can cause excessive foaming and lead to a loss of precious bubbles, which are crucial for that signature mimosa lift. The cold temperature of the wine is paramount here; it helps maintain the carbonation and ensures the drink is refreshing from the first pour.
This is where the magic starts to happen, as the alcohol begins to subtly infuse with the citrus oils. The choice of sparkling wine is a personal preference, but drier options (like Brut or Extra Brut) tend to be more versatile, allowing the fruit flavors to come forward without being overly sweet. If you prefer a sweeter mimosa, a Prosecco with a slightly higher dosage or a demi-sec sparkling wine could be used, though it’s generally advisable to let the orange juice provide the sweetness. The aroma released as the bubbles meet the citrus is intoxicatingly festive.
Step 3: Introduce the Orange Juice
With the sparkling wine settled, it’s time to add the bright, fruity heart of the mimosa: the orange juice. For the best flavor, use high-quality orange juice. Freshly squeezed juice is unparalleled in its vibrant taste and freshness, offering a pure citrus essence. If you opt for store-bought juice, choose one that is 100% juice with no added sugars or artificial flavors, and preferably pulp-free, as this generally leads to a smoother drinking experience.
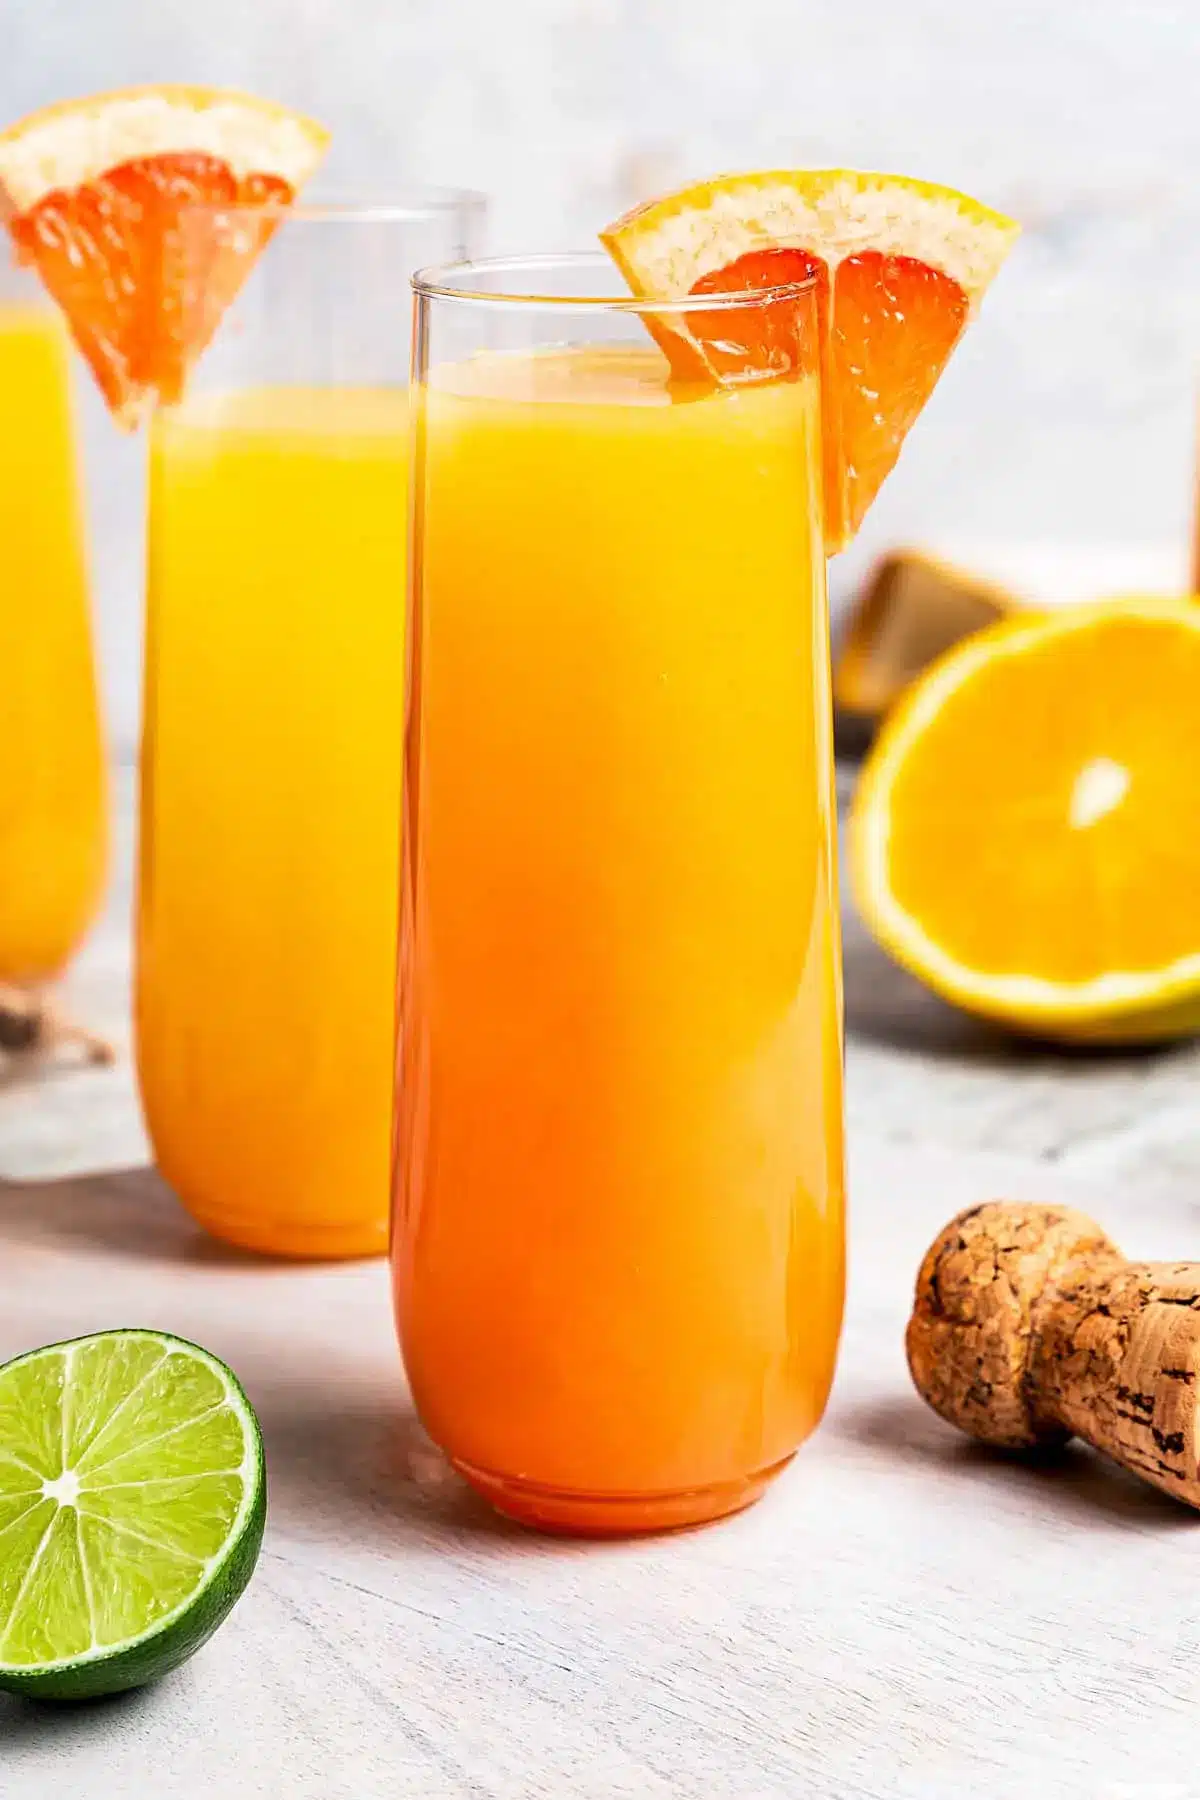
Gently pour the orange juice into the pitcher, allowing it to meld with the sparkling wine and citrus. The amount of orange juice can be adjusted based on your preference for sweetness and flavor intensity. A common ratio is one part orange juice to one part sparkling wine, but you might prefer a bit more of one or the other. As you pour, you’ll notice the colors begin to blend, creating that iconic golden hue that makes mimosas so appealing. Stir gently with a long spoon to combine the liquids without agitating the bubbles too much, ensuring an even distribution of flavors throughout the pitcher.
The quality of your orange juice truly makes a difference here. If you are using freshly squeezed juice, you might want to strain it to remove any excess pulp and seeds for a cleaner finish. Some people enjoy the texture of pulp, so this is a matter of personal preference. For those watching their sugar intake, selecting a “light” or “50% less sugar” orange juice can be a good compromise, or you can opt for a blend that includes less sweet citrus juices. The goal is a balanced flavor that is refreshing and not overly sweet or tart.
Step 4: Marinate and Chill (Optional but Recommended)
For an even deeper infusion of flavor, allow the mixture in the pitcher to marinate for a short period. If you have the time, cover the pitcher and refrigerate it for at least 15-30 minutes. This chilling time allows the flavors of the citrus to meld beautifully with the orange juice and sparkling wine, creating a more complex and rounded taste profile. It also ensures that your mimosa is perfectly cold, which is essential for optimal refreshment.
This step is particularly beneficial if you are preparing the mimosas in advance of your guests arriving. The citrus slices will continue to release their oils and juices, enhancing the overall aroma and flavor of the drink. However, it is crucial to add the sparkling wine just before serving if you want to preserve maximum carbonation. If you are making a pitcher for immediate consumption, you can skip this marination step and proceed directly to serving, but the subtle flavor enhancement is worth the extra wait.
When marinating in advance, a good practice is to add the citrus slices and orange juice to the pitcher and refrigerate. Then, just before you’re ready to serve, gently stir in the chilled Prosecco or sparkling wine. This technique ensures that the drink remains bubbly and vibrant, offering the best of both worlds: pre-infused flavor and fresh effervescence. Ensure your pitcher is well-chilled throughout this process, as a warm drink is far less appealing.
Step 5: Serve and Garnish
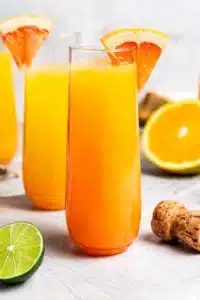
Once the mimosas are ready, it’s time to pour and serve. Select elegant champagne flutes or coupe glasses for the best presentation. Gently ladle or pour the mimosa mixture from the pitcher into each glass, ensuring you get a good distribution of the liquid and perhaps a few of the citrus slices. Avoid overfilling the glasses, leaving a little space at the top for any optional garnishes or extra fizz.
For an extra touch of color and a hint of tartness, add a small splash of cranberry juice to each glass. This is entirely optional but adds a beautiful visual contrast and a complementary flavor note that many enjoy. You can also add a fresh citrus wheel or wedge to the rim of each glass for an attractive garnish, reiterating the fresh ingredients used in the pitcher. Ensure your glasses are clean and free of any smudges for the most appealing presentation.
The final presentation is key to the mimosa experience. The golden liquid, the floating citrus, and the delicate bubbles create an inviting and festive atmosphere. Serve immediately to ensure the best possible carbonation and temperature. This pitcher method makes it incredibly easy to top up glasses throughout brunch, keeping the celebration flowing and your guests happy. Remember to have extra sparkling wine and orange juice on hand in case you need to replenish the pitcher.
Step 6: Enjoy the Celebration
Now that your pitcher of mimosas is ready and beautifully served, it’s time to sit back, relax, and enjoy the fruits of your labor. Mimosas are best enjoyed in good company, paired with delicious brunch dishes. The light, refreshing, and slightly sweet nature of this cocktail makes it a perfect accompaniment to a wide range of foods, from savory egg dishes to sweet pastries.
The festive spirit of the mimosa is infectious, making any occasion feel more special. Whether it’s a casual Sunday brunch with family, a special holiday gathering, or a celebratory shower, this pitcher of mimosas will undoubtedly be a hit. Share the joy, the conversation, and the delicious bubbly beverage with your loved ones. Don’t forget to savor the simple pleasure of a well-made, refreshing cocktail.
Consider this your invitation to embrace the joy of brunching with a perfectly prepared pitcher of mimosas. It’s a delightful way to elevate your gatherings and create lasting memories. Cheers to good food, good company, and good drinks!
Pro Tips for mimosa recipe
Chill Everything: For the ultimate refreshing mimosa, ensure both your sparkling wine and orange juice are thoroughly chilled before mixing. This is non-negotiable for achieving the best flavor and carbonation. Cold ingredients mean a colder drink that holds its bubbles longer.
Quality Matters: While this recipe is forgiving, using good quality Prosecco or sparkling wine and fresh, good-tasting orange juice will elevate your mimosa significantly. Avoid anything overly sweet or artificial tasting. Freshly squeezed is always a winner.
Don’t Over-Stir: When combining the ingredients, stir gently and minimally. Excessive stirring will release the carbonation from your sparkling wine, resulting in a flat, less enjoyable drink. A few gentle folds are all you need to integrate the liquids.
Make-Ahead Smarts: You can prepare the citrus and orange juice mixture in the pitcher ahead of time and store it in the refrigerator. However, add the chilled sparkling wine just moments before serving to preserve its effervescence and ensure a lively mimosa.
Experiment with Citrus: Don’t be afraid to play around with different citrus combinations. A mix of orange, grapefruit, and lime can offer a more complex flavor profile than just orange juice alone. Blood oranges add a stunning visual element during their season.
Serving Suggestions for mimosa recipe
Decoration
Elevate the visual appeal of your mimosas with thoughtful garnishes. A thin wheel of orange, lemon, or lime perched on the rim of the glass adds a classic touch and an inviting aroma. For a more festive look, consider using small skewers with berries like raspberries or strawberries threaded onto them, or even a sprig of fresh mint for a pop of color and a refreshing scent. The citrus slices already in the pitcher add intrinsic decorative value, showcasing the fresh ingredients.
Side Dishes
Mimosas are the quintessential brunch beverage and pair beautifully with a wide array of dishes. Consider serving them alongside classic brunch fare such as fluffy pancakes, savory quiches, eggs Benedict, or crispy bacon and sausages. For a lighter option, they complement fruit salads, yogurt parfaits, or smoked salmon platters. Their refreshing nature also cuts through the richness of heavier dishes, providing a balanced dining experience.
Creative Serving Ideas
Transform your mimosa serving into an experience with a “mimosa bar.” Offer a selection of different sparkling wines, various fruit juices (like grapefruit, pineapple, or cranberry), and a variety of fresh fruits and garnishes for guests to customize their own drinks. You could also create themed mimosas, such as a “pomegranate mimosa” for a holiday gathering or a “peach mimosa” for a summer brunch. For a fun twist, consider adding a small splash of liqueur, like Grand Marnier or St-Germain elderflower liqueur, to individual glasses for an added layer of complexity.
Preparation & Storage
Storing Leftovers
While mimosas are best enjoyed fresh, any leftover mixture can be stored in the pitcher and refrigerated. However, be aware that the sparkling wine will lose its effervescence over time, making the drink taste flatter. For the best chance of retaining some sparkle, cover the pitcher tightly and consume within 24 hours. It’s important to note that the citrus slices may continue to infuse, potentially making the drink slightly more tart over time.
Freezing
Freezing mimosas in their liquid form is generally not recommended, as the carbonation will be lost upon thawing, and the texture may become unappealing. Instead, consider freezing leftover orange juice and any muddled citrus separately in ice cube trays. These “mimosa ice cubes” can then be added to fresh sparkling wine or soda water for a quick, chilled, and flavorful drink that retains some of its original character without being diluted by plain ice.
Reheating
Reheating a mimosa is not practical or advisable, as the primary appeal of this cocktail lies in its cold, effervescent nature. The alcohol and sparkling wine components would be negatively affected by heat. If you have leftover mimosa mixture that has gone flat, it’s better to use it as a base for another beverage or simply discard it and make a fresh batch. The emphasis should always be on serving mimosas chilled and with lively bubbles.
Frequently Asked Questions
-
Why is it called a mimosa?
The name “mimosa” is derived from the mimosa plant, which features small, fluffy yellow flowers. The cocktail’s bright, golden color closely resembles the hue of these flowers, leading to its fitting christening. This association with a delicate yet cheerful bloom perfectly captures the spirit of the drink, making it a popular choice for celebratory brunches and lighthearted gatherings.
-
What is the best sparkling wine to use for mimosas?
The best sparkling wine for mimosas is typically a dry, crisp option. Prosecco, a popular Italian sparkling wine, is a fantastic choice due to its accessible price point and fruity notes. Spanish Cava is another excellent and often more affordable alternative with a bright, dry profile. For a more traditional feel, a budget-friendly bottle of Champagne will also work, but avoid overly sweet varieties like Asti Spumante, as they can make the mimosa cloying. The key is a wine with good acidity and plenty of bubbles.
-
Can I make mimosas in advance?
Yes, you can prepare mimosas in advance to a certain extent, but with a crucial caveat. It’s best to combine the orange juice and citrus slices in the pitcher and chill this mixture. Then, just before serving, gently stir in the chilled Prosecco or sparkling wine. Adding the sparkling wine too early will cause the carbonation to dissipate, resulting in a flat drink. This make-ahead method ensures that the flavors have time to meld while preserving the essential effervescence.