Irresistible Deviled Eggs with Green Olive Garnish – Easy Party Appetizer
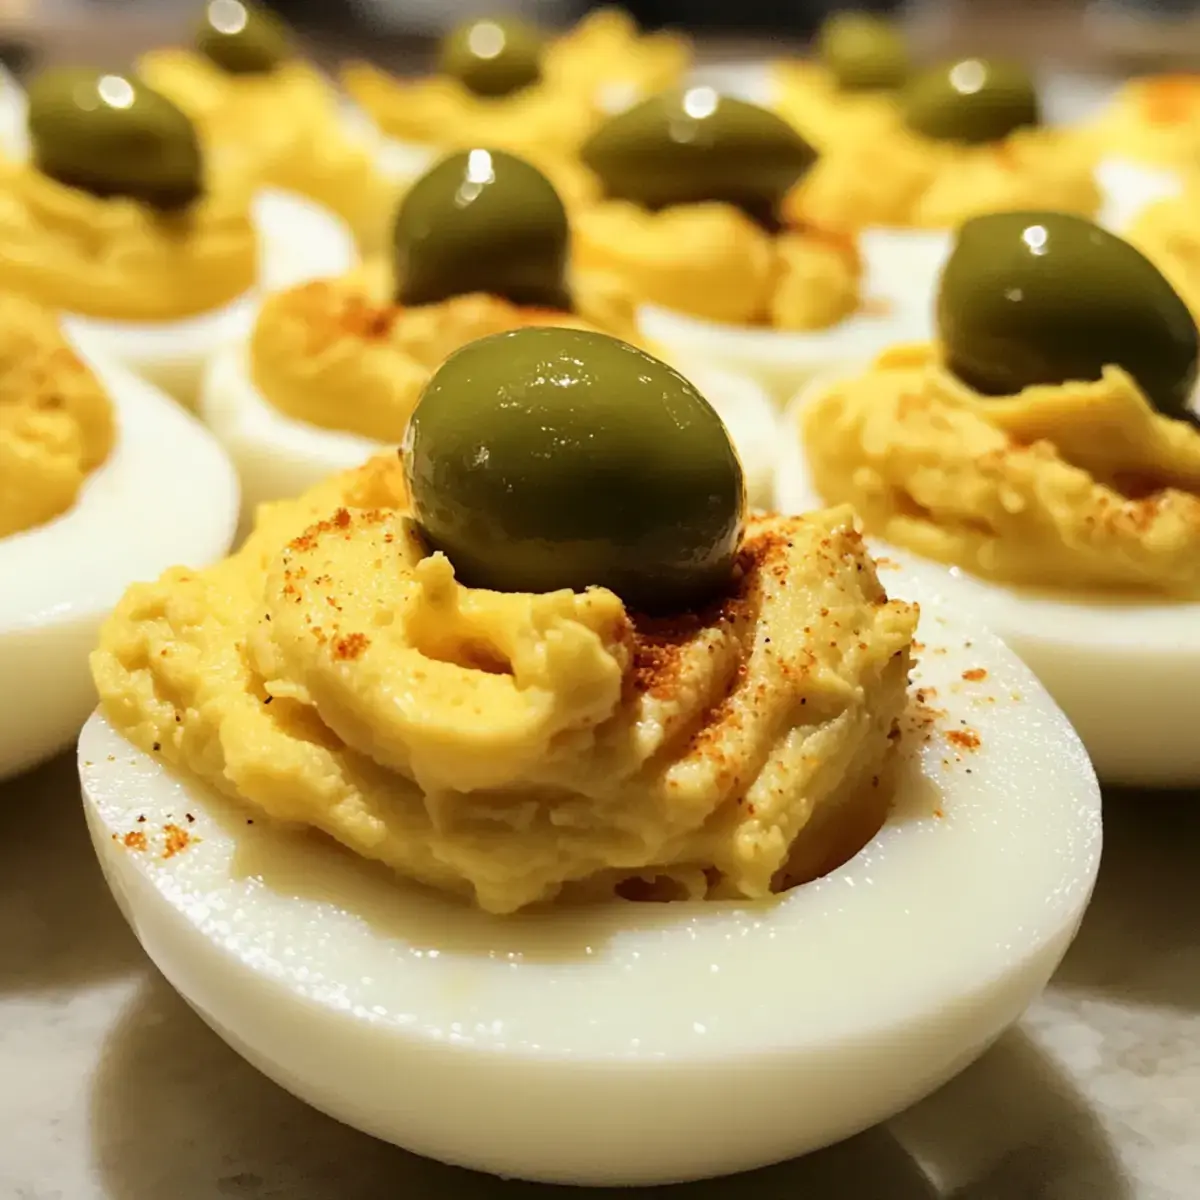
Every gathering has that one dish that steals the show, and for me, it’s always been these Deviled Eggs with Green Olive Garnish! This playful twist on a timeless classic features a creamy filling that carries the briny notes of olives, making it a standout appetizer. Not only are they a breeze to whip up, but they’re also a guaranteed crowd-pleaser that elevates any occasion.
With their beautiful presentation and sophisticated flavor, these deviled eggs will have your guests reaching for seconds. Curious about what makes them so irresistible? Let’s dive into the recipe together! What Makes These Deviled Eggs Special? Crowd-Pleasing Appeal: These Deviled Eggs with Green Olive Garnish are sure to be the star of your next event, leaving your guests raving about their flavorful twist.
Why You Will Love This Recipe
- Effortless Preparation: Dinner is on the table in less than 30 minutes, making these deviled eggs perfect for any last-minute entertaining needs.
- Rich & Creamy Texture: The combination of creamy yolks, mayonnaise, and softened cream cheese creates a decadent filling reminiscent of a luxurious martini.
- Elegant Presentation: A dusting of paprika and a vibrant green olive garnish transform simple eggs into a sophisticated appetizer.
- Versatile Flavor Profile: Easily adaptable with various spices or additional ingredients, these deviled eggs can be customized to suit any palate or party theme.
- Timeless Appeal: A classic appetizer with a delightful twist, these deviled eggs are universally loved and always a hit for brunches, parties, and holiday gatherings.
Ingredients You Need
To create these exquisite deviled eggs, focus on using the freshest ingredients available. The quality of your eggs, the creaminess of your mayonnaise, and the zestiness of your Dijon mustard will significantly impact the final taste and texture. Opting for good quality green olives is also key for that perfect briny finish. Remember, the success of this appetizer lies in the simplicity and freshness of its components.
Deviled Eggs with Green Olive Garnish

Elevate your parties with these Deviled Eggs with Green Olive Garnish, a creamy and sophisticated appetizer sure to please any crowd. A playful twist on a timeless classic, these deviled eggs feature a creamy filling with briny olive notes, making them a standout appetizer. They are easy to prepare and guaranteed to be a crowd-pleaser.
- 6 large Eggs (fresh)
- 1/4 cup Mayonnaise (can substitute with Greek yogurt)
- 2 oz Cream Cheese (softened)
- 1 tbsp Dijon Mustard (can substitute with yellow mustard)
- 1 tbsp Olive Brine (adjust to taste)
- 1 tbsp Vodka (optional)
- 1 tsp Paprika/Smoked Paprika (fresh herbs are an alternative)
- 12 pieces Green Olives (pitted varieties like manzanilla or queen)
- 1Place fresh large eggs in a medium saucepan and cover them with cold water, ensuring the water is about an inch above the eggs. Bring the water to a boil over medium heat, then cover the saucepan and remove it from the heat. Let the eggs sit covered for 12 minutes to achieve perfectly cooked yolks.
- 2After the eggs have sat, carefully transfer them to an ice water bath using a slotted spoon. Let them cool for about 5 to 10 minutes.
- 3Once the eggs are fully cooled, gently peel off the shells under running water if needed. After peeling, slice each egg in half lengthwise.
- 4Scoop the cooked yolks out of each egg white into a mixing bowl. Use a fork to mash the yolks until completely smooth.
- 5To the mashed yolks, add mayonnaise, softened cream cheese, Dijon mustard, olive brine, and vodka if using. Stir everything together until creamy and well combined.
- 6With a spoon or piping bag, carefully fill each egg white half with the yolk mixture.
- 7Sprinkle a dusting of paprika or smoked paprika over the filled eggs and add a juicy green olive on a cocktail pick atop each egg.
- 8Place the garnished deviled eggs in an airtight container and refrigerate for at least 30 minutes before serving.
Keywords: Deviled Eggs, Appetizer, Party Food, Olives, Classic, Easy, Crowd-Pleaser, German, Cocktail Party
- large eggs: form the perfect vessel for our creamy filling, providing a delicate yet sturdy base.
- mayonnaise: binds the creamy filling together, adding richness and a smooth consistency that is essential.
- cream cheese: enhances the decadence, offering a velvety texture and a subtle tang that complements the other flavors beautifully.
- dijon mustard: provides a sharp, tangy counterpoint to the richness, awakening the palate with its distinct flavor profile.
- olive brine: infuses the filling with a savory, salty essence, perfectly echoing the briny notes of the green olive garnish.
- vodka: an optional addition for a sophisticated “dirty martini” twist, adding a subtle complexity without overpowering the other ingredients.
- paprika/smoked paprika: offers a beautiful color contrast and a delicate smoky flavor that enhances the overall appeal of the appetizer.
- green olives: the star garnish, providing a bright, briny burst of flavor and a striking visual element that makes these deviled eggs unforgettable.
The exact quantities for each ingredient are detailed within the recipe card, ensuring you have everything you need for perfect deviled eggs.
Variations
For those seeking a fiery delight, swap the traditional green olives for finely diced pickled jalapeños. This introduces a thrilling spicy kick that will awaken the taste buds and add an exciting dimension to the creamy filling. The sharp heat of the jalapeños creates a sensational contrast with the smooth, rich texture of the deviled eggs.
Consider experimenting with different types of cream cheese to add nuanced flavors. A garlic and herb cream cheese can introduce savory undertones, while a plain cream cheese allows the other ingredients to shine. This simple substitution offers a subtle yet impactful way to personalize your deviled eggs.
For an extra layer of indulgence and texture, a sprinkle of crispy, crumbled prosciutto or bacon bits makes a fantastic topping. This savory crunch provides a delightful contrast to the smooth, creamy filling, making each bite a multi-textural experience that guests will adore. This addition elevates the appetizer from simple to sophisticated.
Infuse freshness and vibrant flavor by mixing finely chopped fresh herbs directly into the yolk mixture. Chives, dill, or parsley can add a bright, herbaceous note that lifts the richness of the filling. This simple addition brings a garden-fresh element that makes the deviled eggs feel lighter and more complex.
To achieve a deeper, more profound flavor profile, opt for smoked paprika instead of regular paprika for dusting. This imparts a subtle smokiness that adds a layer of complexity and richness, perfect for those who appreciate bolder, more robust flavors in their appetizers. The smoky aroma alone will tantalize the senses.
Embrace a Mediterranean flair by substituting the olives with finely chopped sun-dried tomatoes or crumbled feta cheese. These additions bring a delightful tanginess and unique flavor profile that transports your taste buds. This variation offers a sophisticated twist, perfect for impressing guests with a Mediterranean-inspired appetizer.
For a completely plant-based option, mash ripe avocado or use silken tofu as the base for the creamy filling, replacing the egg yolks. Use a high-quality vegan mayonnaise to maintain that essential creamy texture. This thoughtful adaptation ensures that everyone, regardless of dietary choices, can enjoy this delightful appetizer, making it a truly inclusive dish.
How to Prepare deviled eggs with green olive garnish
Step 1: Boil the Eggs
Begin by carefully selecting six large, fresh eggs. Place them gently into a medium saucepan. Ensure you cover the eggs completely with cold water, making sure the water level is about an inch above them. This ensures even cooking and prevents cracking during the boiling process.
Proceed to bring the water to a rolling boil over medium heat on your stovetop. Once the water reaches a boil, immediately cover the saucepan tightly with a lid and remove it from the heat source. Allowing the eggs to sit undisturbed in the hot water for precisely 12 minutes is crucial for achieving perfectly cooked, firm yolks that are ideal for deviled eggs.
After the 12 minutes have elapsed, the eggs are ready for the next stage. This method guarantees that the yolks will be cooked through without becoming rubbery, providing the perfect creamy texture for the filling of your deviled eggs. This initial step is foundational for the entire deviled egg preparation process, ensuring a superior outcome.
Step 2: Cool the Eggs
As soon as the 12 minutes of sitting time are complete, use a slotted spoon to carefully transfer the hot eggs from the saucepan into a prepared ice water bath. This sudden temperature change is critical for several reasons. It immediately halts the cooking process, preventing the yolks from continuing to cook and developing a greenish ring.
Allow the eggs to remain in the ice bath for approximately 5 to 10 minutes. This cooling period is not only essential for stopping the cooking but also plays a significant role in making the subsequent peeling process much smoother and less frustrating. A well-chilled egg is a peeled egg with minimal fuss.
To test if the eggs are sufficiently cooled and ready for peeling, give them a gentle tap on a hard surface. You will feel the shell loosen slightly, indicating that the egg has cooled enough. This step is vital for ensuring the integrity of the egg white when you proceed to peel them.
Step 3: Peel and Halve the Eggs
Once the eggs have cooled completely in the ice bath, it’s time for the peeling process. Gently tap each egg on a hard surface to crack the shell all over. If you find peeling difficult, you can try peeling them under cool running water; the water helps to get under the membrane and makes the shell slide off more easily.
Take your time and be delicate to avoid tearing the egg whites. The goal is to remove the shell entirely, leaving the firm egg white intact and ready to be filled. Inspect each peeled egg to ensure no small shell fragments remain attached, which can be an unpleasant surprise.
After all the eggs have been successfully peeled, place them carefully on a clean cutting board. Using a sharp knife, slice each egg precisely in half lengthwise, from one end to the other. Set the egg white halves aside, arranging them neatly; these will serve as the beautiful, edible cups for your delicious deviled egg filling, ensuring they remain unbroken.
Step 4: Prepare the Filling
With the egg whites set aside, it’s time to focus on creating the luscious filling. Gently scoop out the cooked egg yolks from each of the halved egg white cups. Place all these vibrant yellow yolks into a medium-sized mixing bowl. This is where the magic of transforming simple yolks into a delectable spread begins.
Using the back of a fork, begin to mash the collected egg yolks thoroughly. Continue mashing until the yolks are completely smooth and free of any lumps. Achieving a fine, crumb-free texture here is essential for a velvety smooth deviled egg filling that will delight your guests.
This mashed yolk mixture forms the foundational base for the rich and creamy filling that characterizes perfect deviled eggs. The smoother you make this base, the more luxurious and appealing your final deviled eggs with green olive garnish will be, setting the stage for an exceptional appetizer.
Step 5: Mix the Ingredients
To the perfectly mashed yolks in the mixing bowl, now add the key components for that irresistible creamy texture and tangy flavor. Introduce the mayonnaise, ensuring it’s a good quality one for the best taste and creaminess. Next, add the softened cream cheese; it’s crucial that the cream cheese is at room temperature for it to blend seamlessly without lumps.
Follow this with the Dijon mustard, which provides that essential zesty kick and depth. Add the olive brine, which is key to the “green olive” aspect of this recipe, and if you’re opting for that extra sophisticated touch, now is the time to add the vodka. The measurements provided are a starting point, and you can adjust to your personal preference for tanginess and richness.
Stir all these ingredients together vigorously with a spoon or a whisk until everything is thoroughly combined and the mixture is luxuriously creamy. Ensure there are no streaks of individual ingredients remaining; the goal is a homogenous, smooth, and spreadable filling that is ready to be piped or spooned into the egg white halves. This step is crucial for achieving the desired silky consistency.
Step 6: Fill the Egg Whites
Now comes the artful part: filling the prepared egg white halves with the delicious yolk mixture. You can use a small spoon to carefully dollop the filling into each egg white cup, aiming for an even amount in each. Alternatively, for a more professional and aesthetically pleasing presentation, transfer the filling into a piping bag fitted with a star tip or a round tip.
If using a piping bag, gently squeeze the bag to create a beautiful swirl or mound of filling in each egg white half. This not only looks impressive but also ensures a consistent portion of filling with every bite. Aim to fill them generously, creating a peak of creamy goodness that will hold the garnish.
Take your time with this step, ensuring each egg white is neatly and fully filled. The presentation is just as important as the taste, and perfectly filled egg whites are the canvas for your beautifully garnished deviled eggs with green olive garnish. This careful filling process contributes to the overall elegance of the appetizer.
Step 7: Garnish to Perfection
To elevate the visual appeal and flavor of your deviled eggs, it’s time for the final touches. Take a small sieve or a shaker and gently dust the surface of the creamy filling with paprika or smoked paprika. This adds a vibrant splash of color, creating an attractive contrast against the pale filling and the white of the egg, making them instantly more appetizing.
Next, select your pitted green olives. You can place a whole olive on top of each deviled egg, or for a more elegant look, slice them thinly and artfully arrange a slice or two. If using whole olives, you might want to secure them with a small cocktail pick, which also makes them easier for guests to pick up and eat.
The green olive is not just for decoration; its briny flavor is integral to the signature taste of these deviled eggs. Ensure each egg receives its share of the garnish, tying together that delightful flavor profile that makes this appetizer so special and sought after for any occasion. This garnishing step truly completes the dish.
Step 8: Chill Before Serving
Once your deviled eggs are beautifully filled and perfectly garnished, it’s essential to give them time to meld their flavors. Carefully arrange the deviled eggs in a single layer inside an airtight container. This prevents them from drying out and protects the delicate garnish.
Place the container in the refrigerator and allow the deviled eggs to chill for at least 30 minutes. This chilling period is crucial as it allows the creamy filling to firm up slightly and, more importantly, helps the flavors to harmonize and deepen. A well-chilled deviled egg is a more refreshing and enjoyable experience.
After the chilling time, your Deviled Eggs with Green Olive Garnish are ready to be served and will be a guaranteed hit, impressing your guests with their sophisticated appearance and delectable taste. They are perfect for any event, from casual get-togethers to more formal gatherings, offering an elegant start to any meal or party spread.
Pro Tips for deviled eggs with green olive garnish
Use Slightly Older Eggs: For the easiest peeling experience, opt for eggs that are about 7-10 days old. Fresher eggs tend to cling more stubbornly to their shells, making the peeling process more challenging and potentially damaging the delicate egg white. Slightly older eggs have a membrane that loosens more readily, leading to cleaner, quicker peeling.
Don’t Skip the Ice Bath: The ice water bath is not just for cooling; it’s crucial for stopping the cooking process immediately. This prevents the yolks from overcooking and developing that undesirable greyish-green ring around them, ensuring a vibrant yellow yolk center. It also makes the shell much easier to separate from the cooked egg white.
Soften Cream Cheese Completely: For a flawlessly smooth and creamy filling, ensure your cream cheese is fully softened to room temperature before you begin mixing. Cold, hard cream cheese will lead to lumps in your yolk mixture, detracting from the velvety texture. You can leave it on the counter for an hour or two, or gently warm it in the microwave for a few seconds.
Taste and Adjust: The beauty of deviled eggs is their customizability. Taste the yolk mixture before filling the egg whites and don’t be afraid to adjust the seasonings. If you prefer a tangier filling, add a little more Dijon mustard or olive brine; if you like it richer, a touch more mayonnaise or cream cheese can be added. Personalize it to your perfect flavor profile.
Garnish Just Before Serving: To maintain the vibrancy of the paprika and the freshness of the olive garnish, it’s best to add them right before you plan to serve the deviled eggs. This ensures they look their absolute best and haven’t had time to wilt or become unappealing, preserving that “just made” look and feel for your guests.
Serving Suggestions for deviled eggs with green olive garnish
Decoration
The classic dusting of paprika or smoked paprika provides a beautiful, warm color contrast that immediately draws the eye. This simple sprinkle adds a touch of rustic elegance and hints at the savory flavors within. Consider using a fine-mesh sieve for an even, professional-looking distribution of the spice.
The star of the garnish is, of course, the green olive itself. A whole, pitted green olive perched atop the creamy filling offers a vibrant pop of color and a distinct briny aroma. For an even more refined look, consider slicing the olives thinly and arranging them artfully on the surface of the filling.
Fresh herbs can add another dimension to the decoration. A tiny sprig of fresh dill or a finely chopped chive sprinkle can introduce a fresh green hue and a delicate herbaceous fragrance. This touch of green complements the olive beautifully and adds a layer of visual sophistication.
Side Dishes
Complement the richness of the deviled eggs with a crisp, refreshing vegetable platter. Think vibrant carrot sticks, crunchy bell pepper strips, refreshing cucumber slices, and celery stalks. Their natural crunch and clean flavors offer a delightful contrast to the creamy appetizer, making for a balanced bite.
A selection of artisanal cheeses and crackers provides a wonderful textural and flavor complement. Offer a variety of cheeses, from sharp cheddars to creamy bries, alongside crusty bread or whole-wheat crackers. This allows guests to create their own perfect pairing alongside the deviled eggs, adding an element of interactive enjoyment to your spread.
Tangy pickles and other pickled vegetables can cut through the richness of the deviled eggs beautifully. Dill pickles, pickled onions, or even spicy pickled jalapeños offer a zesty, acidic counterpoint that refreshes the palate. Their distinct flavors enhance the overall experience by providing a sharp, clean finish to each bite.
Creative Serving Ideas
For a truly elegant presentation, consider serving your deviled eggs on a tiered stand or a decorative platter. Arrange them in concentric circles or rows, ensuring there’s enough space between each to admire their individual beauty. This elevates them from a simple appetizer to a centerpiece.
Think about thematic presentation for special occasions. For a holiday party, you could use a star-shaped cookie cutter to lightly press the paprika for a festive pattern. For a summer barbecue, arrange them in a pattern resembling a flower or a sun on a platter.
If you’re serving them as part of a larger buffet or brunch, consider mini skewers. Place a deviled egg on a small cocktail stick, perhaps with a cherry tomato or a piece of cucumber. This makes them incredibly easy for guests to handle and enjoy while mingling, ensuring they remain upright and pristine.
Preparation & Storage
Storing Leftovers
To keep your delicious deviled eggs fresh for enjoyment later, the key is proper storage. Ensure they are placed in a single layer within an airtight container. This prevents the delicate filling from drying out or picking up any unwanted odors from other foods in the refrigerator.
While they are best enjoyed the day they are made, leftovers can typically be stored for up to 2 days. However, it’s important to note that the texture of the filling might slightly change over time, becoming a little firmer. For optimal freshness, it’s always recommended to assemble them just before serving whenever possible.
Avoid stacking the deviled eggs directly on top of each other, as this can cause the filling to be displaced or the delicate whites to be damaged. A single layer ensures each deviled egg remains perfectly formed and visually appealing until you’re ready to serve them again.
Freezing
Unfortunately, deviled eggs are not well-suited for freezing. The creamy, mayonnaise-based filling undergoes a significant textural change when frozen and then thawed. It tends to become watery and grainy, losing the smooth, luscious consistency that makes deviled eggs so delightful.
The emulsification of the mayonnaise and cream cheese breaks down during the freezing and thawing process. This results in a separated and unappealing texture that cannot be easily restored. Therefore, it is strongly advised to prepare deviled eggs fresh to ensure the best possible quality and enjoyment for your guests.
If you find yourself with leftover cooked eggs but haven’t made the filling yet, you can store the hard-boiled, peeled eggs in the refrigerator for a day or two. You can then prepare the filling fresh when you’re ready to make a small batch. This avoids the issue of freezing the finished product.
Reheating
Deviled eggs are inherently a cold appetizer and are not designed to be reheated. The filling, with its mayonnaise and dairy components, would not withstand reheating without compromising its texture and safety. Reheating would likely cause the filling to separate, become oily, or even curdle.
The delightful creaminess and smooth texture of the filling are best enjoyed when the deviled eggs are served chilled. The flavors are also more pronounced and refreshing when they are cold, making them a perfect choice for warmer weather or as a light start to a meal.
If you have leftovers, simply keep them refrigerated and consume them cold. The primary concern with reheating creamy, egg-based dishes is food safety, as certain bacteria can multiply rapidly in foods left at room temperature or improperly reheated. Stick to enjoying them as a cold treat.
Frequently Asked Questions
-
How do I know when my eggs are ripe for boiling and how can I ensure they peel easily?
For the best results when boiling eggs for deviled eggs, it’s recommended to use eggs that are about 7-10 days old. While “fresh” eggs are often preferred for culinary use, slightly older eggs are actually easier to peel. This is because as eggs age, the pH of the egg white increases, which helps the membrane to detach more readily from the shell. When it’s time to boil, place your eggs in a single layer in a saucepan and cover them with cold water by about an inch. Bring the water to a rolling boil over medium-high heat, then immediately cover the pot, remove it from the heat, and let the eggs sit for 10-12 minutes. Immediately after, plunge them into an ice bath for at least 5-10 minutes to stop the cooking process and further aid in easy peeling. Gently tap the cooled egg on a hard surface and roll it to crackle the shell, then begin peeling under cool running water if needed.
-
What’s the best way to store leftover deviled eggs to maintain their freshness and appeal?
To keep your delicious Deviled Eggs with Green Olive Garnish fresh and appealing, proper storage is key. The most effective method is to place the assembled deviled eggs in a single layer within an airtight container. This prevents them from drying out and protects the delicate garnish from being dislodged. If you don’t have a container large enough to accommodate a single layer, you can carefully arrange them in layers, but place a sheet of parchment paper or plastic wrap between each layer to prevent sticking and damage. They are best enjoyed within 1-2 days of preparation. While they can be stored longer, the texture of the filling may slightly change, becoming firmer or a bit drier. For this reason, many people prefer to make the filling ahead of time and assemble the deviled eggs just before serving, especially if they plan to keep them for more than a day.
-
Can I freeze deviled eggs, and if not, what are the best make-ahead strategies for this appetizer?
Unfortunately, deviled eggs do not freeze well. The creamy filling, which typically contains mayonnaise and sometimes cream cheese, undergoes an undesirable textural transformation when frozen and then thawed. The emulsion can break, resulting in a watery, grainy, or separated filling that is neither appealing in texture nor flavor. Therefore, it is strongly recommended to prepare deviled eggs fresh for the best quality. If you wish to prepare components in advance, you can hard-boil and peel the eggs up to 2 days ahead of time and store them in an airtight container in the refrigerator. The filling can also be made up to 24 hours in advance and stored separately in an airtight container in the refrigerator. Assemble the deviled eggs just a few hours before you plan to serve them to ensure the filling remains perfectly creamy and the egg whites are not exposed to the air for too long, maintaining their freshness and preventing them from drying out.