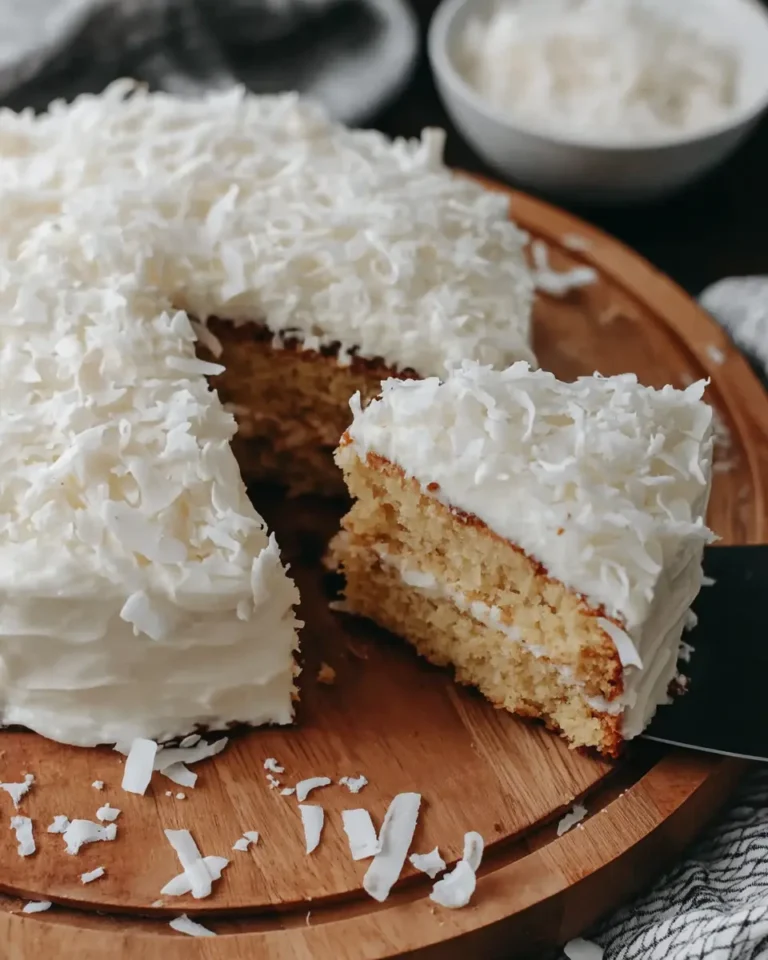
Coconut Cake with Seven-Minute Frosting
This Coconut Cake with 7-Minute Frosting is a timeless classic that evokes a sense of nostalgia and pure baking joy. It’s the kind of dessert that instantly brings a smile to your face, offering a comforting, familiar flavor profile that’s perfect for any occasion. From weeknight treats to grand celebrations, this cake consistently delivers a delightful experience.
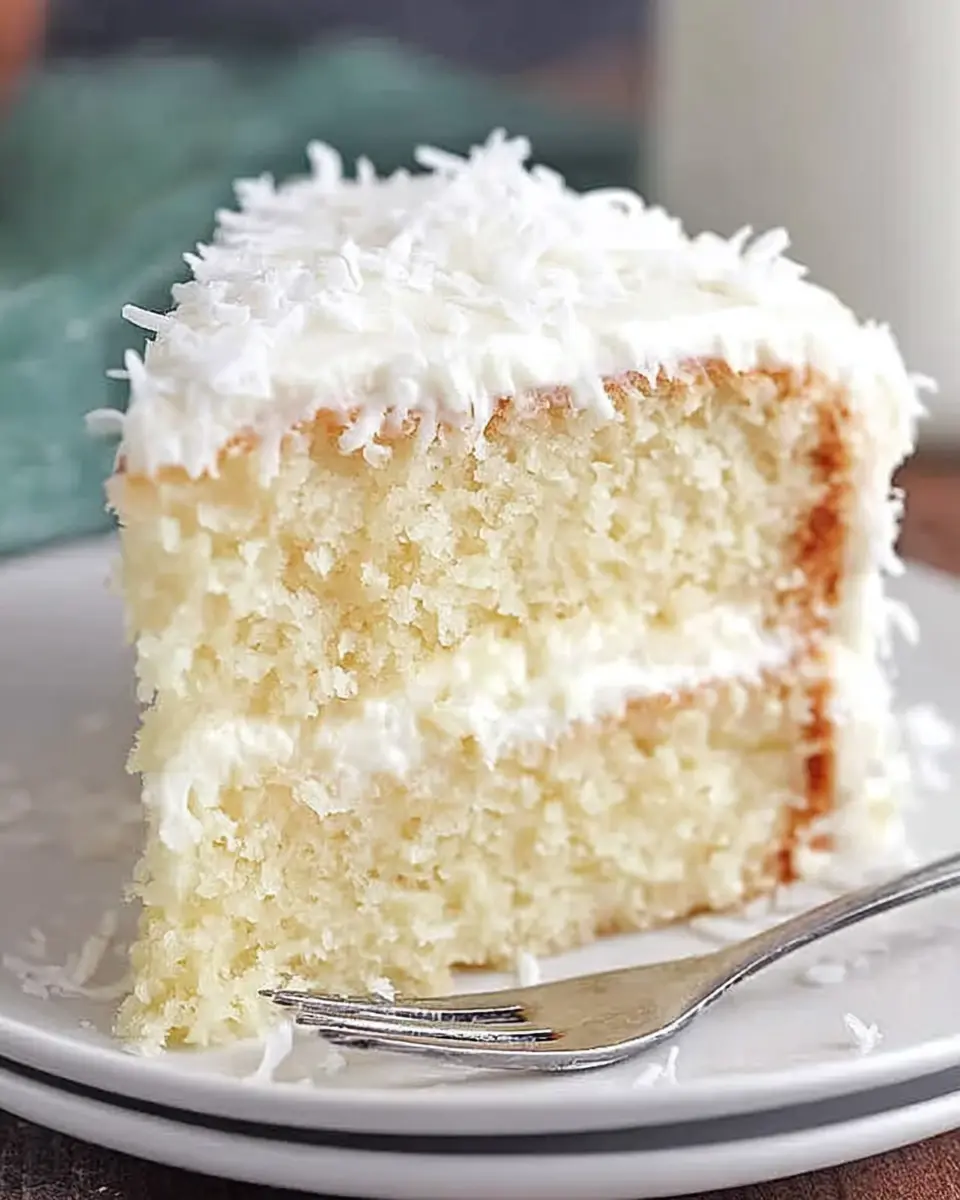
The magic of this cake lies in its beautiful balance of textures and flavors. You get a tender, moist cake that’s rich from the butter and tangy from the buttermilk, perfectly complemented by a light, airy frosting. The sweet, snowy coating of shredded coconut adds an irresistible final touch. It’s a recipe designed to be approachable for beginners yet satisfying for seasoned bakers, ensuring everyone can enjoy its charm.
Why You Will Love This Recipe
- Classic Comfort: This cake offers a beloved, old-fashioned flavor that appeals to a wide range of palates, making it a foolproof choice for gatherings.
- Light & Fluffy Texture: The combination of creaming butter and sugar, and the gentle folding of egg whites, results in an incredibly tender and airy cake crumb.
- Effortless Elegance: The seven-minute frosting provides a beautiful, glossy finish that’s surprisingly easy to achieve, and the coconut coating adds a simple yet stunning visual appeal.
- Versatile Presentation: Whether baked in layers for a showstopper or in a single pan for casual enjoyment, this cake adapts beautifully to your needs.
- Beginner-Friendly: The straightforward steps and forgiving nature of the ingredients make this an excellent choice for those new to baking or looking for a reliable go-to recipe.
Ingredients You Need
The foundation of any great cake is high-quality ingredients, and this Coconut Cake with 7-Minute Frosting is no exception. Using fresh, room-temperature items will ensure your batter mixes smoothly and bakes evenly, leading to the best possible texture and flavor. Selecting good quality unsalted butter, fresh eggs, and fragrant vanilla extract makes a noticeable difference in the final delicious outcome. Pay attention to the details, as they are key to unlocking the full potential of this recipe.
Coconut Cake with 7-Minute Frosting

A classic coconut cake with a tender crumb, enriched with butter and buttermilk, then finished with a dependable seven-minute frosting and a generous coating of sweetened shredded coconut. This beginner-friendly dessert has a soft buttery crumb, a light cloudlike finish, and the kind of old-fashioned charm that works for birthdays, holidays, and simple weekend baking.
- 1 cup unsalted butter, softened at room temperature
- 2 cups granulated sugar
- 5 large eggs, separated with whites and yolks placed in separate bowls
- 1 teaspoon vanilla extract
- 1 teaspoon coconut flavoring (such as imitation coconut extract)
- 2 1/2 cups all-purpose flour
- 1 teaspoon baking powder
- 1 teaspoon baking soda
- 1/4 teaspoon fine salt
- 1 cup buttermilk, brought to room temperature
- Vegetable shortening (for greasing the pans)
- Flour (for coating the prepared pans)
- A batch of reliable seven-minute frosting (such as a Joy of Cooking version)
- 2 cups sweetened shredded coconut (for topping and decorating)
- 1Preheat the oven to 350°F (175°C). Lightly coat two 9-inch round cake pans or one 9x13-inch pan with vegetable shortening, then dust with flour. Set the pans aside.
- 2In a large mixing bowl, beat the softened butter and sugar with an electric mixer on medium speed until the mixture becomes very smooth and creamy, allowing at least 4 minutes for proper aeration.
- 3Add the egg yolks, vanilla extract, and coconut flavoring to the butter mixture. Continue beating until the wet ingredients are fully incorporated.
- 4In a separate medium bowl, whisk together the all-purpose flour, baking soda, baking powder, and salt until evenly blended.
- 5Add the dry mixture and the room-temperature buttermilk gradually to the butter mixture. Beat on medium speed, scraping down the bowl as needed, until the batter is smooth and thoroughly combined, about 2 to 3 minutes.
- 6Beat the egg whites separately until they hold soft peaks, then gently fold them into the batter.
- 7Divide the batter evenly between the prepared round pans, or spread it into the 9x13-inch pan. Bake until a toothpick inserted into the center comes out clean, about 25 to 30 minutes for round layers or 30 to 35 minutes for a 9x13-inch cake.
- 8Remove the cake from the oven and let it cool completely before adding the frosting.
- 9Once the cake has cooled, cover it with the seven-minute frosting in an even layer. Immediately scatter the shredded coconut over the top and gently press it onto the sides so it adheres well.
Keywords: Coconut Cake, 7-Minute Frosting, Classic Cake, Beginner Baking, Buttermilk Cake, Shredded Coconut
The specific quantities and preparation details for each ingredient are meticulously outlined within the accompanying recipe card, ensuring you have all the necessary information at your fingertips for a perfect bake.
Variations
While the classic Coconut Cake with 7-Minute Frosting is undeniably divine, there are numerous ways to put a unique spin on this beloved recipe. Experimenting with these variations can introduce exciting new flavor dimensions and cater to different dietary preferences, ensuring everyone finds a version they adore. Each modification offers a chance to personalize the cake and make it uniquely yours.
Vegan Delight: To create a delicious vegan version, you can substitute the butter with a high-quality vegan butter alternative or a neutral-flavored oil like melted coconut oil. For the eggs, a flax egg (1 tablespoon ground flaxseed mixed with 3 tablespoons water, let sit for 5 minutes) or a commercial egg replacer can be used in place of the separated eggs, while the buttermilk can be replaced with a plant-based milk like almond or soy milk mixed with a teaspoon of apple cider vinegar. The seven-minute frosting can be adapted using aquafaba (the liquid from a can of chickpeas) whipped with sugar and a touch of cream of tartar, offering a surprisingly similar fluffy texture. This vegan adaptation allows everyone to enjoy the delightful coconut cake experience.
Low-Carb Indulgence: For those following a low-carbohydrate lifestyle, this cake can be wonderfully adapted. Swap the all-purpose flour for a blend of almond flour and coconut flour, and use a sugar substitute like erythritol or xylitol in place of granulated sugar. Ensure your baking powder and soda are carbohydrate-free. The frosting can be made using sugar-free powdered sweetener and a bit of heavy cream or full-fat coconut milk. Remember that low-carb baking can sometimes result in a denser texture, but with careful ingredient selection and ratios, you can still achieve a satisfyingly moist and flavorful cake.
Citrus Zest Infusion: Elevate the cake with a bright, refreshing twist by adding citrus zest to the batter. Finely grated zest from one large lemon or two limes can be incorporated along with the wet ingredients in Step 3. The zesty aroma and flavor will mingle beautifully with the coconut, creating a more complex and vibrant dessert profile. This addition provides a delightful tang that cuts through the richness of the cake and frosting, making each bite even more interesting. The subtle floral notes from the citrus complement the sweet coconut exceptionally well.
How to Prepare Coconut Cake with 7-Minute Frosting
Step 1: Oven Ready and Pan Preparation
Begin by preheating your oven to a steady 350 degrees Fahrenheit (175 degrees Celsius). This crucial first step ensures that your oven is at the optimal temperature when the cake batter is ready to bake, promoting even cooking and a proper rise. It’s also the perfect time to prepare your baking pans, whether you’re opting for two classic 9-inch round cake pans or a convenient 9×13-inch baking dish.
Thoroughly grease the inside of your chosen pans with vegetable shortening or butter, ensuring every nook and cranny is covered. Follow this by a light dusting of all-purpose flour, tapping out any excess. This dual preparation method creates a non-stick barrier, which is essential for preventing the cake from sticking and ensuring it releases cleanly after baking. A well-greased and floured pan is the first defense against a cake that clings stubbornly to its mold.
The benefit of this meticulous pan preparation is the confidence you’ll have when inverting the cake. It guarantees beautiful, intact cake layers or a perfectly formed single-layer cake that’s ready for frosting. Taking these few extra moments upfront significantly contributes to the overall success and presentation of your finished coconut cake, making the frosting and decorating process much smoother and more enjoyable.
Step 2: The Creaming Foundation
In a spacious mixing bowl, combine the softened unsalted butter and granulated sugar. Using an electric mixer, preferably on a medium speed, begin the creaming process. This isn’t just about mixing; it’s about vigorously beating these two ingredients together for a substantial amount of time, ideally at least 4 minutes. The goal is to achieve a mixture that is exceptionally pale in color and incredibly light and creamy in texture.
This creaming stage is perhaps the most critical step for developing a tender and airy cake crumb. As the butter and sugar are beaten, tiny air bubbles are incorporated into the mixture. These air pockets expand during baking, providing lift and contributing to the cake’s delicate texture. Skipping this step or not creaming long enough will result in a denser, heavier cake. It’s the foundation upon which a truly light and fluffy cake is built.
The visual cue to look for is a significant change in color and consistency; the mixture will transform from yellow and dense to a fluffy, almost white, aerated mass. This indicates that enough air has been whipped into the batter, setting the stage for a beautifully risen and wonderfully textured cake. Treat this step with the patience it deserves, and your cake will thank you for it.
Step 3: Incorporating Yolks and Dry Ingredients
Once your butter and sugar mixture has reached that perfect pale and creamy stage, it’s time to introduce the egg yolks. Add the 5 large egg yolks to the creamed mixture. Along with the yolks, incorporate the vanilla extract and the coconut flavoring. These flavorings are essential for building the characteristic sweet and warm notes of the cake, so measure them accurately.
Continue beating these wet ingredients into the mixture until everything is smoothly and thoroughly combined. Scrape down the sides of the bowl as needed to ensure all ingredients are fully integrated. Following this, in a separate, medium-sized bowl, whisk together your dry ingredients: the all-purpose flour, baking soda, baking powder, and fine salt. Whisking them together ensures that the leavening agents and salt are evenly distributed throughout the flour.
The importance of whisking the dry ingredients cannot be overstated. It prevents pockets of baking soda or baking powder in the final batter, which could lead to uneven rising or a bitter taste. This even distribution is vital for the cake to bake uniformly and achieve its desired tender crumb. This step ensures that when the dry ingredients are added to the wet, they blend in harmoniously, creating a cohesive batter.
Step 4: Alternating Wet and Dry Additions
Now, it’s time to bring the wet and dry components together to form the cake batter. Begin by adding about one-third of the whisked dry ingredients to the creamed butter and egg yolk mixture. Mix on low speed until just combined. Next, add about half of the room-temperature buttermilk, again mixing on low speed until it’s incorporated into the batter.
Continue this process by adding another third of the dry ingredients, mixing, then the remaining buttermilk, mixing, and finally, the last third of the dry ingredients. It’s crucial to mix on low speed and only until the batter is smooth and no dry streaks of flour remain. Overmixing at this stage can develop the gluten in the flour too much, leading to a tougher cake texture. The goal is a tender crumb, so stop mixing as soon as everything is just combined.
The alternation of dry and wet ingredients helps to create a stable emulsion and prevents the batter from becoming too dense. By adding them in stages, you allow the flour to hydrate gradually, leading to a silkier batter. This method is a time-tested technique in baking that ensures the ingredients meld together beautifully, resulting in a cake that is both moist and light. Patience during this step yields a superior cake texture.
Step 5: Folding in the Egg Whites
This step is where we introduce the lightness that defines a truly exceptional coconut cake. In a clean, dry bowl, use a separate set of beaters or a whisk to beat the reserved egg whites until they form soft peaks. Soft peaks mean that when you lift the beater, the egg whites will hold their shape but the tips will gently curl over. Be careful not to overbeat them into stiff, dry peaks, as this can make them harder to fold in and may affect the cake’s texture.
Now, gently fold the whipped egg whites into the cake batter. Use a large rubber spatula and a careful, sweeping motion, cutting down through the center of the batter, across the bottom, and up the side. This technique preserves the air incorporated into the egg whites, which is what gives the cake its final lift and airy texture. You want to incorporate the whites until just a few streaks remain; it’s better to have a few tiny white specks than to overmix and deflate the batter.
The folding process is what distinguishes this cake, providing a tender, delicate crumb that is miles away from a dense, heavy cake. It’s the reason why separating the eggs in the first place is so important; the yolks add richness, while the whites provide structure and airiness. This careful combination of ingredients and techniques ensures a cake that is both moist and wonderfully light, a true testament to classic baking.
Step 6: Baking and the Final Frosting Touch
Once your batter is ready, carefully divide it evenly between the two prepared 9-inch round pans or spread it smoothly into the 9×13-inch baking dish. Place the pans in the preheated oven. Bake for approximately 25 to 30 minutes for the round layers, or 30 to 35 minutes for the 9×13-inch cake. The cake is done when the center springs back lightly when touched and a wooden skewer or toothpick inserted into the center comes out clean, with no wet batter clinging to it.
After removing the cake from the oven, allow it to cool in the pans on a wire rack for about 10-15 minutes before attempting to invert them onto the rack to cool completely. It is absolutely essential that the cake cools fully before you even think about frosting it. Attempting to frost a warm cake will result in a melted, messy frosting that slides right off. Patience during this cooling phase is key to a beautifully finished cake.
Once the cake has reached room temperature, it’s time for the grand finale: the seven-minute frosting. Generously cover the cooled cake with the frosting, spreading it evenly over the top and sides. While the frosting is still fresh and tacky, immediately scatter the sweetened shredded coconut over the entire cake. Gently press the coconut onto the sides and top with clean, dry hands to ensure it adheres well, creating that signature snowy finish. This final step transforms a delicious cake into a show-stopping dessert.
Pro Tips for Coconut Cake with 7-Minute Frosting
Achieving that perfect, classic Coconut Cake with 7-Minute Frosting is often about the little details and tricks that elevate the bake from good to absolutely spectacular. These tips are designed to help you avoid common pitfalls and ensure your cake turns out beautifully every single time, impressing your friends and family with your baking prowess.
Room Temperature is Key: Always ensure your butter, eggs, and buttermilk are at room temperature before you begin mixing. Softened butter creams more effectively with sugar, incorporating more air for a lighter cake. Room temperature eggs and buttermilk also emulsify better into the batter, creating a smoother, more cohesive mixture that bakes evenly. This simple step makes a significant difference in the final texture and consistency of your cake, preventing dense spots or a grainy crumb.
Don’t Overmix the Batter: Once you add the flour, be very gentle and mix only until just combined. Overmixing develops the gluten in the flour, which can lead to a tough, chewy cake instead of the desired tender, melt-in-your-mouth texture. Use a spatula to fold in the egg whites, maintaining as much air as possible for maximum lift and lightness. This careful handling ensures the delicate crumb structure remains intact.
Frosting Timing Matters: The seven-minute frosting sets up relatively quickly. Have your cake completely cooled and ready to go before you start making the frosting. Frost the cake immediately after the frosting is ready and while it’s still warm and pliable. This makes it easier to spread evenly and ensures the coconut adheres well to the moist frosting before it begins to lose its volume or crust over.
Coconut Application Technique: When applying the shredded coconut, use clean, dry hands to gently press the coconut onto the frosted cake. This method provides better control and ensures a more even coating than simply sprinkling it from above, which can lead to patchy coverage and excessive fallout. Pressing helps the coconut stick firmly to the frosting, creating that beautiful, snow-like appearance that is characteristic of this classic cake. Consider performing this step over a large tray to catch any stray coconut for easy cleanup and reuse.
Cooling is Crucial: Resist the urge to frost a warm cake. Allow the cake layers or the single cake to cool completely on a wire rack before applying the frosting. A warm cake will melt the frosting, leading to a messy, uneven finish and potentially a cake that slides apart. Patience during the cooling phase is rewarded with a beautifully frosted and structurally sound dessert ready for serving.
Serving Suggestions for Coconut Cake with 7-Minute Frosting
Decoration
The natural beauty of this cake lies in its classic coconut coating, which often requires minimal additional decoration. However, you can enhance its visual appeal further by adding a few elegant touches. Consider piping a border of extra frosting around the top edge of the cake before applying the coconut; this creates a slightly raised edge that helps contain the coconut and adds a defined visual frame. Freshly toasted coconut flakes can also be pressed onto the sides or sprinkled on top for a richer, golden-brown hue and a delightful crunchier texture, offering a beautiful contrast to the soft white coconut.
For special occasions, a scattering of edible flowers, like delicate pansies or violets, can bring a pop of color and a touch of sophistication. Alternatively, a dusting of powdered sugar over the top, applied through a stencil of a simple pattern or initial, can provide a subtle elegance. If serving as a birthday cake, placing a few candles strategically around the perimeter before serving adds to the celebratory atmosphere without overpowering the cake’s inherent charm. These small additions can elevate the cake’s presentation significantly.
Side Dishes
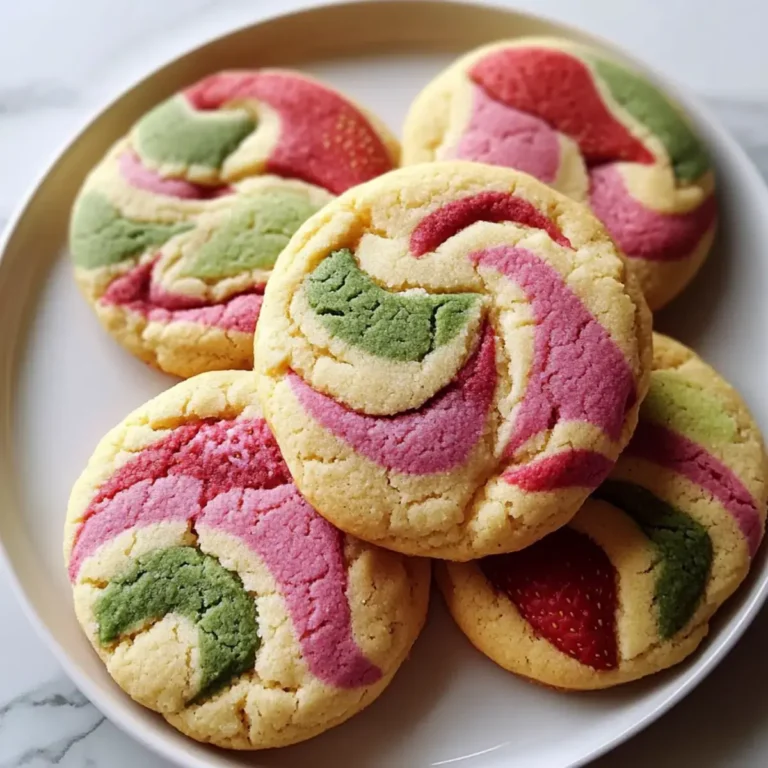
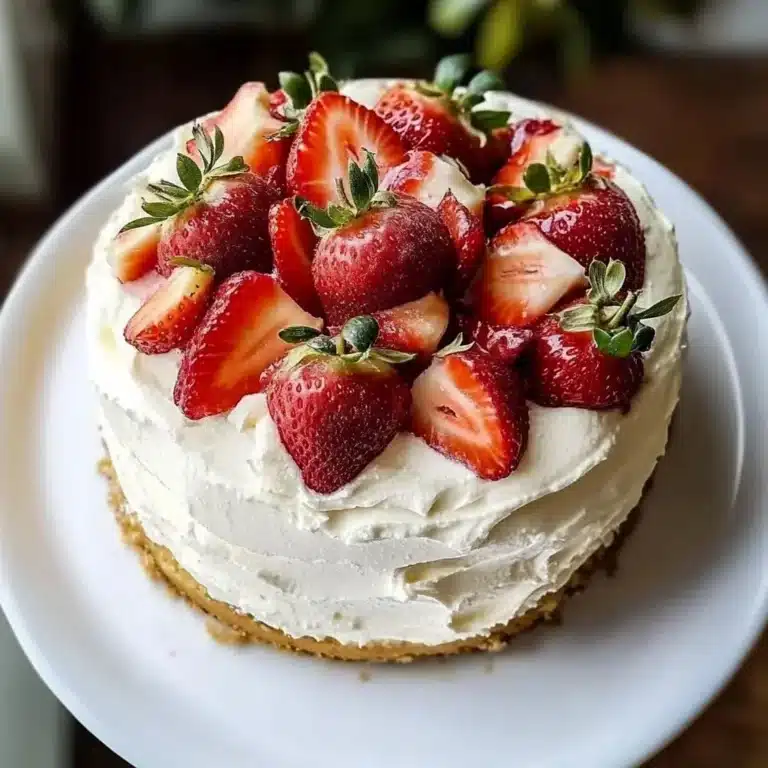
While this coconut cake is a star on its own, certain accompaniments can enhance the overall dessert experience. A small bowl of fresh, vibrant berries like raspberries, strawberries, or blueberries makes a wonderful addition. Their tartness and bright flavor cut through the sweetness of the cake and frosting, providing a refreshing counterpoint. A simple fruit salad featuring melon, pineapple, and kiwi also complements the tropical notes of the coconut beautifully.
For a slightly more decadent pairing, a dollop of lightly sweetened whipped cream or a small scoop of vanilla bean ice cream served alongside a slice of cake can create a luxurious dessert combination. The creamy texture of the ice cream or whipped cream melds wonderfully with the tender cake and fluffy frosting. For a beverage pairing, a glass of chilled milk, a light-bodied coffee, or a fragrant cup of herbal tea offers a comforting and classic way to round off the meal. This cake is also a delightful addition to a brunch spread, pairing well with lighter fare.
Creative Serving Ideas
Transform your Coconut Cake with 7-Minute Frosting into a showstopper with these creative serving ideas. Instead of a traditional slice, consider cutting the cake into smaller, bite-sized cubes and serving them in miniature dessert cups or shot glasses. This makes them perfect for a buffet or a cocktail party, offering guests an easy-to-eat treat. You can garnish each individual cup with a small fresh berry or a tiny mint leaf for an extra touch of elegance and freshness.
For a more whimsical presentation, especially for children’s parties, cut the cake into fun shapes using cookie cutters after it has been frosted and lightly chilled. Stars, hearts, or even simple rounds can be made even more appealing with a few strategically placed sprinkles or edible glitter. Another delightful idea is to serve slices of the cake slightly warmed, accompanied by a rich, homemade caramel sauce for drizzling. This warm and cold contrast, along with the sweet caramel, creates a truly indulgent dessert experience. The versatility of this cake allows it to shine in various serving formats.
Preparation & Storage
Storing Leftovers
To keep your delicious Coconut Cake with 7-Minute Frosting tasting as fresh as possible, proper storage is essential. If you plan to enjoy leftovers within a day or two, the best place to store it is at cool room temperature. Ensure the cake is covered tightly with plastic wrap or placed in an airtight cake carrier. This prevents the cake from drying out and keeps the frosting from becoming sticky or attracting airborne particles. A cool, dry spot away from direct sunlight or heat sources is ideal.
Avoid storing it in a warm environment, as this can cause the frosting to soften and potentially melt, compromising the cake’s appearance and texture. Room temperature storage also helps maintain the cake’s soft crumb, which can become firmer and less appealing when refrigerated for short periods. For cakes with delicate frosting, it’s always best to err on the side of room temperature storage for immediate enjoyment.
It’s important to note that the seven-minute frosting is not as stable as buttercream, so it’s best consumed within a couple of days when stored at room temperature. For longer keeping, refrigeration becomes necessary, but be mindful of how it affects the texture. Proper covering is paramount to prevent the cake from absorbing any unwanted odors from the refrigerator and to keep the coconut topping from drying out.
Freezing
Freezing is an excellent option for preserving the cake for longer periods, but it’s generally best to freeze the unfrosted cake layers rather than the fully assembled and frosted cake. This is because the seven-minute frosting can sometimes become watery or lose its texture upon thawing, and the coconut can become less appealing. To freeze unfrosted layers, ensure they are completely cooled and then wrap them tightly in a double layer of plastic wrap, followed by a layer of aluminum foil or a freezer-safe bag.
This double-wrapping technique is crucial for preventing freezer burn, which can dry out the cake and impart an off-flavor. Label the wrapped layers with the date and contents. Properly frozen unfrosted cake layers can maintain their quality for up to 2 months. When you are ready to bake again, simply remove the layers from the freezer and allow them to thaw overnight in the refrigerator, then bring them closer to room temperature before proceeding with frosting.
If you must freeze the frosted cake, do so with caution. Ensure it is well-covered and understand that the frosting’s texture might change upon thawing. It’s best to freeze individual slices, well-wrapped, if this is your only option for a frosted cake. Thawing should always be done gradually in the refrigerator first, then at room temperature.
Reheating
This particular cake is not designed for reheating, and attempting to do so can negatively impact its texture and delicate frosting. The seven-minute frosting, in particular, is very sensitive to heat. Microwaving the cake will likely cause the frosting to melt into a sticky mess and can also make the cake itself rubbery and unappealing. Therefore, the best way to serve leftover cake is at room temperature, allowing it to come to temperature naturally.
If the cake has been refrigerated, take it out about 20 to 30 minutes before serving to allow it to soften slightly. This gentle warming period is sufficient to restore the cake’s tender crumb and the frosting’s pleasant, airy consistency. Avoid any direct heat application, such as ovens or microwaves, as this will invariably ruin the delicate balance of this classic dessert. Enjoying it at its intended temperature is key to experiencing its full deliciousness.
Frequently Asked Questions
-
Can I make this cake dairy-free?
Yes, you can adapt this recipe to be dairy-free with a few substitutions. Replace the unsalted butter with a high-quality dairy-free butter alternative or melted coconut oil. For the buttermilk, you can use a plant-based milk (like almond, soy, or oat milk) combined with 1 teaspoon of apple cider vinegar or lemon juice, letting it sit for 5-10 minutes to curdle slightly. The seven-minute frosting can be made dairy-free by using a suitable vegan meringue powder or adapting a recipe that uses aquafaba (the liquid from a can of chickpeas) for the egg whites, and ensuring your shredded coconut is unsweetened or doesn’t contain dairy.
-
Why is my seven-minute frosting not setting?
The seven-minute frosting relies on the rapid cooking of egg whites with sugar over a double boiler, creating a meringue-like consistency. If your frosting isn’t setting, it might be due to a few reasons. Ensure you’ve used a reliable recipe and measured your ingredients accurately, especially the sugar and any stabilizing agents like cream of tartar if used. Crucially, the mixture needs to be beaten for a sufficient amount of time while hot over the double boiler to dissolve the sugar and cook the whites properly. It’s also important to continue beating as it cools, but if it doesn’t reach a thick, glossy, meringue-like stage, it may not set firmly on the cake.
-
How can I prevent the coconut from falling off the cake?
To ensure the coconut adheres beautifully to your cake, apply it immediately after frosting, while the frosting is still soft and tacky. Gently pressing the coconut onto the frosted surface with clean, dry hands is far more effective than sprinkling from a height. This technique allows you to control the coverage and ensure good contact between the coconut and the frosting. For extra adhesion, especially on the sides, try holding the cake at a slight angle over a tray and pressing handfuls of coconut upwards against the frosting. If your frosting is too dry or crusty, the coconut won’t stick as well, so timely application is key.