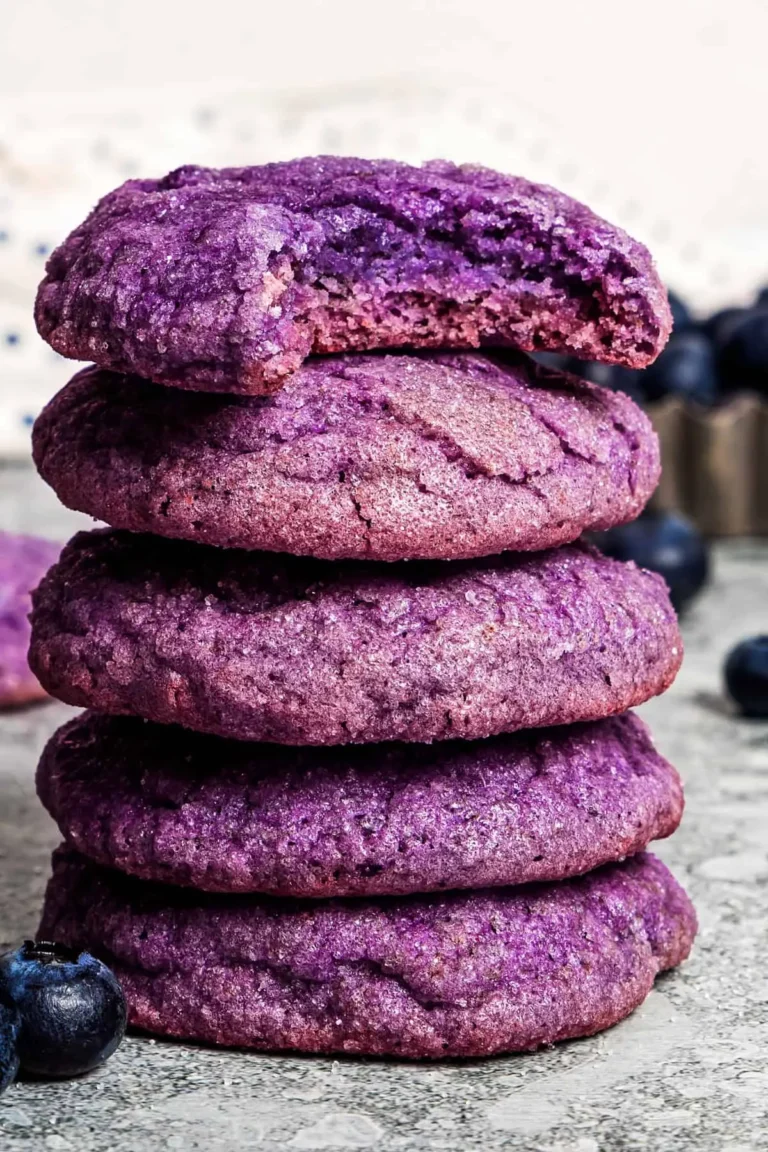
Delicious Strawberry Matcha Marble Cookies for Spring Bliss

As the first blossoms peek out to herald the arrival of spring, my kitchen transforms into a vibrant canvas filled with delightful scents and colors. I love welcoming the season with my Delicious Strawberry Matcha Marble Cookies, a charming treat that effortlessly captures the spirit of springtime.
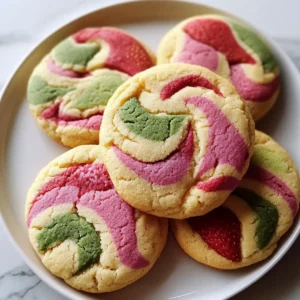
These cookies are not only a feast for the eyes, thanks to their stunning marbled effect, but they also combine fruity sweetness and earthy matcha for a delicious twist that will have you dreaming of sunny afternoons. Perfect for sharing at brunches or enjoying with a cup of tea, they’re also quick to whip up—ideal for those busy days when you crave something homemade. Ready to brighten your day and impress your loved ones? Let’s dive into these delightful cookie recipes that embrace all the joy spring has to offer!
Why You Will Love This Recipe
- Vibrant Colors: The stunning marbled effect of these cookies is a visual delight that embodies the essence of spring, making them perfect for festive gatherings.
- Unique Flavor Combination: Imagine the sweetness of strawberries harmonizing with the earthy notes of matcha—this flavor duo is both refreshing and exciting!
- Quick to Make: With easy-to-follow instructions, you can whip these cookies up in no time, making them an ideal choice for spontaneous baking sessions.
- Versatile Occasion Fit: Whether it’s an afternoon tea or a brunch gathering, these cookies are bound to impress your guests and elevate your dessert table.
- Healthier Snacking Option: Plus, with the addition of matcha, you’re not just enjoying a delicious treat; you’re also getting the health benefits of this superfood.
Ingredients You Need
Selecting the finest ingredients is paramount to achieving the exceptional taste and visual appeal of these Strawberry Matcha Marble Cookies. Prioritizing fresh, ripe strawberries will infuse a natural sweetness and vibrant color, while high-quality matcha powder ensures that distinct earthy undertone and beautiful green hue.
Delicious Strawberry Matcha Marble Cookies
These vibrant Strawberry Matcha Marble Cookies capture the essence of spring with their beautiful marbled effect, combining the fruity sweetness of strawberries with the earthy notes of matcha. They are quick to make, perfect for any occasion, and offer a delightful twist on classic cookies.
- For the Cookie Base
- 1 cup unsalted butter, at room temperature
- 1 cup granulated sugar (can substitute with brown sugar)
- 2 large eggs
- 2 cups all-purpose flour (or gluten-free flour)
- For the Strawberry Layer
- 1 cup fresh strawberries, ripe, pureed
- 1 tablespoon cornstarch
- For the Matcha Layer
- 2 tablespoons high-quality matcha powder
- 1 teaspoon baking powder
- For Decoration (Optional)
- Powdered sugar, for dusting
- Fresh strawberry slices, for topping
- 1Prepare the Dough: In a large mixing bowl, cream 1 cup of unsalted butter and 1 cup of granulated sugar together until light and fluffy, about 3-5 minutes. Add in 2 eggs, one at a time, mixing until fully incorporated. Gradually sift in 2 cups of all-purpose flour and 1 teaspoon of baking powder, mixing gently just until combined.
- 2Make the Strawberry Layer: In a separate bowl, puree 1 cup of fresh strawberries until smooth. Mix in 1 tablespoon of cornstarch to thicken the puree.
- 3Prepare the Matcha Layer: Combine 2 tablespoons of high-quality matcha powder with the cookie dough mixture. Stir until the dough takes on a beautiful green hue.
- 4Create the Marble Effect: Scoop out alternating portions of the strawberry mixture and the matcha dough onto a lined baking sheet, using about a tablespoon of each. Gently swirl the two mixtures together with a toothpick or knife to create a marbled effect, being careful not to over-mix.
- 5Bake the Cookies: Preheat oven to 350°F (175°C). Bake for 12-15 minutes, until the edges are firm but the centers still look slightly soft.
- 6Cool and Decorate: Let the cookies cool on the baking sheet for about 5 minutes before transferring to a wire rack to cool completely. Optionally, dust with powdered sugar or top with fresh strawberry slices.
Keywords: Strawberry, Matcha, Marble, Cookies, Spring, Baking, Dessert, Vegetarian
- unsalted butter: Creamed to perfection, it forms the tender base for these delightful cookies.
- granulated sugar: Provides the essential sweetness and aids in creating that classic cookie texture.
- eggs: Acts as a crucial binder, enriching the dough and contributing to a tender crumb.
- all-purpose flour: The backbone of the cookie, providing structure and allowing other flavors to shine.
- fresh strawberries: Their bright, fruity essence is key to one of the marble layers, offering a refreshing contrast.
- cornstarch: This helps to thicken the strawberry puree, ensuring it integrates beautifully into the cookie dough without making it too wet.
- matcha powder: Sourced for its vibrant green color and distinctive earthy flavor, it creates the complementary marble.
- baking powder: A little lift goes a long way in achieving the perfect cookie texture, preventing them from being too dense.
- powdered sugar: For a delicate dusting that adds a touch of sweetness and elegance, perfect for presentation.
- fresh strawberry slices: These make for an attractive and flavorful garnish, enhancing the cookie’s theme.
The precise quantities for these ingredients are thoughtfully detailed within the accompanying recipe card for your convenience.
Variations
For those with dietary preferences or a desire for adventurous flavors, these cookies offer a wonderful playground for customization. Consider transforming them into a delightful vegan treat by swapping dairy butter for a high-quality vegan alternative and using a plant-based milk for richness.
A fantastic low-carb modification can be achieved by substituting the granulated sugar with erythritol or a similar sugar substitute and using almond flour or coconut flour in place of all-purpose flour. This approach maintains the delightful marble effect while adhering to a lower carbohydrate intake.
You could also explore a nutty dimension by folding finely chopped almonds or pistachios into the matcha dough, adding an extra layer of texture and complementary flavor. Alternatively, for a brighter, more citrusy note, a teaspoon of finely grated lemon or orange zest can be incorporated into the main cookie dough, offering a refreshing twist on the classic flavor profile.
Adding a hint of spice can also create an unexpected and delightful flavor experience. A whisper of ground ginger or even a tiny pinch of cayenne pepper mixed into the matcha layer can create a subtle warmth that beautifully complements the sweetness of the strawberries and the earthiness of the matcha.
For those who adore a richer, more decadent cookie, a small amount of cream cheese can be incorporated into the strawberry layer, creating a subtle cheesecake-like tang and an even more luxurious texture. This also pairs wonderfully with other dessert inspirations, much like those found in our collection of dessert ideas.
Experimenting with different fruit purees can also lead to exciting new flavor combinations. Imagine swapping strawberries for vibrant raspberries or sweet blueberries in the fruit layer, each offering its own unique character and visual appeal. This adaptability makes these cookies a go-to for any occasion or craving.
How to Prepare Strawberry Matcha Marble Cookies
Step 1: Preparing the Creamy Cookie Base
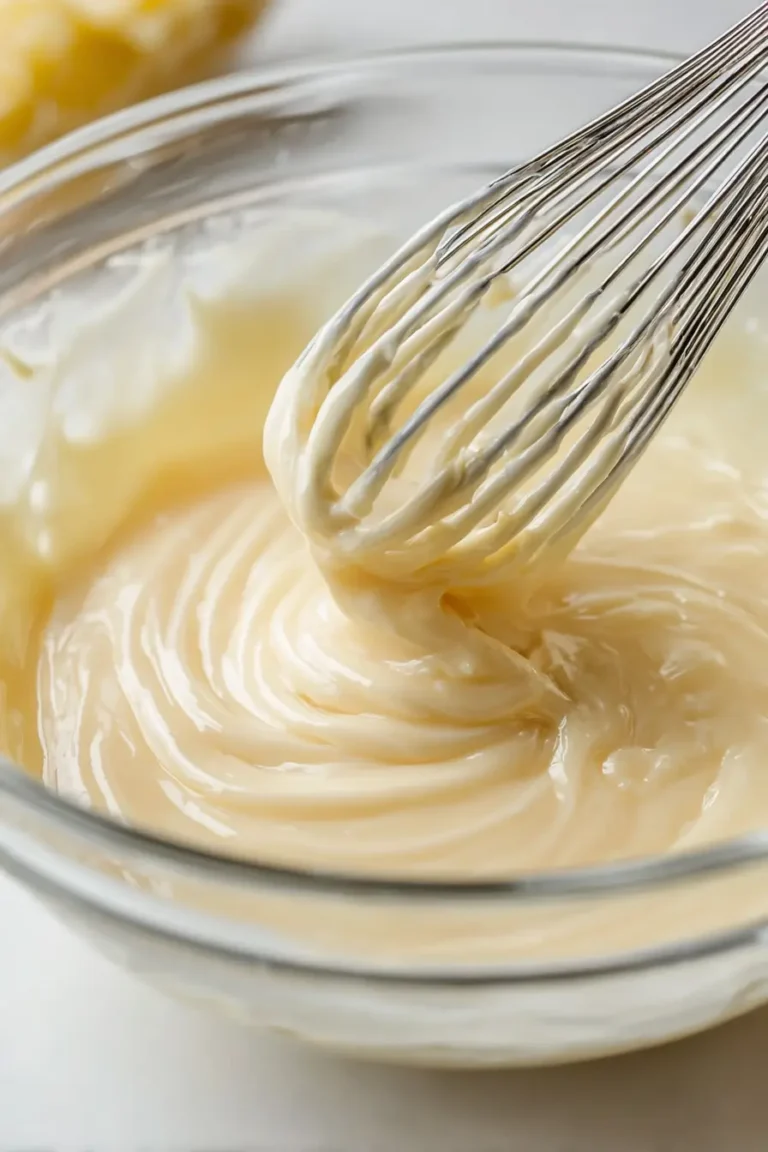
Begin by ensuring your unsalted butter is at the perfect room temperature, which is crucial for achieving a light and fluffy texture. In a generously sized mixing bowl, cream this softened butter with the granulated sugar for a good 3 to 5 minutes. The mixture should transform into a pale, airy, and uniformly smooth consistency; this foundational step is key to tender cookies.
Next, introduce the eggs into the creamed butter and sugar mixture, one at a time. Ensure each egg is thoroughly incorporated before adding the next, mixing well after each addition. This gradual addition helps to emulsify the ingredients properly, contributing to the overall structure and richness of your cookie dough.
Gradually sift the all-purpose flour and baking powder over the wet ingredients. Using a gentle hand and a spatula or wooden spoon, mix these dry ingredients into the wet until they are just combined. It is vital not to overmix at this stage; overworking the flour can develop the gluten too much, leading to tough cookies, so stop as soon as you no longer see streaks of dry flour. The resulting dough should be soft and pliable, ready for its delightful transformation into marbled cookies.
Step 2: Crafting the Luscious Strawberry Layer
To create the vibrant strawberry component, take one cup of fresh, ripe strawberries and place them into a blender or food processor. Process them until they are completely smooth and form a luscious puree. The riper the strawberries, the sweeter and more intense the flavor will be, so choose wisely for the best outcome.
Once you have a smooth strawberry puree, it’s time to add the cornstarch. Stir in one tablespoon of cornstarch thoroughly into the puree. This vital ingredient acts as a thickening agent, ensuring that the strawberry mixture will integrate seamlessly into the cookie dough without making it too watery or causing the cookies to spread excessively during baking.
After thoroughly mixing, set this vibrant strawberry puree aside. It’s now ready to be artfully swirled into the cookie dough, ready to impart its delightful fruity essence and beautiful pinkish-red hue. This layer is what will give your cookies that wonderful burst of sweetness and a visually appealing contrast to the green matcha.
Step 3: Infusing the Earthy Matcha Element
Now, it’s time to introduce the star of the green hue: the matcha powder. Take the cookie dough base that you prepared in Step 1. Into this dough, add two tablespoons of high-quality matcha powder. Using a good quality ceremonial grade matcha will yield the best vibrant green color and the most nuanced, delicious flavor.
Gently mix the matcha powder into the cookie dough. Continue mixing until the dough has taken on a uniform, beautiful green color. Ensure that the matcha is evenly distributed throughout the entire portion of the dough. This step requires a bit of patient mixing to avoid clumps of matcha and to ensure the flavor is consistent in every bite of your delicious strawberry matcha marble cookies.
This matcha-infused dough will provide the perfect earthy counterpoint to the sweet strawberry layer. The visual contrast between the green and the red/pink will be striking, and the unique flavor combination is what truly sets these cookies apart. This mindful preparation ensures a balanced and sophisticated flavor profile for your marbled creations.
Step 4: The Art of Creating the Marble Effect
With both your strawberry puree and your matcha cookie dough prepared, it’s time for the artistic part: creating the mesmerizing marble effect. On a baking sheet lined with parchment paper or a silicone baking mat, begin scooping alternating portions of the strawberry mixture and the matcha dough. Aim for roughly tablespoon-sized amounts of each, placing them randomly next to each other.
Once you have several dollops of both colors on your baking sheet, it’s time to swirl. Take a toothpick or the tip of a thin knife and gently drag it through the two different colored doughs. Create swirling patterns, moving the toothpick in curves and loops through the dough. The key here is to be delicate; over-mixing will blend the colors too much, resulting in a uniform color rather than a distinct marble pattern.
The goal is to have beautiful, distinct veins of strawberry pink and matcha green running through each cookie. This swirling technique not only makes the cookies visually stunning but also ensures that each bite offers a delightful interplay of both flavors. Admire your work; the marble patterns are unique to each cookie and will look spectacular once baked.
Step 5: Baking to Golden Perfection
While you are busy shaping your beautifully marbled cookie dough, preheat your oven to 350 degrees Fahrenheit (175 degrees Celsius). Ensuring the oven is at the correct and stable temperature before placing the cookies in is essential for even baking and achieving the desired texture. A properly preheated oven prevents the cookies from spreading too much or baking unevenly.
Once your oven is preheated, carefully place the baking sheet with the marbled cookies into the center rack. Bake the cookies for approximately 12 to 15 minutes. The exact time can vary slightly depending on your oven, so keep a close eye on them during the last few minutes of baking.
You are looking for the edges of the cookies to be firm and lightly golden brown, while the centers should still appear slightly soft and underdone. This slight underbaking in the center is crucial for maintaining a wonderfully chewy texture in the finished cookies. The vibrant marbling should remain visible and distinct, creating a truly artistic presentation.
Step 6: Cooling and Finishing Touches
Once the cookies have reached that perfect stage of golden edges and slightly soft centers, carefully remove the baking sheet from the oven. Allow the cookies to cool directly on the baking sheet for about 5 to 7 minutes. This brief cooling period on the warm sheet is important; it allows the cookies to firm up just enough so they don’t break apart when you move them, while they are still delicate.
After they have set slightly on the baking sheet, gently transfer the cookies to a wire cooling rack. This allows air to circulate around all sides of the cookies, ensuring they cool completely and evenly. Cooling them fully is essential before moving on to any decorative steps, as warm cookies can be fragile and any applied decoration might melt or smear.
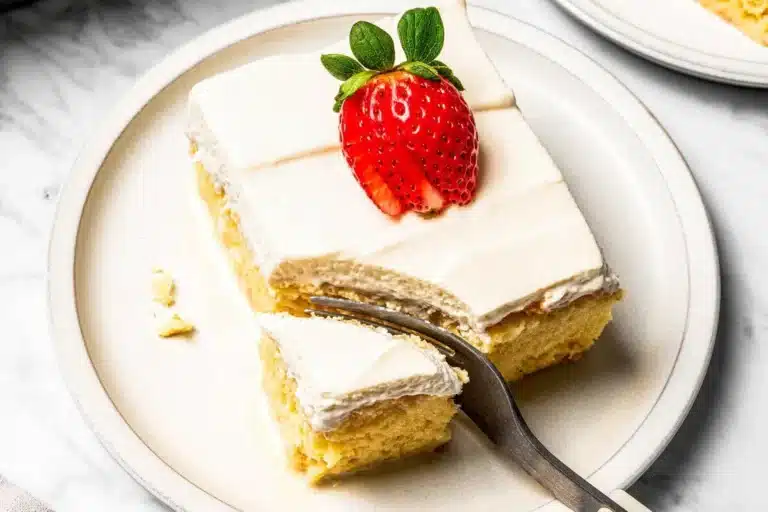
For an optional, yet highly recommended, finishing touch that enhances both the visual appeal and the flavor, consider a light dusting of powdered sugar over the cooled cookies. Alternatively, or in addition, placing a small fresh strawberry slice on top of each cookie provides an elegant garnish that emphasizes the fruity component. These final touches transform your delicious strawberry matcha marble cookies into truly show-stopping treats, ready to be savored and admired.
Pro Tips for Strawberry Matcha Marble Cookies
Butter Consistency is Key: Ensure your butter is at true room temperature – soft enough to indent with a finger but not melted. This is critical for creaming it properly with the sugar, which aerates the dough and leads to a tender cookie texture. If your butter is too cold, it won’t cream well; if it’s too warm, the cookies may spread excessively.
Gentle Mixing is Paramount: Once you’ve added the flour, resist the urge to overmix. Mix only until the ingredients are just combined and no dry streaks of flour remain visible. Overworking the dough develops the gluten in the flour, resulting in tougher, denser cookies instead of the desired tender and chewy texture.
Quality Matters for Flavor: Always opt for ripe, fresh strawberries for your puree to ensure the best natural sweetness and vibrant color. Similarly, invest in a high-quality ceremonial grade matcha powder. The better the ingredients, the more pronounced and delightful the flavor profile of your cookies will be.
The Swirl Technique: When creating the marbled effect, be deliberate but gentle. Use a toothpick or a thin knife to swirl the colors just a few times. You want to see distinct veins and patterns of both the strawberry and matcha doughs, not a uniform blend. This careful swirling contributes significantly to the beautiful presentation.
Proper Cooling Prevents Breakage: Allow the cookies to cool on the baking sheet for at least 5-7 minutes before attempting to move them. They are quite delicate when hot and can easily break. Transferring them to a wire rack to cool completely ensures they firm up properly and maintain their shape and integrity.
Chilling Dough for Control: If your dough feels particularly soft and seems prone to spreading, don’t hesitate to chill it for about 20-30 minutes in the refrigerator before scooping and swirling. Chilled dough is firmer and holds its shape better during baking, minimizing unwanted spread and ensuring well-defined marble patterns.
Serving Suggestions for Strawberry Matcha Marble Cookies
Decoration
The visual appeal of these cookies is already striking, but a few decorative touches can elevate them further. A delicate dusting of powdered sugar mimics a light snowfall, adding a touch of elegance and sweetness that complements the other flavors beautifully. For an even more pronounced aesthetic, place a small, fresh strawberry slice precisely on top of each cookie after it has cooled. This not only adds a pop of color but also signals the delicious fruity flavor within, making them irresistible at first glance.
Side Dishes
These cookies are wonderful on their own, but they also pair exceptionally well with certain beverages and light accompaniments. A tall glass of refreshing iced green tea echoes the matcha notes and provides a palate-cleansing contrast to the sweetness. For a brighter pairing, a tangy glass of homemade lemonade cuts through the richness and complements the strawberry flavor. A simple scoop of creamy vanilla ice cream served alongside offers a delightful textural contrast, turning a simple cookie into an indulgent dessert experience.
Creative Serving Ideas
Beyond traditional tea-time pairings, consider incorporating these cookies into a larger dessert spread. Arrange them artfully on a tiered stand at a spring brunch, alongside fresh fruit and perhaps some pastries. They also make a lovely addition to a cheese board, where the sweet and fruity notes can provide an interesting counterpoint to mild, creamy cheeses like brie or goat cheese. For a more playful presentation, serve them in small, decorative paper cups as part of a cookie buffet, allowing guests to easily grab and enjoy.
Preparation & Storage
Storing Leftovers
Should you find yourself with any leftover Strawberry Matcha Marble Cookies, storing them properly will ensure their deliciousness lasts. For short-term storage, place the completely cooled cookies in an airtight container at room temperature. They will remain delightfully fresh and flavorful for up to 3 to 5 days. Ensure the container is well-sealed to prevent air from drying out the cookies, which can affect their texture and taste.
Freezing
If you wish to preserve these delightful treats for a longer period, freezing is an excellent option. First, allow the cookies to cool completely, then arrange them in a single layer on a baking sheet. Place the baking sheet into the freezer for about 1-2 hours, or until the cookies are firm to the touch. This pre-freezing step prevents the cookies from sticking together in a large clump.
Once frozen solid, transfer the individual cookies into a freezer-safe airtight container or a heavy-duty freezer bag. Seal the container or bag well, removing as much air as possible to prevent freezer burn. Properly frozen, these Strawberry Matcha Marble Cookies can be stored for up to 2 to 3 months, retaining their delightful flavor and texture.
Reheating
When you’re ready to enjoy your frozen cookies, the best approach is to thaw them first. Remove the cookies from the freezer and place them on a plate or a wire rack at room temperature. Allow them to thaw naturally, which usually takes about 30 minutes to an hour, depending on their size and the ambient temperature. This method preserves their texture best.
For a warm, freshly-baked experience, you can briefly reheat the thawed cookies. Place them on a baking sheet and warm them in a preheated oven at a low temperature, around 300°F (150°C), for just a few minutes, until they are slightly warmed through. Be careful not to overheat them, as this can cause them to become too soft or even burn. This warming process can revive their delightful aroma and chewy texture, making them taste as good as the day they were baked.
Frequently Asked Questions
-
What type of strawberries should I use for the cookie dough, and can I use frozen strawberries?
It is highly recommended to use ripe, fresh strawberries for the purest and most vibrant flavor and color in your cookie dough. Their natural sweetness and moisture content contribute significantly to the overall taste profile. While you can technically use frozen strawberries, they contain more water and may require additional thickening. If using frozen, thaw them completely, drain any excess liquid thoroughly, and then puree them as per the recipe. Be prepared to potentially add a little extra cornstarch to achieve the desired consistency, as frozen strawberries can release more moisture when processed.
-
My cookies spread too much during baking. What could have gone wrong, and how can I prevent this next time?
Excessive spreading in cookies often stems from a few common issues. Firstly, ensure your butter was at the correct room temperature – it should be soft but not melted; using melted butter will cause the cookies to spread significantly. Secondly, avoid overmixing the dough once the flour has been added, as this develops gluten and can lead to a looser dough. Another effective preventative measure is to chill the dough for at least 20-30 minutes before baking, especially if you live in a warm climate or your kitchen tends to be warm. Chilled dough is firmer and will hold its shape better in the oven, resulting in thicker, chewier cookies with less spread.
-
Can I make the strawberry puree and matcha dough ahead of time? How long will they keep?
Yes, you can absolutely prepare components of the cookie dough ahead of time to save time on baking day. The strawberry puree can be made and stored in an airtight container in the refrigerator for up to 2 days. The matcha dough, once combined, can also be refrigerated for up to 24 hours. It’s best to store it tightly wrapped in plastic wrap to prevent it from drying out. When you’re ready to bake, allow the refrigerated dough to sit at room temperature for about 15-20 minutes to soften slightly before scooping and swirling. This preparation allows for easier handling and a more consistent baking process.