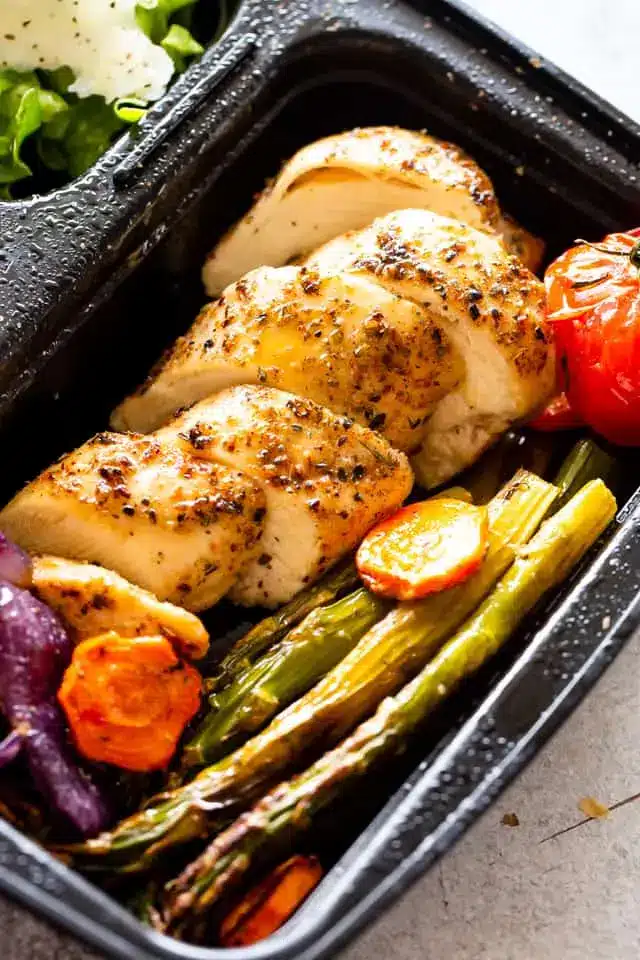
Juicy Oven Roasted Chicken – No More Dry Chicken!
Discover the secret to unbelievably juicy and tender oven-roasted chicken breasts with this foolproof recipe. Say goodbye to dry, bland poultry forever, and hello to a new weeknight staple that’s both incredibly easy and remarkably flavorful.
This method, honed over years of experimentation, focuses on a simple yet transformative brining technique combined with a perfectly balanced spice blend. It’s the key to unlocking succulent, golden-brown chicken that will impress even the most discerning palates.
Why You Will Love This Recipe
- Tender & Juicy Every Time: Experience perfectly moist chicken breasts with every single cook, eliminating the risk of dryness.
- Remarkably Easy Preparation: This recipe simplifies the cooking process, requiring minimal effort for maximum deliciousness.
- Incredibly Versatile: Enjoy the chicken as is, or use it as a base for countless other dishes, from salads to wraps and more.
- Customizable Flavor Profile: The provided spice blend is excellent, but it also serves as a fantastic foundation for your own favorite seasonings.
- Quick Cooking Time: With a relatively short active time and a speedy oven roast, dinner can be on the table in under an hour.
Ingredients You Need
The foundation of this exceptional recipe lies in selecting quality ingredients and understanding their role in achieving the perfect roast. We’ll be using simple, readily available items that, when combined, create a symphony of flavor and texture. The brining process is crucial for infusing moisture deep into the chicken breast, ensuring it remains succulent throughout the cooking process.
Oven Roasted Chicken Breast

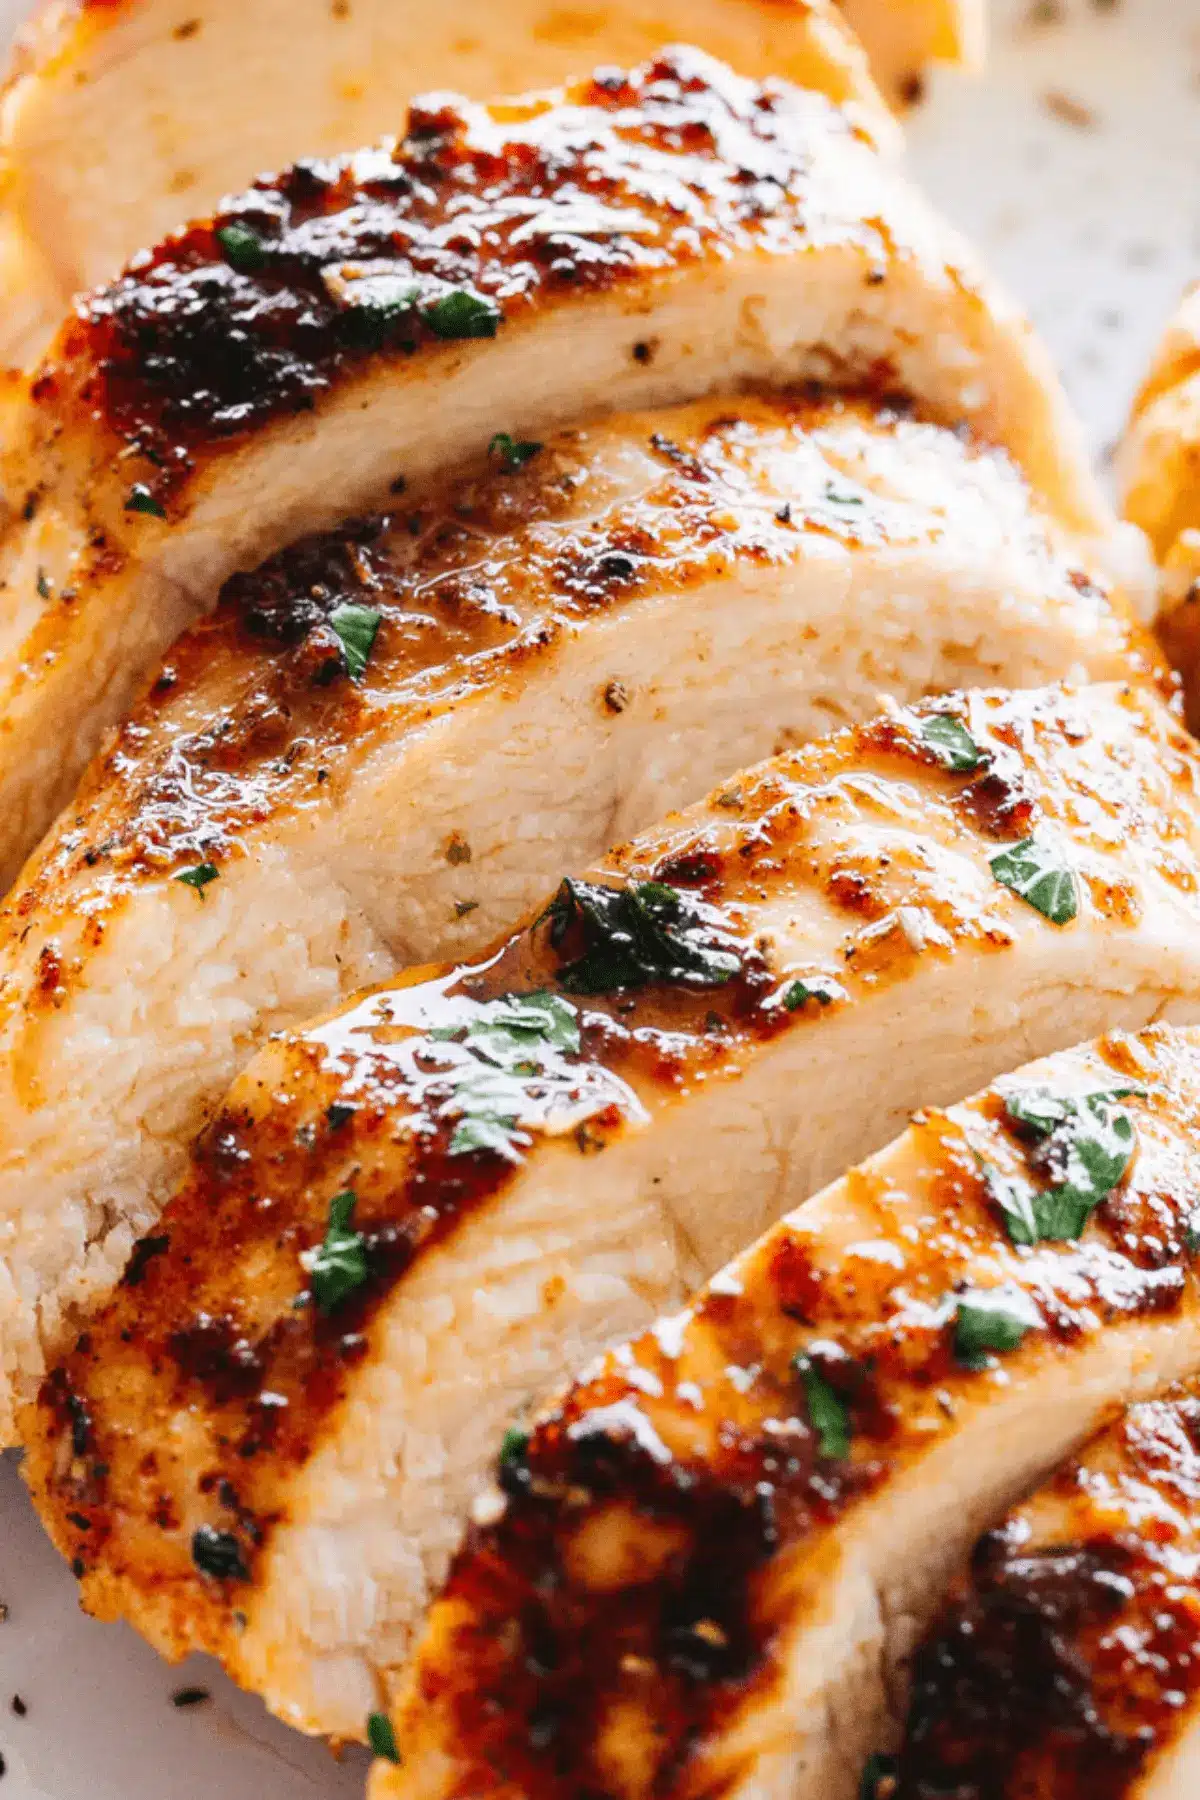
Juicy and tender, this tasty oven roasted chicken breasts recipe comes out perfect each and every time! No more dry chicken with this easy recipe, which uses a quick soak in salt water and a delicious homemade mix of spices.
- 1 to 1.5 pounds boneless, skinless chicken breasts
- 4 cups lukewarm water
- ¼ cup salt
- 1 tablespoon olive oil
- ¼ teaspoon salt (this is optional as the chicken will have absorbed some of the salt from the salted water)
- ¼ teaspoon fresh ground black pepper
- ½ teaspoon smoked or sweet paprika
- ½ teaspoon garlic powder
- ½ teaspoon onion powder
- ½ teaspoon dried thyme
- ½ teaspoon dried basil
- ½ teaspoon dried rosemary
- ¼ teaspoon dried parsley
- &frac158; teaspoon cayenne pepper
- fresh chopped parsley (for garnish)
- 1Preheat the oven to 425°F.
- 2Place the chicken breasts in a large bowl. In a large measuring cup or mixing bowl, combine lukewarm water and salt; stir, then pour over chicken breasts. Set aside for 20 to 30 minutes. You can also cover the bowl and refrigerate for up to 2 hours.
- 3Prepare the chicken seasoning blend: Combine the salt, pepper, paprika, garlic powder, onion powder, dried thyme, dried basil, dried rosemary, dried parsley, and cayenne pepper in a small bowl; stir until thoroughly incorporated. Set aside.
- 4Pour out the salt water and rinse each chicken breast under cold water; pat them dry with paper towels. Place the chicken in a baking dish and rub the olive oil all over each chicken breast. Sprinkle the seasoning blend evenly over the chicken breasts on all sides.
- 5Transfer to the oven and bake for 22 to 25 minutes, or until internal temperature reaches 165°F. Use an Instant Read Meat Thermometer to check for doneness. Thinner breasts will need less time, and thicker chicken breasts might need a little more time. Start checking for doneness around the 20-minute mark.
- 6For a browned, crispy top, set your oven to broil on HIGH for the final 3 to 4 minutes and broil until golden on top.
- 7Remove the chicken breasts from the oven and transfer them to a serving plate to rest for 10 minutes before cutting and serving.
- 8Garnish with fresh chopped parsley and serve.
Keywords: roasted chicken, chicken breast, oven baked chicken, healthy chicken, easy chicken recipe
The precise quantities for each ingredient can be found within the recipe card, ensuring you have everything you need for a flawless execution.
Variations
While this recipe is a triumph in its classic form, its versatility allows for endless creative adaptations to suit various dietary preferences and flavor inspirations. Consider a few exciting avenues to explore.
Vegan Adaptation: While chicken is the star here, a plant-based alternative can be achieved by substituting firm tofu or tempeh. Ensure the tofu is pressed thoroughly to remove excess water, and marinate it in a similar brine-like mixture (using vegetable broth and salt) before applying the spice rub. Baking times will need adjustment, and the texture will naturally differ, but the flavor profile can be beautifully mimicked.
Low-Carb Delight: For those mindful of carbohydrate intake, this recipe is already a strong contender. The chicken itself is naturally low in carbs, and the spice blend primarily relies on herbs and spices with minimal sugar. When serving, pair it with low-carb side dishes such as roasted cauliflower, zucchini noodles, or a crisp green salad tossed with a vinaigrette.
Spicy Kick: If you crave a bit more heat, don’t hesitate to amplify the cayenne pepper in the spice blend. You could also incorporate a pinch of red pepper flakes or a dash of hot sauce into the olive oil rub. This variation is particularly delightful when paired with a cooling side dish, like a cucumber and yogurt raita, to balance the warmth.
How to Prepare Oven Roasted Chicken Breast
Step 1: The Crucial Brine
The journey to ultimate chicken breast perfection begins with an often-overlooked but absolutely essential step: brining. This process, surprisingly simple and remarkably effective, infuses the meat with moisture and seasoning from the inside out. It’s the secret weapon against dry, uninspired chicken.
To initiate the brine, you will need a large bowl or a zip-top bag capable of comfortably holding your chicken breasts. In this vessel, combine four cups of lukewarm water with a quarter cup of salt. Stir these ingredients together until the salt is thoroughly dissolved, creating a saline solution that will work its magic.
Carefully submerge your boneless, skinless chicken breasts into this brining solution. Ensure they are fully immersed. Cover the bowl or seal the bag, and allow the chicken to soak for a minimum of 20 minutes. For an even more profound infusion of moisture and flavor, you can extend this brining period up to two hours, or even refrigerate it for this duration.
Step 2: Preparing the Flavorful Seasoning Blend
While your chicken is gracefully brining, it’s the perfect opportunity to assemble the exquisite spice blend that will coat the breasts and deliver a burst of savory goodness. This mixture is designed to complement the natural flavor of the chicken without overpowering it, creating a harmonious taste experience.
In a small bowl, gather all the components of your seasoning blend. This typically includes a quarter teaspoon of salt (though you can adjust this based on your preference, as the brine already adds saltiness), a quarter teaspoon of fresh ground black pepper for a touch of sharpness, and a half teaspoon each of smoked or sweet paprika, garlic powder, and onion powder for foundational aromatic depth. To enhance the herbaceous notes, add a half teaspoon each of dried thyme, dried basil, and dried rosemary, rounding it out with a quarter teaspoon of dried parsley for a hint of freshness.
For those who enjoy a subtle warmth, a sixth of a teaspoon of cayenne pepper can be added to introduce a gentle heat. Using a fork or a small whisk, thoroughly combine all these dry ingredients. Stir them until they are completely incorporated, ensuring an even distribution of flavor in every sprinkle.
Step 3: Seasoning and Preparing for the Oven
Once the brining period has concluded and your aromatic spice blend is ready, it’s time to transition to the next crucial phase: seasoning the chicken breasts. This step ensures that the exterior of the chicken is as delightful as its interior will be after cooking.
Begin by carefully pouring out the saltwater brine from the bowl or bag. Gently rinse each chicken breast under cold running water. This rinsing helps to remove any excess salt that might be clinging to the surface from the brining process. After rinsing, thoroughly pat each piece of chicken dry with paper towels. This drying step is vital, as it allows the olive oil and seasonings to adhere properly to the meat, creating a more flavorful crust.
Place the dried chicken breasts into a baking dish. Drizzle a tablespoon of olive oil over the chicken, ensuring you rub it all over each breast. This oil acts as a binder for the spices and helps in achieving that coveted golden-brown exterior. Then, generously sprinkle the prepared seasoning blend evenly over all sides of the chicken breasts. Feel free to use as much or as little of the blend as your taste buds desire; the recipe provides a guideline, but personal preference reigns supreme here.
Step 4: The Roasting Process
With the chicken breasts beautifully seasoned and nestled in their baking dish, they are now ready to embark on their transformation in the heat of the oven. This stage is where the magic truly happens, turning simple chicken into a culinary delight.
Preheat your oven to a robust 425 degrees Fahrenheit (220 degrees Celsius). This higher temperature is key to achieving a beautifully roasted exterior and ensuring the chicken cooks through efficiently without becoming dry. Carefully transfer the baking dish containing the seasoned chicken breasts into the preheated oven.
Bake the chicken for approximately 20 to 25 minutes. The exact cooking time will vary depending on the thickness of your chicken breasts. To ensure perfect doneness, it is highly recommended to use an instant-read meat thermometer. Insert the thermometer into the thickest part of the chicken breast; it should register an internal temperature of 165 degrees Fahrenheit (74 degrees Celsius). Start checking for doneness around the 20-minute mark to avoid overcooking.
Step 5: Optional Browning and Essential Resting
To elevate your oven-roasted chicken breast from merely delicious to truly exceptional, consider this optional but highly recommended step for a gorgeous, crispy finish. Following this, the crucial resting period ensures maximum juiciness.
For that desirable golden-brown, slightly crispy top, switch your oven’s setting to broil on HIGH for the final 3 to 4 minutes of cooking. Keep a very close eye on the chicken during this broiling phase, as it can brown very quickly. You want a beautiful caramelization, not a char. Once it achieves that perfect golden hue, immediately remove the baking dish from the oven.
Transfer the roasted chicken breasts from the hot baking dish to a clean cutting board or a serving plate. This is a critical step that often gets overlooked: letting the chicken rest. Allow the chicken to rest undisturbed for at least 5 to 10 minutes before you even think about slicing into it. This resting period allows the juices, which have been driven to the center of the meat during cooking, to redistribute throughout the entire breast, ensuring every bite is as moist and flavorful as the last. Skipping this step will result in juices running out onto the board, leaving you with drier chicken.
Pro Tips for Oven Roasted Chicken Breast
Achieving that perfect, succulent oven-roasted chicken breast isn’t just about following a recipe; it’s about understanding the nuances and employing a few expert techniques that make all the difference. These tips are designed to help you consistently produce restaurant-quality results at home.
Utilize an Instant-Read Thermometer: This is arguably the most important tool for ensuring your chicken is perfectly cooked. Chicken breasts are lean and can go from perfectly done to dry very quickly. An instant-read thermometer guarantees you pull the chicken from the heat at precisely 165°F (74°C) in its thickest part, preventing overcooking and ensuring maximum juiciness.
Don’t Skip the Rest: As mentioned previously, allowing the chicken to rest for 5-10 minutes after cooking is non-negotiable. This resting period is crucial for allowing the juices to redistribute throughout the meat. When you cut into hot, just-cooked chicken, all those flavorful juices will run out, leaving the meat dry. Patience here pays off immensely.
Uniform Thickness is Key: Chicken breasts often come in varying sizes and thicknesses. For the most even cooking, consider pounding the thicker parts of the breasts slightly with a meat mallet or the bottom of a heavy pan to achieve a more uniform thickness. This ensures that all parts of the chicken breast cook at the same rate, preventing some areas from becoming overcooked while others are still underdone. You can place the chicken between two sheets of plastic wrap before pounding to keep things clean and prevent tearing.
Experiment with Seasonings: While the provided spice blend is excellent, don’t be afraid to get creative! This recipe serves as a fantastic base for countless flavor profiles. Consider using pre-made blends like Montreal steak seasoning (surprisingly good on chicken), lemon pepper, or even a touch of your favorite curry powder. You could also create your own blend with smoked paprika, cumin, chili powder, and oregano for a more Southwestern flair. The possibilities are truly endless.
Brining Alternatives: While this recipe uses a quick saltwater brine, you can also explore buttermilk or a herb-infused brine for different flavor nuances. Buttermilk adds a slight tang and helps tenderize the meat beautifully. If using buttermilk, ensure you still pat the chicken very dry before seasoning to allow the rub to adhere.
Serving Suggestions for Oven Roasted Chicken Breast
Decoration
A touch of fresh garnish can elevate the visual appeal of your perfectly roasted chicken breast, making it look as inviting as it tastes. A simple scattering of freshly chopped parsley over the top of the warm chicken right before serving adds a vibrant pop of green and a subtle herbaceous aroma. For a more refined presentation, consider a sprig of fresh rosemary or thyme placed artfully beside the chicken. A light drizzle of good quality olive oil or a squeeze of fresh lemon juice can also add a beautiful sheen and a burst of brightness.
Side Dishes
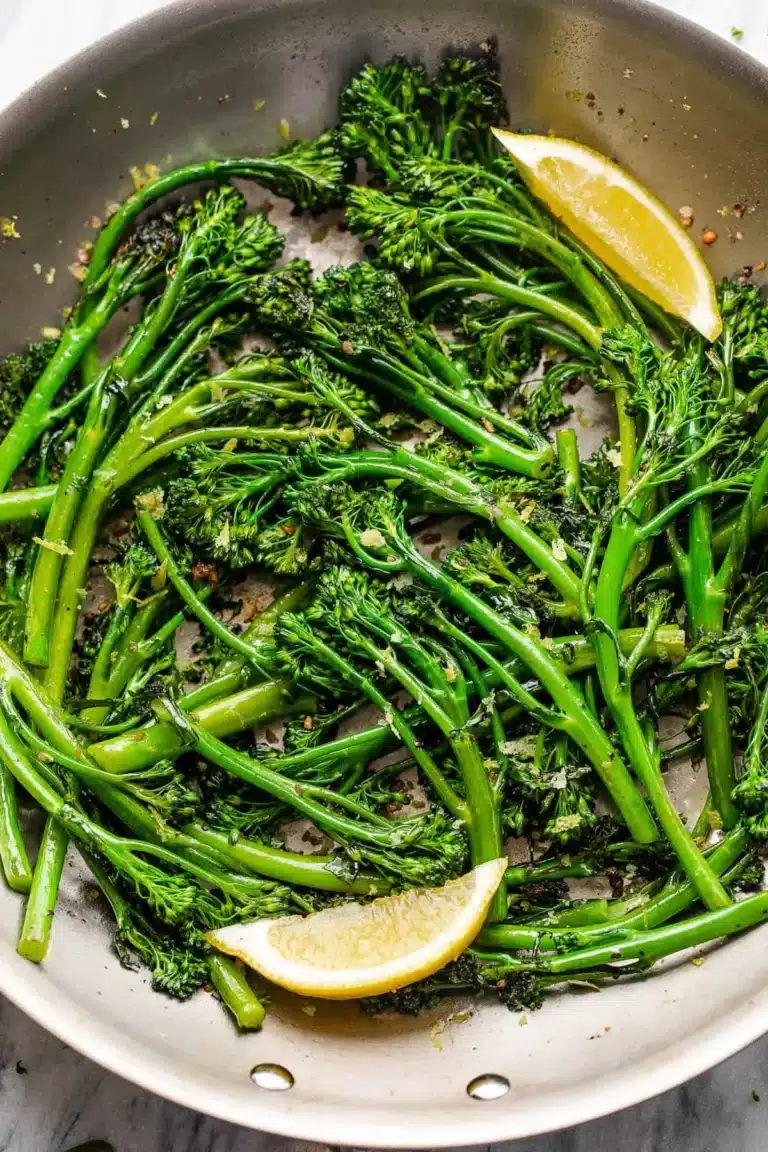
Oven-roasted chicken breast is incredibly versatile, pairing wonderfully with a wide array of side dishes that can cater to any meal occasion. For a classic and comforting meal, consider classic mashed potatoes or roasted potatoes seasoned with garlic and herbs. A vibrant and crisp green salad tossed with a light vinaigrette offers a refreshing counterpoint, while steamed or roasted vegetables like broccoli, asparagus, or green beans provide essential nutrients and color.
For a low-carb option, consider serving the chicken alongside a creamy cauliflower mash or a medley of sautéed mushrooms and onions. Rice pilaf or quinoa also make excellent companions, absorbing any extra savory juices from the chicken. Don’t overlook the power of a good slaw; a creamy coleslaw or a zesty vinegar-based slaw can add a delightful textural contrast and tang to the meal. Exploring dinner recipes often reveals fantastic pairings that complement chicken beautifully.
Creative Serving Ideas
Transform your simple oven-roasted chicken breast into the star of various culinary creations. Slice it thinly and layer it into gourmet sandwiches or wraps, perhaps with a smear of pesto or a dollop of spicy aioli. Dice it and incorporate it into vibrant grain bowls, alongside roasted vegetables, avocado, and a flavorful dressing. It’s also an ideal candidate for shredded chicken dishes, perfect for tacos, enchiladas, or a hearty chicken noodle soup. Consider using it in a flavorful chicken shawarma or a refreshing chicken salad for light lunches. The possibilities are truly boundless, allowing you to reimagine leftovers into exciting new meals.
Preparation & Storage
Storing Leftovers
The beauty of this oven-roasted chicken breast recipe extends to its excellent keeping qualities. Leftover chicken remains moist and flavorful, making it perfect for meal prep or spontaneous deliciousness. To store, ensure the chicken has cooled completely before transferring it to an airtight container. This prevents condensation from forming, which can make the chicken soggy. Properly stored in the refrigerator, your roasted chicken breast can be enjoyed for up to 4 days, retaining its delightful texture and taste.
Freezing
Should you find yourself with an abundance of perfectly roasted chicken, freezing is an excellent option to preserve its quality for future use. Once the chicken has cooled entirely, wrap it securely. You can wrap individual chicken breasts tightly in plastic wrap, then in aluminum foil, or place them in a heavy-duty freezer bag, pressing out as much air as possible to prevent freezer burn. Frozen cooked chicken can maintain its best quality for approximately 3 to 4 months. Thaw it gradually in the refrigerator overnight before you plan to reheat it.
Reheating
Reheating oven-roasted chicken breast requires a gentle approach to maintain its succulence. Avoid the temptation to microwave it on high power, as this can quickly dry out the meat. Instead, place the refrigerated or thawed chicken in a skillet with a tablespoon of water or butter. Cover the skillet tightly and heat it gently over low to medium-low heat. This steaming method helps to reintroduce moisture and warm the chicken through without cooking it further. Alternatively, you can reheat it in a 300°F (150°C) oven, covered, for about 10-15 minutes, or until heated through.
Frequently Asked Questions
-
Can I brine the chicken breasts for longer than the recommended 20 minutes?
Absolutely! While 20 minutes is sufficient for a noticeable improvement in juiciness, you can extend the brining time for even more intense flavor infusion and moisture retention. You can safely brine chicken breasts for up to 2 hours at room temperature, or even longer (up to 24 hours) if you refrigerate them during the process. However, be mindful that excessively long brining periods, especially with more salt, could potentially lead to a slightly saltier outcome, so it’s best to find a balance that suits your palate. Always ensure the chicken is completely submerged in the brine for optimal and even results.
-
What is the best way to ensure the chicken is cooked through without being dry?
The definitive method for ensuring perfectly cooked, non-dry chicken breast is to use an instant-read meat thermometer. Insert it into the thickest part of the breast, avoiding any bone or gristle. The chicken is safely cooked and ready to be removed from the heat when the internal temperature reaches 165°F (74°C). Some chefs prefer to pull it off slightly earlier, around 160-162°F, knowing that the carry-over cooking during the resting period will bring it up to the safe temperature. Relying solely on cooking time can be deceptive, as oven temperatures can fluctuate, and chicken thickness varies significantly.
-
How can I adapt this recipe for bone-in chicken breasts or chicken thighs?
This recipe is fantastic for boneless, skinless breasts, but it’s also adaptable. For bone-in chicken breasts, you’ll typically need to increase the roasting time significantly, often to around 32 to 35 minutes, depending on their size. The internal temperature of 165°F (74°C) still applies. Chicken thighs, whether bone-in or boneless, also require slightly longer cooking times than boneless breasts, usually around 25 to 30 minutes for boneless and potentially longer for bone-in, due to their higher fat content which helps keep them moist. Always use your meat thermometer to confirm doneness, regardless of the cut or cooking time. You might also find that chicken thighs benefit from a slightly longer brining period.