Easy Maki Roll Recipe – Make Your Own Sushi

Embarking on the journey of creating your own sushi at home can feel like a culinary adventure, especially with the delicate art of maki rolls. This recipe demystifies the process, transforming what might seem intimidating into an achievable and incredibly rewarding kitchen experience.
Imagine the vibrant colors and fresh flavors coming together in your own hands, a testament to your culinary prowess. This maki roll recipe is designed to guide you step-by-step, ensuring a delightful outcome that will impress your friends and family, or simply bring a satisfying meal to your own table.
Why You Will Love This Recipe
- Fresh and Flavorful: Experience the delightful combination of perfectly seasoned sushi rice, crisp vegetables, and savory imitation crab, all wrapped in the distinct taste of nori seaweed for a truly satisfying bite.
- Customizable Fun: This recipe serves as a fantastic base, allowing you to easily swap out ingredients and experiment with different fillings to suit your personal taste preferences or dietary needs, making every roll unique.
- Impressive Presentation: Serve these beautifully crafted maki rolls at your next gathering and watch as your guests marvel at your homemade sushi creations, adding a touch of elegance to any occasion.
- Cost-Effective Dining: Enjoy the authentic taste of sushi without the restaurant markup; making these maki rolls at home is a budget-friendly way to indulge in your favorite Japanese cuisine.
- Interactive Mealtime: Rolling sushi can be a wonderfully engaging activity for families or a fun icebreaker at parties, encouraging participation and shared culinary exploration.
Ingredients You Need
The foundation of any exceptional maki roll lies in the quality of its ingredients, where each component plays a crucial role in the final flavor profile and texture. Opting for fresh, vibrant produce and good quality sushi rice will elevate your homemade rolls from good to truly spectacular. Take the time to select ripe avocados, crisp cucumbers, and firm carrots, as these will provide the delightful crunch and refreshing counterpoint to the rich sushi rice.
Easy Maki Roll Recipe

Master the art of homemade sushi with this easy Maki Roll recipe! Featuring nori and perfectly cooked sushi rice wrapped around a colorful combo of imitation crab, cucumber, avocado, and carrots, these rolls promise a fun and flavorful dining experience!
- 1½ cups sushi rice
- 1½ cups water
- ¼ cup rice wine vinegar
- 1½ tablespoons granulated sugar
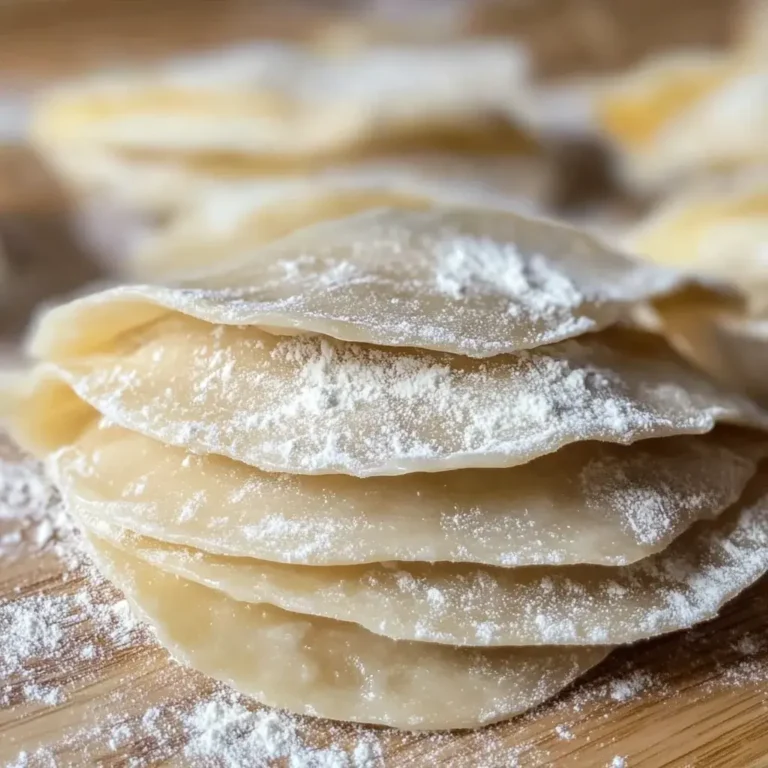
- 4 sheets sushi Nori
- 1 English cucumber, peeled and sliced into thin strips
- 1 medium carrot, peeled and sliced into thin strips
- 1 avocado, sliced
- 4 sticks imitation crab, cut in half, longwise
- 1Prep the rice. In a fine mesh strainer, rinse the rice until the water runs clear.
- 2Cook the rice. Combine the rice and the water in the bowl of an Instant Pot. Seal the Instant Pot and cook on high pressure for 10 minutes. Allow the pressure to release naturally for 12 minutes before opening the instant pot and fluffing the rice with a fork. Meanwhile, make the rice wine vinegar mixture. In a small saucepan, combine the rice wine vinegar and the sugar and cook over medium heat until the sugar dissolves.
- 3Combine and cool. Fold the rice vinegar mixture into the prepared sushi rice. Allow the rice to cool to just above room temperature before using.
- 4Prep. Place a sheet of nori over a bamboo sushi mat. Wet your fingers with warm water. This will help keep the rice from sticking to your hands.
- 5Add the rice. Press about ¾ cup of the prepared sushi rice over the nori. Use your hand to press it into an even layer, covering the nori.
- 6Layer the veggies and crab. Stack 1 row of English cucumbers, 1 row of carrots, 1 row of imitation crab, and 1 row of avocado slices on top of each other in a line at one end of the mat.
- 7Roll. Fold the nori and rice over the filling, then squeeze the bamboo mat to create a tight cylinder. Continue folding the roll over itself, squeezing it into a cylinder after each fold, until you reach the end of the roll. Repeat with the remaining ingredients.
- 8Cut and serve. Wet a sharp knife with warm water and slice the rolls into ½ inch slices, wetting the knife between slices if it starts to get sticky. Serve the sushi rolls with your favorite sushi dipping sauce(s).
Keywords: sushi, maki, japanese, seafood, rolls, cucumber, carrot, avocado, crab, nori, rice
- sushi rice: essential for its sticky texture, crucial for holding the rolls together.
- water: used to cook the sushi rice to the perfect consistency.
- rice wine vinegar: provides a subtle tang and helps season the rice.
- granulated sugar: balances the vinegar and adds a hint of sweetness to the rice.
- sushi nori: the dried seaweed sheets that encase the rice and fillings, offering a unique umami flavor.
- English cucumber: contributes a refreshing crunch and subtle watery notes.
- carrot: adds a vibrant color and a crisp, slightly sweet texture.
- avocado: brings a creamy richness and smooth mouthfeel to the roll.
- imitation crab sticks: a classic sushi filling, offering a mild, slightly sweet seafood flavor.
Specific quantities for each ingredient can be found in the detailed recipe card above, ensuring you have everything needed for perfect maki rolls.
Variations
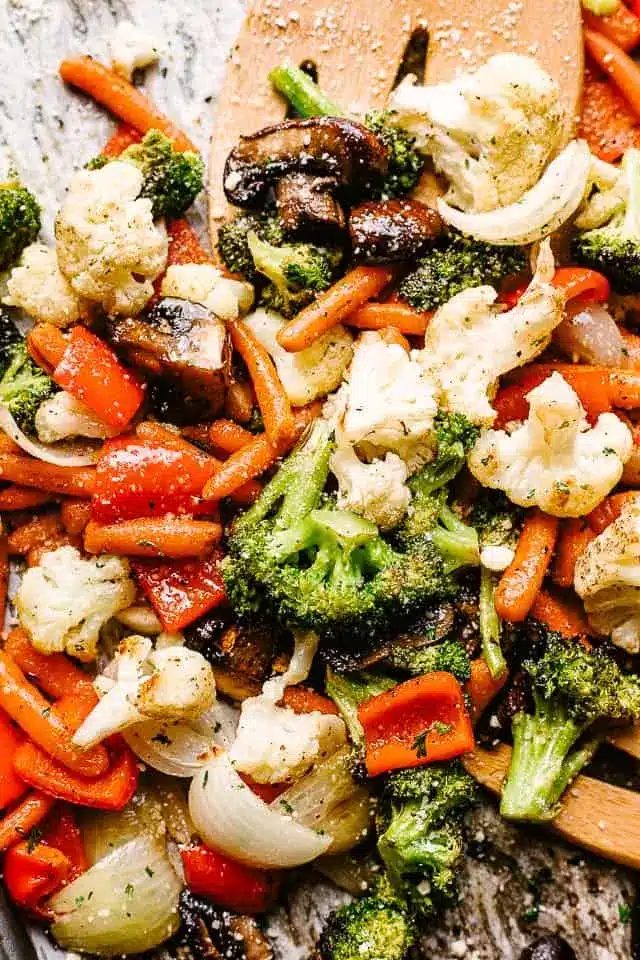
The beauty of maki rolls lies in their inherent versatility, allowing for endless creative adaptations beyond the classic combination. Consider a vegan twist by omitting the imitation crab and filling your rolls with an assortment of colorful vegetables like bell peppers, marinated tofu, or even grilled asparagus. For an added textural element, a sprinkle of toasted sesame seeds on the rice before rolling can be a delightful addition.
For those pursuing a low-carb lifestyle, you can still enjoy the essence of maki rolls without the rice. Simply use thinly sliced cucumber or even large lettuce leaves as your wrapper, and focus on nutrient-dense fillings like smoked salmon, avocado, and your favorite non-starchy vegetables. This approach allows you to savor the flavors and textures while adhering to your dietary goals.
Another exciting variation involves incorporating different types of seafood or proteins. If you have access to sushi-grade fish, consider adding thinly sliced raw tuna or salmon for an authentic sashimi-style maki. Alternatively, cooked shrimp, grilled eel (unagi), or even seasoned shredded chicken can offer a completely different, yet equally delicious, flavor profile. The possibilities are truly boundless when you start experimenting with different combinations.
How to Prepare Maki Roll Recipe
Step 1: Preparing the Sushi Rice
The perfect sushi rice is the cornerstone of any successful maki roll, requiring a specific technique to achieve its characteristic stickiness and subtle sweetness. Begin by thoroughly rinsing the sushi rice in a fine-mesh strainer under cold running water. Continue rinsing until the water runs completely clear; this crucial step removes excess starch, preventing a gummy texture and ensuring the rice grains remain distinct yet cling together beautifully.
Once rinsed, it’s time to cook the rice. The most common method involves using a rice cooker or an Instant Pot, following the manufacturer’s instructions for sushi rice. Typically, this involves a specific water-to-rice ratio, often around 1:1 or 1:1.2. For an Instant Pot, you might combine 1.5 cups of sushi rice with 1.5 cups of water and cook on high pressure for a set time, followed by a natural release period. If using a stovetop, cook the rice according to package directions, ensuring it’s tender and slightly chewy.
While the rice is cooking, prepare the seasoning mixture. In a small saucepan, gently heat rice wine vinegar and granulated sugar over medium heat. Stir continuously until the sugar has completely dissolved, creating a smooth, slightly sweet liquid. This seasoned vinegar, known as sushi-zu, will be folded into the cooked rice, imparting that signature sushi flavor. Once the rice is cooked and slightly cooled, carefully fold the seasoned vinegar into it using a cutting motion with a rice paddle or spatula. Avoid vigorous stirring, which can break the grains. Allow the rice to cool to just above room temperature, covered with a damp cloth, before proceeding to the rolling stage.
Step 2: Preparing the Fillings
The art of maki roll assembly is greatly enhanced by the meticulous preparation of your fillings. This stage involves ensuring all ingredients are uniformly cut to facilitate easy rolling and even distribution within the nori sheet. For the cucumber and carrot, it’s best to peel them and then slice them into long, thin strips, about ¼ inch thick. This uniform shape allows them to lay neatly alongside each other without creating bulky spots in the roll, which can make rolling difficult.
Avocado should be ripe but still firm enough to hold its shape. Halve the avocado, remove the pit, and carefully slice it into long, thin strips, similar in size to the cucumber and carrot. If the avocado is too soft, it may become mushy during the rolling process, detracting from the overall texture. For the imitation crab sticks, it’s often recommended to cut them in half lengthwise. This not only makes them easier to manage within the roll but also helps to distribute the flavor more evenly throughout the maki. Ensure all your fillings are prepped and ready to go before you begin the rolling process, as time is of the essence once the nori is laid out.
Having all your ingredients prepped and within easy reach is key to a smooth and efficient rolling process. This foresight prevents any last-minute scrambling and ensures that the sushi rice doesn’t dry out before you’ve had a chance to use it. Think of it as setting up your personal sushi assembly line, where each component is perfectly positioned for seamless integration into the final delicious product. This attention to detail in the preparation phase directly contributes to the professional appearance and delightful taste of your homemade maki rolls.
Step 3: Assembling the Maki Rolls
This is where the magic truly happens! Begin by placing a sheet of nori, shiny side down, onto a bamboo sushi rolling mat (makisu). If you don’t have a bamboo mat, a clean kitchen towel covered with plastic wrap can serve as a suitable alternative. It’s essential to keep your hands slightly damp with warm water throughout this process to prevent the sticky sushi rice from adhering to your fingers. A small bowl of warm water placed nearby is perfect for this.
Next, take approximately ¾ cup of the prepared sushi rice and spread it evenly over the nori sheet. Leave about a 1-inch border along the top edge of the nori, which will help seal the roll. Gently press the rice down to create a cohesive layer, ensuring it’s not too thick or too thin. The goal is to have a consistent bed of rice that will encase the fillings without overwhelming them. This even distribution is critical for a well-balanced roll, where every bite offers a harmonious blend of rice and filling.
Now, arrange your prepared fillings in a neat line across the bottom third of the rice-covered nori. Place a row of cucumber strips, followed by a row of carrot strips, then a few imitation crab sticks, and finally, a line of avocado slices. Be mindful not to overstuff the roll, as this can make it difficult to close and may cause it to break apart. The key is to create a balanced filling that offers a delightful mix of textures and flavors without compromising the structural integrity of the roll.
Step 4: Rolling the Maki
With your fillings neatly arranged, it’s time to master the rolling technique. Lift the edge of the bamboo mat closest to you, along with the nori and rice, and begin to fold it over the fillings. Use your fingers to gently tuck the nori and rice around the filling, ensuring it’s snug but not so tight that it tears the nori. The initial fold creates the core of your sushi cylinder.
Once the first fold is complete, begin to roll the mat forward, applying gentle but firm pressure to shape the roll into a tight cylinder. As you roll, continue to squeeze the mat around the developing roll. This continuous pressure is what helps to compact the rice and fillings, creating a stable and well-formed maki. Imagine you are gently molding clay, shaping it with consistent care and attention.
Continue rolling the mat forward, tucking and squeezing with each turn, until you reach the end of the nori sheet. The 1-inch border you left at the top will help seal the roll. Once the roll is complete, give it one final squeeze within the mat to ensure it’s perfectly cylindrical and holds its shape. Carefully unroll the bamboo mat, revealing your beautifully formed maki roll. Repeat this process with the remaining ingredients until all your maki rolls are ready to be sliced.
Step 5: Slicing and Serving
The final step in creating these delightful maki rolls is the precise slicing that transforms them into bite-sized pieces, ready to be enjoyed. To achieve clean, professional-looking cuts, it’s crucial to use a very sharp knife. A chef’s knife or a specialized sushi knife works best for this task. Before you begin slicing, dip the blade of your knife into warm water and then wipe off any excess water with a damp kitchen towel.
This wetting of the blade is essential, as it prevents the sticky sushi rice from clinging to the knife, which would otherwise result in ragged cuts and a less appealing presentation. Slice the roll into approximately ½-inch thick pieces. After each cut, or as needed if the knife starts to stick, re-wet and wipe the blade again. This consistent attention to the knife’s surface will ensure each slice is distinct and beautifully formed, showcasing the colorful layers within.
Arrange the sliced maki rolls attractively on a serving platter. You can stand them upright on their cut sides for a more dynamic presentation, or lay them flat. Serve immediately with your favorite accompaniments such as soy sauce, wasabi, and pickled ginger. The vibrant colors and fresh flavors of these homemade maki rolls are sure to be a hit, offering a delightful and satisfying culinary experience that rivals any restaurant.
Step 6: Enjoying Your Creations
You’ve done it! You’ve successfully navigated the process of creating your own delicious maki rolls. Take a moment to admire your handiwork – the neatly sliced rolls revealing layers of vibrant ingredients encased in perfectly seasoned rice and nori. This is a moment of culinary achievement, a testament to your willingness to try something new and your dedication to delicious food.
Now comes the best part: savoring the fruits of your labor. Dip your maki rolls into a small dish of soy sauce, adding a dab of fiery wasabi if you enjoy a spicy kick. The combination of the savory soy sauce, the pungent wasabi, and the fresh, flavorful sushi is an experience that truly delights the senses. Don’t forget the pickled ginger, which acts as a palate cleanser between different types of rolls or bites, allowing you to fully appreciate each distinct flavor.
Share these creations with loved ones, or enjoy them as a personal treat. This recipe is not just about the food; it’s about the experience of creating something wonderful from scratch. It’s about the satisfaction of a job well done and the joy of sharing a delicious, homemade meal. We hope you had a fantastic time making and eating these maki rolls, and that this recipe inspires you to explore more culinary adventures. For more inspiration on delicious dinner ideas, be sure to explore our other recipes.
Pro Tips for Maki Roll Recipe
- Rice Consistency is Key: Ensure your sushi rice is perfectly cooked – not too mushy, not too firm. It should be sticky enough to hold together but with individual grains still distinguishable.
- Don’t Overfill: Resist the temptation to pack too much filling into each roll. Overfilling makes rolling difficult and can cause the nori to tear, leading to a messy outcome.
- Sharp, Wet Knife: A sharp knife is paramount for clean cuts. Dipping it in warm water and wiping between each slice will prevent sticking and ensure professional presentation.
- Practice Makes Perfect: Your first few rolls might not be perfect, and that’s completely okay! The technique improves with practice, so don’t get discouraged.
- Ingredient Quality Matters: Using fresh, high-quality ingredients, especially for the sushi-grade fish if you choose to use it, will significantly impact the final taste and enjoyment of your maki rolls.
Serving Suggestions for Maki Roll Recipe
Decoration
Elevate the visual appeal of your maki rolls with simple yet effective garnishes. A sprinkle of toasted black and white sesame seeds over the top of the rolls adds a nutty crunch and a striking visual contrast. Thinly sliced radishes, fanned out beside the rolls, provide a pop of pink and a peppery bite. Edible flowers or microgreens can also add a touch of elegance and freshness, transforming your homemade sushi into a restaurant-quality presentation.
Side Dishes
Complement your maki rolls with classic Japanese side dishes that enhance the overall dining experience. A simple yet refreshing Asian cucumber salad, tossed with rice vinegar, a touch of soy sauce, and sesame oil, provides a cool and crisp counterpoint to the richness of the sushi. Steamed edamame, lightly salted, offers a satisfyingly chewy texture and a healthy dose of protein. A small bowl of miso soup is also a traditional and comforting accompaniment, warming the palate and adding another layer of umami flavor.
Creative Serving Ideas
Think beyond the platter for truly memorable presentations. Arrange your maki rolls in a colorful bento box, layering them with other small bites like marinated tofu skewers or pieces of fresh fruit. For a fun, interactive experience, create a “sushi bar” where guests can assemble their own rolls with a variety of prepped fillings and sauces. You could also serve deconstructed maki bowls, layering the sushi rice, fillings, and nori strips in individual bowls for a casual yet elegant meal.
Preparation & Storage
Storing Leftovers
Leftover maki rolls can be stored, but it’s important to do so correctly to maintain their quality and food safety. Wrap each individual roll tightly in plastic wrap to prevent them from drying out. Then, place the wrapped rolls in an airtight container. Store them in the coldest part of your refrigerator for no more than 1-2 days, as sushi is best enjoyed fresh.
Freezing
Freezing maki rolls is generally not recommended, as the texture of the rice can become mushy and unpleasant once thawed. The nori will also lose its crispness and become rubbery. It’s best to prepare maki rolls fresh and consume them within a day or two for the optimal culinary experience. If you absolutely must store them for a longer period, ensure they are very tightly wrapped and plan to use them as soon as possible.
Reheating
Maki rolls are not typically reheated; they are meant to be served chilled or at room temperature. If your rolls have been refrigerated, allow them to sit at room temperature for about 15-20 minutes before serving to take the edge off the chill. This will also help to bring out the flavors more effectively. Overheating sushi will compromise its texture and can make the ingredients unappetizing.
Frequently Asked Questions
-
Can I use regular rice instead of sushi rice for maki rolls?
While it is technically possible to use regular short-grain rice, it is highly recommended to use actual sushi rice for maki rolls. Sushi rice has a higher starch content, which is crucial for achieving the sticky texture needed to hold the rolls together. Regular rice grains are typically firmer and less sticky, making it very difficult to form cohesive rolls that don’t fall apart. The addition of rice wine vinegar and sugar to sushi rice also provides the characteristic flavor profile that is essential for authentic maki.
-
How can I ensure my maki rolls are tightly rolled and don’t fall apart?
Several factors contribute to tightly rolled maki rolls that hold their shape. Firstly, the sushi rice must be properly cooked and seasoned to the correct sticky consistency. Secondly, avoid overfilling the roll; too many ingredients will prevent the nori from sealing properly. Thirdly, the rolling technique is key: use a bamboo mat to apply even pressure as you roll, gently tucking and squeezing the ingredients into a firm cylinder. Finally, remember to keep your hands slightly damp with water while spreading the rice to prevent sticking, and ensure the nori’s edge is well-sealed by the rice or a few grains of rice acting as ‘glue’.
-
What is the difference between maki and other types of sushi?
Maki, meaning “rolled” in Japanese, specifically refers to sushi rolls where rice and fillings are rolled up inside a sheet of nori (seaweed). This is distinct from other sushi forms. Nigiri, for instance, consists of a small ball of sushi rice topped with a slice of raw fish or seafood. Sashimi, while often served alongside sushi, is not sushi at all; it is simply thinly sliced raw fish or seafood served without rice. Temaki, another type of roll, is a hand-rolled cone-shaped sushi, typically larger and eaten by hand immediately after preparation. Maki encompasses various sub-types based on size and the number of fillings, such as hosomaki (thin rolls) and futomaki (thick rolls).