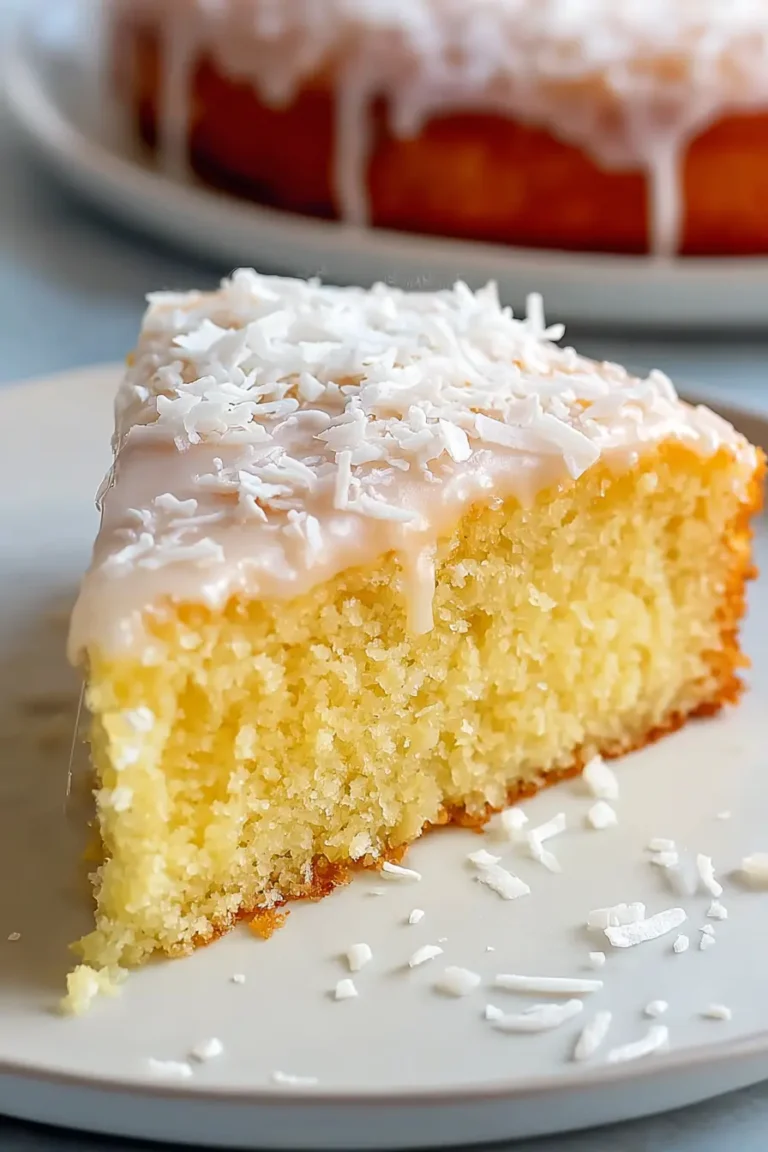
Keto Coconut Cake Delight

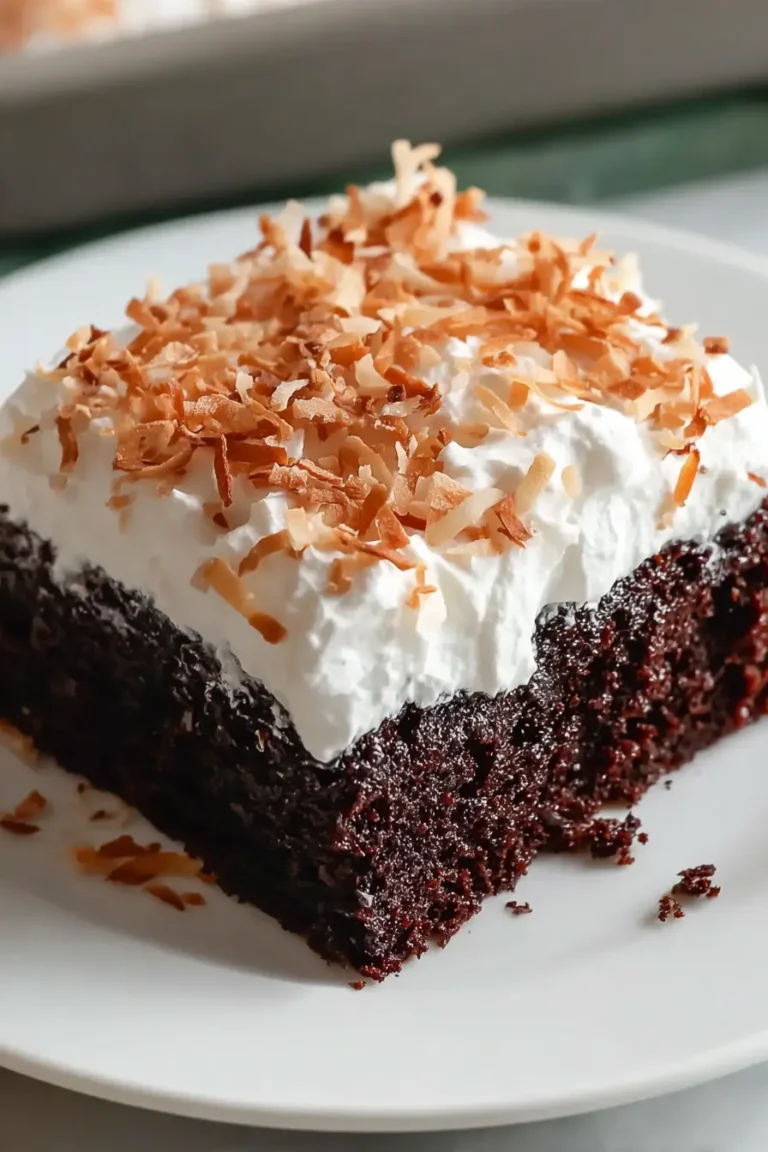
This Keto Coconut Cake is a delightfully rich, low-carb dessert that offers a taste of tropical luxury without the sugar. It features a tender, moist crumb derived from coconut flour, a luscious whipped cream topping, and a delicate sugar-free syrup that enhances its overall appeal. The final flourish of toasted coconut flakes provides a satisfying crunch and an intensified aroma, making every slice a sophisticated indulgence.
This cake is perfect for those seeking a satisfyingly sweet treat that aligns with a ketogenic lifestyle, offering a sophisticated dessert experience that is both simple to prepare and incredibly rewarding. It’s the kind of dessert that makes a statement at any gathering or serves as a comforting, make-ahead option for a quiet moment of indulgence.
Why You Will Love This Recipe
- Effortless Preparation: Despite its elegant appearance and rich flavor, this cake comes together with straightforward steps, making it accessible even for beginner bakers.
- Low-Carb Delight: Crafted with coconut flour and sugar-free sweeteners, this recipe is a perfect fit for ketogenic or low-carb diets, allowing you to enjoy dessert guilt-free.
- Tender Texture: The careful use of coconut flour, combined with the subtle moisture from the syrup, ensures a delightfully tender crumb that avoids the dryness sometimes associated with alternative flours.
- Whipped Cream Perfection: The light and airy whipped cream topping provides a creamy contrast to the cake’s density, adding a touch of ethereal lightness that balances the rich coconut flavor.
- Make-Ahead Friendly: This cake truly benefits from overnight chilling, allowing the flavors to meld and the textures to perfectly set, making it an ideal dessert for entertaining or busy schedules.
Ingredients You Need
Choosing high-quality ingredients is paramount to achieving the best flavor and texture in this Keto Coconut Cake. The subtle nuances of good quality coconut flour, fresh eggs, and pure vanilla extract will shine through, elevating this dessert from good to truly exceptional. Every component plays a vital role in creating the balanced flavor profile and satisfying mouthfeel.
Keto Coconut Cake
A rich, low-carb coconut cake finished with a light whipped cream topping, a delicate sugar-free syrup, and a layer of toasted coconut for added texture and flavor. This cake is perfect for those following a ketogenic diet or looking for a low-sugar dessert option. It's make-ahead friendly and tastes even better the next day.
- For the cake:
- 9 tablespoons sifted coconut flour
- 2 tablespoons heavy cream
- 6 large eggs, at room temperature
- 1 teaspoon vanilla extract
- 1/2 teaspoon salt
- 9 tablespoons unsalted butter, melted and cooled
- 1/2 cup powdered monk fruit sweetener
- 2 teaspoons softened cream cheese
- 1 1/2 teaspoons baking powder
- For the syrup:
- 4 tablespoons powdered monk fruit sweetener
- 3/4 cup water
- For the topping:
- 1/2 teaspoon vanilla extract
- 3/4 cup well-chilled heavy cream
- 4 tablespoons powdered monk fruit sweetener
- 1 cup unsweetened coconut flakes, toasted
- 1Preheat oven to 350°F (175°C). Lightly grease a 9x9-inch baking pan. Melt butter and let it cool.
- 2In a mixing bowl, beat eggs with powdered monk fruit sweetener, cream cheese, heavy cream, vanilla extract, salt, and baking powder until smooth and combined.
- 3Add cooled butter and sifted coconut flour. Beat until fully incorporated.
- 4Spread batter evenly in the prepared pan. Bake for 20-24 minutes, or until a toothpick comes out clean. Let cool slightly.
- 5To make the syrup, simmer water and powdered monk fruit sweetener in a small saucepan for about 6 minutes until slightly reduced and thickened.
- 6While the cake is still warm, make small slits on top and pour the syrup evenly over the surface. Let the cake cool completely.
- 7In a separate bowl, whip chilled heavy cream with powdered monk fruit sweetener and vanilla extract until stiff peaks form.
- 8Spread whipped cream evenly over the cooled cake. Scatter toasted coconut flakes on top.
- 9Refrigerate overnight before serving for best texture and flavor development.
Keywords: Keto Coconut Cake, Low-Carb, Sugar-Free, Gluten-Free, Ketogenic, Dessert, Baking
The precise quantities for all components, from the cake batter to the syrup and topping, are detailed within the recipe card for your convenience.
Variations
One exciting way to adapt this Keto Coconut Cake is to infuse it with additional vibrant flavors. Consider adding a tablespoon of finely grated lemon or lime zest to the cake batter for a delightful citrusy twist that complements the coconut beautifully. This brightens the overall profile and adds a refreshing counterpoint to the richness.
For a more decadent experience, explore creating a sugar-free chocolate drizzle. Melt some keto-friendly chocolate chips with a touch of coconut oil and artfully drizzle it over the whipped cream topping just before serving. This adds a layer of indulgence and appeals to chocolate lovers while remaining low-carb.
Another delightful variation involves introducing spices to the cake itself. A gentle dusting of cinnamon or a pinch of nutmeg incorporated into the dry ingredients can lend a warm, comforting aroma and flavor. This subtly transforms the cake into a more autumnal or winter-appropriate treat, perfect for cooler months.
How to Prepare Keto Coconut Cake
Step 1: Preparing the Foundation
Begin by preheating your oven to a consistent 350°F (175°C). This initial step ensures that the oven is at the optimal temperature when the cake batter is ready to bake, promoting even cooking and proper rise. Simultaneously, prepare your 9×9 inch baking pan by greasing it thoroughly to prevent any sticking, which guarantees easy removal of the finished cake.
Before mixing any batter, melt the unsalted butter. Allowing the melted butter to cool slightly while you prepare the other ingredients is crucial. This prevents it from cooking the eggs prematurely and helps in achieving a smoother, more homogenous batter when it’s time to incorporate it.
Ensure all your ingredients are measured precisely. Coconut flour, in particular, is highly absorbent, and inaccuracies can significantly impact the final texture of the cake. Sifting it is also a highly recommended practice to prevent clumps and ensure a finer crumb.
Step 2: Crafting the Cake Batter Base
In a large mixing bowl, begin by beating the eggs until they are well combined and slightly frothy. This aeration introduces some air into the batter, contributing to a lighter texture in the final cake. Using room-temperature eggs is highly beneficial here as they emulsify more readily with the other ingredients, leading to a smoother consistency.
Add the powdered monk fruit sweetener, softened cream cheese, a portion of the heavy cream, vanilla extract, salt, and baking powder to the bowl with the eggs. Cream cheese is key for smoothness and a subtle tang that balances the sweetness. Beat these ingredients together thoroughly until the mixture is completely smooth and appears somewhat airy. The baking powder will work to give the cake its necessary lift.
This initial blending phase is important for distributing the leavening agents and ensuring the sweetener is fully dissolved, preventing any grittiness. The combination of these wet ingredients forms the rich, creamy base that will carry the coconut flour and butter.
Step 3: Incorporating the Key Flavors and Textures
Once the egg mixture is smooth and well-combined, it’s time to introduce the cooled melted butter. Gently incorporate the butter into the batter, ensuring it is fully integrated before proceeding. The butter adds essential moisture and richness, contributing to the cake’s tender crumb and overall decadent feel.
Next, add the sifted coconut flour to the wet ingredients. It is imperative to use sifted coconut flour to avoid lumps and ensure an even distribution throughout the batter. This is where accuracy in measuring coconut flour is most critical due to its highly absorbent nature.
Stir the mixture gently but thoroughly until the batter is uniform and all the coconut flour has been incorporated. Avoid overmixing, as this can develop the starches in coconut flour more than necessary, potentially leading to a slightly tougher texture. The batter should be thick but spreadable.
Step 4: Baking to Perfection
Carefully spread the thick batter evenly into the prepared baking pan. Use a spatula to ensure the top is as level as possible, which promotes even baking. An even surface helps the cake rise uniformly, preventing one side from becoming overcooked while another remains underbaked.
Place the pan in the preheated oven and bake for approximately 20 to 24 minutes. The baking time can vary slightly depending on your oven, so it’s important to check for doneness. The cake is ready when the center is set and a toothpick inserted into the middle comes out clean, with no wet batter clinging to it.
The top of the cake should appear lightly golden and feel springy to the touch. This slight golden hue indicates that the cake has fully baked through without becoming too dry. Allow the cake to cool slightly in the pan before moving on to the next crucial step.
Step 3.5: Simmering the Sugar-Free Syrup
While the cake is in its initial cooling phase, prepare the simple sugar-free syrup. In a small saucepan, combine the specified amount of powdered monk fruit sweetener with water. This syrup is not intended to be thick and heavy like traditional simple syrup; rather, it serves as a subtle moisture enhancer.
Bring the mixture to a gentle boil over medium-high heat. Allow it to simmer for about 6 minutes, or until it has reduced slightly. You are looking for a light, slightly viscous liquid that will soak into the cake. This step is critical for ensuring the cake remains moist and tender, especially after chilling.
Once the syrup has reached the desired consistency, remove it from the heat. It should still be warm when poured over the cake, which aids in its absorption. This simple syrup is a key component that elevates the cake’s texture and overall eating experience, making it feel more luxurious.
Step 4.5: Syrupping the Cake
Once the cake has cooled for a few minutes in the pan, it’s time to imbue it with the prepared syrup. Using a knife or a skewer, carefully make small slits or poke holes all over the surface of the warm cake. This allows the syrup to penetrate deeply into the cake, ensuring even moisture distribution from top to bottom.
Slowly and evenly pour the warm sugar-free syrup over the entire surface of the cake. Ensure that all areas receive a portion of the syrup. The warmth of the cake and the syrup works together to allow the liquid to be absorbed effectively, contributing to the cake’s tender and moist crumb.
After syrupping, let the cake cool completely in the pan. This cooling period is essential for the syrup to fully soak in and for the cake to settle. Attempting to add the topping too soon might result in a less stable structure or a melted topping.
Step 5: Whipping Up the Creamy Topping
As the cake cools to room temperature, prepare the luxurious whipped cream topping. Ensure your heavy cream is well chilled, as this is vital for achieving stiff peaks. Pour the chilled heavy cream into a clean, dry mixing bowl.
Add the powdered monk fruit sweetener and vanilla extract to the cream. Begin whipping the mixture with an electric mixer on medium speed, gradually increasing to high speed. Continue whipping until stiff peaks form, meaning the cream holds its shape when the beaters are lifted.
This whipped topping is what gives the cake its light and airy contrast. Be careful not to over-whip, which can turn the cream into butter. The result should be a smooth, fluffy topping that is stable enough to spread evenly over the cake.
Step 6: Assembling and Finishing Touches
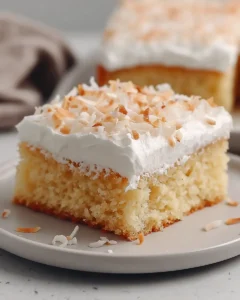
Once the cake has completely cooled, gently spread the whipped cream topping evenly over the entire surface. Use an offset spatula or the back of a spoon to create a smooth, even layer. This creates a beautiful visual appeal and a delightful creamy texture.
The final touch involves scattering the toasted unsweetened coconut flakes over the whipped cream topping. These toasted flakes add a wonderful textural contrast, a deep toasted flavor, and a visually appealing finish. Ensure they are evenly distributed for consistent crunch and flavor in every bite.
After the toppings are in place, the cake requires a crucial resting period. Refrigerate the cake overnight. This chilling period is not just for firming the topping; it allows the syrup to fully permeate the cake, the flavors to meld beautifully, and the overall texture to achieve its optimal state. This makes the cake much easier to slice cleanly and enjoy.
Pro Tips for Keto Coconut Cake
Sifting is Essential: Always sift your coconut flour before measuring and adding it to the batter. This simple step prevents clumps and ensures a much finer, smoother cake texture. It’s a game-changer for coconut flour baking, leading to a more delicate crumb.
Room Temperature Ingredients: Using room-temperature eggs and ensuring your butter is cooled but not solidified helps the batter emulsify more effectively. This results in a better-integrated mixture and a more consistent rise and texture for your cake. Cold ingredients can lead to a less smooth batter.
Toast Coconut Carefully: When toasting the unsweetened coconut flakes, keep a close eye on them. Toast them until they are lightly golden brown. Over-toasted coconut can become bitter and overpower the delicate flavors of the cake, so aim for a gentle, aromatic toast.
Don’t Skip the Chill: The overnight chilling period is critical for this cake. It allows the syrup to fully hydrate the coconut flour and the flavors to meld. The texture of the cake is significantly improved, making it firmer and easier to slice cleanly.
Sweetener Choice Matters: For the syrup and topping, always opt for powdered or finely ground keto-friendly sweeteners. Granular sweeteners can create a gritty texture in both the liquid syrup and the whipped cream, affecting the overall smooth finish of the dessert.
Serving Suggestions for Keto Coconut Cake
Decoration
The toasted coconut flakes provide a lovely, rustic charm as a primary decoration. For added visual appeal, consider a light dusting of powdered monk fruit sweetener over the whipped cream before adding the coconut. A few fresh berries, such as raspberries or blueberries, can offer a pop of color and a touch of tartness.
Side Dishes
This cake pairs beautifully with a simple cup of hot, unsweetened coffee or tea, its subtle bitterness acting as a perfect counterpoint to the cake’s sweetness. For a refreshing beverage pairing, consider unsweetened iced tea or a delicate herbal infusion. These simple accompaniments allow the cake’s flavors to remain the star of the show.
Creative Serving Ideas
Serve individual slices with a small dollop of extra whipped cream or a spoonful of sugar-free berry compote on the side. You could also arrange a small mound of fresh berries next to each slice for a vibrant presentation and a burst of fresh flavor. For a more elegant touch, a delicate drizzle of sugar-free chocolate sauce can elevate the dessert.
Preparation & Storage
Storing Leftovers
Due to the whipped cream topping, this Keto Coconut Cake must be stored in the refrigerator. Cover the cake pan tightly with plastic wrap or transfer individual slices to an airtight container. Properly stored, it should remain fresh and delicious for approximately 3 to 4 days.
Freezing
Freezing this cake is possible, but with a caveat regarding the whipped cream. For the best results, consider freezing the baked cake base without the whipped cream topping. Wrap the unfrosted cake tightly in plastic wrap and then in aluminum foil. Once thawed, you can add a fresh batch of whipped cream and toasted coconut before serving.
Reheating
This cake is designed to be served chilled, so reheating is generally not necessary. If the cake has been refrigerated for an extended period and you prefer a slightly softer texture, you can let a slice sit at room temperature for about 10-15 minutes before serving. Avoid any form of heating, as this will melt the topping and affect the cake’s intended texture.
Frequently Asked Questions
-
Can I make this Keto Coconut Cake ahead of time, and if so, how far in advance?
Absolutely, and in fact, making this cake ahead of time is highly recommended for the best results. The overnight chilling period is crucial as it allows the sugar-free syrup to fully hydrate the coconut flour, resulting in a wonderfully moist and tender crumb. This resting time also helps the flavors to meld together beautifully, creating a more cohesive and satisfying dessert experience. For optimal texture and flavor, preparing it up to 24 hours in advance is ideal.
-
Why is it so important to measure coconut flour so precisely for this recipe?
Coconut flour is exceptionally absorbent, far more so than traditional wheat flour or even almond flour. Even a slight overage can lead to a cake that is excessively dry, crumbly, and dense. Conversely, too little can result in a cake that doesn’t set properly. Using level measurements and sifting the flour helps to ensure the correct ratio of liquid to dry ingredients, which is vital for achieving that desirable tender and moist texture characteristic of well-made coconut flour cakes.
-
What are the best keto-friendly sweetener options to use in this cake, and will they affect the taste?
For this Keto Coconut Cake, powdered or finely granulated erythritol, xylitol (ensure it’s safe for pets if you have them), or a blend like monk fruit and erythritol are excellent choices. Using powdered versions is particularly important for the syrup and whipped topping to ensure they dissolve smoothly without a gritty texture. These sweeteners are generally designed to mimic the taste of sugar closely, so they should not significantly alter the intended sweet flavor profile of the cake, providing a delightful sweetness without the carbohydrate load.
This Keto Coconut Cake is a fantastic example of how a low-carb dessert can be both incredibly satisfying and impressively elegant. Its creamy texture, balanced sweetness, and rich coconut flavor make it a standout treat for any occasion. The thoughtful combination of ingredients and preparation steps ensures a delightful result that even those not following a keto diet will adore.
Beyond its delicious taste and keto-friendly nature, this cake is a testament to smart dessert planning. The ability to prepare it in advance and have it ready to serve the next day makes it an invaluable addition to your baking repertoire, especially when hosting guests or anticipating a busy week. It’s a dessert that consistently delivers on both flavor and convenience.
The toasted coconut topping is the crowning glory, adding that final layer of nutty aroma and delightful crunch that perfectly complements the soft cake and creamy topping. It’s a simple yet effective finishing touch that truly brings the entire dessert together, making each bite a harmonious blend of textures and flavors. Enjoy every decadent, guilt-free slice!