Creamy Cherry Milkshake: A Guilt-Free Delight for You
As I blended the vibrant cherries, a rush of summer memories flooded in, like warm rays streaming through my kitchen window. This Healthy Cherry Milkshake is my go-to for that perfect mix of indulgence and nourishment, and it’s a delightful addition to anyone’s repertoire of drinks.
Packed with antioxidants, it’s not just a treat but an easy, guilt-free way to kickstart your day or recharge after a workout. In just minutes, you can whip up this creamy delight that feels luxurious but keeps your health in check. Whether enjoyed as a refreshing breakfast or a midday snack, this milkshake balances deliciousness with nutrition. Curious how something so indulgent can be so wholesome? Let’s dive into this delightful recipe together!
Why You Will Love This Recipe
- Indulgent Flavor: This creamy cherry milkshake provides a rich, sweet satisfaction that you’d typically associate with less healthy desserts, yet it remains a nutritious option.
- Speedy Preparation: Designed for busy lifestyles, this recipe can be made in mere minutes, making it an ideal choice for quick breakfasts or spontaneous snack cravings.
- Nutrient-Rich Profile: Laden with antioxidants from the cherries and protein from the yogurt, it actively nourishes your body while delivering an exceptional taste experience.
- Adaptable to Tastes: The recipe encourages creativity; you can easily swap fruits, add nut butters, or adjust sweeteners to perfectly match your personal flavor preferences.
- Guaranteed Crowd-Pleaser: Whether served as a breakfast beverage or an afternoon refresher, its appealing taste and texture are sure to impress family and friends.
Ingredients You Need
To create this truly delightful and guilt-free Healthy Cherry Milkshake, selecting high-quality ingredients is paramount. The vibrancy of the cherries, the creaminess of the yogurt, and the subtle sweetness of the almond milk all play crucial roles in the final flavor profile. Opting for fresh, ripe cherries will offer the best natural sweetness, while choosing a good quality Greek yogurt will provide a luxuriously smooth texture. The foundation of this milkshake relies on simple, wholesome components that come together harmoniously.
Healthy Cherry Milkshake
Indulge in this creamy, guilt-free cherry milkshake, packed with antioxidants and protein. It's a quick, easy, and nutritious treat perfect for breakfast or a post-workout snack.
- 2 cups cherries (fresh or frozen)
- 1 cup yogurt (Greek or plant-based alternative)
- 1 cup almond milk (unsweetened)
- 2 tablespoons sweetener (honey or maple syrup, optional)
- 1 cup ice (optional for thickness)
- 1Start by gathering your ingredients: fresh or frozen cherries, yogurt, and almond milk. If using frozen cherries, let them sit out for a few minutes to soften slightly.
- 2Add the prepared cherries, yogurt, and almond milk into a high-speed blender. Blend on medium speed for about 30 seconds until well combined.
- 3To achieve your preferred thickness, add ice and blend again for another 20–30 seconds. Adjust with more almond milk if too thick.
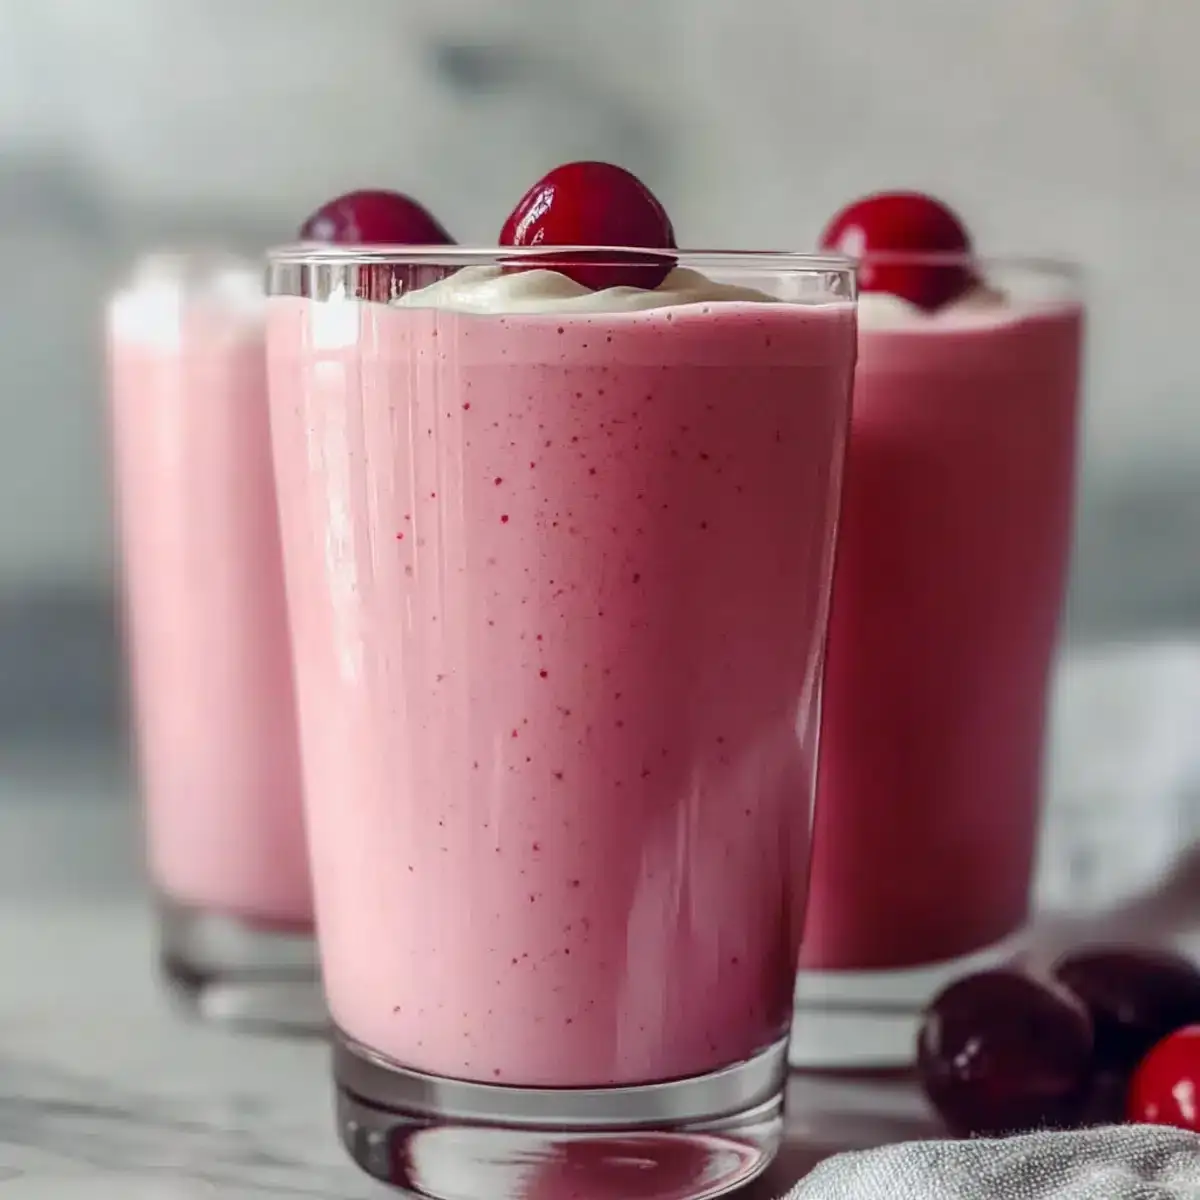
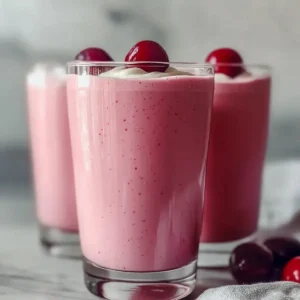
- 4Pour the Healthy Cherry Milkshake into tall glasses and enjoy immediately, optionally garnished with a cherry on top.
Keywords: cherry milkshake, healthy milkshake, fruit smoothie, breakfast shake, post-workout drink, dairy-free, vegan, antioxidant-rich, quick recipe
- cherries: fresh or frozen, these provide natural sweetness and are loaded with antioxidants.
- yogurt: Greek yogurt adds creaminess and protein; opt for a dairy-free version for vegan benefits.
- almond milk: acts as the base; choose unsweetened almond milk for a low-calorie treat.
- sweetener: such as honey or maple syrup; adjust to your taste based on the cherries’ sweetness.
- ice: for a thicker and more refreshing milkshake; crushed ice ensures a smoother texture.
You’ll find the specific quantities needed for these ingredients within the detailed recipe card. This ensures precision for a perfect result every time.
Variations
This Healthy Cherry Milkshake is incredibly versatile, allowing for numerous creative twists to suit different dietary needs and flavor preferences. For those seeking a dessert that is entirely plant-based, swapping the Greek yogurt for a creamy coconut yogurt or a rich cashew yogurt is an excellent strategy. This not only maintains the desired creaminess but also introduces a subtle tropical or nutty undertone that beautifully complements the cherries.
If you are focusing on a low-carb or keto-friendly lifestyle, the approach to sweetness and thickening can be adjusted. Instead of honey or maple syrup, a few drops of liquid stevia or erythritol can be used to sweeten the shake without adding significant carbohydrates. For thickness, relying solely on frozen cherries and perhaps a small amount of avocado or a sprinkle of psyllium husk can create a wonderfully dense texture. Remember to check the carbohydrate content of any additional ingredients you introduce.
Another exciting variation involves enhancing the nutritional profile with added superfoods. A spoonful of chia seeds or flax seeds can boost the fiber and omega-3 content, while a scoop of vanilla or unflavored protein powder transforms the milkshake into a robust post-workout recovery drink. Even a small handful of spinach, which is almost undetectable in flavor, can significantly increase the vitamin and mineral count, making it an even more potent health elixir.
How to Prepare Healthy Cherry Milkshake
Step 1: Prepare Your Ingredients
Begin your culinary journey by meticulously gathering all the necessary components for your Healthy Cherry Milkshake. This crucial first step ensures a smooth and efficient blending process, preventing any last-minute scrambling. Have your fresh or frozen cherries ready, ensuring they are pitted if you are using fresh ones; frozen cherries typically come already prepared and offer a fantastic cooling effect.
Measure out your chosen yogurt, whether it’s creamy Greek yogurt for that protein punch and rich texture, or a plant-based alternative like almond, soy, or coconut yogurt for a dairy-free option. Similarly, have your almond milk, or any other preferred milk, measured and ready to pour into the blender. If you’re opting for an extra touch of sweetness, have your honey, maple syrup, or your preferred sugar-free sweetener within easy reach. This organized approach guarantees that once you start blending, the process is seamless.
For those using frozen cherries, it’s often beneficial to let them sit at room temperature for about 5-10 minutes before blending. This slight thawing makes them easier for your blender to break down, resulting in a smoother, more consistent milkshake without straining the motor. This small adjustment can significantly improve the final texture, ensuring your Healthy Cherry Milkshake is perfectly creamy from the very first sip.
Step 2: Blend the Base Mixture
Now it’s time to introduce your prepared ingredients into the powerful embrace of your high-speed blender. Start by adding the cherries, followed by the yogurt and then the almond milk. This layering order can sometimes help the blender blades catch the ingredients more effectively, leading to a quicker and more uniform blend.
If you’ve decided to add a sweetener, this is the moment to incorporate it into the mix. Pour in your honey, maple syrup, or other preferred sweetener. Remember, it’s always best to start with a little less sweetener and add more later if needed, as the natural sweetness of the cherries can vary considerably. You’re aiming for a balance that delights your palate without being overly sweet, keeping the “healthy” aspect of this milkshake at the forefront.
Secure the lid tightly on your blender and begin to blend on a medium speed. For the initial stage, aim for about 30 seconds to a minute, or until you notice the mixture becoming homogenous. You should see a beautiful, vibrant cherry-red color developing as the ingredients emulsify. The goal here is to create a smooth, liquid base that’s ready for any textural adjustments.
Step 3: Achieve Your Ideal Consistency
This stage is where you can truly personalize your Healthy Cherry Milkshake, tailoring its thickness and temperature to your exact preferences. If you desire a thicker, colder, and more invigorating milkshake, this is the perfect time to introduce ice.
Add a generous handful of ice cubes to the blender. For an even smoother consistency, consider using crushed ice, as it integrates more seamlessly into the liquid. Once the ice is added, secure the lid again and blend for an additional 20-30 seconds. Continue blending until the ice is completely incorporated and the milkshake has reached your desired frosty thickness. The vibrant cherry color should remain, now with a beautifully chilled and creamy appearance.
If, after adding ice, you find that your milkshake has become too thick for your liking—perhaps resembling a smoothie bowl rather than a drinkable milkshake—don’t fret. The solution is simple: add a small splash more almond milk. Start with just a tablespoon or two, then blend again briefly. Repeat this process, adding milk incrementally, until the milkshake flows smoothly and is at the perfect drinkable consistency. This careful adjustment ensures you achieve that velvety texture that is both satisfying and refreshing.
Step 4: Serve and Enjoy
Your Healthy Cherry Milkshake is now perfectly blended and ready to be enjoyed. Pour the luscious, creamy mixture into tall, chilled glasses. The rich color and thick consistency should be visually appealing, hinting at the delightful flavors within. This is the moment to appreciate your creation.
For an extra touch of elegance and a nod to the star ingredient, consider garnishing your milkshake. A single, fresh cherry placed delicately on the rim of the glass, or a small sprig of mint, can elevate the presentation significantly. This simple flourish adds visual appeal and makes the experience of enjoying your milkshake feel even more special and indulgent.
This milkshake is best savored immediately after preparation. Its chilled temperature and frothy texture are at their peak right after blending. It serves as a perfect, guilt-free breakfast, a refreshing post-workout refuel, or a delightful healthy snack any time of day. Take a moment to enjoy the vibrant cherry flavor and the smooth, creamy texture that you’ve created.
Step 5: Consider Additions for Flavor Boosts
While the base recipe for this Healthy Cherry Milkshake is wonderfully satisfying on its own, there are always ways to enhance its flavor profile even further. Think about what complementary tastes and textures could elevate your experience. For instance, a tiny pinch of cinnamon or cardamom can add a warm, aromatic complexity that pairs beautifully with the fruitiness of the cherries.
Another popular addition is a hint of vanilla extract. Just a quarter teaspoon can amplify the sweetness and add a subtle, comforting aroma that makes the milkshake feel even more like a decadent treat. If you enjoy a bit of tartness to balance the sweetness, a squeeze of fresh lemon or lime juice can add a surprising brightness that cuts through the richness and enhances the cherry flavor.
For those who love a bit of crunch, consider stirring in a small amount of toasted shredded coconut or a sprinkle of chopped almonds just before serving. These additions provide textural contrast and add nutty or tropical notes, making each sip an adventure. Experimenting with these small additions can transform your already delicious milkshake into something truly unique and memorable, perfectly aligning with your personal taste.
Step 6: Final Taste and Adjustment Check
Before you pour your masterpiece into glasses, it’s imperative to perform a final taste test. Dip a clean spoon into the blended mixture and take a small sip. This is your opportunity to ensure that the flavor profile is exactly to your liking and make any last-minute adjustments necessary.
Evaluate the sweetness level. If it’s not quite sweet enough for your palate, add another teaspoon of your chosen sweetener and blend for a few more seconds. Conversely, if it seems a touch too sweet, you can try adding a little more almond milk or even a squeeze of lemon juice to create balance. The goal is a harmonious blend of flavors.
Check the consistency one last time. If it’s too thick, add a tiny bit more almond milk. If it’s too thin and you desire a thicker milkshake, you can add a few more ice cubes or even a small piece of frozen banana (if you haven’t already incorporated it into the base) and blend again. This final check guarantees that the Healthy Cherry Milkshake you serve is absolutely perfect in every way, a true reflection of your culinary care.
Pro Tips for Healthy Cherry Milkshake
Embrace Frozen Fruit: Using frozen cherries is a game-changer for achieving a thick, frosty milkshake without diluting the flavor with too much ice. They act as natural ice cubes, creating a lusciously dense texture. If you only have fresh cherries, consider freezing them for at least a couple of hours before blending for the best results.
Sweetness Control is Key: The natural sweetness of cherries varies significantly. Always taste your milkshake before adding extra sweeteners like honey or maple syrup. You might find that the cherries provide enough sweetness on their own, allowing you to enjoy a purer, less sugary treat. This also makes the recipe more adaptable to individual dietary needs.
Chill Your Liquids: For an exceptionally creamy and cold milkshake, ensure your almond milk and yogurt are well-chilled before you begin blending. Starting with cold ingredients significantly contributes to the overall temperature and texture of the final product, making it more refreshing and enjoyable.
Layering for Success: When adding ingredients to your blender, consider the order. Typically, adding liquids first, followed by softer ingredients like yogurt and then frozen items like cherries and ice, can help your blender operate more efficiently. This layering technique can lead to a smoother blend and less strain on your appliance, ensuring a perfectly emulsified milkshake.
Don’t Fear the Greens: For an extra health boost without compromising taste, sneak in a handful of fresh spinach. The vibrant red of the cherries masks the green color, and the flavor is virtually undetectable. It’s a fantastic way to increase your intake of vitamins and minerals, making your milkshake even more nutritious.
Serving Suggestions for Healthy Cherry Milkshake
Decoration
Elevate the visual appeal of your Healthy Cherry Milkshake with simple yet elegant garnishes. A single, perfectly ripe cherry placed on the rim of the glass provides a classic and inviting look. A delicate sprig of fresh mint adds a pop of contrasting green and a hint of fresh aroma, enhancing the overall sensory experience. You could also consider a light dusting of unsweetened shredded coconut or a few slivered almonds sprinkled on top for a touch of texture and visual interest.
Side Dishes
To complement the creamy sweetness of the cherry milkshake, consider serving it alongside dishes that offer a contrast in flavor and texture. A small bowl of crunchy granola provides a satisfying bite and a wholesome breakfast pairing. Fresh fruit salad, featuring berries, melon, or kiwi, adds vibrant colors and a refreshing counterpoint to the rich milkshake. For a more substantial option, consider a slice of whole-grain toast topped with a thin layer of almond butter or a few slices of avocado.
Creative Serving Ideas
Transform your Healthy Cherry Milkshake into a delightful treat with creative presentations. Pouring the milkshake into small, clear glasses and topping with a dollop of whipped coconut cream and a cherry makes for a sophisticated dessert. For a fun, family-friendly option, use fun-shaped ice cube trays to freeze portions of the milkshake, which can then be served as refreshing cherry popsicles on a warm day. You could also layer the milkshake with a bit of chia seed pudding or Greek yogurt in a parfait glass for a more complex and visually appealing dessert or breakfast.
Preparation & Storage
Storing Leftovers
Should you find yourself with any leftover Healthy Cherry Milkshake, proper storage is key to maintaining its quality. Transfer the remaining milkshake into an airtight container or a sealed jar. It’s advisable to store it in the refrigerator. While it’s always best enjoyed fresh, it should remain palatable for up to 24 hours. You might notice some separation; simply give it a vigorous stir or a quick re-blend before serving to restore its smooth texture.
Freezing
For longer preservation, freezing the cherry milkshake is an excellent option. The most convenient method is to pour the milkshake into an ice cube tray. Once completely frozen solid, transfer the cherry milkshake cubes into a freezer-safe zip-top bag. This prevents freezer burn and makes it easy to access the desired quantity. Frozen milkshake cubes can be stored for up to one month, retaining most of their flavor and texture.
Reheating
Reheating isn’t exactly applicable in the traditional sense for a frozen treat, but rather it’s about refreshing its texture. If you’ve frozen your milkshake in cubes, simply remove the desired amount from the freezer the night before and allow them to thaw in the refrigerator. For a quick refresh, you can pop a few frozen cubes into the blender with a splash of fresh almond milk or water and blend until creamy again. This process will revive the smooth consistency and make it ready to enjoy as if it were freshly made.
Frequently Asked Questions
-
How do I choose the ripest cherries for the best flavor?
Selecting the ripest cherries is fundamental to achieving the most vibrant and naturally sweet flavor in your Healthy Cherry Milkshake. Look for cherries that are plump, firm to the touch, and possess a deep, rich color, which typically indicates peak ripeness and sweetness. Avoid any cherries that appear dull, bruised, or have overly soft spots, as these signs often suggest they are past their prime and may not offer the optimal taste. Gently checking the stem attachment point can also be informative; cherries with intact, green stems are generally fresher. For frozen cherries, while you can’t inspect them visually for ripeness, opting for reputable brands that indicate “sweet” cherries will yield the best results. The inherent sweetness of ripe cherries means you’ll likely need less added sweetener, contributing to the overall healthiness of your milkshake.
-
What is the best way to store leftover cherry milkshake to maintain freshness?
To preserve the delightful flavor and texture of any leftover Healthy Cherry Milkshake, prompt and proper storage is essential. Immediately after serving, pour any remaining milkshake into an airtight container or a glass jar with a tight-fitting lid. This prevents air exposure, which can lead to oxidation and a loss of flavor. Store the container in the coldest part of your refrigerator. It’s important to note that milkshakes can naturally separate over time; therefore, before consuming leftovers, give them a thorough stir or place them back in the blender for a quick re-blend with a splash of milk to restore their smooth, creamy consistency. For optimal taste and texture, it is generally recommended to consume leftovers within 24 hours.
-
Can I freeze this cherry milkshake for later, and how should I prepare it for freezing?
Absolutely, freezing your Healthy Cherry Milkshake is a fantastic way to enjoy its goodness at a later time, and it’s quite straightforward to prepare. The most efficient method is to portion the milkshake into an ice cube tray. This allows for easy portion control and ensures the milkshake freezes evenly and quickly. Once the milkshake cubes are completely solid, carefully transfer them from the tray into a heavy-duty, freezer-safe zip-top bag or an airtight container. This step is crucial to prevent freezer burn and to maintain the quality of the milkshake over time. Properly stored frozen milkshake cubes can be kept for up to one month, offering a convenient and refreshing treat whenever the craving strikes. When you are ready to enjoy, simply remove the desired number of cubes and blend them with a small amount of fresh almond milk or water until you achieve your preferred smooth and creamy consistency.