Grilled Veggies in a Basket
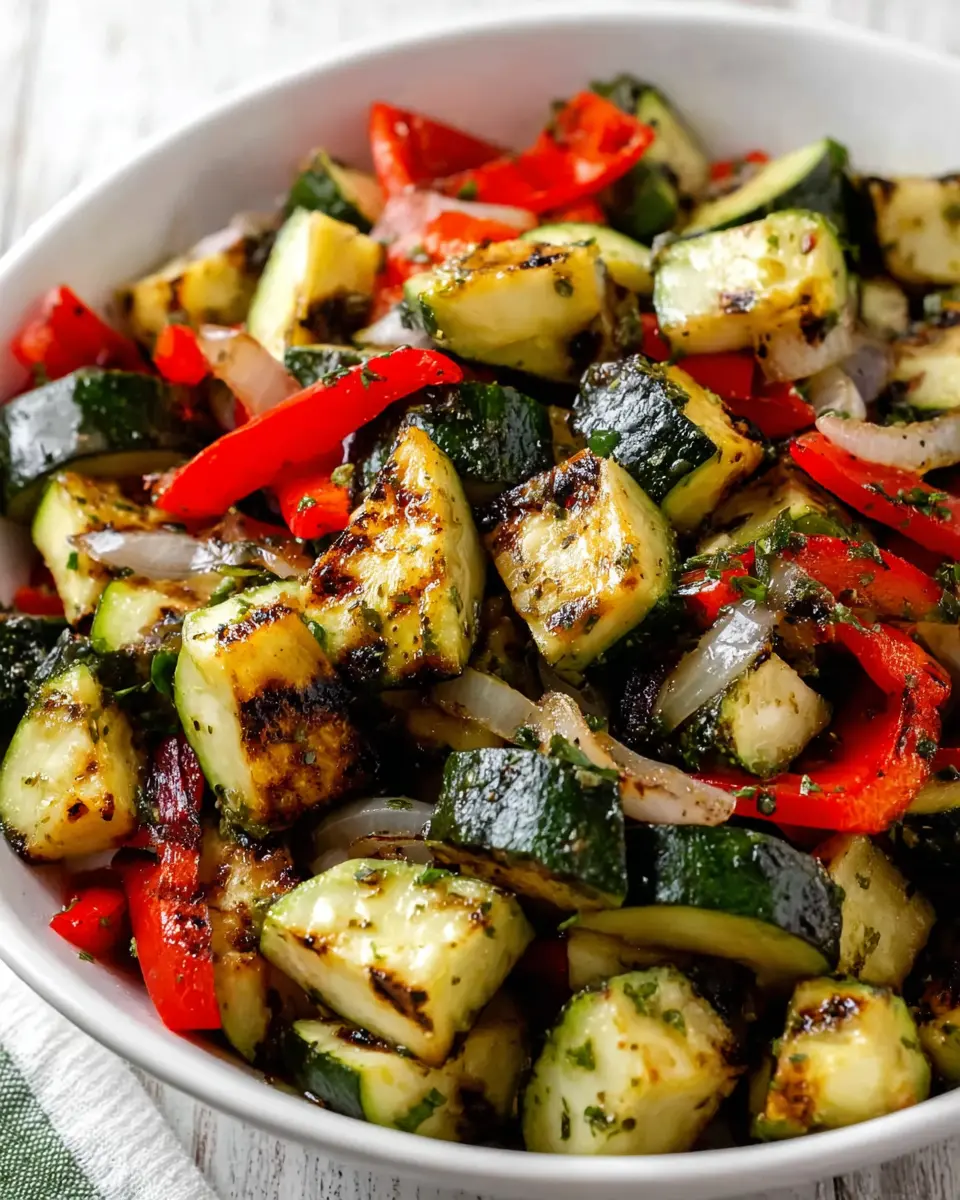
Quick, colorful, and full of smoky garden flavor, Grilled Veggies in a Basket is a simple side dish that works beautifully for weeknight dinners, cookouts, and casual summer meals. The Italian dressing marinade adds fast seasoning, while the grill brings tender texture and light char.
This is the kind of side dish that makes outdoor cooking feel effortless. You can prep the vegetables ahead, let them soak up flavor in the fridge, and then toss everything into a hot grill basket when it is time to cook.
Why You Will Love This Recipe
- Quick Preparation: Dinner is on the table in less than 30 minutes of active cooking time, making it perfect for busy weeknights.
- Effortless Marinade: The Italian dressing does all the heavy lifting, infusing vegetables with delicious flavor in a single step.
- Versatile Side Dish: Pairs beautifully with virtually any main course, from grilled meats to vegetarian options.
- Healthy and Flavorful: Packed with fresh vegetables and smoky char, offering a nutritious and satisfying accompaniment to any meal.
- Minimal Cleanup: Using a grill basket significantly reduces the mess, making post-meal cleanup a breeze.
Ingredients You Need
The beauty of this dish lies in its simplicity and the quality of the fresh produce used. Opt for vibrant, firm vegetables that will hold up well to the heat of the grill, ensuring a delightful texture and flavor. The Italian dressing serves as both a tenderizer and a flavor enhancer, coating each piece with a zesty kick.
Grilled Veggies in a Basket

Quick, colorful, and full of smoky garden flavor, Grilled Veggies in a Basket is a simple side dish that works beautifully for weeknight dinners, cookouts, and casual summer meals. The Italian dressing marinade adds fast seasoning, while the grill brings tender texture and light char.
- 2 medium zucchini
- 1 large sweet onion
- 1 large red bell pepper
- 1/2 cup Italian salad dressing
- 1 pinch dried herbs
- Freshly ground black pepper as needed for the best flavor
- Salt to taste
- 1Trim the zucchini and slice each one in half lengthwise. Cut each half into pieces slightly smaller than 2 inches thick.
- 2Remove the peel from the onion, trim away both ends, and cut it in half. Separate the onion into layers, then cut those layers into chunks comparable in size to the zucchini pieces.
- 3Slice the red bell pepper in half, discard the seeds and stem, and cut it into pieces similar in size to the onion and zucchini.
- 4Transfer all of the prepared vegetables to a resealable plastic bag or a plastic container with a secure lid. Use the smallest container that will hold them comfortably so the marinade coats the vegetables thoroughly.
- 5Pour the Italian dressing over the vegetables. Add the dried herbs for extra seasoning, if desired. Seal the bag or container and refrigerate for 4 to 6 hours, or leave the vegetables to marinate throughout the day.
- 6When ready to cook, place a grill basket or grill pan on the grill grate and preheat the grill, along with the pan, to medium-high heat. The grill should be hot enough that you can only keep your hand above it for a few seconds.
- 7While the grill heats, drain the marinated vegetables in a colander over the sink so the excess dressing can drip away. This step is important for reducing flare-ups during grilling.
- 8Add the drained vegetables to the hot grill basket and spread them into an even layer so as many pieces as possible make contact with the surface.
- 9Close the grill lid and cook the vegetables, stirring them every 5 minutes so they brown evenly on all sides.
- 10Grill for 15 to 20 minutes, or until the vegetables are tender with a slight crispness and a bit of char around the edges. For a lighter finish, monitor them closely as they cook.
- 11Remove the vegetables from the grill and serve them hot. Season with salt and freshly ground black pepper to taste just before serving.
Keywords: Grilled Veggies, Vegetable Basket, Zucchini, Onion, Bell Pepper, Italian Dressing, Side Dish, Cookout, Healthy, Vegetarian
- zucchini: tender and mild, it forms the bulk of the vegetable mix.
- sweet onion: adds a natural sweetness that caramelizes beautifully on the grill.
- red bell pepper: provides a vibrant color and a slightly sweet, crisp-tender texture.
- Italian salad dressing: the base for our quick and flavorful marinade.
- dried herbs: optional, but they add an extra layer of aromatic complexity.
- freshly ground black pepper: for a touch of warmth and bite.
- salt: to enhance all the flavors at the end.
Quantities for these essential components can be found within the provided recipe card.
Variations
To infuse your grilled vegetables with an entirely different profile, consider swapping the standard Italian dressing for a zesty lemon-herb vinaigrette. This would involve whisking together fresh lemon juice, olive oil, minced garlic, and a medley of fresh herbs like parsley, thyme, and rosemary. The bright citrus notes will offer a refreshing contrast to the smoky char.
For a heartier, more substantial side, you could introduce other hearty vegetables like broccoli florets or asparagus spears. These additions would require similar preparation but might benefit from slightly adjusted grilling times to ensure they reach optimal tenderness. Think about adding a sprinkle of smoked paprika to the marinade for an extra layer of smoky depth.
If you’re aiming for a touch of Mediterranean flair, incorporate chopped Kalamata olives and crumbled feta cheese after grilling. This combination introduces a salty, briny element that perfectly complements the sweet, charred vegetables, elevating them into a complex and delightful side dish that can stand on its own.
How to Prepare Grilled Veggies in a Basket
Step 1: Preparing the Vegetables for Marination
The initial step in creating these delightful grilled vegetables involves carefully preparing your chosen produce. Begin by thoroughly washing all the vegetables under cool running water to remove any dirt or debris. This ensures a clean and safe eating experience and also prepares them to readily absorb the upcoming marinade.
Next, you will need to cut the zucchini, sweet onion, and red bell pepper into uniform, bite-sized pieces. Aim for chunks that are roughly 1 to 1.5 inches in size. This consistency in size is crucial because it ensures that all the vegetables cook evenly on the grill. If some pieces are significantly smaller than others, they risk becoming overcooked and mushy while the larger pieces remain underdone.
For the zucchini, trim off both ends and then slice them in half lengthwise. Following this, cut each half into pieces that are roughly the same thickness as your other vegetables. With the sweet onion, remove the outer papery skin, trim off the top and bottom ends, and then cut the onion in half through the root. Separate the layers into manageable chunks, ensuring they are comparable in size to the zucchini.
When it comes to the red bell pepper, slice it in half and carefully remove the seeds and the central stem. After discarding these parts, cut the pepper halves into pieces that mirror the dimensions of the zucchini and onion. The goal here is to create a visually appealing mix where each vegetable component is of a similar size, promising a harmonious cooking process and a balanced eating experience.
Step 2: The Marinade Magic
Once your vegetables are meticulously cut and ready, it’s time to imbue them with flavor through marination. Transfer all the prepared vegetable pieces into a large, resealable plastic bag or a sturdy, airtight container. Using a container that is just large enough to comfortably hold the vegetables ensures that the marinade will coat them thoroughly and evenly, maximizing flavor penetration.
Now, generously pour the Italian salad dressing over the vegetables. This dressing is the cornerstone of the marinade, providing a delightful blend of oil, vinegar, and seasonings that will tenderize the vegetables and infuse them with its signature tangy taste. For an optional but highly recommended boost of aromatic complexity, add a pinch of dried herbs to the bag or container.
Commonly used dried herbs that work wonderfully here include oregano, basil, thyme, or a blend of Italian seasoning. Ensure the bag is sealed tightly, or the container lid is securely fastened, to prevent any leaks and to keep the marinade contained. Gently shake or toss the bag or container to ensure that every piece of vegetable is coated in the delicious dressing.
With the vegetables fully coated, place the bag or container in the refrigerator. Allow them to marinate for at least 4 hours, or preferably longer, up to 6 hours, or even overnight if time permits and you are using heartier vegetables. This extended marination period is crucial for allowing the flavors to deeply penetrate the vegetables, transforming them into a truly savory and delicious side dish. The longer they marinate, the more intense the flavor will become.
Step 3: Preheating the Grill and Basket
As your vegetables are diligently soaking up all that wonderful marinade, it’s time to prepare your grilling equipment. For this recipe, a grill basket is highly recommended as it allows the vegetables to cook evenly and prevents them from falling through the grates while still allowing for that desirable smoky char. If you don’t have a dedicated grill basket, a grill pan or even a sturdy foil tray with strategically placed holes can serve as an alternative.
Place your chosen grill basket directly onto the grill grates. Close the lid of your grill and set the heat to medium-high. It’s essential to preheat both the grill and the basket thoroughly. This initial high heat is critical for achieving that characteristic char and preventing the vegetables from sticking to the basket.
You’ll know your grill is sufficiently preheated when you can only hold your hand a few inches above the grill grate for a few seconds before it becomes uncomfortably hot. This intense heat ensures that the vegetables begin to sizzle and brown almost immediately upon contact, rather than slowly steaming, which would result in a less desirable texture and flavor. A properly preheated grill basket is the secret to perfectly cooked grilled vegetables.
Allow the grill and basket to preheat for at least 10-15 minutes. This ensures that the entire surface of the basket is hot and ready to receive the vegetables. Rushing this step can lead to uneven cooking and sticking, so patience here will be rewarded with superior results. The goal is a surface hot enough to quickly sear the vegetables, creating beautiful grill marks and a delightful smoky aroma.
Step 4: Draining the Vegetables
Before the marinated vegetables make their way onto the hot grill, a crucial step must be performed: draining them thoroughly. This may seem like a minor detail, but it plays a significant role in the success of your grilled vegetables, particularly in managing flare-ups on the grill.
Carefully remove the bag or container of marinated vegetables from the refrigerator. Open it over a sink or a large bowl. You will notice there is a considerable amount of excess marinade that has pooled at the bottom. This excess liquid, while flavorful, can cause problematic flare-ups when it drips onto the hot coals or burners of your grill.
Using a colander placed in the sink is the most efficient way to drain the vegetables. Tip the bag or container contents into the colander, allowing all the excess dressing to drip away freely. Gently shake the colander a few times to help remove as much of the liquid as possible. This step ensures that only a light coating of the flavorful marinade remains on the vegetables, promoting better searing and reducing the risk of uncontrolled flames.
Do not discard all the marinade; a thin layer clinging to the vegetables is what you want. This residual coating will continue to impart flavor as the vegetables cook. However, be diligent in removing the bulk of the liquid pooling in the bag or container. This proactive measure will lead to a smoother grilling experience and prevent the vegetables from being excessively oily or creating excessive smoke.
Step 5: Grilling the Vegetables
With the vegetables drained and the grill basket piping hot, it’s time for the main event. Carefully transfer the drained vegetables from the colander into the preheated grill basket. It is important to spread the vegetables out in as even a layer as possible across the bottom of the basket.
An even layer ensures that each piece of vegetable has direct contact with the hot grill surface. This maximizes the chances of achieving a nice sear and developing those desirable grill marks. Avoid overcrowding the basket; if necessary, you may need to cook the vegetables in batches to ensure proper cooking and prevent them from steaming instead of grilling. Adequate space allows the heat to circulate effectively around each piece.
Once the vegetables are distributed in the basket, carefully place the basket back onto the preheated grill. Immediately close the lid of the grill. This traps the heat and smoke, creating an environment that promotes even cooking and infuses the vegetables with smoky flavor.
Set a timer for approximately 5 minutes. During this initial cooking period, resist the urge to constantly stir or move the vegetables. Allow them to sit undisturbed for a few minutes to develop a nice char on one side. After the initial 5 minutes, use tongs or a spatula to gently stir and turn the vegetables. Continue this process of cooking for about 5 minutes, then stirring, for the entire duration of the grilling time. This constant, gentle agitation ensures that the vegetables cook from all sides and develop a consistent char.
Step 6: Achieving Perfect Tenderness and Flavor
The final stage of grilling involves cooking the vegetables until they reach that ideal balance of tenderness with a slight crispness, all while showcasing beautiful char marks. Continue the process of grilling and stirring every 5 minutes, monitoring the vegetables closely.
The total grilling time will typically range from 15 to 20 minutes, but this can vary depending on the heat of your grill and the exact size of your vegetable pieces. The goal is for the vegetables to be tender enough to pierce easily with a fork but still retain a pleasant firmness, not be mushy or overly soft. Look for the edges to develop a nice browning and slight charring; this adds a wonderful depth of flavor.
As the vegetables approach their perfect state of doneness, you’ll notice a slight softening and a beautiful caramelization occurring. The sweet onion will become wonderfully mellow and golden, the zucchini will be tender and slightly translucent, and the red bell pepper will be softened but still possess a satisfying bite. The overall aroma filling your kitchen or backyard should be wonderfully smoky and savory.
Once the vegetables have reached your desired level of tenderness and char, carefully remove the grill basket from the heat. Transfer the perfectly grilled vegetables to a serving platter. Now is the time to add the final seasonings. Sprinkle generously with salt to taste and finish with a liberal grinding of freshly ground black pepper. Serve them immediately while they are still hot and possess that wonderful smoky essence from the grill.
Pro Tips for Grilled Veggies in a Basket
Preheating is Paramount: Always ensure your grill basket is thoroughly preheated on the grill before adding the vegetables. This critical step is the key to achieving a beautiful sear and preventing the vegetables from sticking. A hot basket immediately begins the caramelization process, locking in flavor and creating those appealing grill marks.
Don’t Overcrowd: Resist the temptation to cram too many vegetables into the basket at once. Overcrowding leads to steaming rather than grilling, resulting in soggy, unappealing vegetables. Give the vegetables enough space to allow heat and smoke to circulate freely around each piece, ensuring even cooking and a lovely char.
Taste and Adjust: While the marinade provides a good base flavor, always taste the vegetables after grilling before serving. Add salt and freshly ground black pepper to your preference just before serving. This final seasoning step ensures the flavors are bright and perfectly balanced, as salt can lose some of its potency when applied too early.
Embrace the Char: A little bit of charring is not only visually appealing but also adds a wonderful depth of smoky flavor to the vegetables. Don’t be afraid of those slightly blackened edges; they are a sign of perfectly grilled goodness. Just ensure the vegetables are cooked through to your desired tenderness beneath the char.
Consider Herb Freshness: If you have access to fresh herbs, consider adding them towards the end of the grilling process or as a garnish after cooking. Fresh herbs like parsley, basil, or chives add a burst of freshness that complements the smoky, savory notes of the grilled vegetables beautifully, offering a vibrant counterpoint to the richness.
Serving Suggestions for Grilled Veggies in a Basket
Decoration
Elevate the visual appeal of your grilled vegetables by adding a sprinkle of fresh, finely chopped parsley or chives just before serving. This not only adds a pop of vibrant green color but also introduces a subtle, fresh aroma that enhances the overall dining experience. A few thin slices of lemon or lime can also be artfully arranged around the platter, offering a visual cue to the bright flavors within and a zesty garnish option.
For a more rustic presentation, consider garnishing with a few toasted sesame seeds or a light drizzle of balsamic glaze. The nutty crunch of sesame seeds or the sweet tang of balsamic can provide an interesting textural and flavor contrast. Alternatively, a few strategically placed edible flowers can add an unexpected touch of elegance and sophistication, transforming a simple side dish into a culinary masterpiece.
Side Dishes
These grilled vegetables are incredibly versatile and serve as an exceptional accompaniment to a wide array of main courses. They pair exquisitely with simple grilled proteins such as chicken breasts, pork chops, succulent steak bites, or even grilled shrimp. The fresh, lightly tangy profile of the vegetables cuts through the richness of the meats beautifully, creating a balanced and satisfying meal.
For a more casual affair, spoon them onto the plate alongside classic burgers, hearty grilled turkey sandwiches, or barbecue chicken sandwiches. They bring a welcome element of freshness and a satisfying texture that complements the more robust flavors of these handheld favorites, evoking a quintessential backyard barbecue feel. This combination makes for an easy yet complete meal that appeals to everyone.
If you’re aiming for a lighter, more grain-focused meal, these vegetables are wonderful served over a bed of fluffy rice, tender couscous, or delicate orzo pasta. The warm, savory vegetables meld beautifully with the grains, transforming a simple base into a more substantial and flavorful dish. This method is perfect for a satisfying vegetarian main or a well-rounded side option.
Creative Serving Ideas
Transform your grilled vegetables into a vibrant and flavorful addition to grain bowls. Serve them over quinoa, farro, or brown rice, and top with a protein like grilled chicken or chickpeas, along with a dollop of tahini dressing or a sprinkle of crumbled feta cheese for a complete and wholesome meal. This offers a healthy and satisfying option for lunch or a light dinner.
Incorporate them into hearty frittatas or omelets for a flavorful brunch or breakfast. Chop the cooled grilled vegetables and fold them into your egg mixture before cooking for an added layer of smoky deliciousness. This is a fantastic way to use up any leftovers and create a more complex flavor profile for your morning meal.
Mix them into pasta salads or toss them with warm pasta for a simple yet elegant dinner. Their tender texture and savory marinade make them a perfect addition to a classic Italian pasta salad or a quick weeknight pasta dish. A light lemon-garlic sauce would complement them beautifully, tying all the flavors together cohesively.
Preparation & Storage
Storing Leftovers
Should you be fortunate enough to have any of these delicious grilled vegetables remaining, storing them is straightforward. Transfer any leftovers into an airtight container. Ensure the container is well-sealed to prevent the vegetables from drying out or absorbing odors from other foods in the refrigerator. These containers will help maintain their quality for subsequent enjoyment.
Store the sealed container in the refrigerator. Properly stored, these grilled vegetables will remain tasty and enjoyable for up to 3 days. While they will naturally soften slightly as they sit, their flavor remains excellent, making them perfect for repurposing in various dishes. The texture change is usually minimal and doesn’t detract significantly from their overall appeal.
Freezing
Freezing is generally not recommended for this particular grilled vegetable dish. The primary reason for this caution lies in the texture of the vegetables, particularly zucchini and bell peppers. These softer vegetables tend to lose their desirable firmness and can become quite mushy and watery once they have been frozen and subsequently thawed.
While it is technically possible to freeze them, the resulting texture compromise means they are unlikely to be as appealing when reheated. If you are set on freezing, ensure they are thoroughly cooled first and use a freezer-safe airtight container or bag, removing as much air as possible. However, for the best eating experience, fresh preparation or refrigeration of leftovers is strongly advised.
Reheating
When it comes to reheating your leftover grilled vegetables, several methods can be employed to bring them back to their former glory. The most recommended method for reheating is in a skillet over medium heat. Add a tiny bit of oil or butter if desired, and stir the vegetables occasionally until they are heated through.
This skillet method is particularly effective because it helps to revive some of the grilled char and crispness, preventing them from becoming overly soft or soggy. It allows you to recapture some of that original texture and flavor profile. Aim to heat them for a few minutes until they are warm to the touch and slightly re-caramelized.
Alternatively, you can reheat them in the microwave. Place the vegetables in a microwave-safe dish and heat them in short bursts, stirring in between. While this method is quicker, be aware that the texture will likely be softer compared to skillet reheating. This is still a viable option if convenience is your priority, and they will still be delicious in other applications.
Frequently Asked Questions
-
Can I prepare the vegetables and marinate them ahead of time for a large gathering?
Absolutely. Preparing and marinating the vegetables ahead of time is one of the major advantages of this recipe, making it ideal for entertaining. You can chop and marinate all the vegetables for up to 6 hours in advance, or even overnight if you are using slightly firmer vegetables. Store them in the refrigerator in their sealed bag or container. This advance preparation allows the flavors to meld beautifully and significantly reduces your workload on the day of the event, freeing you up to attend to other hosting duties. Just ensure they are well-sealed to maintain freshness and prevent flavor contamination.
-
What are some good alternative vegetables to use if I don’t have zucchini or bell peppers?
The beauty of grilled vegetables is their versatility. If zucchini and bell peppers aren’t available, you can easily substitute them with a variety of other sturdy vegetables. Consider using chunks of yellow squash, eggplant, red onion (in addition to or instead of sweet onion), broccoli florets, cauliflower florets, asparagus spears, or even Brussels sprouts halved or quartered. Heartier root vegetables like carrots or parsnips might require a bit more prep, such as parboiling them first, to ensure they cook through on the grill. Always aim for similarly sized pieces to promote even cooking, and adjust grilling times as needed for the specific vegetables you choose.
-
How can I ensure the vegetables don’t stick to the grill basket, especially if my basket is older?
Preventing sticking is key to perfect grilled vegetables. First and foremost, ensure your grill basket is thoroughly preheated over medium-high heat for at least 10-15 minutes; this is the most effective way to create a non-stick surface. Second, make sure you drain the vegetables well after marinating to remove excess oil, which can cause flare-ups and sticking. You can also lightly coat the grill basket itself with a high-heat cooking spray or a bit of oil using a paper towel held with tongs just before adding the vegetables. If your basket is particularly prone to sticking, consider lining it with perforated grill foil, which allows heat and smoke to pass through while providing a smoother surface.