Grilled Lemon Chicken Recipe – The Best Lemon Marinade!

This juicy grilled lemon chicken has always been my family’s go-to grilled chicken recipe for summer. Bursting with fresh flavor and herbs, the garlicky lemon chicken marinade is quick and easy to make, promising a delightful meal.
In honor of May Day, I’m marinating juicy chicken with plenty of lemon and tossing it onto the grill. My mom would grill this lemon chicken alongside kebapi (kebabs) and eggplant for our May Day picnic, creating cherished culinary memories.
Why You Will Love This Recipe
- Effortless Preparation: With simple ingredients and a straightforward method, this grilled lemon chicken comes together quickly, perfect for busy weeknights or relaxed weekends.
- Vibrant Flavor Profile: The zesty lemon, pungent garlic, and fresh parsley create a bright and aromatic marinade that infuses the chicken with incredible taste.
- Versatile Application: This recipe works beautifully on an outdoor grill, a stovetop grill pan, or even under the broiler, offering flexibility for any kitchen setup.
- Family Favorite: Passed down through generations, this chicken recipe is a guaranteed crowd-pleaser, evoking nostalgic summer picnics and happy gatherings.
- Healthy and Delicious: Lean chicken breast is marinated in fresh, wholesome ingredients, making it a nutritious and satisfying choice for a balanced meal.
Ingredients You Need
Selecting the freshest ingredients is paramount to achieving the most exquisite flavor in your grilled lemon chicken. The quality of your produce directly impacts the brightness of the lemon, the pungency of the garlic, and the herbaceous notes of the parsley.
Grilled Lemon Chicken
This juicy lemon chicken is a go-to grilled chicken recipe for summer! The garlicky lemon marinade is bursting with fresh flavor and needs only 5 ingredients.
- 2 pounds boneless, skinless chicken breasts
- zest of 2 lemons
- 4 cloves garlic, minced
- salt and fresh ground pepper, to taste
- 1 whole lemon, cut into slices
- 1Marinate the chicken: In a large ziploc bag, combine chicken, olive oil, lemon zest, lemon juice, garlic, parsley, salt, and pepper. Seal the bag and shake it all up until well combined. Place the bag in the refrigerator and marinate for about 4 hours or overnight.
- 2Prepare the grill: Preheat the grill to about 375ºF to 400ºF. Brush the grill grates with olive oil.
- 3Grill the chicken: Remove the chicken breasts from the marinade and place them on the hot grill; cook without touching the grill until they start to get grill marks, about 5 minutes.
- 4Flip: Turn the chicken breasts over, cover the grill, and let them finish cooking, about 7 more minutes, depending on the thickness of the chicken. The chicken is done when a meat thermometer registers 165 degrees Fahrenheit.
- 5Rest the chicken: Remove chicken from grill; cover and let rest for 5 minutes before cutting and serving.
- 6Grill Pan Instructions: Prep. Preheat oven to 350ºF. Grease a grill pan with cooking spray and set it over medium-high heat. Sear the chicken. Add the chicken and cook for 4 minutes; flip, and continue to cook for 2 more minutes, or until lightly browned. Finish in the oven. Place the grill pan in the oven and cook for 18 to 20 minutes or until the chicken is cooked through. Remove from oven and let rest for 5 to 8 minutes before cutting and serving.
Keywords: grilled chicken, lemon chicken, summer recipe, marinade, easy recipe, healthy recipe
- olive oil: i prefer the herby flavor of olive oil in marinades, but another cooking oil like canola will work as well.
- lemons: fresh lemon is a must for this recipe, as you’ll need the juice and zest; zest the lemons before you juice them, and use less for a milder lemon taste.
- garlic: freshly minced garlic provides the most robust flavor, but in a pinch, you can replace each clove with ½ teaspoon of garlic powder or 1 tablespoon of jarred garlic.
- parsley: freshly chopped parsley adds a beautiful herbaceous note, but if you’re using dried herbs, you’ll need about ⅓ the amount of fresh, approximately 4 teaspoons of dried parsley; if parsley isn’t your favorite, consider thyme, rosemary, or basil.
- salt and pepper: feel free to add extra seasonings like chili flakes in addition to salt and pepper if you’d like, or use a blend like homemade chicken seasoning.
The exact quantities for these key ingredients are detailed in the recipe card for your convenience.
Variations
This grilled lemon chicken is incredibly adaptable, allowing for creative twists to suit various dietary preferences and flavor cravings.
For a vibrant Vegan Option: While chicken is the star here, consider marinating firm tofu or thick slices of cauliflower in the same lemon garlic mixture. Press the tofu well to remove excess moisture, and grill until golden brown and slightly crispy. Cauliflower florets will caramelize beautifully on the grill, offering a delicious plant-based alternative that soaks up the marinade wonderfully.
Embrace a Low Carb Lifestyle: Serve this lemon chicken alongside a generous portion of grilled asparagus or a crisp, refreshing cucumber and tomato salad. Skip starchy sides like rice or potatoes, and focus on nutrient-dense vegetables that complement the bright citrus flavors of the chicken without adding extra carbohydrates.
Spice Up Your Plate: For those who enjoy a bit of heat, incorporate a pinch of red pepper flakes into the marinade. You could also add a finely minced jalapeño or a dash of your favorite hot sauce. This adds a delightful kick that beautifully balances the tartness of the lemon and the savory garlic notes, creating a more complex flavor profile that is truly addictive.
Herbaceous Adventures: Don’t be afraid to experiment with other fresh herbs beyond parsley. Fresh dill, thyme, or rosemary would all be stunning additions to the marinade, offering different aromatic dimensions. You could even create a blend of your favorite Mediterranean herbs for an even richer, more complex taste experience that transports your palate.
How to Prepare Grilled Lemon Chicken
Step 1: Marinate the Chicken
Begin by preparing the flavorful marinade that will transform your chicken into a zesty delight. In a large resealable plastic bag or a non-reactive bowl, combine the boneless, skinless chicken pieces with the olive oil, the zest of two fresh lemons, and the juice from those same lemons. The lemon zest provides a concentrated burst of citrus aroma, while the juice tenderizes the meat and infuses it with a bright, tangy flavor that is simply irresistible.
Next, add four cloves of freshly minced garlic to the mixture, ensuring each piece of chicken is coated with this pungent aromatic. Finely chopped fresh parsley is then added, bringing a vibrant herbaceous note that complements the lemon and garlic beautifully. Season generously with salt and freshly ground black pepper, or your preferred blend of seasonings, to enhance all the flavors. Seal the bag tightly, removing as much air as possible, or cover the bowl securely.
Gently shake the bag or toss the chicken in the bowl to ensure every piece is thoroughly coated with the marinade. Place the marinating chicken in the refrigerator for at least 4 hours. For an even more intense flavor penetration, allowing the chicken to marinate overnight is highly recommended. This extended marination time ensures the lemon and garlic penetrate deeply into the chicken, creating a wonderfully tender and flavorful result that is truly exceptional.
Step 2: Prepare the Grill
As the chicken reaches its marinating peak, it’s time to prepare your grilling equipment for optimal results. If you are using an outdoor grill, preheat it to a medium-high heat, aiming for a temperature range of approximately 375°F to 400°F. This consistent heat is crucial for achieving those desirable grill marks and ensuring the chicken cooks evenly without burning.
Once the grill has reached the desired temperature, it’s essential to clean the grates thoroughly to prevent the chicken from sticking. Use a sturdy grill brush to scrub away any residue from previous cooking sessions. After cleaning, lightly brush the grill grates with olive oil or another high-heat cooking oil. This creates a non-stick surface, ensuring the chicken releases easily and develops beautiful char marks.
If you are using a stovetop grill pan, preheat the pan over medium-high heat. For cast-iron grill pans, ensure they are thoroughly heated before adding any oil. Once the pan is hot, lightly grease it with cooking spray or a bit of olive oil to prevent sticking. The key is to have a sufficiently hot surface that will immediately begin searing the chicken upon contact, creating that authentic grilled texture.
Step 3: Grill the Chicken
With the grill or grill pan perfectly preheated and seasoned, it’s time to introduce the marinated chicken. Carefully remove the chicken breasts from the marinade, allowing any excess to drip off. Discard the used marinade; it should not be reused for safety reasons, as it has been in contact with raw chicken. Place the chicken pieces directly onto the hot grill grates or into the preheated grill pan.
The initial searing is critical for developing those coveted grill marks and locking in the juices. Resist the urge to move or press down on the chicken for the first five minutes. This allows a beautiful crust to form and prevents the chicken from sticking. Listen for that satisfying sizzle as the chicken hits the hot surface; this indicates the grill is at the perfect temperature for searing.
After approximately five minutes of grilling on the first side, check for distinct grill marks. Once you see them, it’s time to flip the chicken. Carefully turn each piece over using tongs. If you are using a covered grill, close the lid to help the chicken cook through evenly.
Step 4: Finish Cooking
Once the chicken has been flipped, continue to cook it for an additional seven to ten minutes, or until it is cooked through. The exact cooking time will vary depending on the thickness of your chicken breasts. It is crucial to ensure the chicken reaches an internal temperature of 165°F (74°C) to guarantee it is safe to eat and fully cooked.
For outdoor grilling, cover the grill during this stage to maintain consistent heat and facilitate thorough cooking. For those using a stovetop grill pan, if the chicken is browning too quickly on the outside before the inside is cooked, you can transfer the pan to a preheated oven set at 350°F (175°C) to finish cooking. This method ensures even cooking without sacrificing that desirable grilled char.
Using an instant-read meat thermometer is the most reliable way to check for doneness. Insert the thermometer into the thickest part of the chicken breast, avoiding any bone if applicable. The moment the thermometer registers 165°F, the chicken is perfectly cooked and ready to be removed from the heat.
Step 5: Rest the Chicken
This step is often overlooked, but it is absolutely essential for achieving exceptionally juicy and tender grilled lemon chicken. Once the chicken has reached its optimal internal temperature of 165°F, immediately remove it from the grill or grill pan. Do not be tempted to slice into it right away, as all the delicious juices will escape, leaving you with drier chicken.
Transfer the cooked chicken to a clean plate or cutting board. Loosely tent the chicken with aluminum foil. This creates a warm, steamy environment that allows the juices, which have been driven to the center of the meat during cooking, to redistribute throughout the entire chicken breast. This resting period is typically between five to ten minutes, depending on the size of the chicken pieces.
This brief period of rest allows the muscle fibers to relax, resulting in a more tender and succulent bite. When you finally slice into the chicken after it has rested, you’ll notice how much more moist and flavorful it is. This simple step elevates the quality of your grilled chicken significantly, making it taste like it came from a fine restaurant.
Step 6: Serve and Enjoy
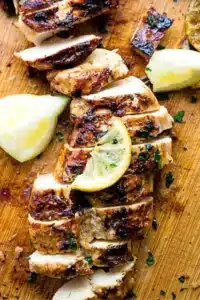
Once the grilled lemon chicken has had ample time to rest, it’s ready to be presented and savored. Slice the chicken breasts against the grain into your desired thickness. This technique further enhances the tenderness of the meat, making each bite a delight. The beautifully charred exterior and juicy, lemon-infused interior are now ready to be enjoyed.
Arrange the sliced chicken attractively on a serving platter. Garnish with fresh lemon wedges and a sprinkle of extra chopped parsley for a pop of color and added freshness. The bright yellow of the lemon slices and the vibrant green of the parsley create a visually appealing dish that is as delightful to the eyes as it is to the palate. This simple presentation allows the natural beauty of the grilled chicken to shine through.
Serve the grilled lemon chicken immediately with your favorite accompaniments. This dish pairs wonderfully with a variety of sides, from fluffy rice and roasted vegetables to fresh salads and creamy pastas. Its versatility makes it a perfect centerpiece for any meal, from a casual family dinner to a more elaborate outdoor barbecue. Enjoy the delicious, zesty flavors that are sure to become a new favorite in your culinary repertoire.
Pro Tips for Grilled Lemon Chicken
The Importance of Quality Lemons: Always opt for fresh, vibrant lemons for both the zest and juice. Meyer lemons offer a sweeter, more floral flavor profile if you can find them, but standard Eureka or Lisbon lemons will work perfectly. The quality of your lemon directly impacts the brightness and authenticity of the marinade’s citrus notes.
Don’t Overcrowd the Grill: Ensure there is adequate space between chicken pieces on the grill to allow for even cooking and proper charring. Overcrowding can lead to steaming rather than grilling, resulting in less flavor and undesirable texture. If necessary, cook in batches to maintain optimal grilling conditions.
Marinade Time is Key: While 4 hours is a good minimum, marinating overnight truly unlocks the full potential of the lemon and garlic flavors. However, avoid marinating poultry in citrus for excessively long periods (more than 24 hours), as the acid can begin to break down the protein too much, leading to a mushy texture. Finding that sweet spot ensures tender, flavorful chicken.
Resting is Non-Negotiable: As emphasized in the preparation steps, allowing the chicken to rest after grilling is crucial for retaining its moisture and succulence. This simple step makes a dramatic difference in the final texture and overall enjoyment of the dish. Patience truly pays off here for the juiciest results.
Consider the Cut of Chicken: While boneless, skinless chicken breasts are used here for their lean nature and quick cooking time, boneless, skinless chicken thighs also work wonderfully. Thighs are naturally more forgiving and tend to stay moister, making them a great option for beginners or if you prefer a richer flavor profile. Adjust cooking times accordingly for different cuts.
Serving Suggestions for Grilled Lemon Chicken
Decoration
Elevate the visual appeal of your grilled lemon chicken with simple yet impactful garnishes. A scattering of freshly chopped parsley not only adds a vibrant green contrast to the golden-brown chicken but also enhances its herbaceous aroma. Thinly sliced lemon rounds, placed strategically around the dish, offer a bright visual cue to the primary flavor and can be squeezed over the chicken for an extra burst of citrusy goodness.
For a touch of sophistication, consider adding a few sprigs of fresh rosemary or thyme to the serving platter. These herbs not only look elegant but also contribute subtle, complementary fragrances. A drizzle of high-quality olive oil over the finished chicken can also add a beautiful sheen, making the dish look even more appetizing and rich.
If you’re serving this for a special occasion, a few edible flowers, such as pansies or nasturtiums, can add a delightful pop of color and a whimsical touch. Ensure the flowers are food-grade and washed thoroughly before use. These small decorative touches transform a delicious dish into a feast for the eyes as well.
Side Dishes
This versatile grilled lemon chicken pairs beautifully with a wide array of side dishes, making it adaptable for any meal. For a light and refreshing option, consider serving it alongside a crisp Dinner salad featuring mixed greens, cherry tomatoes, cucumbers, and a light vinaigrette. A Greek salad with olives, feta cheese, and red onion would also be a fantastic complement to the Mediterranean-inspired flavors.
For a more substantial meal, fluffy Mediterranean rice pilaf or couscous infused with herbs and lemon zest provides a wonderful base for soaking up any delicious pan juices. Roasted vegetables such as asparagus, broccoli, bell peppers, or zucchini, tossed with olive oil, salt, and pepper, offer a healthy and flavorful accompaniment. Potatoes, whether roasted, mashed, or in a potato salad, are also a classic pairing that satisfies.
Pasta dishes can also be excellent partners. Consider a light lemon-herb pasta salad or a creamy leek and mushroom pasta. For a heartier option, chopped grilled lemon chicken can be tossed into a cheesy tortellini alfredo or a baked ziti for added protein and flavor. The possibilities are truly endless, allowing you to tailor the meal to your specific tastes and dietary needs.
Creative Serving Ideas
Beyond traditional platters, get creative with how you present your grilled lemon chicken. Consider slicing the chicken thinly and layering it into warm pita bread with shredded lettuce, diced tomatoes, and a dollop of tzatziki sauce for delicious, portable chicken gyros. This makes for an excellent lunch option or a casual picnic meal that’s easy to eat on the go.
Another imaginative idea is to chop the grilled chicken and toss it into a vibrant quinoa salad, incorporating chopped herbs, diced bell peppers, red onion, and a light lemon vinaigrette. This creates a nutritious and flavorful salad that works wonderfully as a main course or a substantial side dish. It’s a fantastic way to repurpose leftovers into a brand-new, exciting meal.
For a more elegant presentation, serve the grilled lemon chicken skewers, marinated and grilled in larger chunks, alongside a colorful array of grilled vegetables like cherry tomatoes, zucchini rounds, and bell pepper chunks. This adds a fun, interactive element to the meal, perfect for outdoor gatherings or parties. A final drizzle of the reserved lemon marinade or a balsamic glaze can add an extra layer of flavor and visual appeal.
Preparation & Storage
Storing Leftovers
Properly storing leftover grilled lemon chicken is key to maintaining its quality and ensuring food safety. Once the chicken has cooled completely to room temperature, which typically takes about one to two hours, transfer it to an airtight container. Ensure the container is sealed tightly to prevent air exposure, which can lead to drying out or contamination. You can also wrap the cooled chicken tightly in plastic wrap or aluminum foil before placing it in a container for an extra layer of protection.
Refrigerate the stored leftovers promptly. In the refrigerator, grilled lemon chicken will remain fresh and safe to consume for up to 3 to 4 days. It’s a good practice to label the container with the date it was stored, helping you keep track of its freshness. This allows you to easily plan meals for the upcoming days, making efficient use of your delicious preparation.
Leftover grilled lemon chicken is incredibly versatile and can be enjoyed in various ways. It can be served cold over salads for a quick and healthy lunch, or it can be reheated for another warm meal. The flavors often meld and deepen overnight, making leftovers just as delicious as the freshly cooked dish.
Freezing
For longer-term storage, grilled lemon chicken can be frozen successfully. It’s best to freeze the chicken either whole or in individual portions, depending on how you plan to use it later. Ensure the chicken is completely cooled before you begin the freezing process. This step is crucial to prevent the formation of ice crystals, which can degrade the texture of the meat.
Wrap the cooled chicken tightly in plastic wrap, ensuring there are no air pockets. Then, place the wrapped chicken into a heavy-duty freezer bag or an airtight freezer-safe container. Squeeze out as much air as possible from the freezer bag before sealing it to minimize the risk of freezer burn. Label the bag or container with the date and the contents for easy identification.
When properly stored, frozen grilled lemon chicken can maintain its quality for up to 2 to 3 months. While it may remain safe to eat beyond this period, its texture and flavor might start to decline. Thawing is best done by transferring the frozen chicken to the refrigerator and allowing it to thaw gradually overnight.
Reheating
Reheating leftover grilled lemon chicken requires care to ensure it is warmed through without becoming dry or tough. The best method depends on how you plan to serve it. For a quick reheat, place the chicken in a microwave-safe dish and warm it on medium power in 30-second to 1-minute intervals, stirring occasionally. This method is fast but can sometimes lead to uneven heating or a slightly rubbery texture if overdone.
A more preferable method for retaining moisture and flavor is to reheat the chicken in the oven. Preheat your oven to 350°F (175°C). Place the chicken in an oven-safe dish, perhaps with a tablespoon or two of water, broth, or even a little of the reserved lemon marinade to add moisture. Cover the dish loosely with aluminum foil to trap steam and prevent drying. Heat for about 10 to 15 minutes, or until the chicken is heated through to an internal temperature of 165°F (74°C).
If you cooked the chicken in a skillet or grill pan, you can also gently reheat it in the same pan over low to medium-low heat. Add a splash of liquid to the pan to help create steam. Stir or flip the chicken occasionally until it’s heated through. Regardless of the method, avoid high heat and overcooking, as this will result in dry chicken. Ensure the chicken is piping hot before serving.
Frequently Asked Questions
-
Can I use chicken thighs instead of breasts for this recipe?
Absolutely! Boneless, skinless chicken thighs are an excellent substitute for chicken breasts in this grilled lemon chicken recipe. They tend to be more forgiving during the grilling process and often remain moister due to their higher fat content. The marinating time and process remain the same, but you may need to adjust the grilling time slightly, as chicken thighs can take a few minutes longer to cook through compared to breasts. Always ensure chicken reaches an internal temperature of 165°F (74°C) for safety.
-
How can I ensure my chicken doesn’t stick to the grill?
Preventing chicken from sticking to the grill is a common concern, but easily addressed with a few key steps. First, ensure your grill grates are thoroughly clean before cooking; debris from previous cooks can cause sticking. Next, preheat your grill to the correct temperature (medium-high heat, around 375-400°F). Once hot, generously brush the grates with a high-heat cooking oil, such as canola or vegetable oil, using a brush with long bristles or a folded paper towel held with tongs. Apply the oil just before adding the chicken. Finally, and perhaps most importantly, resist the urge to move or flip the chicken too soon; allow it to sear and develop a crust for the first 5 minutes on each side before attempting to turn it.
-
What can I do if I don’t have a grill or grill pan?
If you don’t have access to an outdoor grill or a stovetop grill pan, you can still achieve delicious grilled lemon chicken using your oven broiler. Preheat your broiler to high and place the marinated chicken on a baking sheet lined with parchment paper or foil. Position the baking sheet about 4-6 inches away from the broiler element. Broil for approximately 5-7 minutes per side, watching very closely to prevent burning, as broilers cook quickly and intensely. Alternatively, you can sear the chicken in a hot skillet on the stovetop and then finish cooking it in a 350°F (175°C) oven until cooked through. The broiler method will give you the closest texture and char resemblance to grilling.