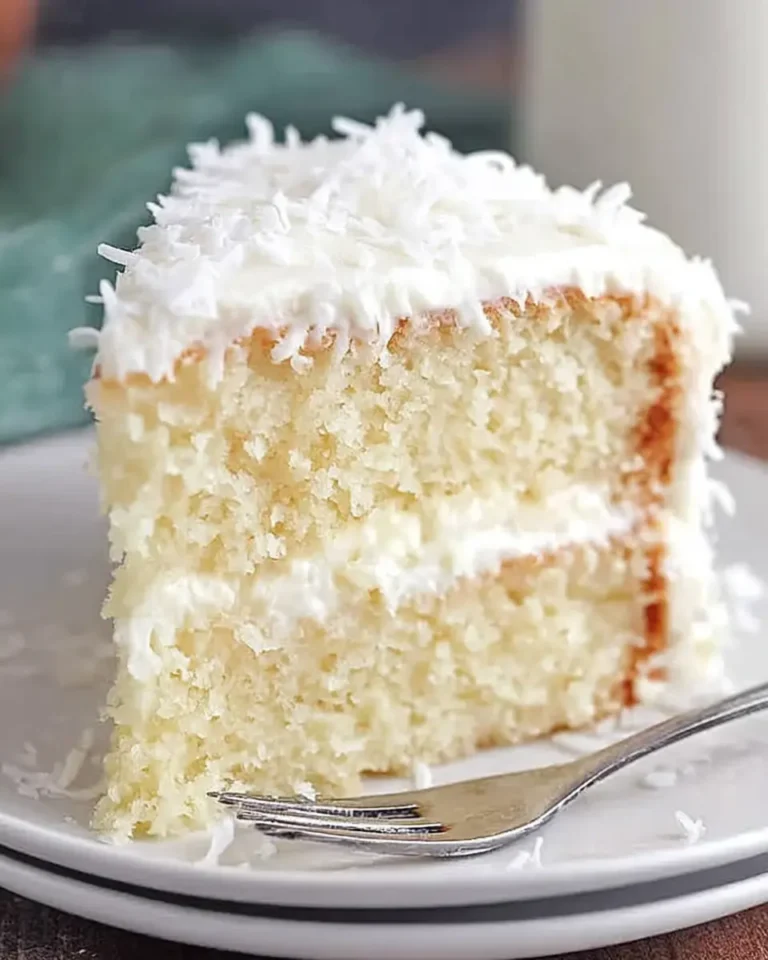
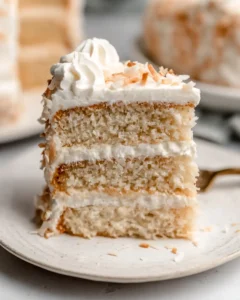
Gluten Free Vegan Coconut Cake

Gluten Free Vegan Coconut Cake is a tender, celebration-ready dessert with rich coconut flavor, soft layers, and a creamy dairy-free frosting that feels elegant enough for special occasions but simple enough for weekend baking. It’s the perfect treat for any gathering, especially when you need to accommodate dietary restrictions without sacrificing taste or texture.
This is the kind of cake that works beautifully when you want something impressive without leaning on complicated techniques. The batter comes together in a familiar, straightforward way, and the toasted coconut finish gives it that bakery-style look with very little extra effort. It truly embodies the spirit of delightful home baking.
Why You Will Love This Recipe
- Exceptional Flavor Profile: This cake boasts a deep, authentic coconut taste that is both rich and refreshing, enhanced by the perfect balance of sweet and creamy elements.
- Tender, Moist Crumb: Despite being gluten-free and vegan, the cake achieves a remarkably soft and moist texture, avoiding the dryness often associated with alternative baking.
- Elegant Presentation: With its beautiful frosting and decorative toasted coconut flakes, this cake looks and tastes like a gourmet dessert, perfect for birthdays, holidays, or any special event.
- Dietary Friendly: It is thoughtfully crafted to be completely gluten-free and vegan, making it a considerate choice for guests with common dietary needs or allergies.
- Straightforward Preparation: While appearing sophisticated, the steps are designed for ease, ensuring that even novice bakers can achieve professional-looking results with confidence and minimal stress.
Ingredients You Need
Crafting this exquisite Gluten Free Vegan Coconut Cake relies on selecting high-quality ingredients that work harmoniously to create its unique texture and flavor. Using full-fat coconut milk is paramount for achieving the luxurious moisture and depth of flavor that defines this cake. Similarly, a good quality gluten-free 1-to-1 flour blend ensures a tender crumb structure that stands up beautifully to frosting. Ensuring your vegan butter is at the correct temperature for both the cake and frosting is also key for achieving the right consistency.
Gluten-Free Vegan Coconut Cake
A tender, celebration-ready dessert with rich coconut flavor, soft layers, and a creamy dairy-free frosting that feels elegant enough for special occasions but simple enough for weekend baking. This cake is beautifully balanced, with coconut in several forms for a clear flavor without heaviness, and a tangy frosting for contrast.
- For the Cake:
- 1 1/2 cups full-fat canned coconut milk
- 1 tablespoon baking powder
- 2 teaspoons vanilla extract
- 3/4 cup dairy-free yogurt
- 1 cup unsweetened shredded coconut
- 1 3/4 cups granulated sugar
- 3 1/4 cups gluten-free 1-to-1 flour or cake flour
- 1/2 cup vegan butter, softened to about 70°F
- 1 teaspoon coconut extract
- 1/4 teaspoon sea salt
- 1 teaspoon arrowroot (when using all-purpose or gluten-free flour)
- 1/2 teaspoon baking soda
- For the Frosting:
- 4 cups powdered sugar, sifted
- 1 cup vegan butter, at room temperature
- 1 teaspoon vanilla extract
- 1 cup vegan cream cheese, softened
- 2 tablespoons coconut cream
- 1 teaspoon coconut extract
- For the Garnish:
- 3 cups toasted coconut flakes
- 1Preheat oven to 350°F (175°C). Lightly grease three 6-inch or 8-inch cake pans with olive oil or coconut oil.
- 2In a large bowl, beat softened vegan butter and granulated sugar until creamy. Mix in dairy-free yogurt, vanilla extract, coconut extract, and sea salt until smooth.
- 3In a separate bowl, whisk together gluten-free flour, arrowroot (if using), baking soda, baking powder, and sea salt.
- 4Add half of the dry mixture to the wet ingredients, then add half of the coconut milk. Mix on low speed. Add remaining dry ingredients and coconut milk, blending until just combined. Fold in shredded coconut.
- 5Divide batter evenly among prepared pans. Bake for 22-24 minutes (6-inch pans) or 27-30 minutes (8-inch pans) until a toothpick comes out clean.
- 6Let layers rest in pans for 10 minutes, then transfer to a wire rack to cool completely.
- 7For the frosting, beat vegan butter and softened vegan cream cheese until creamy. Gradually add powdered sugar, mixing well until a thick buttercream forms.
- 8Blend in vanilla extract, coconut extract, and coconut cream until smooth and spreadable.
- 9Once cake layers are fully cooled, spread frosting between layers and over the outside. Press toasted coconut flakes onto sides and top.
Keywords: Gluten Free, Vegan, Coconut Cake, Dairy-Free, Celebration Cake, Easy Baking
- full-fat canned coconut milk: This is essential for lending richness, moisture, and a pronounced coconut flavor to the cake batter.
- gluten-free 1-to-1 flour: A carefully formulated blend designed for baking ensures a tender crumb and good structure without gluten.
- arrowroot: This optional ingredient can help to further refine the texture, making the cake especially delicate and light.
- granulated sugar: Provides sweetness and contributes to the cake’s tender texture when creamed with the vegan butter.
- vegan butter: Used in both the cake and frosting, it adds essential richness, creaminess, and helps bind the ingredients together.
- dairy-free yogurt: Contributes significant moisture and a subtle tang that balances the sweetness, keeping the cake incredibly soft.
- unsweetened shredded coconut: Infuses the cake with authentic coconut texture and flavor throughout the batter.
- vanilla extract: A classic flavor enhancer that rounds out the other flavors and adds a comforting warmth.
- coconut extract: Intensifies the coconut essence, ensuring a vibrant tropical note in every bite.
- baking powder: Works with the baking soda to provide lift and create a light, airy cake structure.
- baking soda: Crucial for leavening, it helps the cake rise and prevents it from becoming too dense, especially important in gluten-free baking.
- vegan cream cheese: The base for a tangy, stable, and delightfully creamy frosting that complements the cake perfectly.
- powdered sugar: Provides sweetness and structure to the frosting, ensuring it’s spreadable yet holds its shape.
- coconut cream: Adds extra smoothness and richness to the frosting, making it luxuriously creamy and easy to work with.
- toasted coconut flakes: The crowning glory, offering a delightful crunch, beautiful golden color, and enhanced coconut aroma for decoration.
The precise quantities for each ingredient are detailed in the recipe card provided.
Variations
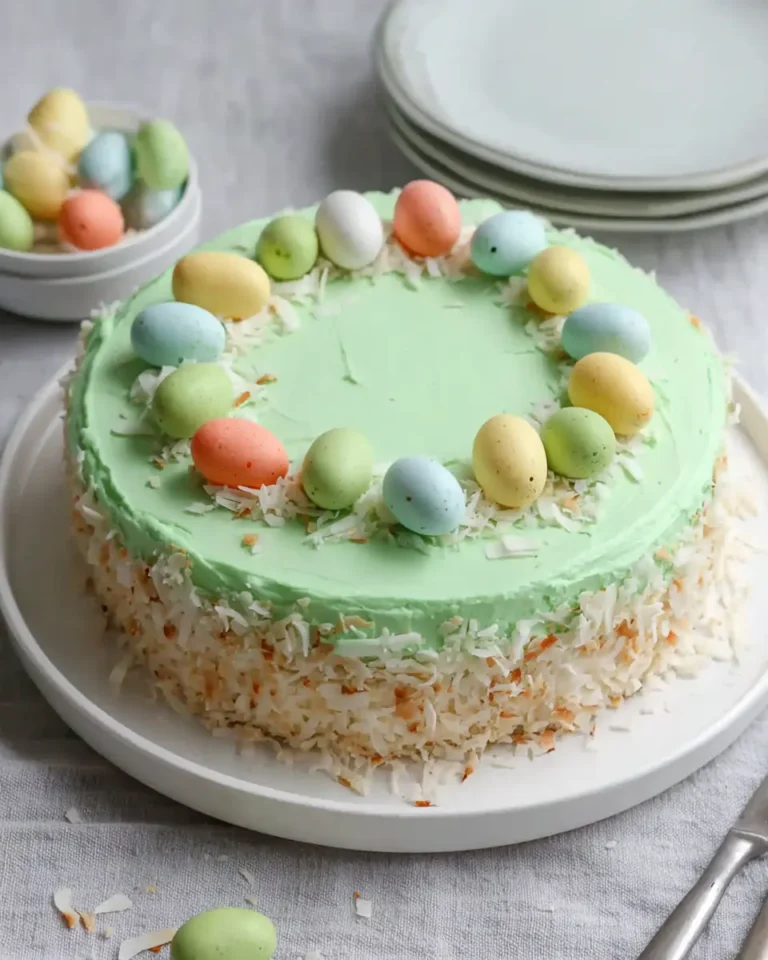
This versatile dessert can be adapted to suit a variety of dietary preferences and flavor profiles. Imagine a vibrant funfetti version, where vegan sprinkles are gently folded into the batter just before baking, adding pops of color and celebratory joy to every slice. This is particularly wonderful for children’s parties or any occasion calling for a touch of whimsy. The subtle addition of sprinkles doesn’t alter the cake’s delicate coconut flavor but significantly enhances its visual appeal and playful character.
For those seeking a lower-sugar option, you can experiment with sugar substitutes that are suitable for baking, such as erythritol or xylitol, adjusting the quantity as per the sweetener’s guidelines. While this might slightly alter the texture, it can make the cake more accessible for those monitoring their sugar intake. It’s always advisable to test a small batch if you’re unsure of the substitution’s effect on the final outcome. The core coconut flavor will still shine through beautifully.
Another exciting variation involves infusing the frosting with complementary flavors. Consider adding a teaspoon of finely grated lime zest to the frosting for a refreshing citrus twist that beautifully cuts through the richness of the coconut. Alternatively, a hint of cardamom or cinnamon could be added to the dry ingredients for a warmly spiced cake, transforming it into a delightful treat for cooler months. These subtle enhancements can elevate the cake from delicious to truly unforgettable, offering a personalized touch to your baking.
How to Prepare Gluten Free Vegan Coconut Cake
Step 1: Preparing the Pans and Oven
Begin by preheating your oven to the optimal temperature of 350°F (175°C). This ensures that the oven environment is perfectly calibrated for even baking, a crucial step for achieving a consistently tender crumb in gluten-free cakes. Proper preheating prevents the cake from sinking or developing a dense texture, which can be common issues when the oven isn’t quite hot enough at the start.
Next, thoroughly prepare your cake pans. Lightly grease the interior surfaces of three 6-inch or 8-inch cake pans with a neutral oil, such as olive oil or coconut oil. You can also line the bottoms with parchment paper circles for added insurance against sticking. This meticulous preparation is vital because gluten-free cakes can sometimes be more delicate, and ensuring a clean release from the pans prevents them from breaking apart.
Take your time with this step, ensuring every nook and cranny of the pans is coated. The oil not only prevents sticking but also helps create a slightly crisp exterior on the cake layers, which can add a pleasant textural contrast. A well-prepared pan is the foundation for beautifully intact cake layers, making the assembly process significantly smoother and more enjoyable later on. This attention to detail sets the stage for a flawless final product.
Step 2: Creating the Creamy Wet Base
In a large mixing bowl, combine the softened vegan butter with the granulated sugar. Use an electric mixer, either a stand mixer fitted with a paddle attachment or a hand mixer, to beat these ingredients together. The goal is to achieve a light, creamy, and well-blended mixture, ensuring the sugar is mostly dissolved into the butter. This creaming process is fundamental for incorporating air, which contributes to the cake’s lift and tender texture.
Once the butter and sugar mixture looks pale and fluffy, it’s time to introduce the other wet ingredients. Add the dairy-free yogurt, vanilla extract, coconut extract, and the sea salt to the bowl. Continue to mix on medium-low speed initially, just to incorporate these new elements without splattering. Gradually increase the mixer’s speed to medium and continue beating until everything is smoothly combined. Don’t forget to scrape down the sides and bottom of the bowl periodically with a spatula to ensure all ingredients are thoroughly incorporated and the mixture is uniformly smooth.
The smoothness of this wet base is quite important. An evenly emulsified mixture of fats, sugars, and liquids leads to more uniform baking. If parts of the butter or yogurt are left unmixed, you might end up with pockets of inconsistency in your cake’s crumb. This step might seem simple, but it lays the groundwork for a cake that bakes evenly and has a pleasingly soft texture throughout each layer.
Step 3: Whisking the Dry Ingredients
In a separate, medium-sized bowl, take a moment to meticulously whisk together all the dry ingredients. This typically includes your gluten-free 1-to-1 flour blend, the arrowroot starch (if you are using it for added tenderness), the baking soda, and the baking powder. A good whisking action ensures that all these components are thoroughly distributed throughout the flour.
The purpose of this step is crucial for the cake’s structure and rise. By evenly combining the leavening agents (baking soda and baking powder) with the flour, you guarantee that they will be distributed uniformly throughout the batter once combined. This prevents areas of the cake from rising too much or not at all, leading to a more consistent and desirable cake texture. It’s a simple measure that significantly impacts the final outcome of your baking.
Make sure to scrape the bottom of the bowl with your whisk or spatula to catch any settled flour or leavening agents. This thoroughness ensures that every particle is accounted for, and you won’t encounter any unexpected pockets of baking soda or powder in your finished cake, which could lead to an off-flavor or uneven rise. A well-mixed dry base is key to a successful gluten-free cake.
Step 4: Combining Wet and Dry Mixtures
Now, it’s time to bring the wet and dry ingredients together. Add about half of the thoroughly whisked dry ingredients to the bowl containing the creamy wet mixture. Begin mixing on a low speed with your electric mixer. Just before it’s fully combined, pour in about half of the full-fat canned coconut milk.
Continue mixing on low speed until just incorporated. Then, add the remaining dry ingredients to the bowl. Follow this by adding the rest of the coconut milk. Mix on low speed again, continuing only until the batter just comes together. It is absolutely critical at this stage to avoid overmixing the batter. Gluten-free flours can become gummy or tough when overmixed, compromising the desired tender crumb.
The batter should be smooth and uniform, but do not beat it vigorously or for an extended period. The goal is simply to ensure there are no streaks of dry flour remaining. If you notice any pockets of flour at the bottom of the bowl, you can use a spatula to gently fold them in until the batter is homogenous. This careful approach to mixing is one of the secrets to a perfectly tender dessert.
Step 5: Incorporating Coconut and Baking
Gently fold the unsweetened shredded coconut into the cake batter using a spatula. Ensure it’s evenly dispersed throughout the mixture, but again, avoid overmixing at this stage. The coconut adds delightful texture and a more pronounced coconut flavor to the cake’s interior, making each bite more interesting.
Once the coconut is evenly incorporated, divide the batter equally among your prepared cake pans. Use a spatula to gently smooth the tops of the batter in each pan. This step is important for ensuring the cake layers bake evenly and have a relatively flat surface, which makes frosting much easier later on. Aim for roughly the same amount of batter in each pan for consistent baking times.
Place the pans in the preheated oven and bake. For 6-inch pans, baking time is typically around 22-24 minutes, while 8-inch pans will require slightly longer, about 27-30 minutes. You’ll know the cakes are ready when a toothpick inserted into the center comes out clean, with no wet batter clinging to it. The tops should spring back lightly when touched. Avoid the temptation to overbake, as this can lead to dry layers, even with a moist recipe.
Step 6: Cooling the Cake Layers
Once the cake layers are baked to perfection, remove them from the oven. Allow the cakes to rest in their pans for a brief period, usually about 10 minutes. This short resting time is crucial; it allows the cake layers to firm up slightly within the confines of the pan, making them more stable and less likely to break when you attempt to remove them. This gentle transition helps maintain their structural integrity.
After this initial resting period, carefully invert the cake pans onto a wire cooling rack. If you prepared your pans properly, the cakes should release cleanly. If any sticking occurs, gently run a thin knife or offset spatula around the edges to loosen them before inverting. The goal is to get them out of the hot pans as soon as they are stable enough to handle.
Let the cake layers cool completely on the wire rack. It is absolutely essential that the layers are fully cooled before you attempt to frost them. Warm cakes can cause the frosting to melt, leading to a messy and unstable cake. Patience during the cooling process is key to a beautiful and well-constructed final dessert. The wire rack allows air to circulate around the cake layers, ensuring even cooling and preventing the bottoms from becoming soggy.
Step 7: Crafting the Luscious Frosting
While the cake layers are cooling, you can prepare the delicious dairy-free frosting. In a large mixing bowl, or the bowl of your stand mixer fitted with the paddle attachment, combine the softened vegan butter and the softened vegan cream cheese. Beat these together for about 2 to 3 minutes until the mixture is exceptionally creamy and well-blended. Ensure both ingredients are at room temperature for optimal emulsification and smoothness.
Gradually add the sifted powdered sugar, about one cup at a time, mixing well after each addition. Continue mixing until a thick, smooth buttercream begins to form. Scrape down the sides of the bowl frequently to ensure all the sugar is incorporated. This gradual addition prevents a cloud of powdered sugar from erupting and helps create a stable, lump-free frosting.
Once the base of the frosting is thick and smooth, blend in the vanilla extract, coconut extract, and the coconut cream. Beat for another minute or two until the frosting reaches a perfectly smooth, spreadable consistency. It should be thick enough to hold its shape on the cake but soft enough to spread easily with an offset spatula. If the frosting is too thick, you can add an extra tablespoon of coconut cream or a splash of dairy-free milk; if too thin, add a little more sifted powdered sugar.
Step 8: Assembling and Decorating the Cake
With your cake layers completely cooled and your frosting ready, it’s time for the exciting assembly. Place one cake layer on your serving plate or cake stand. Use an offset spatula to spread a generous, even layer of frosting over the top of this first layer. Don’t be shy with the frosting; it acts as the “glue” for the subsequent layers and adds moisture.
Carefully place the second cake layer on top of the frosting, followed by another generous spread of frosting. Repeat this process with the third cake layer. Once all layers are stacked, apply a thin “crumb coat” of frosting all over the sides and top of the cake. This initial thin layer traps any loose crumbs and provides a smooth canvas for the final, thicker layer of frosting. Chill the cake for about 15-20 minutes after this crumb coat to allow it to set.
After chilling, apply the final, thicker layer of frosting, smoothing it as much as possible with your offset spatula for a polished look. For the finishing touch, gently press the toasted coconut flakes onto the sides and over the top of the cake. This creates a beautiful, textured finish that enhances the coconut theme and makes the cake look truly spectacular. Slice and serve this magnificent creation!
Pro Tips for Gluten Free Vegan Coconut Cake
Use Full-Fat Coconut Milk: The richness and fat content of full-fat canned coconut milk are non-negotiable for achieving the best crumb and flavor in this cake. Avoid the thinner, refrigerated carton varieties, as they lack the necessary fat and moisture content to deliver the desired results, often leading to a drier, less flavorful cake. The consistency of the milk is a direct contributor to the cake’s overall success and delightful texture.
Ensure Complete Cooling: Patience is a virtue when it comes to frosting. Always allow your cake layers to cool completely on a wire rack before applying any frosting. Frosting warm layers will cause the dairy-free frosting to melt, resulting in a slippery mess and a cake that is difficult to assemble and decorate attractively. This cooling period ensures the frosting adheres properly and maintains its structure.
Toast Coconut Flakes Ahead: For the crispiest and most flavorful garnish, toast your coconut flakes in advance. Spread them in a single layer on a baking sheet and toast at 300°F (150°C) for a few minutes, watching them very closely as they can burn quickly. Let them cool completely before using them to decorate the cake; warm toasted coconut can melt the frosting and lose its satisfying crunch. This ensures they add both visual appeal and a delightful textural contrast.
Gentle Mixing is Key: Gluten-free batters, especially those designed to be tender, can become tough or gummy if overmixed. When combining the wet and dry ingredients, mix only until just combined, ensuring no dry flour remains. Overworking the batter can develop the starches in the gluten-free flour too much, leading to a less desirable texture. Embrace a lighter touch during this critical stage for the best outcome.
Room Temperature Ingredients for Frosting: For the smoothest and most easily spreadable frosting, ensure your vegan butter and vegan cream cheese are at proper room temperature. This allows them to emulsify beautifully with the powdered sugar and coconut cream, creating a luxurious consistency. Cold ingredients will result in a lumpy or stiff frosting, making it difficult to apply evenly to your cake layers.
Serving Suggestions for Gluten Free Vegan Coconut Cake
Decoration
Elevate your Gluten Free Vegan Coconut Cake with thoughtful decoration that enhances its already appealing appearance. The toasted coconut flakes are a classic choice, providing a beautiful golden hue and a delightful crunch that contrasts wonderfully with the soft cake. For an extra touch of elegance, consider a dusting of edible shimmer powder or a scattering of edible flowers for a truly celebratory look. You can also pipe decorative borders around the top edge of the cake using the frosting, creating a refined finish.
Side Dishes
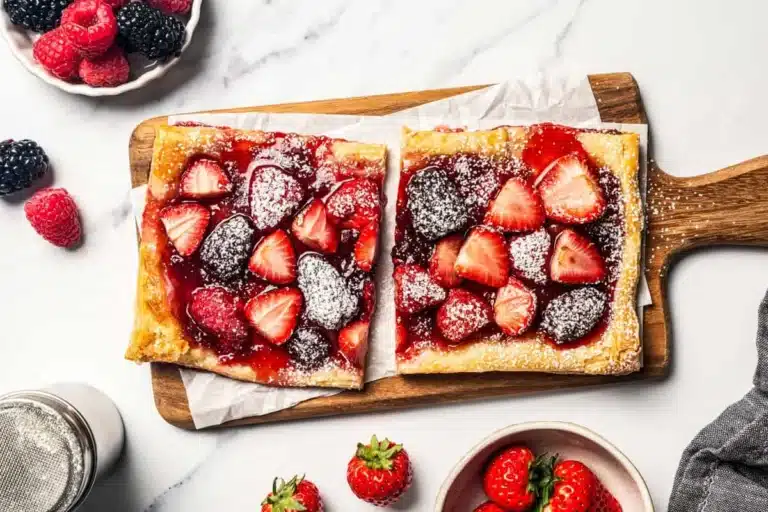
This coconut cake is a star on its own, but it also pairs beautifully with simple yet complementary additions. Fresh berries, such as raspberries or blueberries, offer a burst of freshness and a lovely tartness that cuts through the cake’s sweetness. A dollop of dairy-free whipped cream or a scoop of vanilla vegan ice cream makes for a classic dessert pairing that enhances the creamy textures. A drizzle of raspberry coulis can add a vibrant color and a sophisticated fruity note, making each bite an exciting combination of flavors and temperatures.
Creative Serving Ideas
Transform your cake into a delightful dessert experience. Serve individual slices alongside a warm cup of herbal tea or a rich vegan hot chocolate, especially on a cozy evening. For a brunch or afternoon tea setting, consider serving smaller, individual portions alongside a delicate fruit salad, allowing guests to enjoy the coconut flavor in a lighter format. You could also use the cake as a base for a deconstructed dessert, serving crumbled cake pieces with tropical fruits and a drizzle of coconut cream for a modern presentation.
Preparation & Storage
Storing Leftovers
To keep your Gluten Free Vegan Coconut Cake fresh and delicious, store any leftovers properly. It is best to keep the cake covered in the refrigerator. Due to the presence of vegan cream cheese in the frosting, chilling is essential to maintain the frosting’s stability and prevent it from becoming too soft or runny. A cake dome or an airtight container will work well to protect the cake from drying out and absorbing any unwanted odors from other foods in the refrigerator. Properly stored, the cake should remain delightful for up to 4 days.
Freezing
For longer storage, this cake freezes remarkably well, making it ideal for preparing ahead of special occasions. You can freeze individual slices or entire unfrosted cake layers. Ensure that the cake or layers are completely cool and then wrap them tightly in several layers of plastic wrap, followed by a layer of aluminum foil or a freezer-safe bag. This double layer of protection is crucial to prevent freezer burn. Frozen cake layers or slices can be stored for up to 2 months. Thawing should be done slowly in the refrigerator overnight for the best texture.
Reheating
When you are ready to enjoy your refrigerated cake, allow it to come to room temperature before serving. Letting the slices sit out for about 15 to 20 minutes will soften the frosting slightly and allow the coconut flavors to bloom, enhancing the overall taste and texture experience. Avoid reheating the cake in a microwave, as this can alter the texture of the cake and frosting, potentially making it tough or overly soft. The gentle warming at room temperature is the most effective method for enjoying the cake at its best, preserving its delicate crumb and creamy frosting.
Frequently Asked Questions
-
Can I make this cake ahead of time?
Yes, absolutely! This Gluten Free Vegan Coconut Cake is an excellent candidate for advance preparation. You can bake the cake layers a day or two in advance. Once they have cooled completely, wrap them individually and tightly in plastic wrap and store them at room temperature or in the refrigerator. The frosting can also be made ahead and stored in an airtight container in the refrigerator; allow it to soften slightly at room temperature before frosting the cake. Assembling the cake on the day of serving ensures the freshest presentation, but having the components ready significantly reduces stress on the day of your event.
-
What can I use instead of dairy-free yogurt?
If you don’t have dairy-free yogurt on hand, unsweetened applesauce is a fantastic and readily available substitute. It provides similar moisture and helps create a tender crumb without significantly altering the cake’s flavor profile, especially with the prominent coconut notes. Ensure the applesauce is unsweetened to avoid adding too much extra sugar to the batter. Other options might include pureed banana (though this will impart a banana flavor) or an extra tablespoon of coconut cream mixed with a touch of lemon juice to mimic the tanginess. Experimentation can lead to delightful results, but unsweetened applesauce is generally the most reliable swap.
-
How do I keep a gluten-free layer cake from crumbling?
Preventing a gluten-free layer cake from crumbling involves a few key techniques throughout the preparation process. Firstly, ensure your gluten-free flour blend is of good quality and suitable for baking; some blends perform better than others. Secondly, avoid overmixing the batter once the wet and dry ingredients are combined; this is crucial for preventing a tough or crumbly texture. Thirdly, allow the cake layers to cool completely before handling or frosting them; warm cake layers are far more fragile. When cutting, use a sharp knife and consider chilling the cake for a short period beforehand, as a slightly firmer cake will slice more cleanly. Gentle handling at every stage is paramount.