Ultimate Cottage Cheese & Yogurt Egg Cheesecake Delight
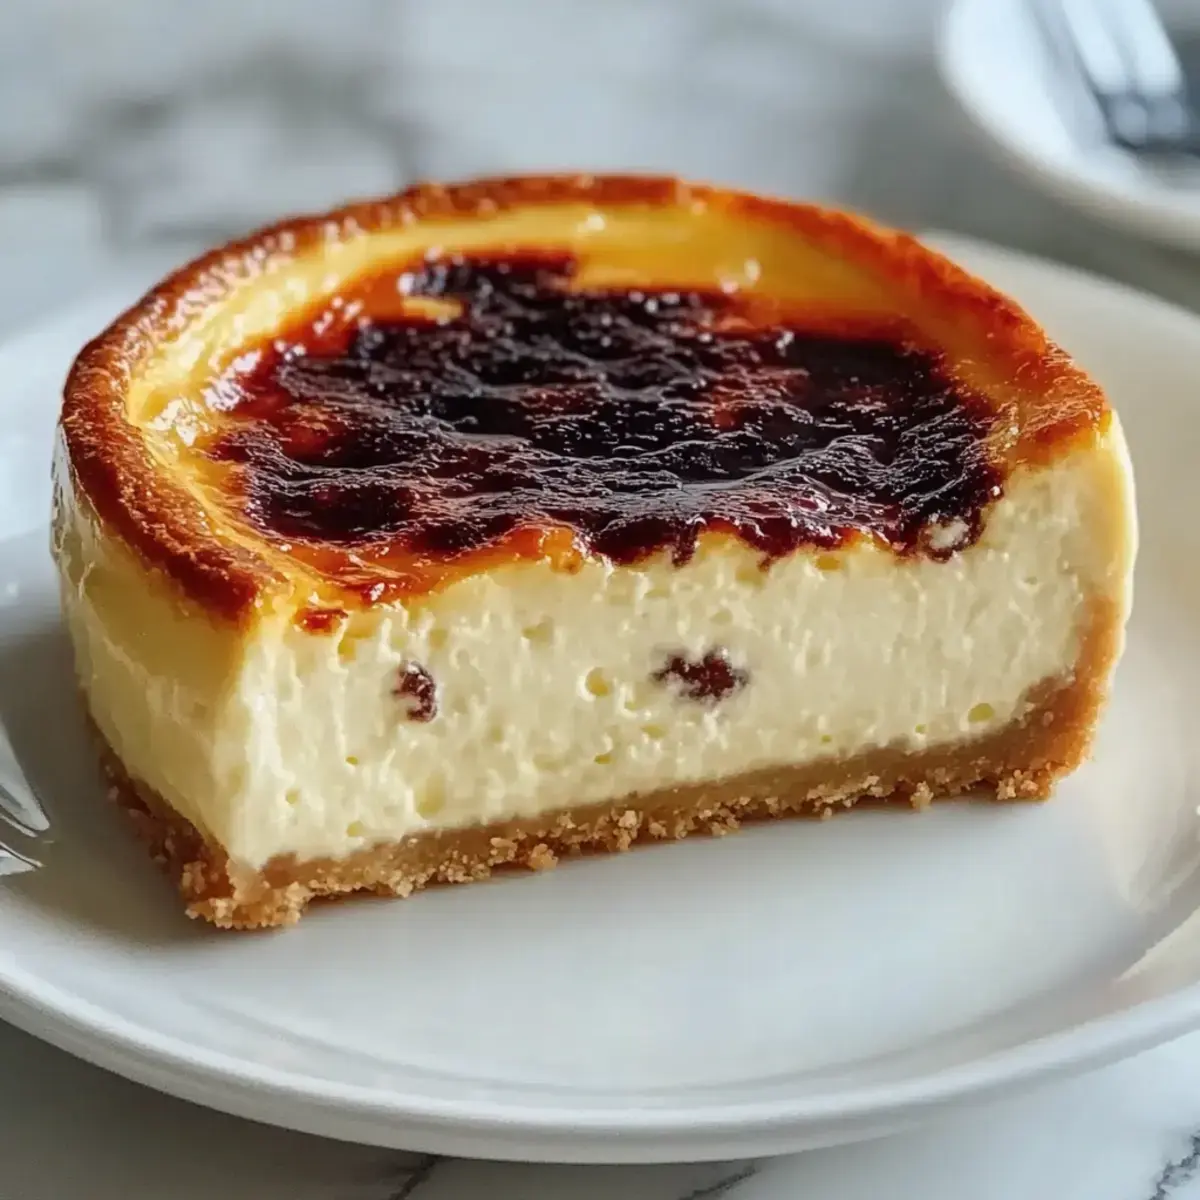
The scent of a freshly baked cheesecake is an instant mood booster, filling the kitchen with a promise of sweet indulgence. This particular recipe for Cottage Cheese & Yogurt Egg Cheesecake is a healthier, protein-packed twist on a classic dessert that doesn’t compromise on flavor or texture. It’s a testament to how simple, wholesome ingredients can come together to create something truly special.
Imagine a dessert that’s both incredibly creamy and delightfully light, offering a rich taste without the heavy guilt. This cheesecake achieves just that, making it a perfect centerpiece for any occasion or a comforting treat for yourself. Its golden-brown top and tender, custardy interior are a feast for the senses, inviting you to savor every bite.
Why You Will Love This Recipe
- Creamy Texture: The strategic combination of cottage cheese and yogurt results in a silky-smooth filling that melts in your mouth, offering a luxurious mouthfeel without the richness of traditional cream cheese.
- High-Protein Delight: Packed with protein from both cottage cheese and yogurt, this cheesecake offers a satisfying dessert option that supports your well-being and keeps you feeling fuller for longer.
- Make-Ahead Convenience: This cheesecake is an ideal candidate for meal prep, as it requires chilling time to set. Prepare it the day before your event, and you’ll have a stunning dessert ready to impress without any last-minute stress.
- Versatile Flavor Profile: While delicious on its own, this cheesecake serves as a blank canvas for a multitude of toppings, from fresh berries and fruit compotes to a simple drizzle of honey, allowing you to customize it to your heart’s content.
- Crowd-Pleasing Treat: Its unique yet familiar flavors and satisfying texture make this cheesecake a guaranteed hit with family and friends, easily becoming a favorite dessert for any gathering.
Ingredients You Need
The success of any great cheesecake lies in the quality of its ingredients, and this recipe is no exception. Opting for fresh, full-fat cottage cheese and plain yogurt will yield the creamiest and most flavorful result. Using good quality eggs and pure vanilla extract will further enhance the depth of taste. Remember, simple ingredients, expertly combined, create extraordinary desserts.
Easy Cottage Cheese & Yogurt Egg Cheesecake
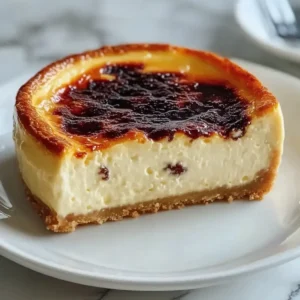
A delightful blend of cottage cheese and yogurt creates a rich, smooth filling that melts in your mouth. This high-protein delight is perfect for prepping in advance and can be customized with endless topping possibilities.
- For the Crust
- 1 cup Graham Cracker Crumbs
- 4 tablespoons Melted Butter
- For the Filling
- 1 cup Cottage Cheese
- 1 cup Plain Yogurt
- 2 large Eggs
- 3/4 cup Granulated Sugar
- 1 teaspoon Vanilla Extract
- 1 tablespoon Cornstarch
- 1Preheat your oven to 350°F (175°C) and prepare a 6-inch springform pan by greasing it or lining with parchment paper.
- 2In a mixing bowl, combine graham cracker crumbs with melted butter until sandy. Press this mixture into the bottom of the prepared pan to form a crust.
- 3In a blender, add cottage cheese, plain yogurt, eggs, sugar, vanilla extract, and cornstarch. Blend until smooth, about 1-2 minutes.
- 4Pour the filling over the prepared crust and gently tap the pan on the countertop to release air bubbles.
- 5Bake in the oven for 35-40 minutes until the edges are set, but the center wobbles slightly.
- 6Cool the cheesecake at room temperature for 30 minutes, then refrigerate for at least 4 hours or overnight.
- 7Remove the sides of the springform pan and slice the cheesecake. Serve cold, topped with fresh fruits or honey if desired.
Keywords: cheesecake, cottage cheese, yogurt, egg, high-protein, dessert, easy, make-ahead, healthy
For the precise quantities and detailed ingredient breakdown, please refer to the recipe card above. It ensures you have everything you need for a perfect bake.
Variations
This Cottage Cheese & Yogurt Egg Cheesecake is wonderfully adaptable, allowing for creative twists to suit diverse dietary needs and flavor preferences. One popular modification is to increase the proportion of dessert ingredients. For instance, substituting half of the cottage cheese with Greek yogurt can create an even richer and denser filling, appealing to those who adore a classic, thick cheesecake texture.
Another delightful variation involves enhancing the crust. Instead of traditional graham crackers, consider using crushed digestive biscuits for a slightly different flavor profile, or for a gluten-free option, an almond flour or coconut flour crust bound with melted coconut oil provides a wonderful nutty undertone and a satisfying crunch.
Furthermore, flavor infusions can transform this cheesecake into something entirely new. Adding citrus zest, like lemon or orange, to the filling imparts a bright, zesty note that cuts through the richness beautifully. For a more decadent experience, a swirl of melted dark chocolate or a mix of cocoa powder can turn this into a delightful chocolate cheesecake variation, reminiscent of a berry tart with a chocolatey twist.
How to Prepare Cottage Cheese Yogurt Cheesecake
Step 1: Preheat and Prepare the Pan
The journey to a perfect cheesecake begins with setting the stage. Start by preheating your oven to a consistent 350°F (175°C). This ensures the oven cavity reaches the optimal temperature for even baking from the moment the cheesecake enters.
Simultaneously, prepare your chosen baking vessel. A 6-inch springform pan is recommended for its ease of use and ability to release the finished cheesecake cleanly. Lightly grease the interior of the pan with butter or cooking spray, paying attention to the sides and bottom. Alternatively, lining the bottom with parchment paper can offer an extra layer of security against sticking.
This initial preparation is crucial for preventing the cheesecake from adhering to the pan and for ensuring it bakes evenly. A properly prepared pan contributes significantly to the final presentation and the ease of serving your delightful creation.
Step 2: Prepare the Crust
The foundation of this cheesecake is a simple yet crucial graham cracker crust. In a medium mixing bowl, combine your crushed graham cracker crumbs with the melted butter. The butter acts as a binder, holding the crumbs together to form a cohesive layer.
Stir the mixture thoroughly until the crumbs are evenly moistened and resemble wet sand. This texture is key to achieving a crust that is neither too dry and crumbly nor too wet and gummy. Once combined, transfer this mixture to the prepared springform pan. Using the back of a spoon or the base of a measuring cup, press the crumbs firmly and evenly into the bottom of the pan.
Ensure the crust is compact and covers the entire base without any gaps. A well-pressed crust provides a stable and delicious base for the creamy filling, contributing an essential textural contrast to the finished cheesecake. This sturdy base also helps prevent the filling from leaking during the baking process.
Step 3: Make the Filling
This is where the magic truly happens, transforming simple ingredients into a velvety smooth filling. In a high-powered blender or a food processor, combine the cottage cheese, plain yogurt, and eggs. These dairy components are the heart of the cheesecake, providing its signature creaminess and tang.
Add the granulated sugar, vanilla extract, and cornstarch to the blender. The sugar balances the tanginess of the dairy, while the vanilla extract imparts a classic, warm flavor. Cornstarch is vital for stabilizing the filling, ensuring it sets properly without becoming rubbery, and it helps achieve that sought-after smooth, custard-like consistency. For the smoothest possible texture, blend on high speed for approximately 1 to 2 minutes.
Continue blending until the mixture is completely smooth and homogenous, with absolutely no lumps of cottage cheese visible. A perfectly smooth filling is paramount to achieving a luxurious texture in your finished cheesecake; it’s worth taking the extra time to ensure it’s flawlessly blended.
Step 4: Pour and Tap
Once your filling is impeccably smooth, it’s time to unite it with the crust. Carefully pour the blended filling over the graham cracker crust in the springform pan. Use a spatula to gently spread the filling evenly, ensuring it reaches all the edges of the crust and creates a level surface for baking.
This step is critical for ensuring an even bake and a beautiful finish. Before moving the cheesecake to the oven, gently tap the springform pan on your countertop a few times. This seemingly simple action is incredibly effective at releasing any trapped air bubbles within the filling. The presence of air bubbles can lead to an uneven texture and potential cracks in the cheesecake’s surface.
By tapping the pan, you encourage these bubbles to rise to the surface and dissipate, contributing to a more uniform and visually appealing cheesecake. The result will be a smoother, denser texture that truly melts in your mouth.
Step 5: Bake the Cheesecake
With the filling in place, your cheesecake is ready for its transformation in the oven. Carefully place the prepared springform pan into the preheated oven at 350°F (175°C).
Bake for approximately 35 to 40 minutes. The visual cues for doneness are important here: the edges of the cheesecake should appear set and slightly puffed, but the center should still have a slight wobble. This wobble is precisely what you want; it indicates that the cheesecake is cooked through but will continue to set as it cools, resulting in its signature creamy, custardy texture.
Avoid the temptation to overbake, as this can lead to a dry or cracked cheesecake. The goal is a delicate balance of set edges and a tender, almost molten center that firms up beautifully upon chilling. Keep a watchful eye during the final minutes of baking to achieve this perfect consistency for your cheesecake.
Step 6: Cool Down
The cooling process is just as vital as the baking itself for achieving the perfect texture and preventing cracks. Once the baking time is complete, remove the cheesecake from the oven. Let it stand at room temperature on a wire rack for about 30 minutes.
This gradual cooling allows the cheesecake to begin setting gently, reducing the risk of thermal shock that can cause cracks. After this initial cooling period, cover the springform pan loosely with plastic wrap. Refrigerate the cheesecake for a minimum of 4 hours, or ideally, overnight. This extended chilling period is essential for the cheesecake to firm up completely and for the flavors to meld and deepen.
Patience during this stage is key. The extended chilling allows the custard structure to stabilize fully, resulting in the smooth, dense, and utterly delectable texture that defines a great cheesecake. Rushing this step will likely result in a softer, less structured dessert.
Step 7: Slice and Serve
The moment of truth has arrived: it’s time to unveil and enjoy your masterpiece. Once the cheesecake has chilled sufficiently and is firm to the touch, carefully run a thin knife around the edge of the springform pan to loosen it from the sides. Then, release the clasp and remove the ring of the pan, revealing the beautifully set cheesecake.
Use a sharp, thin knife to slice the cheesecake into wedges. For impeccably clean cuts that showcase the smooth interior, wipe the knife with a damp cloth between each slice. This simple trick prevents crumbs from adhering to the blade and smearing the cheesecake’s delicate surfaces.
Serve your Cottage Cheese & Yogurt Egg Cheesecake cold. It is delightful served plain, allowing its subtle flavors to shine, or you can elevate it further with your preferred toppings. Fresh berries, a drizzle of honey, or a dollop of whipped cream are all fantastic accompaniments that enhance the overall sensory experience of this high-protein delight.
Pro Tips for Cottage Cheese Yogurt Cheesecake
Smooth Filling is Key: To achieve the silkiest texture, ensure your cottage cheese is blended until it is completely smooth and lump-free before combining it with other ingredients. A high-speed blender or a powerful food processor is your best ally here for achieving that perfect consistency.
Don’t Overbake: Overbaking is a common pitfall that can lead to a dry or cracked cheesecake. The center should retain a slight wobble, akin to jelly, even after the bake time is complete; it will continue to set as it cools, ensuring a moist and creamy interior.
Chill Completely: Patience is paramount for this cheesecake. Allow it to cool at room temperature before refrigerating for at least 4 hours, or ideally overnight. This extended chilling period is crucial for the cheesecake to firm up properly and develop its ideal texture and flavor.
Clean Slices: For that professional, bakery-worthy presentation, use a sharp knife and wipe it with a damp cloth after each slice. This prevents sticking and smudging, ensuring each piece looks as pristine as the last.
Embrace Variations: Don’t be afraid to experiment with the suggested variations. Adding citrus zest, different sweeteners, or even a touch of spices like cinnamon can elevate the flavor profile and make your cheesecake uniquely yours. The base recipe is wonderfully forgiving and adaptable.
Serving Suggestions for Cottage Cheese Yogurt Cheesecake
Decoration
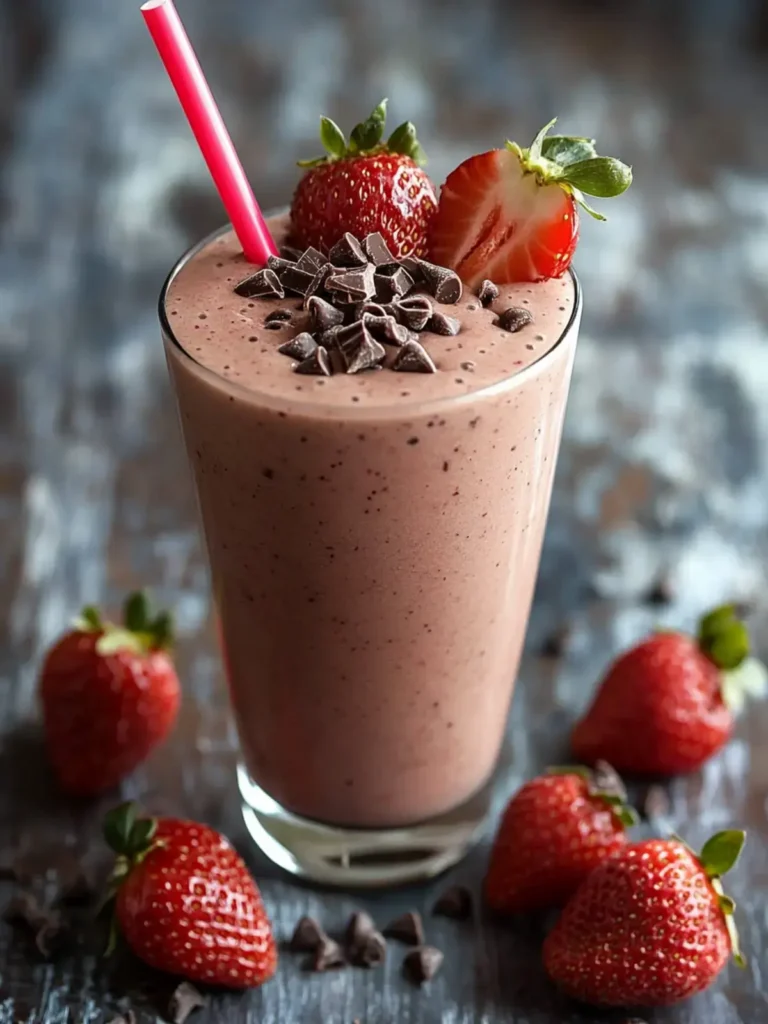
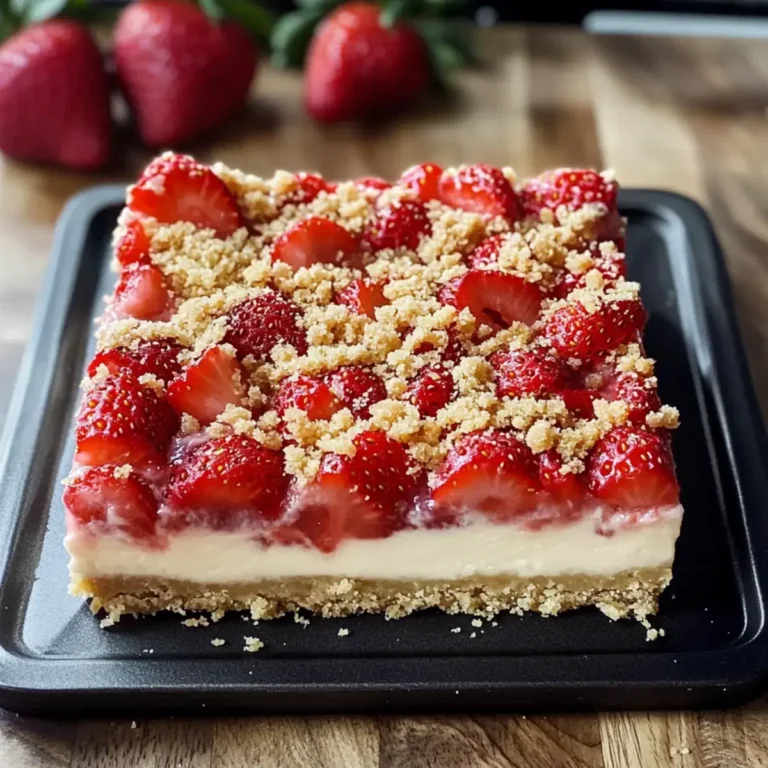
Garnishing your Cottage Cheese & Yogurt Egg Cheesecake can transform it from a simple dessert into a show-stopping centerpiece. A vibrant medley of fresh berries, such as strawberries, blueberries, raspberries, and blackberries, provides a beautiful color contrast and a burst of refreshing tartness that perfectly complements the creamy sweetness of the cheesecake.
A delicate drizzle of honey, maple syrup, or a fruit compote adds an elegant touch and an extra layer of flavor. For a lighter, dairy-free option, coconut whipped cream offers a tropical flair and a fluffy texture. Consider a light dusting of powdered sugar or a sprinkle of finely chopped toasted nuts like almonds or pistachios for added texture and visual appeal.
Side Dishes
While this cheesecake is delightful on its own, serving it with complementary sides can enhance the overall dining experience. A side of fresh fruit salad, featuring seasonal produce, offers a refreshing and healthy accompaniment. For a more indulgent pairing, consider a small portion of lobster bisque if serving as part of a larger meal, though this is highly unconventional for a dessert.
Crunchy elements like almond biscotti or shortbread cookies provide a satisfying textural contrast to the cheesecake’s smoothness. A warm fruit compote, such as stewed apples or a mixed berry blend, adds a comforting warmth and enhanced sweetness that pairs beautifully, especially during cooler months. For a beverage pairing, a cup of freshly brewed coffee, a delicate herbal tea, or even a glass of sparkling wine can round out the dessert beautifully.
Creative Serving Ideas
Beyond the classic slice, get creative with how you serve this versatile cheesecake. Individual mini cheesecakes, baked in muffin tins lined with cupcake liners, make for perfect single-serving portions and are ideal for parties or potlucks. These smaller versions bake faster and are easier to transport.
Consider deconstructing the cheesecake for a modern presentation. Serve dollops of the creamy filling alongside a crumble of the crust and a selection of fresh fruits or sauces on the side, allowing guests to assemble their own perfect bite. For a brunch setting, a lighter topping of yogurt and granola can offer a more breakfast-appropriate twist.
You can also incorporate the cheesecake into other desserts. Crumble slices into a parfait with yogurt and fruit, or use it as a filling for crepes or even as a layer in a trifle. The possibilities are endless, allowing you to reimagine this delicious dessert in numerous creative ways.
Preparation & Storage
Storing Leftovers
To keep your Cottage Cheese & Yogurt Egg Cheesecake tasting its best, proper storage is essential. Once the cheesecake has been fully chilled and sliced, cover any remaining portions tightly with plastic wrap or transfer them to an airtight container. Refrigeration is the preferred method for storing leftovers, as it helps maintain its creamy texture and prevents it from drying out.
Ideally, consume leftover cheesecake within 3 to 4 days. Interestingly, many find that the flavors of this cheesecake actually deepen and improve after it has been refrigerated for at least 24 hours, making it an excellent choice for make-ahead desserts where you want the taste to fully develop.
Ensure the container is well-sealed to prevent the absorption of any odors from other foods in the refrigerator, which could subtly alter the cheesecake’s delicate flavor profile. Proper sealing also helps maintain its moisture content.
Freezing
If you find yourself with more cheesecake than can be consumed within a few days, freezing is an excellent option for longer storage. To freeze, it’s best to wrap individual slices securely. First, wrap each slice tightly in plastic wrap, ensuring there are no gaps. Then, for an extra layer of protection against freezer burn, wrap the plastic-covered slice again in aluminum foil.
Place the individually wrapped slices in a freezer-safe container or bag. Properly frozen cheesecake can maintain its quality for up to 2 months. This method allows you to enjoy a slice of this delightful dessert at your convenience long after it has been baked.
When you are ready to enjoy a frozen slice, the best way to thaw it is to remove it from the freezer and place it in the refrigerator. Allow it to thaw overnight. This slow thawing process helps the cheesecake retain its texture and prevents condensation, which can make it soggy.
Reheating
While cheesecake is traditionally served chilled, some people prefer a slightly warmed dessert, especially during colder months. If you wish to gently reheat a slice of your Cottage Cheese & Yogurt Egg Cheesecake, the best approach is to do it subtly to avoid cooking it further or altering its texture negatively.
You can achieve this by simply leaving the cheesecake out at room temperature for about 30 minutes to an hour before serving. This allows it to come to a slightly softer, more palatable temperature. Alternatively, you can microwave a slice on a low power setting for very short intervals of 10-15 seconds.
Be extremely cautious with microwaving; the goal is only to take the chill off, not to heat it through. Overheating in a microwave can cause the cheesecake to become gooey and lose its desired structure. Always err on the side of caution to preserve the integrity of this delicious dessert.
Frequently Asked Questions
-
How do I select the best cottage cheese for this cheesecake?
When choosing cottage cheese for this recipe, opt for a brand that boasts a creamy, smooth consistency and contains minimal excess liquid. While low-fat versions can be used, full-fat or regular cottage cheese generally provides a richer flavor and superior texture for cheesecakes. Visually inspect the cottage cheese for any dark spots or an off-putting sour odor, as these are indicators of spoilage and should be avoided for both taste and safety.
-
What’s the best way to store the cheesecake?
To ensure optimal freshness and texture, store your Cottage Cheese & Yogurt Egg Cheesecake in the refrigerator. It should be kept in an airtight container or well-covered with plastic wrap to prevent it from drying out or absorbing unwanted odors from other foods. This cheesecake is particularly delicious when allowed to chill for at least 24 hours after baking, as the flavors meld beautifully over time, making it perfect for advanced preparation for events.
-
Can I freeze leftover cheesecake?
Yes, freezing leftover cheesecake is a fantastic option for preserving it for later enjoyment. To do this effectively, wrap individual slices very tightly in plastic wrap first, and then follow with a layer of aluminum foil to create a protective barrier against freezer burn. Properly wrapped cheesecake can be stored in the freezer for up to two months. When you’re ready to indulge, the best method for thawing is to transfer the frozen slice to the refrigerator and let it defrost overnight, which helps maintain its ideal texture.