Irresistible Italian Pasta Salad for Your Summer BBQ
In the heart of every home, desserts weave stories and experiences that connect us with tradition. Today, I’m thrilled to share my take on the beloved Indonesian Sticky Coconut Cake, also known as Wingko Babat.
This gluten-free delight brings the chewiest textures and a rich coconut flavor that transports your taste buds straight to the tropical beaches of Indonesia. What’s more, this recipe is remarkably easy to whip up, using common ingredients you probably already have in your pantry! Whether you’re looking for a unique dessert to impress friends or simply a satisfying treat for yourself, this cake is a true crowd-pleaser that’s perfect for sharing.
Why You Will Love This Recipe
- Unique Flavor: The tropical essence of coconut shines through, making every bite a delightful escape.
- Easy to Make: With straightforward steps and simple ingredients, you’ll be whipping up this cake in no time.
- Gluten-Free Delight: Perfect for those with dietary restrictions, this cake allows everyone to enjoy a sweet treat without worry.
- Impressive Texture: Experience the satisfying chewiness that sets this cake apart, reminiscent of a traditional coconut macaroon.
- Cultural Connection: Celebrate Indonesian cuisine and broaden your culinary repertoire as you share this delightful dessert with family and friends.
Ingredients You Need
Selecting the finest ingredients is paramount to achieving the signature chewiness and rich coconut flavor of this Sticky Coconut Cake. The quality of your coconut milk and shredded coconut will significantly influence the final outcome, so opt for full-fat canned coconut milk for the best results.
Gluten-Free Indonesian Sticky Coconut Cake (Wingko Babat)

A delightful gluten-free Sticky Coconut Cake, also known as Wingko Babat, that offers a chewy texture and rich coconut flavor, transporting you to the tropical beaches of Indonesia. This easy-to-make dessert is perfect for sharing and impressing guests with its unique taste and texture.
- For the Cake:
- Eggs (2, separated)
- Granulated Sugar (1¼ cup)
- Full-Fat Canned Coconut Milk (2¼ cup)
- Shredded Sweetened Coconut (3 cups)
- Glutinous Rice Flour (1½ cup)
- Vanilla Extract (1 teaspoon, optional)
- For the Topping:
- Egg Yolk (1)
- 1Preheat your oven to 350°F (175°C).
- 2In a medium bowl, whisk together the separated egg whites and granulated sugar until well combined and slightly frothy.
- 3Gradually add the coconut milk to the egg mixture, stirring gently until fully combined.
- 4Stir in the shredded sweetened coconut, glutinous rice flour, and vanilla extract until the batter is well mixed and smooth.
- 5Pour the batter into an 8x8-inch baking pan, smoothing the top.
- 6Bake for 45 minutes, or until the cake is set and the edges are lightly browned.
- 7Remove from oven and gently brush the top with the egg yolk.
- 8Return to the oven and broil for 5-10 minutes, watching closely, until the top is golden brown.
- 9Allow the cake to cool completely on a wire rack.
- 10Cover and refrigerate for at least 8 hours, or preferably overnight.
- 11Slice and serve.
Keywords: Sticky Coconut Cake, Wingko Babat, Indonesian Dessert, Gluten-Free, Coconut Cake, Chewy Cake, Tropical Dessert
- eggs (2, separated): essential for structure and moisture; substitute with aquafaba for an egg-free version.
- granulated sugar (1¼ cup): adds sweetness and aids in achieving that golden crust.
- full-fat canned coconut milk (2¼ cup): rich in flavor and enhances the overall coconut taste; remember to shake well before use!
- shredded sweetened coconut (3 cups): offers intense coconut flavor and great texture; you can use unsweetened coconut for a less sugary option.
- glutinous rice flour (1½ cup): the key to that chewy delight; absolutely must be used instead of regular flour; Mochiko serves as a good alternative.
- vanilla extract (1 teaspoon): adds a layer of depth to the flavors; optional for variations.
- egg yolk (1): brushing on top adds a beautiful golden finish; handle gently to avoid tearing the surface.
The precise quantities for each ingredient are readily available within the recipe card above for your convenience.
Variations
While the classic Sticky Coconut Cake is undeniably delightful, there’s always room for culinary creativity. Consider infusing this treat with subtle hints of spice for a warming experience, a delightful departure from the traditional tropical profile. A pinch of cinnamon or nutmeg can add an unexpected yet welcome depth.
For those seeking a lighter, more refreshing twist, incorporating citrus zest into the batter can elevate the flavor. Lemon or lime zest, when finely grated, introduces a bright, zesty note that beautifully complements the sweetness of the coconut. This variation is particularly appealing on warmer days.
Another exciting avenue is to introduce a layer of contrast with a fruit compote or a dollop of fruit jam. A tangy berry compote or a sweet mango chutney swirled into the batter before baking can create pockets of vibrant flavor and a beautiful marbled effect. These additions transform the cake into an even more complex and enticing dessert experience.
How to Prepare Sticky Coconut Cake
Step 1: Preheat the Oven and Prepare Your Pan
Begin your culinary journey by preheating your oven to the optimal temperature of 350°F (175°C). This initial step is crucial for ensuring your Sticky Coconut Cake bakes evenly and develops that coveted texture.
Simultaneously, prepare your 8×8-inch baking pan. Greasing it thoroughly with butter or non-stick spray and then lightly dusting it with a bit of glutinous rice flour will prevent any sticking and guarantee easy removal of your finished cake. This small preparation detail makes a big difference in the final presentation.
Step 2: Whisk Egg Whites and Sugar for Structure
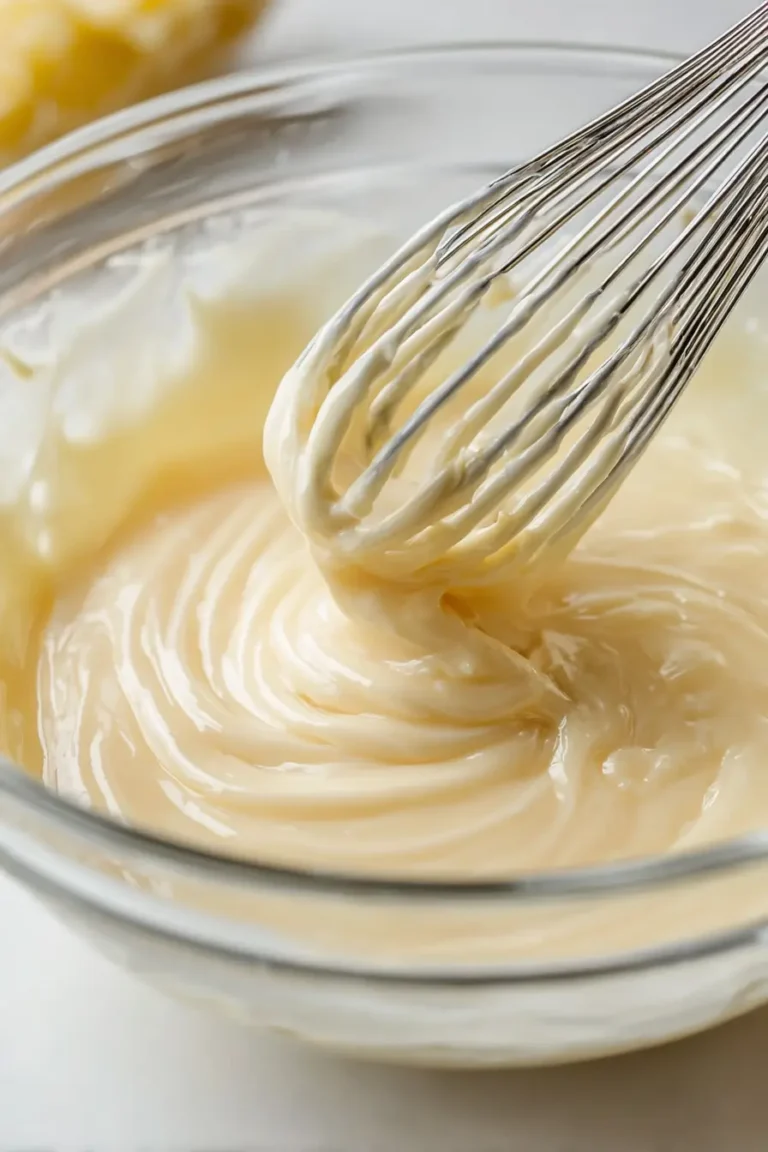
In a medium-sized mixing bowl, combine the two separated egg whites with the granulated sugar. Using a whisk or an electric mixer, beat these ingredients together vigorously until they form soft peaks and the mixture becomes pale and slightly frothy. This process incorporates air, which is vital for the cake’s structure.
This stage is where you build the foundation of your cake’s delightful chewiness. The sugar will dissolve, and the egg whites will begin to emulsify, creating a stable base that can hold the other ingredients. Patience here ensures a better final texture, so don’t rush this step.
Step 3: Incorporate the Creamy Coconut Milk
Once the egg white and sugar mixture is ready, it’s time to introduce the richness of the coconut milk. Gradually pour the full-fat canned coconut milk into the bowl while continuously stirring. Ensure that the coconut milk is well-combined with the egg mixture, creating a smooth and homogenous liquid base for your batter.
The coconut milk is the heart of the cake’s tropical essence and contributes significantly to its moistness. Make sure to shake the can of coconut milk well before opening it to redistribute the creamy solids and liquid for optimal flavor integration. A well-emulsified mixture promises a superior cake.
Step 4: Mix in the Remaining Dry Ingredients
Now, it’s time to bring everything together by adding the remaining dry ingredients to the wet mixture. Gently fold in the shredded sweetened coconut, the glutinous rice flour, and the vanilla extract. Continue to stir until all the ingredients are thoroughly combined and you achieve a smooth, thick batter.
The glutinous rice flour is the secret to the cake’s signature chewy texture, so it’s essential to incorporate it fully. The aroma of coconut and vanilla will start to fill your kitchen, hinting at the deliciousness to come. Avoid overmixing at this stage; just ensure there are no pockets of dry flour.
Step 5: Bake to Golden Perfection
Carefully pour the prepared batter into your greased and floured 8×8-inch baking pan. Use a spatula to spread the batter evenly, ensuring a level surface for consistent baking. This even distribution is key to preventing some parts from overbaking while others are undercooked.
Place the pan in the preheated oven and bake for approximately 45 minutes. You’ll know it’s ready when the cake is set and the edges begin to turn a light golden brown. The delightful aroma will also be a strong indicator that your cake is nearly ready to be taken out.
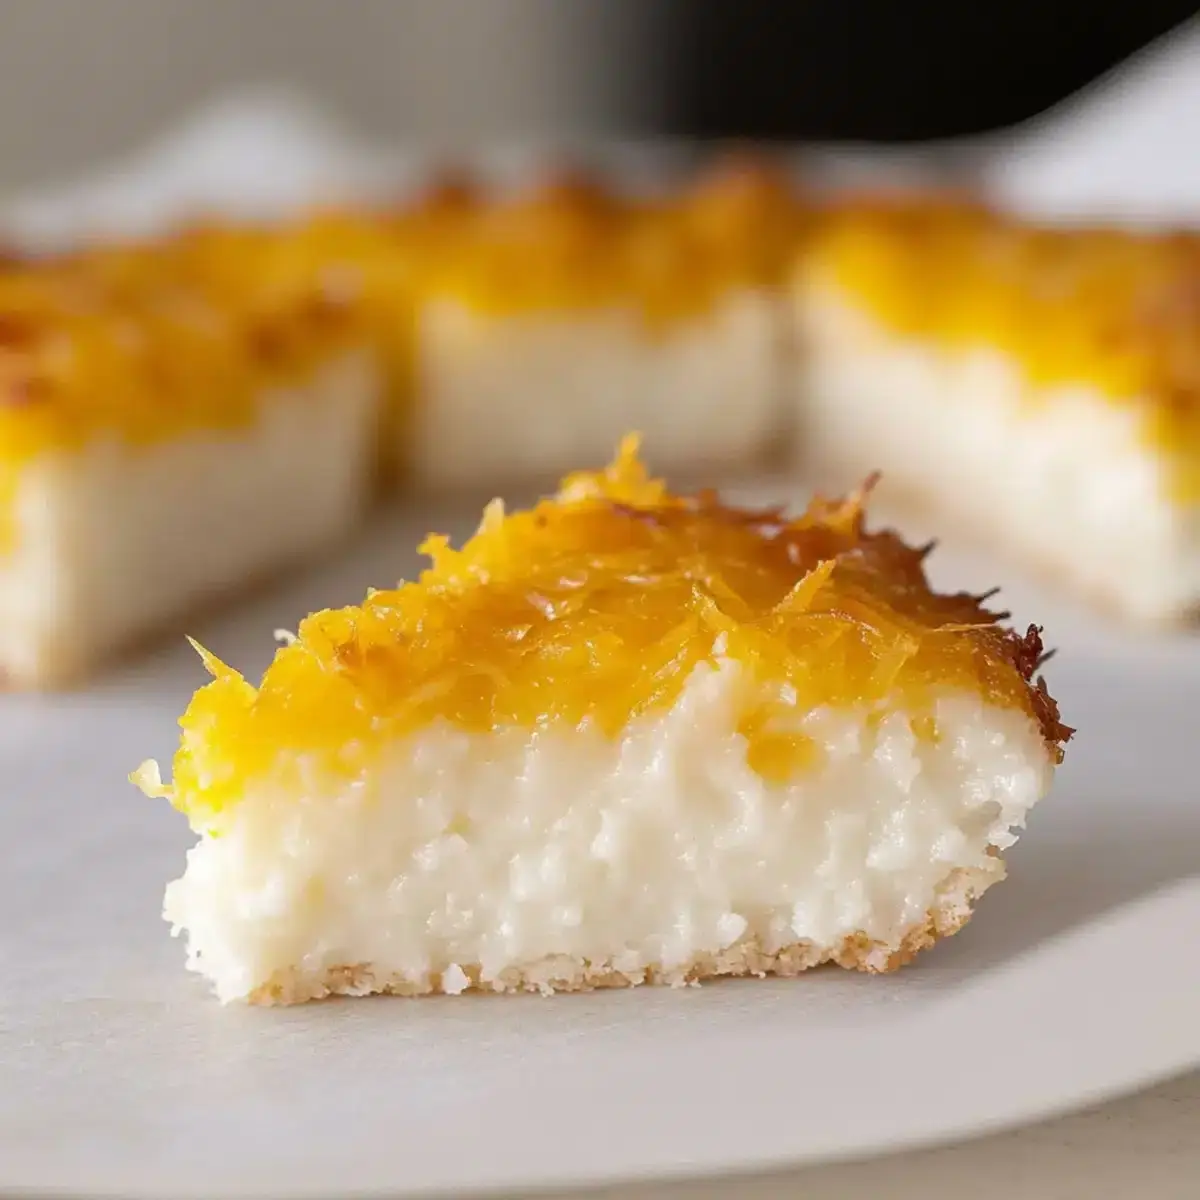
Step 6: Apply the Golden Egg Yolk Glaze
Once the cake has finished its initial bake and is set, carefully remove it from the oven. In a small bowl, lightly whisk the single egg yolk. Using a pastry brush, gently and evenly spread this egg yolk mixture over the entire surface of the cake.
This egg yolk topping is what will give your Sticky Coconut Cake that beautiful, appetizing golden-brown finish. It adds a lovely sheen and a slightly crispier texture to the top layer. This is an optional but highly recommended step for that professional bakery look.
Step 7: Broil for the Perfect Crispy Top
After applying the egg yolk glaze, return the cake to the oven. Switch the oven setting to broil and keep a very close eye on the cake. Broil for an additional 5-10 minutes, or until the top of the cake achieves a rich, golden-brown color. Constant vigilance is key during this step to prevent burning.
The broiling process caramelizes the sugars on the surface, creating a delightful contrast between the crispy topping and the chewy interior. This step truly elevates the cake from good to exceptional, offering a multi-sensory experience with every bite. Ensure the oven rack is positioned appropriately to avoid the cake getting too close to the heating element.
Step 8: Cool and Chill for Ultimate Texture
Once the cake has achieved its perfect golden hue, carefully remove it from the oven. Allow the cake to cool completely in the baking pan on a wire rack. This gradual cooling process is essential for the cake to firm up properly before the next crucial step.
After it has completely cooled, cover the cake tightly and refrigerate it for at least 8 hours, or preferably overnight. This extended chilling period is not just for convenience; it allows the flavors to meld together and the glutinous rice flour to fully hydrate, resulting in that signature incredibly chewy texture that defines Sticky Coconut Cake. Patience here will be richly rewarded with a superior dessert.
Step 9: Slice and Savor Your Creation
When the chilling time is complete, take the cake out of the refrigerator. Using a sharp knife, slice the cake into your desired portions, whether squares or elegant triangles. The dense, chewy texture combined with the crisp, golden-brown top will be immediately apparent.
Serve your delicious Sticky Coconut Cake and enjoy the unique taste of Indonesian cuisine right in your own home. This gluten-free dessert is perfect for sharing with family and friends, offering a delightful culinary experience that’s both exotic and comforting. It’s a testament to how simple ingredients can create something truly extraordinary.
Pro Tips for Sticky Coconut Cake
Use Full-Fat Coconut Milk: For the richest flavor and best texture, always opt for full-fat canned coconut milk. Light coconut milk or coconut beverage will not provide the necessary richness and density.
Don’t Skip the Chill Time: The overnight chilling is absolutely crucial for developing the signature chewy texture of Wingko Babat. Rushing this step will result in a cake that is too soft and lacks that characteristic bite.
Glutinous Rice Flour is Key: Ensure you are using glutinous rice flour (also known as sweet rice flour or Mochiko) and not regular rice flour or all-purpose flour. Glutinous rice flour is what gives the cake its unique elasticity and chew.
Watch the Broiler Closely: The broiling step is quick and can lead to burning if you’re not attentive. Keep a close eye on the cake to achieve that perfect golden-brown top without scorching.
Room Temperature Ingredients (Mostly): While the eggs are separated, ensuring they are at room temperature will help them emulsify better with the sugar and coconut milk, leading to a smoother batter. The coconut milk should be well-shaken but can be used at room temperature or slightly warmed.
Serving Suggestions for Sticky Coconut Cake
Decoration
The natural golden-brown topping achieved through broiling often requires minimal embellishment. However, for an extra touch of elegance, consider garnishing with a light dusting of shredded coconut or a few toasted coconut flakes. A single edible flower can also add a delicate and exotic flair.
Side Dishes
This rich and chewy cake pairs wonderfully with a refreshing beverage. A glass of chilled green tea or a tropical fruit juice like mango or pineapple would complement its flavors beautifully. For those who enjoy a beverage with a bit more kick, a light, crisp white wine can also be a delightful accompaniment.
Creative Serving Ideas
Cut the cooled cake into small, bite-sized cubes and serve them in colorful mini cupcake liners for a charming presentation at parties. You can also serve warm slices with a scoop of vanilla bean ice cream or a dollop of whipped cream infused with a hint of coconut extract for an indulgent dessert experience. Another idea is to layer crumbled cake pieces with fresh tropical fruits and coconut yogurt for a deconstructed trifle.
Preparation & Storage
Storing Leftovers
To store leftover Sticky Coconut Cake, wrap it tightly in plastic wrap or place it in an airtight container. This prevents it from drying out and keeps its chewy texture intact. Store the cake at room temperature for up to two days if your kitchen is cool, or refrigerate it for longer storage.
Freezing
Sticky Coconut Cake freezes remarkably well, making it a convenient option for future enjoyment. Cut the cake into individual portions, wrap each piece securely in plastic wrap, and then place them in a freezer-safe bag or container. It can be stored in the freezer for up to two months.
Reheating
To reheat frozen portions, allow them to thaw overnight in the refrigerator. For a slightly warmed treat, you can gently microwave each slice for about 10-15 seconds, or place them on a baking sheet in a preheated oven at 300°F (150°C) for a few minutes until warmed through. Be cautious not to overheat, as this can alter the cake’s texture.
Frequently Asked Questions
-
What is the best type of coconut to use for Sticky Coconut Cake?
For the most authentic and delicious Sticky Coconut Cake, it is highly recommended to use full-fat canned coconut milk and desiccated or shredded sweetened coconut. The full-fat coconut milk provides essential richness and moisture, contributing significantly to the cake’s dense, chewy texture and intense coconut flavor. Desiccated or shredded coconut adds both flavor and texture, ensuring that every bite is packed with coconut goodness. While unsweetened coconut can be used, you may need to adjust the sugar content in the recipe to compensate for the reduced sweetness.
-
Why is my Sticky Coconut Cake not chewy enough?
The chewiness of Sticky Coconut Cake is primarily attributed to the use of glutinous rice flour and the essential chilling period. Glutinous rice flour, also known as sweet rice flour or Mochiko, contains a higher starch content that gelatinizes upon baking and then firms up during chilling, creating that signature elastic and chewy consistency. If your cake lacks chewiness, it’s possible that regular rice flour was used instead of glutinous rice flour, or that the chilling period was insufficient. Ensuring the cake is refrigerated for at least 8 hours, or preferably overnight, allows the glutinous rice flour to fully absorb moisture and develop its characteristic texture.
-
Can I make Sticky Coconut Cake without eggs?
Yes, you can absolutely make a delicious egg-free version of Sticky Coconut Cake by using aquafaba as an egg substitute. Aquafaba is the liquid from a can of chickpeas and can effectively mimic the binding and leavening properties of eggs in baking. To replace the two eggs, you would typically use about 6 tablespoons of aquafaba (approximately 3 tablespoons per egg). Whisk the aquafaba until it forms soft peaks, similar to how you would whisk egg whites, before incorporating it into the batter. This substitution works wonderfully, resulting in a moist and tender cake that is still wonderfully chewy.