Challah French Toast Recipe – Fluffy & Flavorful!
Challah French toast is a delightful breakfast treat that elevates the classic dish to new heights of flavor and texture. Its inherently rich and slightly sweet profile, combined with a fluffy yet sturdy crumb, makes it the perfect vehicle for absorbing a decadent custard.
This recipe embraces the wonderful qualities of challah, transforming simple ingredients into a truly memorable meal. Get ready to experience a breakfast that is both comforting and exquisitely satisfying, perfect for lazy weekend mornings or a special brunch.
Why You Will Love This Recipe
- Exceptional Texture: The use of day-old challah bread ensures that each slice is perfectly toasted, achieving a delightful balance between a crispy exterior and a tender, custardy interior that doesn’t turn soggy.
- Rich Custard Infusion: A luxurious blend of eggs, half-and-half, honey, vanilla, and freshly grated nutmeg creates a deeply flavorful custard that permeates the bread, infusing it with warmth and sweetness.
- Simple Yet Elegant: Despite its impressive taste and texture, this challah French toast recipe is surprisingly easy to prepare, making it accessible for home cooks of all skill levels.
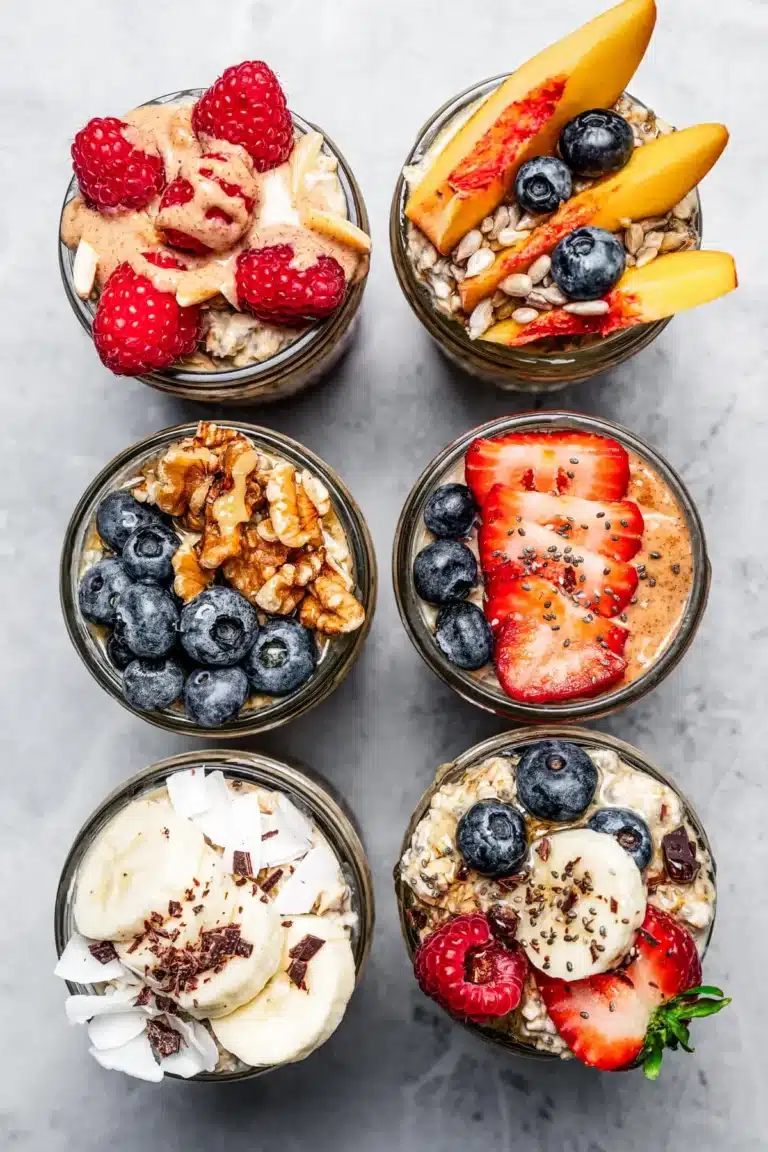
- Versatile Serving Options: Whether you prefer it simply dusted with powdered sugar or adorned with a cascade of fresh fruit, whipped cream, and maple syrup, this French toast is a versatile canvas for your favorite toppings.
- Perfect for Special Occasions: Its elevated taste and presentation make it an ideal choice for holiday brunches, family gatherings, or any occasion where you want to impress with a delicious homemade breakfast.
Ingredients You Need
The quality of your ingredients plays a crucial role in the final outcome of any dish, and this challah French toast is no exception. Opting for fresh, high-quality components will ensure the most delicious and satisfying results. Using stale challah bread is key to achieving the right texture, as it allows the bread to soak up the custard without disintegrating into a mushy mess. Similarly, using fresh vanilla extract and freshly grated nutmeg will impart a more vibrant and nuanced flavor profile than their pre-ground counterparts.
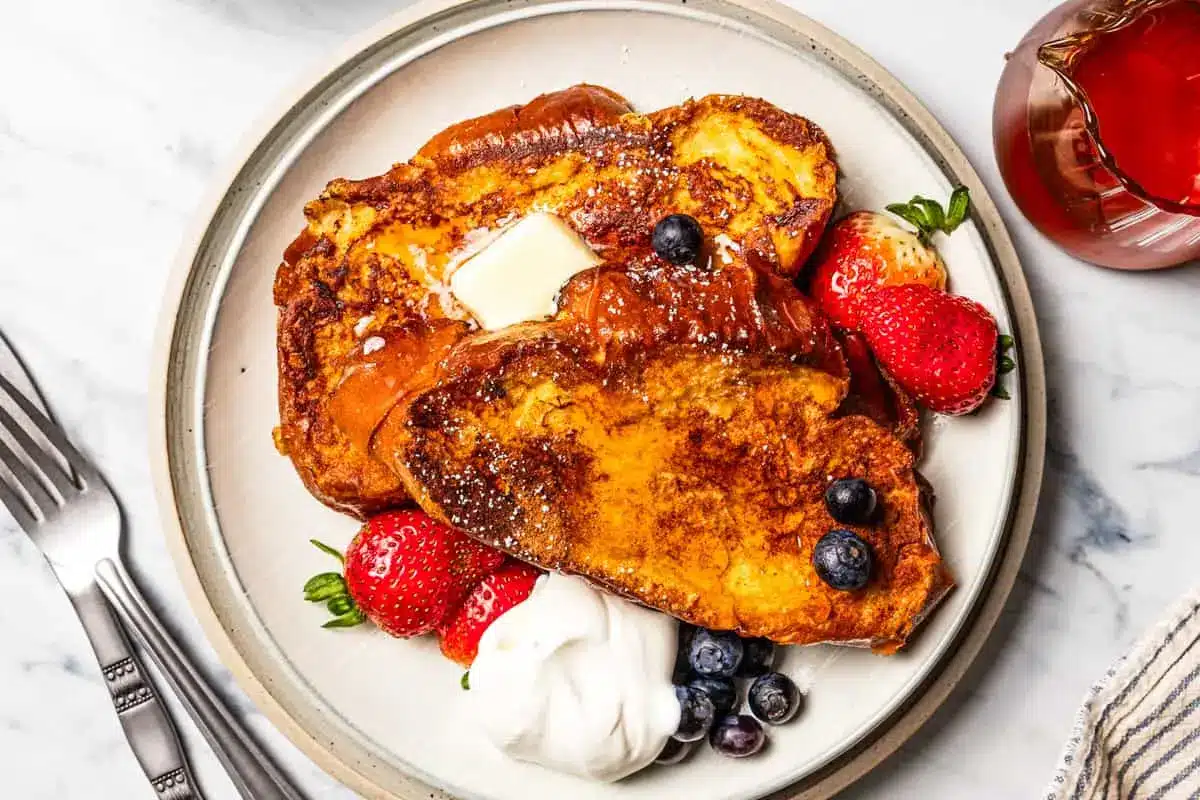
Challah French Toast

Make thick, fluffy challah bread French toast soaked in an eggy custard with cinnamon, vanilla, and grated nutmeg. Using challah is an easy way to level up homemade French toast!
- 1 loaf of challah bread, stale
- 6 large eggs
- 2 cups half and half (milk or heavy cream are also okay to use)
- 2 teaspoons pure vanilla extract
- pinch of grated nutmeg
- pinch of ground cinnamon
- 3-4 tablespoons unsalted butter, for cooking
- French toast toppings of choice (such a maple syrup, whipped cream, fresh fruit, or confectioners' sugar)
- 1Slice the bread and leave out overnight. If your challah is fresh, cut it into thick slices and lay them out on a cooling rack to dry overnight.
- 2Prepare your tools. Position a drying rack over a cookie sheet lined with parchment paper. Preheat your oven to 190°F and place a separate oven-safe drying rack over a cookie sheet lined with parchment paper in the oven. (So you will need two sets of drying racks set over lined baking sheets.)
- 3Make the custard. In a medium bowl, whisk the eggs, half & half, warm honey, salt, vanilla, nutmeg, and cinnamon until thoroughly combined, then pour into a 9x9 baking dish.
- 4Add the bread. Soak the dried bread slices in the custard, 2 slices at a time, for about 2 minutes per side. Then set the soaked bread on the wire rack (the one outside the oven) so any extra custard can drip off before cooking. Sprinkle each slice with a pinch or two of cinnamon to taste.
- 5Cook. After soaking for about 3 to 4 minutes, cook the soaked bread on a greased griddle or pan, buttered with 1 tablespoon of butter, over medium heat. Don't overcrowd the pan/griddle (I cook two slices at a time). Cook the bread slices on each side for about 2 minutes. Check for doneness judging by color. Each side should be golden brown. Make sure the slices cook through and evenly (rotate them around if your pan or griddle has hot spots). Add 1/2 tablespoon of butter to the griddle after each batch of French toast has cooked, and let it foam and subside before adding the next batch.
- 6Keep warm in the oven. This is optional, but a great way to serve your toast warm. Once they are cooked, place them on the rack that's inside the oven, batch by batch, to keep warm.
- 7Serve. I like to serve French toast with homemade whipped cream, maple syrup, and blueberries.
Keywords: French toast, challah, breakfast, brunch, eggy custard, cinnamon, vanilla, nutmeg
All the specific quantities for these delightful ingredients are readily available in the comprehensive recipe card provided within this guide.
Variations
The beauty of French toast, especially when made with a bread as versatile as challah, lies in its adaptability. You can easily tailor this recipe to suit different dietary preferences or to introduce exciting new flavor dimensions. Consider exploring these creative variations to make your challah French toast even more unique and personalized.
For a delightful dessert-inspired twist, try incorporating a tablespoon of unsweetened cocoa powder and a touch of cinnamon into your custard mixture. You can then top the finished French toast with a drizzle of chocolate sauce, a dusting of powdered sugar, and perhaps some fresh raspberries for a decadent treat that perfectly bridges the gap between breakfast and dessert.
If you’re aiming for a lower-carbohydrate option, you can experiment with using a gluten-free or almond flour-based bread that has a similar dense texture to challah. While the flavor profile will differ slightly, the principle of soaking and frying remains the same, allowing for a satisfying indulgence with adjusted ingredients.
Another exciting avenue is to infuse the custard with floral notes. A subtle addition of rosewater or orange blossom water can impart an unexpected yet delightful aroma and taste, especially when paired with fresh fruit toppings like figs or peaches. This variation transforms the humble French toast into an elegant and fragrant breakfast experience.
How to Prepare challah french toast
Step 1: Prepare the Bread
The foundation of exceptional French toast lies in the bread, and for this recipe, using day-old challah is paramount. If your challah is fresh from the bakery, you’ll need to take a deliberate step to ensure it’s properly dried out. This crucial step prevents the bread from becoming overly soggy when it absorbs the custard, allowing it to hold its shape and achieve a delightful texture during cooking.
To achieve this, slice your loaf of challah bread into thick, substantial pieces, approximately one inch in thickness. Lay these slices out in a single layer on a wire cooling rack. Allow them to air dry for at least several hours, or ideally, overnight. This allows moisture to evaporate, making the bread more porous and receptive to the custard’s richness without turning into a mushy disaster.
If you find yourself short on time, there’s a quicker method to dry out the bread. Preheat your oven to a low temperature, around 300°F (150°C). Place the challah slices on a baking sheet lined with parchment paper, ensuring they have some space between them. Bake for about 10-15 minutes, flipping them halfway through. The goal is to dry them out, not to toast them to a golden brown; they should feel slightly firm to the touch but not hard.
Step 2: Create the Custard Base
While your challah bread is drying or resting, it’s time to prepare the luscious custard that will give your French toast its signature creamy texture and rich flavor. This step is where the magic truly begins to happen, infusing the bread with delightful aromatics and sweetness.
In a medium-sized mixing bowl, gently whisk together your eggs. Aim for a consistent texture, ensuring no distinct streaks of egg white or yolk remain. The goal is to create a homogenous base that will evenly coat every piece of bread.
Next, gradually whisk in the half-and-half. For a richer, more decadent custard, you can opt for heavy cream, or for a lighter version, whole milk works beautifully. Once the liquid is incorporated, add your flavorings. Pure vanilla extract is essential for that classic French toast aroma and taste, while a pinch of freshly grated nutmeg provides a warm, comforting spice that complements the sweetness perfectly. If you have honey available, warm it slightly in the microwave for about 30 seconds to make it easier to incorporate; this adds a subtle, natural sweetness. A touch of kosher salt helps to balance the sweetness and enhance the overall flavor profile of the custard.
Step 3: Soak the Challah Slices
With your dried challah slices ready and your rich custard prepared, it’s time for the crucial soaking process. This is where the bread truly transforms, absorbing the flavorful custard and becoming wonderfully tender.
Pour the prepared custard mixture into a shallow baking dish or a wide, shallow bowl. This will provide ample surface area for dipping the bread slices. You want a dish that is wide enough to comfortably lay at least two slices of challah side-by-side without them overlapping too much.
Working with one or two slices of bread at a time, gently place them into the custard. Allow each side to soak for approximately two minutes. You’ll notice the bread beginning to soften and absorb the liquid. Avoid the temptation to over-soak, as this can lead to a soggy texture. The goal is to saturate the bread without it becoming waterlogged.
Once a slice has absorbed the custard, carefully lift it out using a spatula or your hands, allowing any excess custard to drip back into the dish. Place the soaked bread slices onto a wire rack that is set over a baking sheet. This allows any remaining excess liquid to drain away, ensuring a better cooking result. If you desire an extra hint of cinnamon, you can lightly sprinkle each soaked slice with a pinch or two of ground cinnamon at this stage.
Step 4: Cook the French Toast to Golden Perfection
Now comes the exciting part: transforming those custard-soaked challah slices into perfectly golden-brown French toast. This step requires attention to heat control to ensure an even cook and a delightful crispness.
Preheat your griddle or a non-stick skillet over medium heat. It’s essential to maintain a consistent medium heat throughout the cooking process. If the heat is too high, the outside of the French toast will burn before the inside is cooked through. If it’s too low, the toast may become greasy and not develop a nice crust.
Add about one tablespoon of unsalted butter to the preheated griddle. Allow it to melt and foam slightly before adding your soaked challah slices. Do not overcrowd the pan; cook in batches of two to four slices at a time, depending on the size of your cooking surface. This ensures that the slices have enough space and cook evenly.
Cook each slice for approximately two to three minutes per side. You’re looking for a beautiful golden-brown color on both sides, indicating that the custard has set and the bread is cooked through. Gently lift a slice with a spatula to check the color underneath before flipping.
After each batch has cooked, add another half tablespoon of butter to the griddle. This helps to create a beautiful sear and prevents sticking. Continue this process until all your challah French toast slices are cooked to perfection. Don’t forget to rotate them around if you notice any hot spots on your griddle.
Step 5: Keep Warm and Serve
As you finish cooking each batch of your glorious challah French toast, you’ll want to keep it warm and ready for serving. This step ensures that everyone at the table can enjoy their French toast at its optimal temperature and texture.
To keep the cooked French toast warm, you can utilize a low oven. Preheat your oven to its lowest setting, typically around 190-200°F (88-93°C). Place a separate wire rack over a baking sheet inside the oven. As each batch of French toast is cooked, transfer the slices to this rack. The circulating warm air will keep them wonderfully warm without further cooking or drying them out.
This method allows you to prepare all your French toast in advance if needed, making it a perfect strategy for feeding a crowd. Once all the slices are cooked and kept warm, you can then assemble them on plates and add your favorite toppings.
Serve immediately, perhaps with a generous dollop of homemade whipped cream, a drizzle of warm maple syrup, a scattering of fresh berries like blueberries or raspberries, or a light dusting of confectioners’ sugar. The combination of the warm, fluffy French toast and your chosen toppings creates an unforgettable breakfast experience. This dish, perfect for a weekend brunch, pairs wonderfully with a drink like a classic mimosa or fresh orange juice.
Step 6: Garnish and Enjoy
The final flourish for your homemade challah French toast is the art of garnishing and, of course, enjoying this delightful creation. This is where you can truly personalize your dish and make it visually appealing as well as incredibly delicious.
Consider a classic topping of pure maple syrup. Warm it slightly before pouring to allow it to cascade beautifully over the stack of French toast. A dollop of freshly whipped cream adds a touch of airiness and a creamy counterpoint to the rich toast. For added texture and a burst of freshness, a generous scattering of mixed berries – think strawberries, blueberries, and raspberries – works wonders.
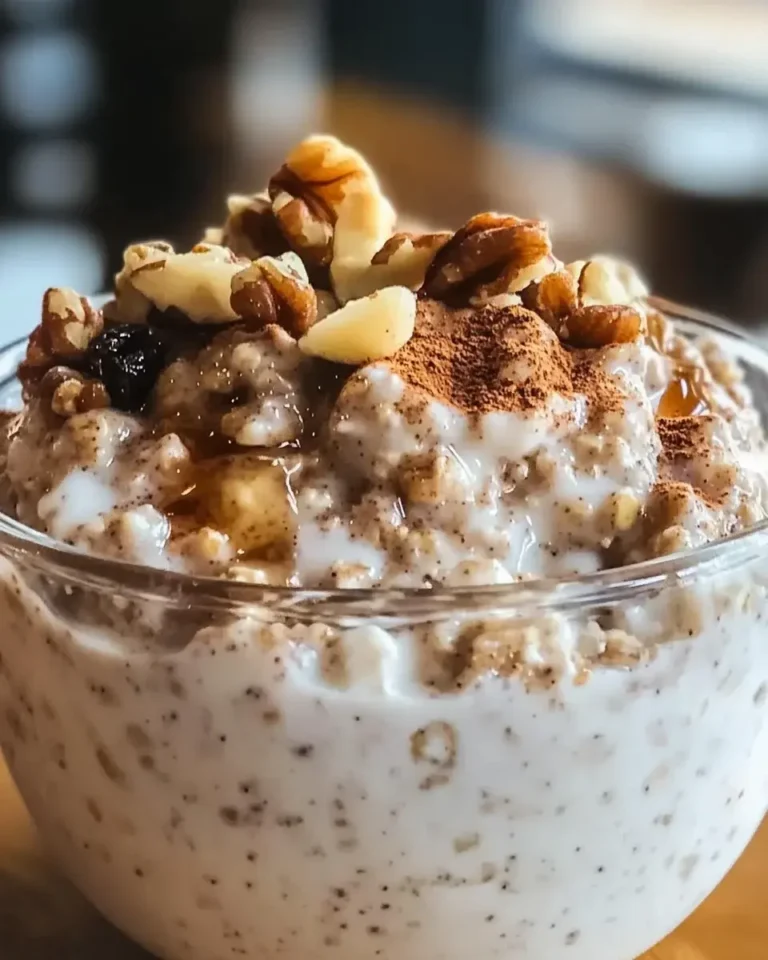
If you prefer a more subtle sweetness, a delicate dusting of confectioners’ sugar through a fine-mesh sieve provides an elegant finish. For those who enjoy a bit of crunch, a sprinkle of toasted chopped nuts, such as pecans or walnuts, can be a delightful addition. You can also explore homemade fruit compotes or a swirl of caramel sauce for an extra layer of indulgence.
Take a moment to admire your creation before diving in. The aroma alone is enough to make any morning feel special. Serve this exquisite challah French toast with a sense of accomplishment and savor every single bite. It’s a testament to how simple ingredients, prepared with care, can yield such extraordinary results.
Pro Tips for challah french toast
Elevating your challah French toast from good to absolutely extraordinary is achievable with a few insider tips. These small adjustments can make a significant difference in texture, flavor, and overall presentation, ensuring a restaurant-quality experience right in your own kitchen.
The Bread is Key: Always, always use stale, day-old challah bread. Fresh challah is too soft and will fall apart. The drying process, whether overnight or in the oven, is non-negotiable for achieving that perfect balance of soak and structure. This is the single most important factor for success.
Custard Consistency Matters: Ensure your custard is thoroughly whisked. Unevenly mixed eggs can lead to pockets of undercooked egg white or a less uniform flavor. A smooth, homogenous custard ensures every bite is consistently delicious and rich. Don’t rush this step; take your time to fully emulsify the ingredients.
Gentle Soaking Technique: Resist the urge to over-soak the bread. A few minutes per side is usually sufficient. The goal is to hydrate the bread, not to make it a sponge that will disintegrate. Observe the bread; it should feel saturated but still retain its shape and integrity when you lift it.
Medium Heat is Your Friend: Cooking over medium heat is crucial for even browning and thorough cooking. High heat will burn the outside before the inside is cooked, leaving you with a disappointing result. Patience is key; let the griddle do its work without rushing it.
Butter is for Flavor, Oil is for Smoke Point: While butter provides fantastic flavor and browning, it can burn easily at higher temperatures. If you notice your butter browning too quickly or smoking, consider adding a small splash of neutral cooking oil (like vegetable or canola oil) to the pan. Oil has a higher smoke point and will help prevent the butter from burning, ensuring a cleaner cooking process and preventing off-flavors.
Don’t Forget the Draining Rack: After soaking, placing the bread on a wire rack allows excess custard to drip away. This extra step prevents the bread from carrying too much liquid to the hot griddle, which can lead to steaming rather than frying and a less desirable texture.
Serving Suggestions for challah french toast
Decoration
The visual appeal of your challah French toast can be as delightful as its taste. Simple yet elegant garnishes can elevate the presentation, making it feel like a truly special dish. A light dusting of confectioners’ sugar through a fine-mesh sieve creates a delicate snowfall effect, adding a touch of sophistication without overpowering the flavors.
Fresh berries are not only visually appealing with their vibrant colors but also add a refreshing tartness. Arrange them artfully around the stack or scattered across the top. A swirl of homemade whipped cream, piped or dolloped, adds a lovely contrast in texture and color, providing a cloud-like topping that melts in your mouth. Edible flowers, if available, can also add a touch of whimsy and color for a truly instagrammable presentation.
Side Dishes
While challah French toast is a satisfying dish on its own, it pairs wonderfully with a variety of complementary side dishes. For a more substantial breakfast or brunch, consider serving it alongside a fluffy egg white frittata or a savory spinach quiche. These offer a protein-rich counterbalance to the sweetness of the toast.
Crispy breakfast potatoes or home fries provide a delightful textural contrast and a savory element that many enjoy. If you’re leaning towards a lighter meal, a simple fresh fruit salad, perhaps featuring melon, grapes, and citrus segments, offers a refreshing and healthy accompaniment. Even a side of perfectly cooked bacon or sausage can add a savory dimension to the overall meal.
Creative Serving Ideas
Move beyond the traditional plate and explore creative ways to serve your challah French toast. Consider building a “French toast tower” by stacking several slices and artfully arranging toppings between each layer, creating a visually impressive centerpiece for your brunch table. Another fun idea is to cut the French toast into smaller, bite-sized cubes after cooking and serve them in individual ramekins or small glasses, topped with fruit and a dollop of cream, essentially creating “French toast parfaits.”
For a playful twist, especially if serving to children, use cookie cutters to create fun shapes from the soaked bread slices before cooking. This adds an element of surprise and delight. You could also transform your French toast into a more elaborate dessert by topping it with a scoop of vanilla bean ice cream, a drizzle of caramel sauce, and toasted nuts, turning breakfast into a decadent treat. For a truly interactive experience, set up a “French toast topping bar” with a variety of fruits, nuts, sauces, and creams, allowing each guest to customize their own creation.
Preparation & Storage
Storing Leftovers
Should you be fortunate enough to have leftover challah French toast, storing it properly will ensure you can enjoy its deliciousness at a later time. The key is to let the French toast cool completely to room temperature before attempting to store it. This prevents the buildup of condensation within the storage container, which can lead to sogginess and spoilage.
Once cooled, carefully place the slices in an airtight container. You can also layer them between sheets of parchment paper to prevent them from sticking together. Store the container in the refrigerator for up to 3 to 4 days. While it’s best enjoyed fresh, proper storage will help maintain its quality and flavor for a few days.
Freezing
For longer-term storage, freezing your leftover challah French toast is an excellent option. Similar to storing leftovers, ensure the French toast is completely cooled before freezing. This is a crucial step to prevent freezer burn and maintain the best possible texture upon reheating.
Arrange the cooled French toast slices in a single layer on a baking sheet lined with parchment paper. Place the baking sheet in the freezer until the slices are firm, which typically takes about 1 to 2 hours. Once frozen, transfer the individual slices to a freezer-safe bag or an airtight container, separating them with parchment paper if needed to prevent them from sticking together. Properly stored, challah French toast can be frozen for up to 2 months.
Reheating
Reheating your challah French toast is straightforward and can be done using several methods, depending on your preference and available equipment. The goal is to warm it through without making it soggy or dry.
The oven or toaster oven is often the best method for reheating, as it helps to crisp up the exterior. Preheat your oven or toaster oven to around 350°F (175°C). Place the frozen or refrigerated French toast slices on a baking sheet (lined with parchment paper for easier cleanup) and heat for about 5-10 minutes for refrigerated slices, or 10-15 minutes for frozen slices, until warmed through. You may want to flip them halfway through for even heating.
If you’re in a hurry, the microwave can be used, though it may result in a softer texture. Microwave on a microwave-safe plate in 30-second intervals, checking for warmth. For a quick crisping after microwaving, you can briefly toast them in a toaster or skillet. Avoid reheating in the microwave for too long, as this can make the French toast rubbery.
Frequently Asked Questions
-
What makes challah bread so ideal for French toast compared to other breads?
Challah bread’s unique composition makes it exceptionally well-suited for French toast. It’s an enriched bread, meaning it’s made with eggs and a touch of sugar or honey, which gives it a tender crumb and a subtle sweetness that complements the custard beautifully. The structure of challah, being slightly denser than standard white bread but still airy, allows it to absorb a generous amount of custard without becoming overly saturated and falling apart. This absorption capability is crucial for achieving that signature moist and flavorful interior that defines perfect French toast. Furthermore, the eggy richness of the challah itself contributes to the overall luxuriousness of the final dish, enhancing the custard’s flavor and texture.
-
Can I use fresh challah bread, or does it absolutely have to be stale?
While it is possible to make French toast with fresh challah, using stale or day-old bread is highly recommended and significantly improves the final result. Fresh bread has a higher moisture content, which means it will absorb the custard much more readily, but also to the point where it can become overly sodden and disintegrate during the cooking process. Stale bread, on the other hand, has had some of its moisture evaporate, making its crumb more porous and receptive to soaking up the custard without becoming mushy. This slight dryness allows the bread to hold its shape, resulting in a French toast that has a delightful contrast between its crispy exterior and its tender, custardy interior. If you only have fresh challah, you can quickly dry it out by slicing it and leaving it on a wire rack at room temperature for several hours, or by toasting it lightly in a low oven (around 300°F/150°C) for 10-15 minutes, flipping halfway through, until it feels slightly firm but not browned.
-
My French toast often turns out unevenly cooked, with burnt edges and a soggy center. What can I do to prevent this?
Uneven cooking is a common challenge, but it can be effectively addressed by focusing on heat management and proper preparation. The primary culprit is often heat that is too high. When the griddle or pan is excessively hot, the exterior of the French toast cooks and burns rapidly before the custard in the center has a chance to set. To remedy this, ensure you are cooking over medium heat. Preheat your pan thoroughly, but then maintain a consistent medium temperature throughout the cooking process. Adding enough butter to coat the pan for each batch also helps prevent sticking and promotes even browning.
Furthermore, the soaking time plays a role. If the bread is over-soaked, it carries too much liquid to the pan, which can steam rather than fry, leading to a soggy center. Ensure you are not over-soaking (usually 2-3 minutes per side is sufficient) and that you allow excess custard to drip off before placing the bread on the griddle. Using a wire rack to drain the soaked bread for a few minutes before cooking is a highly beneficial step. Finally, don’t overcrowd the pan; cooking in batches allows each slice to receive direct heat and cook evenly.