Cauliflower Chickpea Curry Recipe That’ll Blow Your Mind!
Cauliflower Chickpea Curry has become my absolute go-to for those evenings when I need something warming yet effortlessly impressive. There’s something magical about how the cauliflower florets soak up the rich, aromatic spices while the chickpeas add that perfect hearty texture.
Last Tuesday, when rain tapped against my kitchen window, the fragrant blend of ginger, garlic, and garam masala transformed my entire home into a cozy sanctuary. This plant-based powerhouse isn’t just delicious—it’s a budget-friendly meal that delivers restaurant-quality flavor with minimal effort. Ready to discover your new favorite comfort food? Let’s dive in! Check out my other comfort recipes for more inspiration.
Why You Will Love This Recipe
- Perfect Balance of Flavor and Nutrition: This Cauliflower Chickpea Curry strikes that elusive balance between deeply satisfying and genuinely nourishing. The cauliflower florets maintain just enough bite while soaking up the velvety tomato-coconut sauce, and each spoonful delivers layers of flavor—earthy cumin, warming garam masala, and bright turmeric that dance on your tongue. Meanwhile, the protein-packed chickpeas ensure you stay full for hours.
- Quick and Adaptable for Busy Lives: What initially drew me to this Cauliflower Chickpea Curry was how it fits seamlessly into my chaotic weeknight schedule. The 30-minute miracle comes together in just one pot, saving precious cleanup time.
- Pantry Staple Friendly: The ingredients are pantry staples I always have on hand, making this my reliable “haven’t-grocery-shopped-in-days” solution. You can easily customize the spice level—dial it back for sensitive palates or crank it up when you need that extra kick.
- Dietary Inclusivity: Plus, it’s naturally vegan and gluten-free, making it perfect for accommodating various dietary needs without requiring special ingredients or extra steps. This makes it an excellent choice for gatherings with diverse dietary preferences.
Ingredients You Need
The beauty of this Cauliflower Chickpea Curry lies in its ability to transform simple, accessible ingredients into something truly spectacular. Prioritizing fresh aromatics like ginger and garlic, and good quality spices, will elevate your curry to restaurant-quality levels. Even if you don’t have every single spice on hand, you can adapt with what you have in your pantry; the key is the combination and blooming of these flavors.
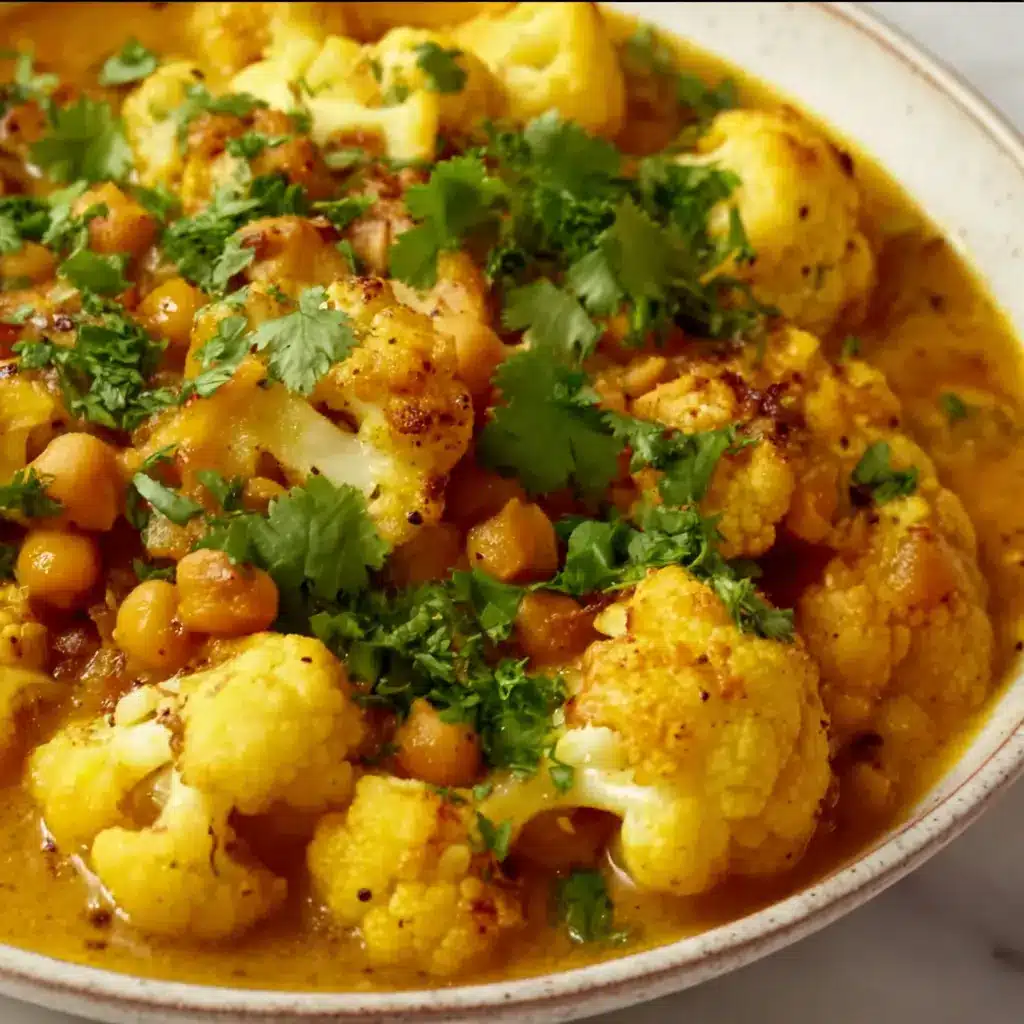
Cauliflower Chickpea Curry

A warming, aromatic, and plant-based curry that combines cauliflower florets and protein-packed chickpeas in a velvety tomato-coconut sauce. Perfectly balanced, budget-friendly, and ready in just 30 minutes.
- 1 large head of cauliflower, cut into 1½-inch florets
- 1 can (15 oz) chickpeas, drained and rinsed
- 1 large onion, diced
- 3 cloves garlic, minced
- 1 tbsp fresh ginger, grated
- 1 can (14 oz) coconut milk
- 1 can (14 oz) tomato sauce or crushed tomatoes
- 2 tbsp curry powder (or garam masala, cumin, turmeric mix)
- 2 tbsp oil for sautéing
- Salt and pepper to taste
- Fresh cilantro and lime juice for serving
- 1Heat oil in a large pot or pan over medium heat. Add onions and sauté until translucent, about 5 minutes.
- 2Add minced garlic and grated ginger, cooking until fragrant.
- 3Stir in your spice blend and toast for 30-60 seconds to bloom the flavors.
- 4Add the cauliflower florets, tossing to coat in the spice mixture.
- 5Pour in the tomato sauce and coconut milk. Bring to a simmer and cook for 15-20 minutes until cauliflower reaches your desired tenderness.
- 6Add the rinsed chickpeas and cook for an additional 5-7 minutes.
- 7Season with salt, pepper, and a squeeze of fresh lime juice. Serve hot over rice or quinoa.
Keywords: curry, vegan, gluten-free, cauliflower, chickpeas, easy dinner, comfort food, plant-based
- cauliflower florets: cut into bite-sized pieces, ensuring they will cook evenly.
- chickpeas: drained and rinsed canned chickpeas provide a quick and hearty protein source.
- onion: finely chopped, this forms the base of our flavor development.
- garlic: minced, its pungent aroma is essential to the curry’s depth.
- ginger: grated or finely minced, fresh ginger adds a warming, zesty note.
- crushed tomatoes: the vibrant, acidic base for our sauce.
- coconut milk: full-fat coconut milk will create a rich, creamy, and luxurious sauce.
- vegetable broth: adds liquid to achieve the perfect simmering consistency.
- vegetable oil: for sautéing aromatics and blooming spices.
- ground cumin: an earthy, warm spice that is foundational to Indian curries.
- ground coriander: adds a citrusy, slightly sweet note that balances the cumin.
- turmeric: for its vibrant color and earthy, slightly peppery flavor.
- garam masala: a complex blend of warming spices, added towards the end to preserve its aroma.
- cayenne pepper or red chili flakes: to adjust the heat to your personal preference.
- salt: to enhance all the other flavors.
- fresh cilantro: chopped, for garnishing and adding a burst of freshness.
- lime wedges: for serving, adding a crucial bright, acidic finish.
The quantities for these ingredients are detailed within the provided recipe card.
Variations
One of the most rewarding aspects of this Cauliflower Chickpea Curry is its incredible adaptability, allowing you to tailor it to various dietary needs and preferences with simple swaps. Consider this your canvas for culinary creativity.
For a delightful Vegan Take, this recipe is already inherently vegan, which is a massive win! Ensure your vegetable broth is certified vegan, and you are good to go. If you desire an even richer, more indulgent vegan experience, consider stirring in a tablespoon of cashew butter or a swirl of cashew cream right at the end of cooking. This adds a luxurious creaminess without altering the fundamental flavors.
Embracing a Low-Carb Lifestyle? This curry is surprisingly friendly! To minimize carbohydrates, serve your curry over riced cauliflower instead of traditional grains, or pair it with spiralized zucchini noodles for a refreshing twist. You can also add extra low-carb vegetables like bell peppers, green beans, or spinach to boost the fiber and nutrient content without adding significant carbs.
If you’re looking for an extra boost of protein, consider adding cubed extra-firm tofu, pan-fried until golden before adding it to the curry. Alternatively, a can of white beans, such as cannellini or great northern beans, can be swapped for or added alongside the chickpeas for a different, creamy texture and more plant-based protein power.
How to Prepare Cauliflower Chickpea Curry
Step 1: Preparing the Aromatics and Blooming the Spices
Begin by heating your vegetable oil in a large pot or Dutch oven over medium heat. This initial step is crucial for building the flavor foundation of your curry, as it allows the spices to release their essential oils, intensifying their aroma and taste. Be patient with this process, as it’s the bedrock of a truly delicious curry.
Once the oil is shimmering, add your finely chopped onion and sauté it until it becomes translucent and begins to soften, which typically takes about 5-7 minutes. Avoid rushing this step, as caramelized onions lend a subtle sweetness that balances the spices beautifully. Then, stir in the minced garlic and grated ginger, cooking for another minute until fragrant, being careful not to burn them. The kitchen will already start to smell wonderfully inviting at this stage.
Now comes the magic: add your ground cumin, ground coriander, turmeric, and cayenne pepper (or red chili flakes). Stir these spices constantly for about 30-60 seconds, allowing them to toast in the hot oil. This “blooming” process is critical; it unlocks their full flavor potential and aroma, transforming a simple spice blend into a complex, fragrant tapestry that will define your curry. The smell should be incredibly potent and enticing.
Step 2: Building the Sauce Base
Pour in the crushed tomatoes and vegetable broth, scraping the bottom of the pot to loosen any browned bits from the sautéed aromatics and spices. These bits are packed with flavor and will contribute significantly to the depth of your curry. Bring the mixture to a gentle simmer, allowing the flavors to begin melding together beautifully.
Stir in the drained and rinsed chickpeas. They will absorb the developing flavors of the sauce as they heat through. At this point, you can add a pinch of salt to start seasoning the curry, but it’s best to adjust the final salt level later once all the ingredients are fully combined and cooked. This ensures you don’t over-salt the dish.
Allow this tomato and chickpea mixture to simmer gently for about 10 minutes. This simmering period is essential for developing the base flavor of the sauce, allowing the tomatoes to break down slightly and meld harmoniously with the spices and aromatics. You’ll notice the sauce thickening slightly and its color deepening into a richer hue.
Step 3: Cooking the Cauliflower
Add the uniformly cut cauliflower florets to the simmering curry sauce. Ensure the florets are submerged as much as possible in the liquid so they cook evenly. If the sauce seems a little too thick for the cauliflower to absorb all the flavors, you can add an additional splash of vegetable broth or water to achieve the desired consistency.
Cover the pot and let the curry simmer gently for about 15-20 minutes, or until the cauliflower is tender-crisp. The cooking time will depend on the size of your florets and your desired level of tenderness; some prefer their cauliflower with a slight bite, while others like it very soft. Periodically stir the curry to prevent sticking and ensure even cooking of the cauliflower.
To check for doneness, carefully pierce a cauliflower floret with a fork. It should yield with slight resistance but not be mushy. If it’s still too firm, continue simmering, checking every few minutes. The goal is tender cauliflower that holds its shape, ready to soak up the delicious sauce.
Step 4: Achieving Creaminess and Final Seasoning
Pour in the full-fat coconut milk and stir it into the curry. This is where the sauce transforms into its signature creamy, velvety texture. Coconut milk adds a subtle sweetness and richness that beautifully complements the spices and balances the acidity of the tomatoes. Ensure it’s well incorporated into the sauce, creating a smooth, luscious consistency.
Now, stir in the garam masala. Adding it towards the end of cooking preserves its aromatic qualities, as garam masala is typically a blend of spices that can lose their potency if cooked for too long. This is also the time to taste and adjust your seasoning. Add more salt if needed, and more cayenne pepper if you desire a spicier curry. A small squeeze of fresh lime juice at this stage can also brighten the flavors considerably.
Let the curry simmer gently for another 5 minutes, uncovered, to allow the flavors to meld and the sauce to thicken slightly to your liking. The consistency should be thick enough to coat the back of a spoon but still pourable. If it’s too thick, add a splash more vegetable broth or coconut milk; if it’s too thin, continue simmering uncovered for a few more minutes.
Step 5: Resting and Garnishing
Once the curry has reached your desired consistency and the flavors have melded, remove it from the heat. Letting the curry rest for about 5-10 minutes before serving allows the flavors to deepen and settle, creating an even more harmonious taste experience. This brief resting period is a simple step that can make a noticeable difference in the final dish.
Just before serving, stir in most of the chopped fresh cilantro, reserving some for garnish. The fresh herbs add a burst of vibrant, herbaceous flavor that cuts through the richness of the curry. Ensure the cilantro is evenly distributed throughout the pot for a pop of green and fresh aroma in every serving.
Serve the Cauliflower Chickpea Curry hot, garnished with the remaining fresh cilantro. Offer lime wedges on the side for individuals to squeeze over their curry, adding that essential bright, zesty finish. This final touch elevates the entire dish, making it truly complete and incredibly satisfying.
Step 6: Serving with Accompaniments
Traditionally, this curry is served with fluffy basmati rice, which is perfect for soaking up every last drop of the delicious sauce. The long, slender grains of basmati absorb the flavors beautifully without becoming mushy. Ensure your rice is cooked perfectly – fluffy and separate grains are key to the ideal pairing.
For a more nutritious and flavorful alternative, consider serving the curry alongside quinoa, which adds a nutty flavor and extra protein. Another excellent option for those watching their carbohydrate intake is to serve it over a bed of cauliflower rice, creating a delightful double-cauliflower experience. Warm naan bread or roti is also a fantastic choice for scooping up the curry, offering a chewy, satisfying texture.
Don’t forget to explore additional side dishes that complement the curry’s flavors. A cooling cucumber raita or a simple side salad with a light vinaigrette can provide a refreshing contrast. A dollop of plain yogurt or a swirl of vegan sour cream can also help temper any heat and add a creamy dimension.
Pro Tips for Cauliflower Chickpea Curry
Bloom Your Spices Properly: Always toast your ground spices in the hot oil for at least 30 seconds until fragrant before adding liquids. This is a non-negotiable step for unlocking their full aromatic potential and flavor depth.
Don’t Overcook the Cauliflower: Aim for tender-crisp cauliflower. It should be easily pierced with a fork but still hold its shape. Mushy cauliflower can make the entire dish texturally unappealing.
Taste and Adjust Seasoning: The salt and spice levels in a curry can vary greatly. Always taste your curry towards the end of cooking and adjust salt, pepper, and chili flakes to your preference. A squeeze of lime juice is often the secret ingredient that brightens everything up.
Use Full-Fat Coconut Milk: For the creamiest, most luxurious sauce, opt for full-fat coconut milk. Light coconut milk will result in a thinner, less rich curry. You can also use coconut cream for an extra decadent experience.
Let It Rest: Allowing the curry to sit off the heat for 5-10 minutes before serving allows the flavors to meld and deepen. This brief resting period truly enhances the overall taste profile.
Serving Suggestions for Cauliflower Chickpea Curry
Decoration
Garnish generously with freshly chopped cilantro for a vibrant splash of green and a burst of herbaceous freshness. A few toasted slivered almonds or pumpkin seeds can add a lovely crunch and visual appeal, elevating the presentation significantly. A swirl of coconut cream or a dollop of plant-based yogurt can also add an elegant touch, creating beautiful patterns on the surface of the curry.
Side Dishes
Serve this hearty curry alongside fluffy basmati rice for the classic pairing that perfectly soaks up the rich sauce. Consider a side of warm, soft naan bread for an interactive and satisfying way to enjoy every last morsel. For a healthier option, opt for quinoa or a simple salad with a light, zesty dressing to provide a refreshing contrast to the curry’s warmth.
A cooling cucumber and mint raita is an excellent accompaniment, providing a creamy, tangy counterpoint that soothes the palate. For a more substantial meal, consider serving it with German pancakes, or perhaps a light lentil soup to round out the meal. Remember that contrast in textures and temperatures often makes a meal more enjoyable.
Creative Serving Ideas
Transform this curry into a delightful bowl meal by serving it over a bed of mixed greens and adding toppings like sliced avocado, toasted cashews, and a drizzle of sriracha. You can also spoon it into hollowed-out bread bowls for a fun, hearty presentation that’s perfect for a cozy evening. For a unique appetizer, serve small portions in individual ramekins and top with crispy fried onions or a sprinkle of chili flakes.
Consider making miniature curry pots for a party, using small oven-safe ramekins and baking them briefly before serving. Another creative idea is to use the curry as a filling for savory crepes or parathas, offering a novel way to enjoy these familiar flavors. The versatility of this dish means it can be adapted to almost any occasion or serving style you can imagine.
Preparation & Storage
Storing Leftovers
This Cauliflower Chickpea Curry stores exceptionally well, and many find the flavors actually improve after a day or two in the refrigerator. Ensure the curry has cooled completely before transferring it to an airtight container. It can be stored in the refrigerator for up to 3 to 4 days, making it an excellent candidate for meal prepping throughout the week.
When storing, it’s best to keep it in a single layer if possible to help it cool down faster and prevent bacterial growth. If you plan on having a lot of leftovers, consider portioning them into smaller containers, which makes reheating individual servings much easier and quicker. Always check for any signs of spoilage before consuming leftovers.
Freezing
Cauliflower Chickpea Curry freezes beautifully, making it a fantastic option for stocking your freezer with convenient, healthy meals. Portion the cooled curry into freezer-safe containers or heavy-duty freezer bags. Leave a small amount of headspace in the containers, as liquids expand when frozen. It can be stored in the freezer for up to 2 to 3 months.
When freezing, it’s a good idea to label your containers with the date of freezing and the contents. This helps ensure you use your frozen meals in a timely manner and keeps your freezer organized. Avoid freezing if you’ve added dairy-based yogurt or cream as a topping, as it may alter the texture upon thawing.
Reheating
To reheat refrigerated leftovers, simply warm the curry gently on the stovetop over medium-low heat, stirring occasionally, until heated through. If the curry has thickened too much, add a splash of water, vegetable broth, or coconut milk to reach your desired consistency. Be patient; slow and steady reheating preserves the texture of the cauliflower and chickpeas.
To reheat frozen curry, thaw it overnight in the refrigerator first. Then, reheat it on the stovetop as described above. Alternatively, you can reheat it directly from frozen by placing the container in a saucepan with a little added liquid and simmering gently, stirring frequently, until fully heated. Microwaving is also an option, but stovetop reheating generally yields a better texture and more evenly distributed heat.
Frequently Asked Questions
-
Can I make Cauliflower Chickpea Curry in an Instant Pot or Slow Cooker?
Yes, absolutely! For an Instant Pot, sauté the aromatics and spices using the “sauté” function. Add the remaining ingredients, seal the lid, and cook on high pressure for 3-5 minutes, followed by a quick release. For a slow cooker, sauté the aromatics and spices on the stovetop, then transfer everything to the slow cooker and cook on low for 6-8 hours or on high for 3-4 hours. The cauliflower will be very tender in both methods, but the flavors will meld beautifully.
-
Is Cauliflower Chickpea Curry very spicy? How can I adjust the heat level?
The spice level is entirely customizable. The recipe includes cayenne pepper or chili flakes for heat, but you can omit them entirely for a mild curry. If you prefer a spicier dish, add more cayenne, a fresh chopped chili pepper along with the aromatics, or a dash of your favorite hot sauce at the end. Always start with less spice and add more gradually to achieve your preferred heat.
-
What is the best way to ensure the cauliflower doesn’t become mushy?
To prevent mushy cauliflower, cut the florets into uniform, bite-sized pieces and avoid overcooking them. Add them to the simmering curry during the last 15-20 minutes of cooking. You can also opt to add some cauliflower florets earlier for a softer texture and reserve some smaller florets to add in the final 10 minutes for a firmer bite, providing a delightful textural contrast within the same dish.