Irresistible Strawberry Cheesecake Cinnabon Rolls Recipe

As I unwrapped the sweet memories of my grandmother’s kitchen, I found the perfect weekend delight: Creamy Strawberry Cheesecake Cinnabon Rolls.
The aroma of freshly baked dough mingled with the richness of cream cheese and the bright burst of juicy strawberries, creating a symphony for the senses. This indulgent recipe is not only a delightful way to elevate your brunch but also a make-ahead marvel that’s perfect for busy mornings.
Picture fluffy, soft rolls swirling with a creamy filling, all topped with a luscious vanilla glaze that makes it impossible to resist. Whether you’re looking to impress guests or simply indulge yourself, these strawberry cheesecake Cinnabon rolls will leave everyone coming back for more.
Why You Will Love This Recipe
- Indulgent Experience: These Strawberry Cheesecake Cinnabon Rolls are a perfect blend of creamy cheesecake and fresh strawberries, delivering an unforgettable taste sensation.
- Make-Ahead Marvel: Prepare them the night before and wake up to the delightful aroma, making busy mornings feel special.
- Fluffy Perfection: Each roll offers a soft, fluffy texture that melts in your mouth, enhanced by a rich vanilla glaze that ties everything together.
- Crowd-Pleasing Brunch Hit: These rolls not only satisfy your sweet tooth but are sure to impress friends and family, making them a fantastic centerpiece for any brunch gathering.
- Versatile Options: Want to mix things up? Try substituting raspberries or blueberries for a delightful spin, or pair with a cup of hot coffee for that perfect brunch moment.
Ingredients You Need
The quality of your ingredients will significantly impact the final taste of these delightful rolls. Using fresh, ripe strawberries and good quality cream cheese will truly make these stand out. Don’t be afraid to explore different types of flour or milk for unique flavor profiles.
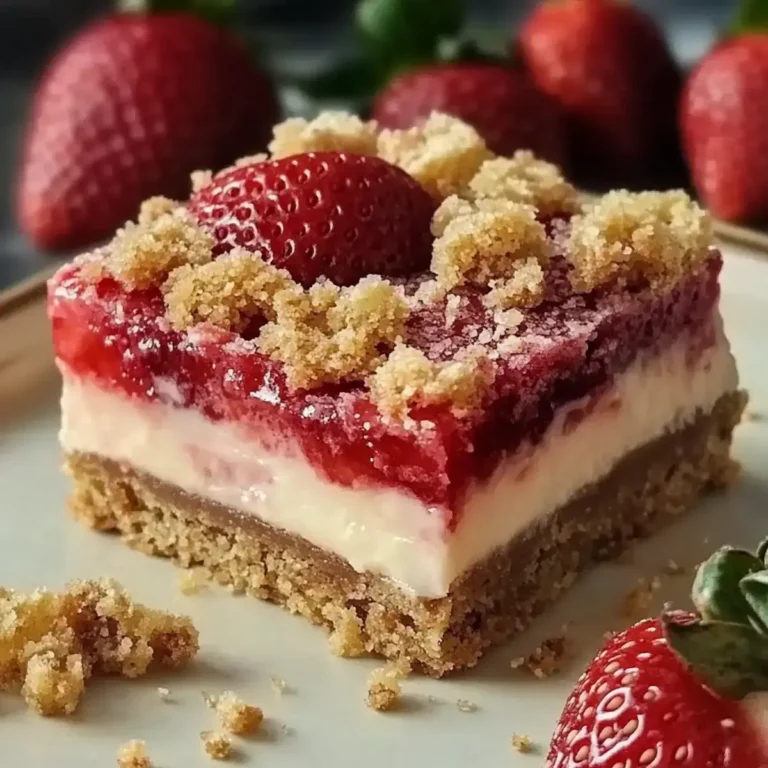
Creamy Strawberry Cheesecake Cinnabon Rolls
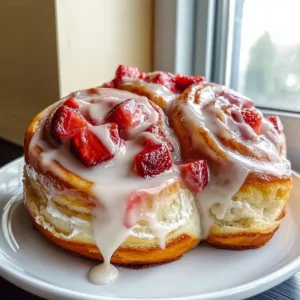
Indulgent Strawberry Cheesecake Cinnabon Rolls featuring a creamy filling and juicy strawberries, perfect for brunch. These make-ahead marvels are fluffy perfection with a luscious vanilla glaze.
- For the Dough:
- 4 cups all-purpose flour (Bread flour can add chewiness)
- 1/3 cup granulated sugar (Coconut sugar is a healthier alternative)
- 2 1/4 tsp instant yeast (Active dry yeast works but requires proofing)
- 1/2 cup whole milk (Essential for hydrating the dough)
- 1/4 cup warm water (Just a touch of moisture)
- 1/3 cup unsalted butter (Adds rich flavor)
- 2 large eggs (Use room temperature for better mixing)
- 1/2 tsp salt (Enhances flavor)
- For the Cheesecake Filling:
- 8 oz cream cheese (Opt for dairy-free for vegan rolls)
- 1/2 cup granulated sugar (Sweetens the filling)
- 1 tsp vanilla extract (Enhancer for flavor)
- 1 1/2 cups fresh strawberries (Frozen can be used if thawed)
- 1/4 cup granulated sugar (Additional sweetness for filling)
- 1 tbsp cornstarch (Thickens strawberry compote)
- 1 tsp lemon juice (Balances sweetness)
- For the Roll Filling:
- 1/3 cup light brown sugar (Adds caramelized flavor)
- 2 tsp ground cinnamon (Infuses warmth and spice)
- For the Vanilla Glaze:
- 1 cup powdered sugar (Base for the glaze)
- 2 tbsp cream cheese (Dairy-free works too)
- 2 tbsp milk (To thin out glaze)
- 1/2 tsp vanilla extract (Extra layer of flavor)
- 1Make the Dough: In a large mixing bowl, combine flour, sugar, and yeast. Add warm milk, warm water, melted butter, eggs, and salt. Knead for 5-7 minutes until smooth and elastic.
- 2First Rise: Transfer dough to a greased bowl, cover, and let rise in a warm area for about 1 hour, or until doubled in size.
- 3Prepare Filling: In a separate bowl, mix softened cream cheese, sugar, and vanilla until smooth. For the strawberry compote, combine strawberries, sugar, cornstarch, and lemon juice in a saucepan over medium heat; stir until thickened and set aside to cool.
- 4Assemble Rolls: Punch down risen dough, roll it out into a large rectangle on a floured surface. Evenly spread the cheesecake filling, followed by the cooled strawberry mixture. Roll the dough tightly and slice into 12 equal rolls.
- 5Second Rise: Place sliced rolls in a greased baking dish, cover, and refrigerate overnight for best flavor development. On baking day, allow rolls to come to room temperature and rise again for 45-60 minutes.
- 6Bake: Preheat oven to 350°F (175°C). Bake rolls for 25-28 minutes, until golden brown and hollow-sounding when tapped.
- 7Glaze: While rolls bake, whisk together powdered sugar, cream cheese, milk, and vanilla until smooth. Drizzle over warm rolls immediately after they come out of the oven.
Keywords: Strawberry Cheesecake Rolls, Cinnabon Rolls, Brunch, Breakfast, Dessert, Baking, Homemade, Make-Ahead
The detailed quantities for all ingredients are available in the recipe card above for your convenience.
Variations
For a burst of berry goodness that complements the cheesecake filling, consider a delightful berry swap. Imagine swapping the classic strawberries for tart raspberries or sweet blueberries. Each berry brings its own unique sweetness and vibrant color, transforming the rolls into a new flavor adventure.
Adding a touch of warmth can elevate these rolls significantly. A pinch of nutmeg, when incorporated into the cheesecake filling, imparts a subtle yet comforting spiced note. This addition brings a depth and complexity that is especially wonderful during cooler months, making each bite even more satisfying.
You can also personalize the creamy element by using flavored cream cheese for the filling. Strawberry or vanilla bean cream cheese can amplify the core flavors and introduce an exciting new dimension to the familiar taste of these sweet rolls. This simple change offers a delightful way to customize the recipe to your liking, ensuring a unique experience every time you bake them.
How to Prepare Strawberry Cheesecake Cinnabon Rolls
Step 1: Make the Dough
In a large mixing bowl, begin by combining the dry ingredients for the dough. This typically involves sifting together the all-purpose flour, granulated sugar, and instant yeast to ensure an even distribution. The flour provides the fundamental structure, the sugar adds a touch of sweetness to the dough itself, and the instant yeast is crucial for achieving that signature fluffy texture.
Next, introduce the wet ingredients to the dry mixture. Pour in the warm whole milk, which is essential for hydrating the dough and activating the yeast, followed by a touch of warm water to achieve the perfect consistency. Then, incorporate the melted unsalted butter, which lends a rich flavor and tenderness to the dough, and finally, add the two large eggs. Remember, room temperature eggs blend more seamlessly into the dough, creating a smoother batter.
Once all the ingredients are in the bowl, it’s time for the kneading process. Work the mixture for approximately 5 to 7 minutes until the dough transforms into a smooth, elastic ball. You’re aiming for a soft, pillowy texture that springs back gently when poked. This kneading develops the gluten, which is key to the rolls’ light and airy structure. If the dough feels too sticky, you can add a tablespoon of flour at a time, but be cautious not to add too much, as this can make the rolls tough.
Proper kneading is fundamental for achieving the characteristic Cinnabon texture. It’s the process where the proteins in the flour align and form a network, trapping the air produced by the yeast. This network will expand during rising and baking, creating the characteristic swirls and yielding a tender crumb. Ensure you knead thoroughly, reaching that smooth, elastic stage, as it’s a non-negotiable step for success.
The dough should feel supple and slightly tacky, but not stick to your fingers excessively. A good indicator of proper kneading is the “windowpane test” – you should be able to stretch a small piece of dough very thinly without it tearing, so that you can almost see through it. This demonstrates that the gluten has been sufficiently developed, promising a wonderfully tender outcome for your strawberry cheesecake Cinnabon rolls.
Step 2: First Rise
Once your dough has reached the desired smooth and elastic consistency, it’s time to let it begin its first rise. Carefully transfer the kneaded dough into a large, lightly greased mixing bowl. The grease prevents the dough from sticking to the sides as it expands, ensuring a clean release and easier handling later on.
Cover the bowl snugly with a clean, damp kitchen towel or a piece of plastic wrap. This covering is crucial as it helps to maintain a consistent temperature and humidity around the dough, creating the ideal environment for the yeast to work its magic. A damp towel prevents the surface of the dough from drying out and forming a crust.
Place the covered bowl in a warm, draft-free location in your kitchen. This could be a slightly warmed oven (turned off!), near a sunny window, or on top of your refrigerator. Allow the dough to rise for approximately 1 hour, or until it has visibly doubled in size. The dough should appear puffy, airy, and significantly larger than when you started, filling the bowl with its promising aroma.
The rising process is a critical stage where the yeast consumes sugars in the dough and releases carbon dioxide gas. This gas gets trapped by the gluten network, causing the dough to expand and become light and airy. The extended time in a warm environment ensures that the yeast is fully active and has ample opportunity to create a beautifully risen dough, setting the stage for your Strawberry Cheesecake Cinnabon Rolls to achieve their signature fluffy perfection.
Observing the dough’s transformation is one of the most rewarding parts of baking. The initial dense ball of dough will puff up into a soft, yielding mass, its surface smooth and slightly shiny. This visual cue is your signal that the gluten structure has been adequately developed and the yeast has done its job, readying the dough for the next exciting steps in creating these delightful rolls.
Step 3: Prepare Filling
While your dough is enjoying its first rise, dedicate this time to crafting the decadent fillings that will make your rolls truly irresistible. Begin with the creamy cheesecake filling. In a separate medium-sized bowl, combine 8 ounces of softened cream cheese with 1/2 cup of granulated sugar and 1 teaspoon of vanilla extract. Ensure the cream cheese is truly softened to room temperature for the smoothest possible texture; this prevents lumps and ensures a luscious, uniform filling.
Whisk these ingredients together vigorously until the mixture is completely smooth, creamy, and free of any streaks of cream cheese or sugar. The vanilla extract adds a beautiful aromatic depth that complements the richness of the cream cheese perfectly. This filling should be thick and spreadable, providing a delightful creamy contrast to the soft dough. For an extra touch of decadence, some bakers like to add a touch more vanilla or a hint of lemon zest at this stage.
Next, prepare the vibrant strawberry compote that brings a bright, fruity burst to each roll. In a small saucepan over medium heat, combine 1 1/2 cups of diced fresh strawberries with 1/4 cup of granulated sugar, 1 tablespoon of cornstarch, and 1 teaspoon of lemon juice. The sugar enhances the natural sweetness of the strawberries, while the lemon juice balances the sweetness and brightens the fruity flavor profile.
Stir this strawberry mixture constantly as it heats up. The cornstarch will act as a thickener, transforming the loose berries into a delightful, jam-like compote. Cook for approximately 5 to 7 minutes, or until the mixture has thickened significantly and the strawberries have softened but still hold some of their shape. Allow this compote to cool completely before spreading it onto the dough; spreading a warm compote can melt the cream cheese filling and potentially make the dough sticky and difficult to roll.
The success of this compote lies in achieving the right consistency – it should be thick enough to coat the back of a spoon but not so stiff that it becomes difficult to spread. If it seems too thin, you can gently simmer it for a few more minutes, stirring constantly to prevent scorching. If it appears too thick, a tiny splash of water can help loosen it. This careful attention to the compote’s texture ensures a delicious burst of strawberry flavor in every bite of your rolls, perfectly balancing the creamy cheesecake.
Step 4: Assemble Rolls
Once your dough has completed its first rise and is beautifully puffed, it’s time to deflate it and prepare for assembly. Gently punch down the dough to release the trapped air. This process not only makes the dough easier to handle but also redistributes the yeast and sugars, preparing it for the second rise.
Lightly flour a clean work surface, and then carefully transfer the deflated dough onto it. Using a rolling pin, roll the dough out into a large rectangle. Aim for a thickness of about 1/4-inch; this consistent thickness is crucial for even baking and a uniform swirl in your finished rolls. The dimensions of your rectangle will depend on your preferred roll size, but a good starting point is around 12×18 inches.
Now, it’s time to layer on the delicious fillings. Evenly spread the prepared, cooled cheesecake filling across the entire surface of the rolled-out dough. Be sure to leave a small border, about a half-inch, along one of the long edges. This border will help to seal the roll once it’s tightly wrapped, preventing the filling from oozing out during baking.
Next, carefully spoon and spread the cooled strawberry compote evenly over the cheesecake filling. Again, try to maintain that border to ensure a neat seal. The combination of the creamy cheesecake and the sweet, slightly tart strawberry compote creates a flavor profile that is simply divine and utterly irresistible in these Cinnabon-style rolls.
Starting from the long edge opposite the clean border, begin to roll the dough up as tightly as possible. Applying even pressure as you roll will help create tight, consistent swirls in your finished rolls. Once you reach the end, pinch the seam to seal the roll. This meticulous sealing prevents any of that delightful filling from escaping during its journey in the oven, ensuring a beautiful presentation and a perfect swirl in every bite.
After you have a tightly rolled log of dough, it’s time to slice it into individual rolls. Use a very sharp knife or a piece of dental floss for a cleaner cut, which prevents squishing the delicate layers. Slice the log into 12 equal portions, approximately 1 to 1.5 inches thick each. Arranging these cut rolls in a prepared baking dish is the next exciting step in creating your masterpiece.
Step 5: Second Rise
Arrange the sliced rolls snugly in a greased baking dish, ensuring they are close but not quite touching. As they rise and bake, they will expand and connect, creating that quintessential Cinnabon roll appearance. A standard 9×13 inch baking dish is usually perfect for this quantity.
Once the rolls are in their dish, cover it loosely with plastic wrap or a clean, damp kitchen towel. This covering helps to retain moisture and prevent the dough from drying out during this crucial second rise. The humidity created aids in the dough’s expansion, leading to a softer, fluffier final product.
For the best flavor development and a more relaxed morning, cover the dish and refrigerate the rolls overnight. This slow, cold fermentation allows the flavors to meld and deepen significantly, resulting in a more complex and delicious taste. It also provides the convenience of having your rolls ready to bake first thing in the morning.
On the actual baking day, remove the dish from the refrigerator. Allow the rolls to come to room temperature and continue their second rise for about 45 to 60 minutes. You’ll know they are ready when they have puffed up beautifully and appear significantly larger, nearly doubling in size and becoming noticeably lighter and airier. This final rise is essential for achieving the signature soft and fluffy texture.
The difference between a good roll and a great roll can often be attributed to this second rise. It allows the yeast to produce more carbon dioxide, creating tiny air pockets throughout the dough. These pockets are what give the rolls their light, airy texture, making them melt-in-your-mouth delicious. Patience during this stage is rewarded with superior results in your strawberry cheesecake Cinnabon rolls.
Step 6: Bake
Before you place your beautifully risen rolls into the oven, it’s time to preheat. Set your oven to 350°F (175°C). Ensuring the oven is at the correct temperature is vital for even baking, preventing the outside from burning before the inside is cooked through. A properly preheated oven guarantees a golden-brown exterior and a perfectly cooked, fluffy interior.
Carefully place the baking dish containing your risen rolls into the preheated oven. Bake for approximately 25 to 28 minutes. The exact baking time can vary slightly depending on your oven, so keep an eye on them towards the end of the baking period. You are looking for the tops of the rolls to turn a beautiful golden brown color.
A good way to test if your rolls are fully baked is to gently tap the tops. If they sound hollow, they are likely done. Alternatively, you can insert a toothpick into the center of one of the rolls; it should come out clean or with just a few moist crumbs attached. This indicates that the interior is cooked through and the dough is no longer raw.
As they bake, the most wonderful aroma will begin to fill your kitchen. The sweet scent of strawberries, combined with the warm, comforting notes of cinnamon and cream cheese, is truly intoxicating. This delicious perfume is a tell-tale sign that your Strawberry Cheesecake Cinnabon Rolls are nearing perfection, tempting everyone to gather around and eagerly await their warm, freshly baked goodness.
The golden-brown exterior not only signifies doneness but also contributes to the overall texture and flavor of the rolls. This caramelization of sugars on the surface creates a delightful slightly crisp edge that contrasts beautifully with the soft, tender interior. The visual appeal of perfectly baked rolls is just as enticing as their aroma, making them a truly irresistible treat.
Ensure you rotate the baking dish halfway through the baking time if your oven tends to have hot spots. This will promote more even browning and prevent one side from becoming darker than the other. Consistent heat is key to achieving that perfect, uniform golden-brown finish on all your strawberry cheesecake Cinnabon rolls, ensuring they look as good as they taste.
Step 7: Glaze
While your strawberry cheesecake Cinnabon rolls are still warm from the oven, it’s the perfect time to prepare and apply the luscious vanilla glaze. In a medium bowl, combine 1 cup of powdered sugar, which forms the smooth base of the glaze. To this, add 2 tablespoons of softened cream cheese; this imparts a delightful creaminess and a subtle tang that beautifully complements the sweetness.
Next, add 2 tablespoons of milk to the mixture. You can adjust this amount slightly depending on your desired glaze consistency; add more milk a teaspoon at a time for a thinner glaze, or less if you prefer it thicker. Finally, stir in 1/2 teaspoon of vanilla extract for a lovely extra layer of sweet, aromatic flavor that ties everything together.
Whisk all the glaze ingredients together until they are completely smooth, creamy, and free of any lumps. You are aiming for a consistency that is pourable but not too runny, so it coats the rolls beautifully without dripping excessively. The glaze should be luscious and glossy, ready to adorn your warm rolls.
Once the rolls are out of the oven and still warm, generously drizzle the prepared vanilla glaze over them. The warmth of the rolls will allow the glaze to melt slightly and spread, creating an irresistible, glossy finish that makes them even more decadent. This final touch is the crowning glory, adding an extra layer of sweetness and visual appeal to your Strawberry Cheesecake Cinnabon Rolls.
The way the glaze cascades over the warm, fluffy rolls is a sight to behold. It pools slightly in the crevices between the swirls, creating pockets of pure sugary bliss. This final step not only enhances the visual appeal but also adds that perfect sweet counterpoint to the rich strawberry and creamy cheesecake filling, ensuring a truly satisfying treat.
Pro Tips for Strawberry Cheesecake Cinnabon Rolls
Room Temperature Ingredients: Always ensure your eggs and cream cheese are at room temperature before you begin. This makes them much easier to cream together, resulting in a smoother, more homogenous filling that won’t leave little lumps in your cheesecake layer. Properly softened cream cheese is a game-changer for achieving that luscious texture we all crave in these rolls.
Overnight Magic: For the absolute best flavor and a stress-free morning, refrigerate the assembled rolls overnight. This slow, cold fermentation allows all the flavors to meld and deepen beautifully. You’ll wake up to perfectly proofed rolls ready to bake, and the taste development is significantly enhanced, making these rolls truly extraordinary.
Prevent Sogginess: Make sure your fresh strawberries are well-drained after dicing and before adding them to the filling. Excess moisture can seep into the dough during baking, leading to soggy bottoms or a less desirable texture. Patting them dry with a paper towel is a simple yet effective step to prevent this.
Testing Doneness: Use a toothpick to check if your rolls are baked through. Insert it into the center of a roll; it should come out clean or with just a few moist crumbs. Avoid overbaking, as this can lead to dry rolls. The goal is a perfectly cooked, fluffy interior with a golden-brown exterior.
Freezing for Later: Consider baking the rolls and allowing them to cool completely before freezing. Wrap them tightly in plastic wrap and then in foil. Thaw them overnight in the refrigerator and then reheat them in the oven or microwave for a quick, delicious treat that tastes almost as good as fresh. This makes them a convenient option for future cravings.
Serving Suggestions for Strawberry Cheesecake Cinnabon Rolls
Decoration
The vanilla glaze provides a beautiful, glossy finish, but you can enhance the visual appeal further. A scattering of finely chopped fresh strawberries directly on top of the warm glaze adds vibrant color and a hint of freshness. For an extra touch of elegance, consider a delicate drizzle of melted white chocolate or a dusting of powdered sugar just before serving.
Side Dishes
To balance the sweetness and richness of these rolls, a fresh fruit salad is an excellent choice. A medley of seasonal fruits like melon, berries, and kiwi provides a refreshing contrast. Alternatively, a simple side of creamy Greek yogurt with a sprinkle of granola can offer a pleasing texture and a lighter option to complement the decadent rolls.
For a more traditional brunch experience, savory elements pair wonderfully. Fluffy scrambled eggs seasoned lightly with salt and pepper offer a perfect savory counterpoint. Crispy maple-cured bacon or savory breakfast sausages also provide a delightful salty and smoky contrast that enhances the overall meal.
Creative Serving Ideas
Elevate your brunch with a festive touch by serving these rolls alongside a classic mimosa or a sparkling fruit juice blend. The bubbles and citrus notes cut through the sweetness beautifully, making each bite feel even more indulgent. For a truly decadent dessert experience, serve a warm roll with a scoop of high-quality vanilla bean ice cream, allowing it to melt luxuriously over the pastry.
Preparation & Storage
Storing Leftovers
If you happen to have any leftover strawberry cheesecake Cinnabon rolls, storing them properly will help maintain their freshness and delightful texture. For room temperature storage, place the cooled rolls in an airtight container or wrap them tightly in plastic wrap. They should remain soft and delicious for up to 2 days when kept at room temperature.
Freezing
These rolls freeze exceptionally well, making them a fantastic make-ahead treat. It is often best to freeze them before the glaze is applied. Wrap each individual baked roll securely in plastic wrap, and then place them in a freezer-safe bag or container. Properly stored, they can maintain their quality for up to one month in the freezer.
Reheating
To enjoy your leftover or frozen rolls anew, reheating is simple. For rolls stored at room temperature or in the refrigerator, a quick zap in the microwave for about 15-20 seconds per roll is usually enough to warm them through. If reheating frozen rolls, allow them to thaw overnight in the refrigerator first, then warm them gently in the microwave or for a few minutes in a preheated oven (around 300°F/150°C) until they are heated through and soft.
Frequently Asked Questions
-
How do I choose the best strawberries for this recipe?
Absolutely! When selecting strawberries, look for those that are vibrant red with a glossy appearance, indicating peak ripeness and sweetness. Avoid any berries that show dark spots or feel overly soft, as these can be signs of overripeness or bruising, which might affect their flavor and texture. Ideally, choose strawberries that have a sweet, fragrant aroma, as this is a strong indicator of their deliciousness. If possible, purchasing strawberries during their peak season will yield the best flavor and quality for your recipe.
-
How should I store leftover Strawberry Cheesecake Cinnabon Rolls?
For keeping your rolls fresh at room temperature, place them in an airtight container, ensuring they are sealed to prevent moisture loss. They will maintain their optimal softness and flavor for up to 2 days when stored this way. If you plan to keep them longer, it’s best to wrap them tightly in plastic wrap before placing them in a sealed container and refrigerating them, where they can stay fresh for up to 5 days. Remember to gently reheat them before serving to enjoy their warm, comforting appeal.
-
Can I freeze the Strawberry Cheesecake Cinnabon Rolls?
Yes, you can! To freeze the rolls for future enjoyment, it’s recommended to do so before adding the glaze for the best results. Wrap each unglazed roll very tightly first in plastic wrap, and then in aluminum foil to protect them from freezer burn. Stored this way, they can be kept in the freezer for up to one month. When you’re ready to enjoy them, simply remove them from the freezer and allow them to thaw overnight in the refrigerator before reheating them in the oven or microwave until warm.