Ultimate Muffin Tin Mini Apple Pies
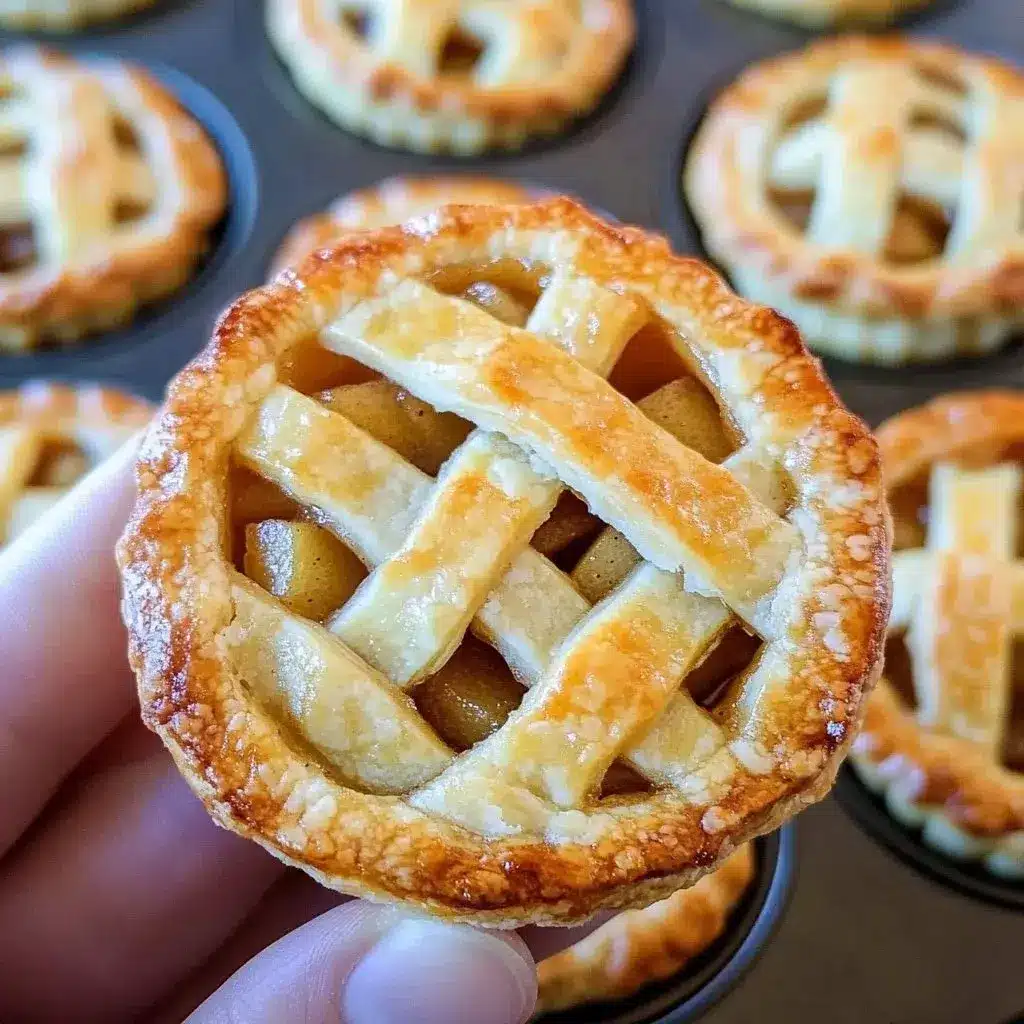
Fall is in the air, and what better way to embrace the season than with warm, comforting Muffin Tin Mini Apple Pies? These delightful little treats are perfect for gatherings, picnics, or just a cozy night at home. Can you imagine the smell of baking apples and cinnamon wafting through your kitchen? It’s a scent that evokes feelings of warmth and nostalgia, reminiscent of family gatherings and homemade desserts.
Muffin Tin Mini Apple Pies are not just easy to make; they are also incredibly versatile. You can customize the flavors, adjust the sweetness, or even swap out the apples for your favorite fruits. Whether you prefer tart Granny Smith apples or sweet Fuji apples, this recipe allows for creativity and personalization. Plus, these mini pies are the perfect size for everyone to enjoy without feeling too indulgent.
Why You Will Love This Recipe
- Delicious Flavor: The combination of sweet apples and warm cinnamon creates a mouthwatering flavor profile that is universally loved and undeniably comforting.
- Simplicity and Speed: With readily available ingredients and straightforward steps, you can whip up these homemade pies in a remarkably short amount of time, making them perfect for weeknight treats or last-minute entertaining.
- Exceptional Versatility: This recipe serves as a fantastic base, allowing for endless customization through different fruit choices, spice blends, or even by adding nuts or a hint of citrus zest to the filling.
- Perfect for Sharing: The individual portion sizes make these mini pies ideal for parties, potlucks, or any event where you want to offer guests their own delightful dessert without the need for slicing or serving utensils.
- Engaging for All Ages: This recipe is wonderfully family-friendly, providing a fun and accessible activity for children to participate in, from rolling out dough to filling the crusts.
Ingredients You Need
The foundation of any great dessert lies in the quality of its ingredients. For these Muffin Tin Mini Apple Pies, opting for fresh, ripe apples is key to achieving the perfect balance of sweetness and tartness. Using high-quality refrigerated pie crusts simplifies the process significantly, ensuring a flaky and delicious pastry base without the fuss of making dough from scratch. A well-balanced blend of sugar and cinnamon provides that classic apple pie flavor that everyone adores.
Muffin Tin Mini Apple Pies

These delightful mini apple pies made in a muffin tin are the perfect fall treat, customizable and easy to share, capturing the essence of homemade goodness.
- 1 package refrigerated pie crusts
- 1 egg (for egg wash)
- 3 cups peeled and chopped apples (Granny Smith or Fuji are great choices)
- 1 teaspoon cinnamon
- 1 tablespoon lemon juice (to prevent browning)
- 1 tablespoon all-purpose flour (to thicken the filling)
- 1Preheat your oven to 375°F (190°C) and grease a muffin tin.
- 2Roll out the refrigerated pie crusts on a floured surface and cut into circles.
- 3Press the dough circles into the greased muffin tin cups.
- 4In a mixing bowl, combine chopped apples, sugar, cinnamon, lemon juice, and flour. Stir until well mixed.
- 5Spoon the filling into each pie crust, ensuring they are generously filled without overflowing.
- 6Cut out circles or strips from the remaining crust to create lattice tops and place them on each pie.
- 7Beat the egg and brush the tops of the pies with it.
- 8Bake for 20-25 minutes until golden brown and apples are tender.
- 9Allow the mini pies to cool slightly before removing them from the tin.
- 10Serve warm, optionally with a scoop of vanilla ice cream.
Keywords: apple pie, Baking Recipe, Easy Dessert, Fall Dessert, Mini Pies
- refrigerated pie crusts: one package will be sufficient for a standard muffin tin.
- apples: approximately 3 cups, peeled, cored, and chopped into bite-sized pieces; Granny Smith or Fuji are excellent choices for their flavor profile.
- granulated sugar: about ½ cup, adjustable to the sweetness of your apples and personal preference.
- cinnamon: 1 teaspoon, a quintessential spice that complements apples beautifully.
- lemon juice: 1 tablespoon, essential for preventing the apples from browning and adding a touch of brightness.
- all-purpose flour: 1 tablespoon, used to thicken the apple filling, preventing a watery result.
- egg: 1, beaten, for an egg wash that will give your mini pies a beautiful golden sheen.
The precise quantities for each ingredient are readily available in the accompanying recipe card, ensuring you have all the details needed for perfect execution.
Variations
For a truly decadent twist, consider a caramel apple variation. Simply add a generous drizzle of thick caramel sauce directly into the apple filling before spooning it into the crusts. This introduces a rich, buttery sweetness that pairs exceptionally well with the tart apples, elevating the entire dessert experience with an extra layer of flavor complexity.
Another delightful adaptation involves transforming these into cheesecake-stuffed mini pies. Before adding the apple mixture, place a small dollop of sweetened cream cheese filling into the bottom of each crust. This creates a surprising and luxurious creamy center that perfectly complements the baked apples, offering a sophisticated and utterly irresistible dessert.
For a taste of summer any time of year, try the mixed berry variation. Replace the apples with a vibrant mix of fresh or frozen berries like blueberries, raspberries, and blackberries. These berries cook down beautifully, offering a burst of tartness and color that is equally as satisfying as the classic apple filling, making these mini pies incredibly versatile.
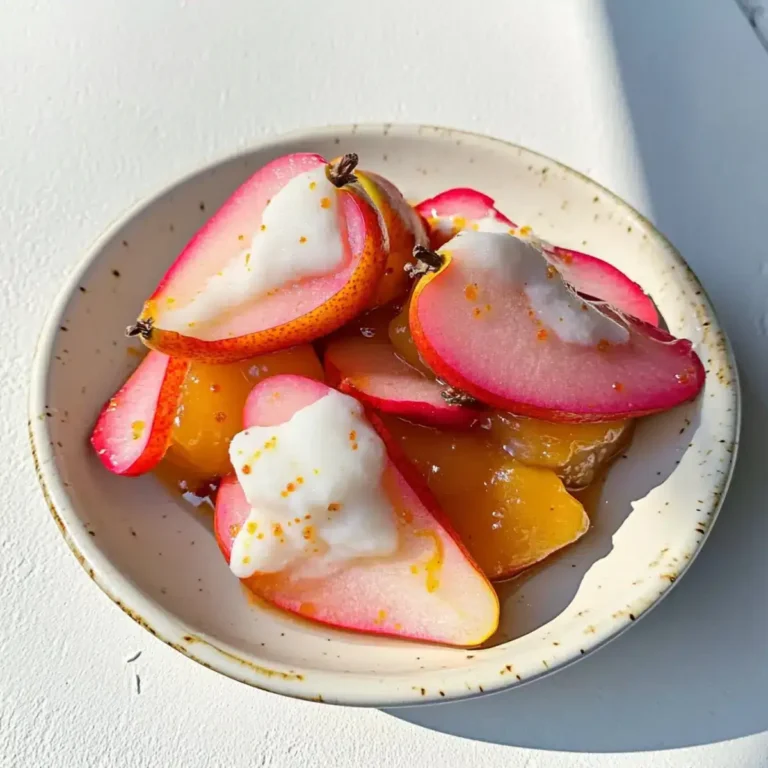
If you’re aiming for a lighter, more refined flavor, a spiced pear variation is an excellent choice. Swap the apples for ripe pears and introduce a pinch of ground ginger to the filling. This combination offers a subtly different sweetness and a delightful warmth that’s perfect for cooler evenings, providing a unique and sophisticated flavor profile.
When considering dietary needs, these mini pies are remarkably adaptable. For a vegan treat, ensure your pie crust is plant-based and replace the egg wash with a simple mixture of plant-based milk and a touch of maple syrup. These small adjustments allow everyone to enjoy these charming desserts without compromise.
How to Prepare Muffin Tin Mini Apple Pies
Step 1: Prepare Your Workspace and Oven
Begin this delightful baking adventure by preheating your oven to a steady 375°F (190°C). This consistent temperature is crucial for ensuring the pastry bakes to a perfect golden crisp while the apple filling becomes tender and beautifully caramelized. Simultaneously, take a moment to thoroughly grease each cup of your muffin tin. A light coating of butter or baking spray will prevent the mini pies from sticking, guaranteeing easy removal and preserving their charming presentation.
The preparation of your workspace is just as vital. Ensure you have a clean, dry surface for rolling out the dough and ample space for mixing your ingredients. Having all your tools and ingredients within easy reach will make the entire process flow smoothly, allowing you to focus on the joy of baking. Think of this as setting the stage for a truly delicious outcome.
Step 2: Crafting the Perfect Crust Base
Unroll your refrigerated pie crusts onto a lightly floured surface, being careful not to overwork the dough, which can lead to a tough pastry. The key here is to handle it gently to maintain its flakiness. Use a round cookie cutter or a glass that is slightly larger than the diameter of your muffin tin cups—approximately 4 to 5 inches is ideal. Press down firmly to cut out clean circles from the dough.
Once your dough circles are cut, it’s time to nestle them into the prepared muffin tin. Carefully drape each dough circle into a greased muffin cup, gently pressing it down to fit snugly against the bottom and sides. Ensure there are no large air bubbles trapped underneath, and try to create an even thickness for consistent baking. This forms the sturdy yet delicate base for your luscious apple filling.
Step 3: Assembling the Irresistible Apple Filling
In a medium-sized mixing bowl, combine your peeled, cored, and chopped apples. Add the granulated sugar and cinnamon, stirring gently until the apple pieces are evenly coated. This initial coating helps to draw out some of the apple’s natural juices and distribute the sweet, warm spice. Next, incorporate the lemon juice; this not only prevents the apples from turning an unappetizing brown color but also adds a subtle, bright tang that balances the sweetness.
Finally, sprinkle the all-purpose flour over the apple mixture. Toss everything together gently until the flour is fully incorporated, acting as a natural thickener for the filling. This step is crucial for preventing a watery pie filling and ensuring that your mini pies hold their shape beautifully after baking. The aroma of the spiced apples at this stage is simply heavenly, a true preview of the deliciousness to come.
Step 4: Generously Filling Your Mini Pies
Now comes the satisfying part: filling your pie crusts. Spoon the prepared apple mixture into each of the dough-lined muffin tin cups. Aim to fill them generously, packing the apples in without overstuffing to the point of overflowing. An even distribution of filling across all the mini pies will ensure that they all bake uniformly, resulting in consistent texture and flavor in every bite.
Ensure that the filling is mounded slightly in the center, as the apples will cook down during baking. This slight mound will also help prevent the filling from seeping out of the crust as easily. Take a moment to admire the colorful medley of apples nestled within their pastry cradles, ready for their transformation in the oven. This visual appeal is part of the joy of making these delightful treats.
Step 5: Creating Beautiful Pie Tops
Using the remaining pie crust dough, you have several options for creating attractive tops for your mini pies. You can roll out the dough thinly and cut out smaller circles to create solid lids, or for a more decorative approach, cut thin strips of dough to weave a classic lattice top. A simple cut-out star or heart shape from the dough can also add a charming touch, especially for special occasions. Get creative and have fun with this step!
If you opt for a lattice top, arrange the strips in an overlapping pattern over the apple filling, pressing the ends gently onto the edge of the bottom crust to seal. For solid lids, place the cut-out circles over the filling and crimp the edges with a fork or your fingers to seal them securely. Whichever method you choose, ensure the tops are well-sealed to keep the delicious apple filling contained during baking.
Step 6: The Golden Touch with Egg Wash
In a small bowl, whisk together the egg with a tablespoon of water or milk. This simple mixture, known as an egg wash, is the secret to achieving that coveted bakery-quality golden-brown crust. Using a pastry brush, gently and evenly apply the egg wash over the entire surface of your pie tops—whether they are solid lids or lattice work. Be thorough but avoid letting the egg wash drip down the sides of the crusts, as this can sometimes prevent them from puffing up properly.
The egg wash not only enhances the visual appeal, giving your Muffin Tin Mini Apple Pies a beautiful, appetizing sheen, but it also helps to create a crispier texture on the crust. This final touch before baking adds an extra layer of professionalism to your homemade treats, making them look as delightful as they will taste. It’s a small step that makes a significant difference in the final presentation.
Step 7: Baking to Perfection
Carefully place the prepared muffin tin into the preheated oven. Bake for approximately 20 to 25 minutes. The exact baking time may vary slightly depending on your oven, so keep a watchful eye. You’re looking for the pie crusts to turn a beautiful, deep golden brown and for the apple filling to be visibly bubbling slightly. If the crusts start to brown too quickly before the filling is tender, you can loosely tent the muffin tin with aluminum foil for the remainder of the baking time.
The aroma that fills your kitchen as these mini pies bake is simply intoxicating—a warm, sweet symphony of baked apples and cinnamon. Once they are perfectly golden and the filling is bubbly, carefully remove the muffin tin from the oven using oven mitts. Allow the pies to cool in the tin for a few minutes before attempting to remove them; this allows them to set up slightly, making them easier to handle without falling apart.
Step 8: Cooling and Revealing Your Masterpieces
Once removed from the oven, resist the urge to dive in immediately! Let the Muffin Tin Mini Apple Pies cool in the tin for about 10 to 15 minutes. This crucial cooling period allows the molten apple filling to thicken and set properly, preventing your pies from becoming a delicious, yet messy, puddle when you try to remove them. It’s a small pause that ensures a much more enjoyable eating experience.
After this initial cooling period, you can begin the exciting process of unmolding your mini pies. Gently run a thin knife or offset spatula around the edges of each pie to loosen them from the muffin tin cups. Then, carefully lift each mini pie out of the tin. Place them on a wire rack to cool further, or serve them warm, as they are absolutely delightful with a slightly gooey interior and a crisp crust.
Pro Tips for Muffin Tin Mini Apple Pies
Apple Selection Matters: For the best flavor and texture, choose apples that hold their shape well when baked and offer a good balance of sweetness and tartness. Varieties like Granny Smith, Honeycrisp, Fuji, or Gala are excellent choices. Avoid softer apples like Red Delicious, which can turn mushy.
Don’t Overwork the Dough: When working with refrigerated pie crusts, handle them as little as possible. Overworking the dough develops the gluten too much, resulting in a tough, less flaky crust. If the dough becomes too warm and sticky, refrigerate it for a few minutes before continuing.
Prevent a Soggy Bottom: To ensure your crusts remain crisp, you can lightly brush the bottom of the pie crusts with a thin layer of melted butter or even a bit of melted chocolate before adding the apple filling. This creates a slight barrier against the moisture from the fruit.
Spice It Up: While cinnamon is classic, consider adding other warm spices to your apple filling for more complexity. A pinch of nutmeg, a whisper of ground ginger, or a tiny dash of allspice can beautifully enhance the overall flavor profile of your mini pies.
Cooling is Key: Patience is a virtue, especially when it comes to baking. Allow your Muffin Tin Mini Apple Pies to cool sufficiently before serving. This allows the filling to set, making them easier to handle and preventing hot filling from causing burns.
Serving Suggestions for Muffin Tin Mini Apple Pies
Decoration
Elevate your Muffin Tin Mini Apple Pies with a dusting of powdered sugar that mimics a fresh snowfall, or a sprinkle of coarse turbinado sugar for a delightful crunch and sparkle. A tiny dollop of whipped cream, perhaps infused with a hint of vanilla or cinnamon, adds a cloud-like texture. For a more elaborate touch, consider drizzling them with warm caramel sauce or a rich chocolate ganache.
Side Dishes
These individual pies are wonderfully self-contained, but they truly shine when paired with classic accompaniments. A scoop of premium vanilla bean ice cream is an eternal favorite, melting into the warm pie for a perfect textural contrast. A side of freshly whipped cream, light and airy, offers a refreshing counterpoint to the sweet, spiced apples.
Consider serving them alongside a warm mug of spiced apple cider, especially during the autumn months. The complementary flavors create a cozy, comforting experience. For a more savory counterpoint, a small cheese board featuring mild, creamy cheeses like brie or a sharp cheddar can offer an unexpected but delightful pairing.
Creative Serving Ideas
For a charming brunch or breakfast treat, serve them warm with a dollop of Greek yogurt and a scattering of toasted nuts. Present them as part of a dessert tasting menu, offering a trio of mini pies with different fruit fillings or spice combinations. Imagine a “build-your-own-pie” station where guests can add their preferred toppings like caramel, chocolate, or extra whipped cream.
These mini pies are also perfect for themed parties. For a fall harvest party, arrange them on a rustic wooden board adorned with cinnamon sticks and small gourds. For a holiday gathering, sprinkle edible glitter or gold dust over the tops for an extra festive touch. They are incredibly versatile and can be adapted to suit any occasion.
Preparation & Storage
Storing Leftovers
To keep your Muffin Tin Mini Apple Pies tasting their best, allow them to cool completely to room temperature before storing. Once cooled, place them in an airtight container. They can be stored on the counter for up to two days if they are meant to be consumed relatively quickly, but for longer freshness and to maintain optimal texture, it’s best to refrigerate them. In the refrigerator, they will remain delicious for about 3 to 4 days.
Freezing
These mini pies freeze exceptionally well, making them a perfect candidate for make-ahead baking. Once completely cooled, wrap each individual pie tightly in plastic wrap to prevent freezer burn. Then, place the wrapped pies into a freezer-safe airtight container or a heavy-duty freezer bag. Properly stored, they can maintain their quality in the freezer for up to three months, ensuring you have a delicious homemade treat ready whenever the craving strikes.
Reheating
When you’re ready to enjoy a frozen mini pie, the best method is to thaw it overnight in the refrigerator. Once thawed, you can gently reheat it in a preheated oven at around 350°F (175°C) for 10-15 minutes, or until warmed through and the crust is crisp again. If reheating pies that have been stored in the refrigerator, a quick trip in a microwave for about 30-60 seconds will warm them up, or a few minutes in a toaster oven will restore their crispness.
Frequently Asked Questions
- Can I prepare the Muffin Tin Mini Apple Pies ahead of time, and if so, what is the best method for doing so?
Yes, these delightful mini pies are excellent candidates for advance preparation. You can prepare the apple filling up to two days in advance and store it covered in the refrigerator; just ensure you give it a good stir before using. The crusts can also be cut out and stored layered between parchment paper in an airtight container in the refrigerator for about 24 hours. For the best results in terms of crust texture and fresh flavor, it is recommended to assemble and bake the pies on the same day, or at most, the day after preparing the components.
- What are the most effective ways to store and reheat leftover Muffin Tin Mini Apple Pies to maintain their quality and texture?
Once cooled completely, leftovers should be stored in an airtight container in the refrigerator for up to 3-4 days. For longer preservation, freezing is an excellent option; wrap individual pies tightly and store them in a freezer-safe bag for up to three months. To reheat, thaw frozen pies overnight in the fridge, then bake at 350°F (175°C) for 10-15 minutes until warm and crisp. Refrigerated pies can be reheated in a microwave for about 30-60 seconds for a quick warm-up, or in a toaster oven or oven for a crisper finish.
- What are some creative substitutions for the apples, and are there any popular variations that significantly change the flavor profile?
The possibilities for apple substitutions are vast and exciting! Pears, with their subtle sweetness, make a wonderful stand-in, often enhanced with a pinch of ginger. A mix of berries, such as blueberries, raspberries, and blackberries, offers a vibrant, tart, and juicy alternative, particularly delightful in warmer months. For a truly transformative flavor, consider adding caramel sauce to the filling for a decadent caramel apple twist, or introducing a dollop of sweetened cream cheese to create a cheesecake-apple hybrid that is incredibly rich and satisfying.