Irresistible Hot Honey Feta Chicken recipe
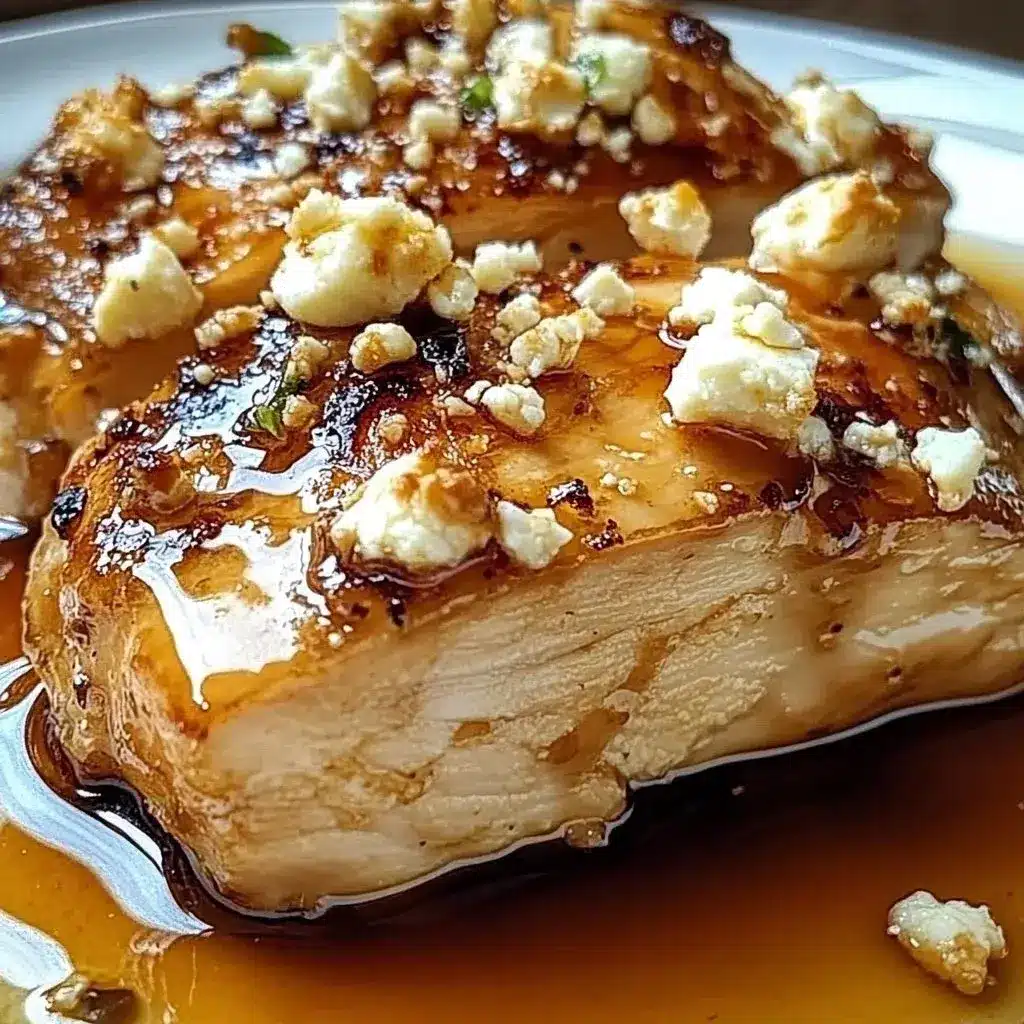
Are you searching for a dish that perfectly balances sweet and savory notes with an exciting kick? Look no further than Hot Honey Feta Chicken, a culinary creation that promises to delight your taste buds and simplify your weeknight dinners. This scrumptious recipe brings a delightful twist to traditional chicken preparations, masterfully combining the rich, tangy flavor of feta cheese with the comforting sweetness of honey and a hint of delightful spice.
Imagine succulent, tender chicken breasts, lovingly coated in a unique honey-feta mixture, then baked to golden-brown perfection in your oven. This dish is not only incredibly delicious but also astonishingly simple to prepare, making it an enticing option for both casual family meals and more elaborate gatherings. The harmonious blend of flavors ensures a memorable dining experience that will have everyone asking for seconds.
Why You Will Love This Recipe
- Flavor Explosion: The interplay between the sweet honey and the salty, tangy feta cheese creates a complex flavor profile that is both comforting and exhilarating.
- Effortless Preparation: With minimal chopping and simple mixing, this recipe comes together quickly, making it ideal for busy individuals and families.
- Versatile Pairing: This dish is incredibly adaptable; it pairs wonderfully with a wide array of side dishes, from fresh salads to roasted vegetables and hearty grains.
- Crowd-Pleasing Appeal: The unique sweet and savory combination is universally loved, ensuring that even the pickiest eaters will find something to enjoy.
- Elegant Simplicity: Despite its straightforward preparation, the resulting dish has an elegant presentation that can easily grace any dinner table.
Ingredients You Need
The success of any dish hinges on the quality of its ingredients, and for Hot Honey Feta Chicken, freshness and flavor are paramount. Opting for good quality chicken breasts ensures a tender and juicy outcome, while fresh feta cheese will provide that signature salty tang that complements the sweetness of the honey beautifully. Using a good extra virgin olive oil will add a subtle fruity note to the glaze.
Hot Honey Feta Chicken

A delicious and simple dish that combines sweet honey with salty feta cheese, perfect for any occasion. This recipe elevates traditional chicken dinners with a unique honey-feta mixture, baked to perfection, making it an enticing option for a weeknight meal or a special occasion. Its simplicity and versatility make it a favorite for impressing guests or enjoying a flavorful homemade meal.
- 4 pieces chicken breasts (Make sure they are of even thickness for even cooking.)
- 1/2 cup crumbled feta cheese (Can substitute with dairy-free feta.)
- 1/4 cup honey (A sugar-free alternative can be used.)
- 2 tablespoons olive oil (Extra virgin for better flavor.)
- 1 tablespoon red pepper flakes (Adjust for spice preference.)
- Salt and pepper to taste (Season according to your taste.)
- Fresh parsley for garnish (optional, chop finely before garnishing)
- 1Preheat your oven to 375°F (190°C).
- 2In a mixing bowl, combine honey, crumbled feta cheese, olive oil, red pepper flakes, salt, and pepper to create a glaze.
- 3Arrange chicken breasts in a baking dish, allowing space between each piece.
- 4Pour the honey-feta mixture over the chicken, ensuring it is well-coated.
- 5Bake in the preheated oven for 25-30 minutes or until the chicken reaches an internal temperature of 165°F (74°C).
- 6Check the chicken after the initial baking time and continue baking in 5-minute increments if not done.
- 7Let the chicken rest for 5 minutes after removing it from the oven.
- 8Garnish with chopped fresh parsley before serving.
Keywords: Chicken, Dinner Recipe, Easy Meal, Feta, Honey
- chicken breasts: ensures a lean and tender base for the flavorful glaze.
- crumbled feta cheese: provides a sharp, salty counterpoint to the sweet honey, creating a delightful contrast.
- honey: brings a natural sweetness and helps to create a beautiful caramelization during baking.
- olive oil: acts as a binder for the glaze and helps to ensure the chicken stays moist.
- red pepper flakes: adds a subtle warmth and a gentle kick of spice that awakens the palate.
- salt and pepper: essential seasonings to enhance and balance all the flavors in the dish.
- fresh parsley: a bright, herbaceous garnish that adds a pop of color and freshness.
Quantities and specific measurements for these ingredients can be found within the dedicated recipe card.
Variations
To truly make this dish your own, consider a few delightful variations that cater to different tastes and dietary needs. For a refreshing Mediterranean twist, stir in some chopped sun-dried tomatoes and Kalamata olives into the honey-feta mixture before baking; their intense flavors will meld beautifully with the chicken and cheese.
If you are looking for a lighter, herb-infused option, incorporate a generous amount of freshly chopped basil, dill, or even a hint of rosemary into the glaze. These fresh herbs add an aromatic complexity that elevates the entire dish, making it feel even more gourmet.
For those seeking a heartier meal, consider a stuffed chicken variation. Carefully create a pocket in each chicken breast and fill it with a mixture of feta, spinach, and finely minced garlic before coating with the honey glaze. This method ensures pockets of molten cheese and savory fillings throughout the tender chicken.
How to Prepare Hot Honey Feta Chicken
Step 1: Prepping the Stage for Flavor
Begin your culinary journey by gathering all the necessary ingredients and giving them a preliminary check. Ensuring everything is within easy reach before you start mixing and cooking will lead to a smoother and more enjoyable preparation process. Take a moment to measure out your honey, crumble your feta cheese if it isn’t already, and prepare any other components that require pre-measurement or chopping.
If you plan on using fresh parsley as a garnish, now is the perfect time to finely chop it and set it aside in a small bowl. This simple act of mise en place, or preparing your ingredients beforehand, is a cornerstone of efficient cooking and helps prevent any last-minute rushes. It also allows you to focus on the creative aspects of combining flavors without the stress of searching for ingredients.
Consider the chicken breasts themselves; ensure they are of relatively uniform thickness. If you have some significantly thicker than others, you can gently pound them with a meat mallet or the flat side of a heavy pan. This uniformity is key to ensuring that all pieces of chicken cook through at the same rate, preventing some from becoming dry while others remain undercooked.
Step 2: Crafting the Irresistible Glaze
The heart of this dish lies in its incredibly simple yet profoundly flavorful honey-feta glaze. In a medium-sized mixing bowl, combine the sweet, viscous honey with the tangy, crumbled feta cheese. Add the smooth olive oil, which will help emulsify the glaze and add a lovely richness. Finally, incorporate the red pepper flakes for that signature touch of heat, along with a generous pinch of salt and freshly ground black pepper.
Whisk these ingredients together vigorously until they form a cohesive and visually appealing mixture. The feta will begin to soften and integrate into the honey, creating a slightly chunky, golden-hued glaze that promises to cling beautifully to the chicken. This mixture is where the magic truly begins, marrying the distinct flavors into a harmonious blend that will bake into a sublime topping.
It’s important to taste this glaze before applying it to the chicken, even though it’s not meant to be eaten on its own. This brief taste test allows you to adjust the seasoning, ensuring the salt and pepper levels are to your liking and that the heat from the red pepper flakes is present but not overwhelming. Remember, the flavors will intensify slightly as they bake and caramelize on the chicken.
Step 3: Arranging the Chicken for Optimal Baking
Select a baking dish that is appropriately sized for your chicken breasts. A 9×13 inch baking dish often works well, but ensure the chicken pieces are not overcrowded. Lay the chicken breasts in a single layer within the dish, leaving a small amount of space between each piece.
This spacing is crucial for allowing the heat to circulate evenly around each chicken breast. If the chicken pieces are too close together, they may steam rather than bake properly, and the glaze might not caramelize as effectively. Proper arrangement ensures that every piece of chicken gets an equal share of the delicious honey-feta topping and cooks to a perfect tenderness.
Consider the depth of your baking dish. A dish with slightly raised sides is ideal, as it will contain the glaze and any juices released from the chicken during baking, preventing a mess in your oven and keeping all that wonderful flavor concentrated around the meat. This preparation step is simple but vital for achieving consistent results every time you make this recipe.
Step 4: Generously Coating with the Flavorful Glaze
Now comes the exciting part: generously spoon the prepared honey-feta mixture over each chicken breast. Use a spatula or a spoon to ensure that every surface of the chicken is thoroughly coated with the glaze. Pay particular attention to getting some of the mixture into any crevices or uneven surfaces of the chicken.
This even coating is what ensures that the sweet and savory flavors are distributed throughout the chicken as it bakes. The red pepper flakes will become distributed as well, providing those delightful little bursts of warmth in every bite. Don’t be shy with the glaze; it’s designed to create a luscious, slightly caramelized topping that is the hallmark of this dish.
Some cooks like to push the feta bits into the chicken slightly to ensure they adhere well during the baking process. You can also tilt the baking dish slightly to encourage the glaze to pool around the edges of the chicken, allowing for even more flavor infusion. This step is where the chicken truly begins to transform into the star of your meal.
Step 5: The Alchemy of Baking
Preheat your oven to the specified temperature, typically around 375°F (190°C). A properly preheated oven is essential for ensuring the chicken cooks evenly and the glaze develops its characteristic caramelization. Once the oven is ready, carefully place the baking dish with the glazed chicken into the center rack.
Bake the chicken for approximately 25 to 30 minutes. The exact baking time will depend on the thickness of your chicken breasts and the accuracy of your oven. During this time, the honey will bubble and caramelize, the feta will soften and meld, and the chicken will cook through to a tender perfection.
The goal is for the chicken to reach an internal temperature of 165°F (74°C) to ensure it is safely cooked. Using an instant-read meat thermometer is the most reliable way to check for doneness. Insert the thermometer into the thickest part of a chicken breast, avoiding any bone or connective tissue, to get an accurate reading. This step is paramount for food safety and achieving the best texture.
Step 6: Verifying Perfect Doneness
Once the initial baking time has elapsed, it’s crucial to verify that the chicken is cooked through. Carefully remove the baking dish from the oven, leaving the oven on if further cooking is needed. Use your meat thermometer to check the internal temperature of one or two of the chicken breasts.
If the thermometer reads 165°F (74°C) or higher, your chicken is perfectly cooked and ready to rest. If the temperature is still below this threshold, return the dish to the oven and continue baking in 5-minute increments. Check the temperature after each interval to avoid overcooking, which can lead to dry chicken.
Observing the glaze is also a good indicator. It should be bubbly and slightly golden brown, with the feta showing signs of melting into the honey. The chicken juices should run clear when you pierce it with a fork or knife. This careful monitoring ensures that the chicken is not only safe to eat but also perfectly tender and juicy.
Step 7: The Vital Resting Period
After removing the chicken from the oven, resist the urge to slice into it immediately. Allowing the chicken to rest for about 5 to 10 minutes is a critical step that significantly impacts the final texture and juiciness of the meat. During baking, the muscle fibers in the chicken tighten, forcing the juices towards the center.
When you let the chicken rest, these fibers relax, allowing those delicious, flavorful juices to redistribute throughout the meat. If you cut into the chicken too soon, all those juices will escape onto the plate, leaving you with drier, less flavorful chicken. This simple step makes a world of difference in the overall quality of your dish.
Tent the chicken loosely with aluminum foil during its resting period to keep it warm. This short pause allows the internal temperature to continue to equalize slightly and ensures that every bite you take is moist and succulent. It’s an essential step that transforms good chicken into great chicken.
Step 8: The Grand Finale – Garnish and Serve
Once the chicken has had its well-deserved rest, it’s time for the final flourish. If you prepared fresh parsley, sprinkle it generously over the top of the chicken breasts. The vibrant green of the parsley provides a beautiful visual contrast to the golden glaze and adds a fresh, aromatic element to the dish.
You can also add a final drizzle of honey or a few extra crumbles of feta if desired, though it’s usually not necessary. The chicken is now ready to be served immediately. The aroma wafting from the dish will be irresistible, a testament to the delightful flavors you’ve created.
Present the Hot Honey Feta Chicken proudly on your dinner table. It’s a dish that looks as good as it tastes, and the rich, glossy glaze coating the chicken is truly a sight to behold. Enjoy the culmination of your efforts and the delicious rewards of this simple yet spectacular recipe.
Pro Tips for Hot Honey Feta Chicken
- Adjust the Heat: Feel free to increase or decrease the amount of red pepper flakes to suit your personal preference for spice. For a milder version, omit them entirely or use a pinch of smoked paprika for a smoky undertone.
- Quality Feta Matters: Using a good quality block feta cheese that you crumble yourself will yield a better texture and flavor than pre-crumbled varieties, which can sometimes be dry.
- Uniformity is Key: For the most even cooking, ensure your chicken breasts are of similar thickness. You can achieve this by pounding thicker ones slightly or slicing very large breasts horizontally.
- Don’t Skip Resting: The 5-10 minute resting period after baking is non-negotiable for juicy chicken. It allows the juices to redistribute, ensuring moistness in every bite.
- Broiler Boost: For an extra touch of caramelization and a slightly crispier topping, you can briefly place the chicken under the broiler for the last 1-2 minutes of cooking, watching it very closely to prevent burning.
Serving Suggestions for Hot Honey Feta Chicken
Decoration
A sprinkle of fresh, finely chopped parsley is the classic and most effective garnish for Hot Honey Feta Chicken. Its bright green color provides a beautiful visual contrast against the golden-brown chicken and the rich glaze. For an added touch of elegance, a few extra crumbles of feta cheese can be sprinkled over the top just before serving, adding little pockets of creamy tanginess. You could also add a very light drizzle of extra honey for shine, if desired, but be mindful not to make it overly sweet.
Side Dishes
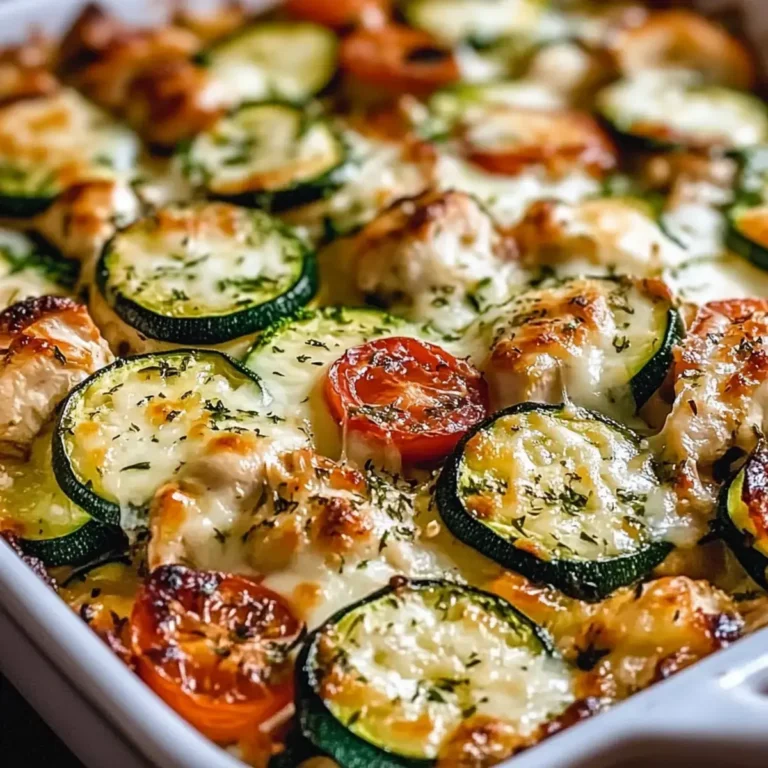
This dish is incredibly versatile and pairs wonderfully with a variety of accompaniments. Roasted vegetables such as Brussels sprouts, asparagus, bell peppers, or zucchini complement the richness of the chicken beautifully. A crisp, fresh garden salad with a light lemon vinaigrette provides a refreshing counterpoint. For a more substantial meal, consider serving it alongside fluffy couscous, fragrant quinoa, or even creamy mashed potatoes that can soak up any extra glaze.
Creative Serving Ideas
Transform Hot Honey Feta Chicken into a stunning appetizer by slicing the cooked chicken into bite-sized pieces and arranging them on a platter, perhaps with toothpicks for easy enjoyment. You could also serve it over a bed of wilted spinach or kale for a healthier, complete meal that incorporates greens directly. For a more casual approach, shred the cooked chicken and use it in warm pita bread with some tzatziki sauce and lettuce for delicious chicken wraps.
Preparation & Storage
Storing Leftovers
To properly store any leftover Hot Honey Feta Chicken, allow the chicken to cool down to room temperature first. Once cooled, transfer the chicken and any remaining glaze into an airtight container. It is crucial to use a container that seals well to prevent the chicken from drying out and to keep it fresh in the refrigerator. Properly stored leftovers can be enjoyed for up to 3 to 4 days.
Ensure that the container is not overfilled, as this can lead to less efficient cooling. If there is a significant amount of excess glaze in the bottom of the baking dish, you can scoop some of it into the container with the chicken, as it will add moisture and flavor upon reheating. Avoid storing the chicken with very wet sides like a large salad, as this can make them soggy.
When storing, it’s best to keep the chicken in its original baked form rather than cutting it into smaller pieces beforehand. This helps to retain more moisture within the meat during the storage period. If you notice any signs of spoilage, such as an off odor or slimy texture, it is best to discard the leftovers immediately.
Freezing
Hot Honey Feta Chicken can indeed be frozen for longer-term storage, allowing you to enjoy this delicious meal at a later date. For the best results, cool the chicken completely. Then, wrap individual portions tightly in plastic wrap or aluminum foil, ensuring there are no air pockets. For an extra layer of protection against freezer burn, place the wrapped portions into a heavy-duty freezer bag or an airtight freezer-safe container.
Properly frozen, the chicken can maintain its quality for up to 2 to 3 months. Beyond this period, while still safe to eat, the texture and flavor might begin to degrade. Label your freezer bags or containers with the date of freezing to keep track of how long the chicken has been stored. Thaw frozen chicken in the refrigerator overnight before reheating.
It is generally advisable to freeze the chicken without any accompanying side dishes, as some sides may not freeze or reheat as well. The honey-feta glaze tends to freeze and reheat quite well, retaining most of its flavor and texture. When freezing, consider portioning the chicken into single-serving sizes to make reheating more convenient and efficient.
Reheating
Reheating Hot Honey Feta Chicken is a straightforward process that aims to restore its original moistness and flavor. The most recommended method for reheating is in the oven. Place the leftover chicken in a small, oven-safe dish, and add a tablespoon or two of water or chicken broth to help create steam and prevent drying. Cover the dish tightly with foil and reheat in a preheated oven at approximately 350°F (175°C) for about 10 to 15 minutes, or until heated through.
Alternatively, you can reheat the chicken in a skillet over medium-low heat. Add a splash of water or broth to the skillet, cover, and gently warm the chicken, stirring occasionally. This method can help re-caramelize the glaze slightly. Microwaving is also an option for quick reheating, but it can sometimes result in a less desirable texture. If microwaving, place the chicken on a microwave-safe plate, cover it loosely, and heat in short intervals, checking for warmth.
Regardless of the method chosen, it’s important to ensure the chicken is heated thoroughly to an internal temperature of 165°F (74°C) for food safety. Avoid overheating, as this can cause the chicken to become dry and tough. If the glaze seems a little dry after reheating, you can warm a teaspoon of honey separately and drizzle it over the chicken for a fresh gloss and sweetness.
Frequently Asked Questions
-
Can I use frozen chicken breasts for this recipe?
Yes, you can use frozen chicken breasts, but it is crucial to thaw them completely before proceeding with the recipe. Cooking chicken directly from frozen can lead to uneven cooking, where the outside may become overcooked and dry before the inside is safely cooked through. Thaw the chicken in the refrigerator overnight for the best and safest results. Ensure that the thawed chicken is patted dry before applying the glaze, as excess moisture can prevent the glaze from adhering properly and caramelizing effectively.
-
How can I make this dish gluten-free?
This Hot Honey Feta Chicken recipe is naturally gluten-free, assuming that all the individual ingredients you use are also gluten-free. The primary components—chicken, feta cheese, honey, olive oil, red pepper flakes, salt, and pepper—typically do not contain gluten. However, it’s always a good practice to check the labels of your ingredients, especially pre-crumbled feta cheese or flavored honeys, to ensure there are no hidden gluten-containing additives or cross-contamination risks. This makes it an excellent option for those following a gluten-free diet without requiring any modifications.
-
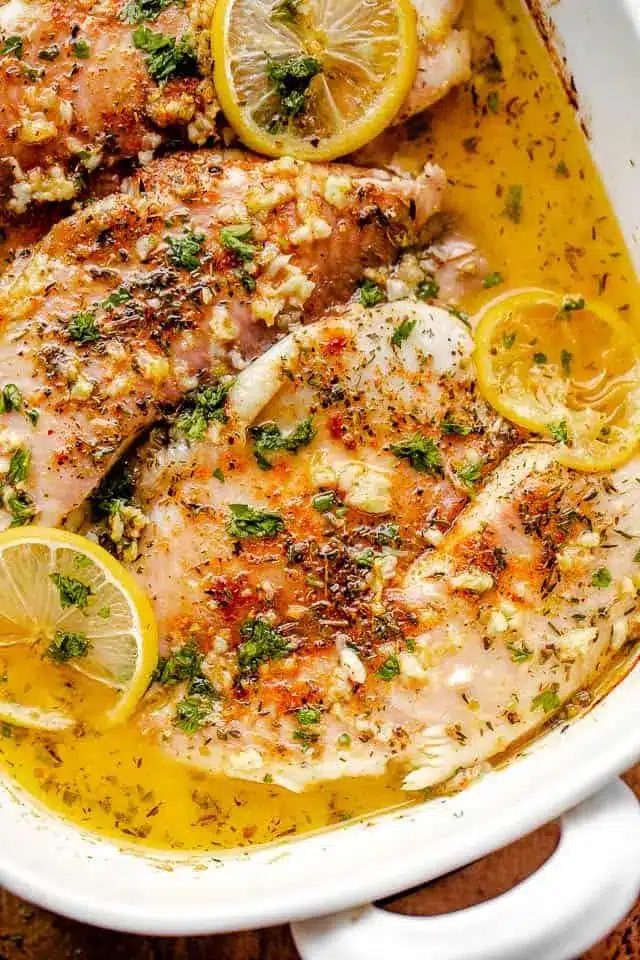
What side dishes pair best with Hot Honey Feta Chicken?
The sweet and savory profile of Hot Honey Feta Chicken makes it exceptionally versatile in terms of side dishes. For a refreshing contrast, a crisp green salad with a light vinaigrette is an excellent choice, cutting through the richness of the chicken. Roasted vegetables like asparagus, broccoli, bell peppers, or sweet potatoes offer a complementary texture and flavor. Heartier options such as fluffy couscous, fragrant jasmine rice, or creamy mashed potatoes are also fantastic, as they can soak up the delicious honey-feta glaze. Consider serving it with a side of baked lemon chicken for a double dose of flavorful poultry.