Mediterranean Bowl Recipe – A Meal Prep Favorite
This Mediterranean bowl recipe is a vibrant and wholesome creation, designed to bring the fresh, sun-kissed flavors of the Mediterranean directly to your table. It’s a delightful medley of textures and tastes, featuring fluffy lemony quinoa as the base, complemented by crispy, cumin-spiced chickpeas and tender roasted vegetables.
Each spoonful offers a journey through savory, tangy, and herbaceous notes, perfectly balanced by creamy hummus and cooling tzatziki. This dish isn’t just a meal; it’s an experience that nourishes both body and soul, making it an ideal choice for a healthy and satisfying lunch or dinner. Prepare to fall in love with the simplicity and incredible flavor packed into every bowl.
Why You Will Love This Recipe
- Effortless Preparation: Despite its impressive array of components, this recipe is surprisingly straightforward to assemble, making it perfect for busy weeknights or quick lunches. All elements can be prepared concurrently, minimizing your time in the kitchen.
- Nutrient-Dense Powerhouse: Packed with plant-based protein from quinoa and chickpeas, healthy fats from olive oil and olives, and a wealth of vitamins and minerals from fresh vegetables, this bowl is a complete and balanced meal that will keep you feeling energized.
- Customizable Delight: The beauty of a bowl recipe lies in its adaptability. Feel free to swap out vegetables, grains, or even proteins to suit your personal preferences or what you have on hand, ensuring endless delicious variations.
- Ideal for Meal Prep: This recipe shines as a meal prep champion. The components hold up exceptionally well in the refrigerator, allowing you to prepare several days’ worth of lunches or dinners in one go, saving you valuable time during the week.
- Bursting with Flavor: The combination of zesty lemon, warm cumin, fresh herbs, tangy tzatziki, and savory olives creates a complex and incredibly satisfying flavor profile that is both refreshing and deeply comforting.
Ingredients You Need
Crafting these delightful Mediterranean bowls begins with selecting high-quality, fresh ingredients. The vibrancy of the vegetables, the richness of the olive oil, and the distinct character of the spices all contribute to the final flavor profile. Using good ingredients ensures that each component shines, creating a harmonious and delicious end product that is both visually appealing and incredibly tasty.
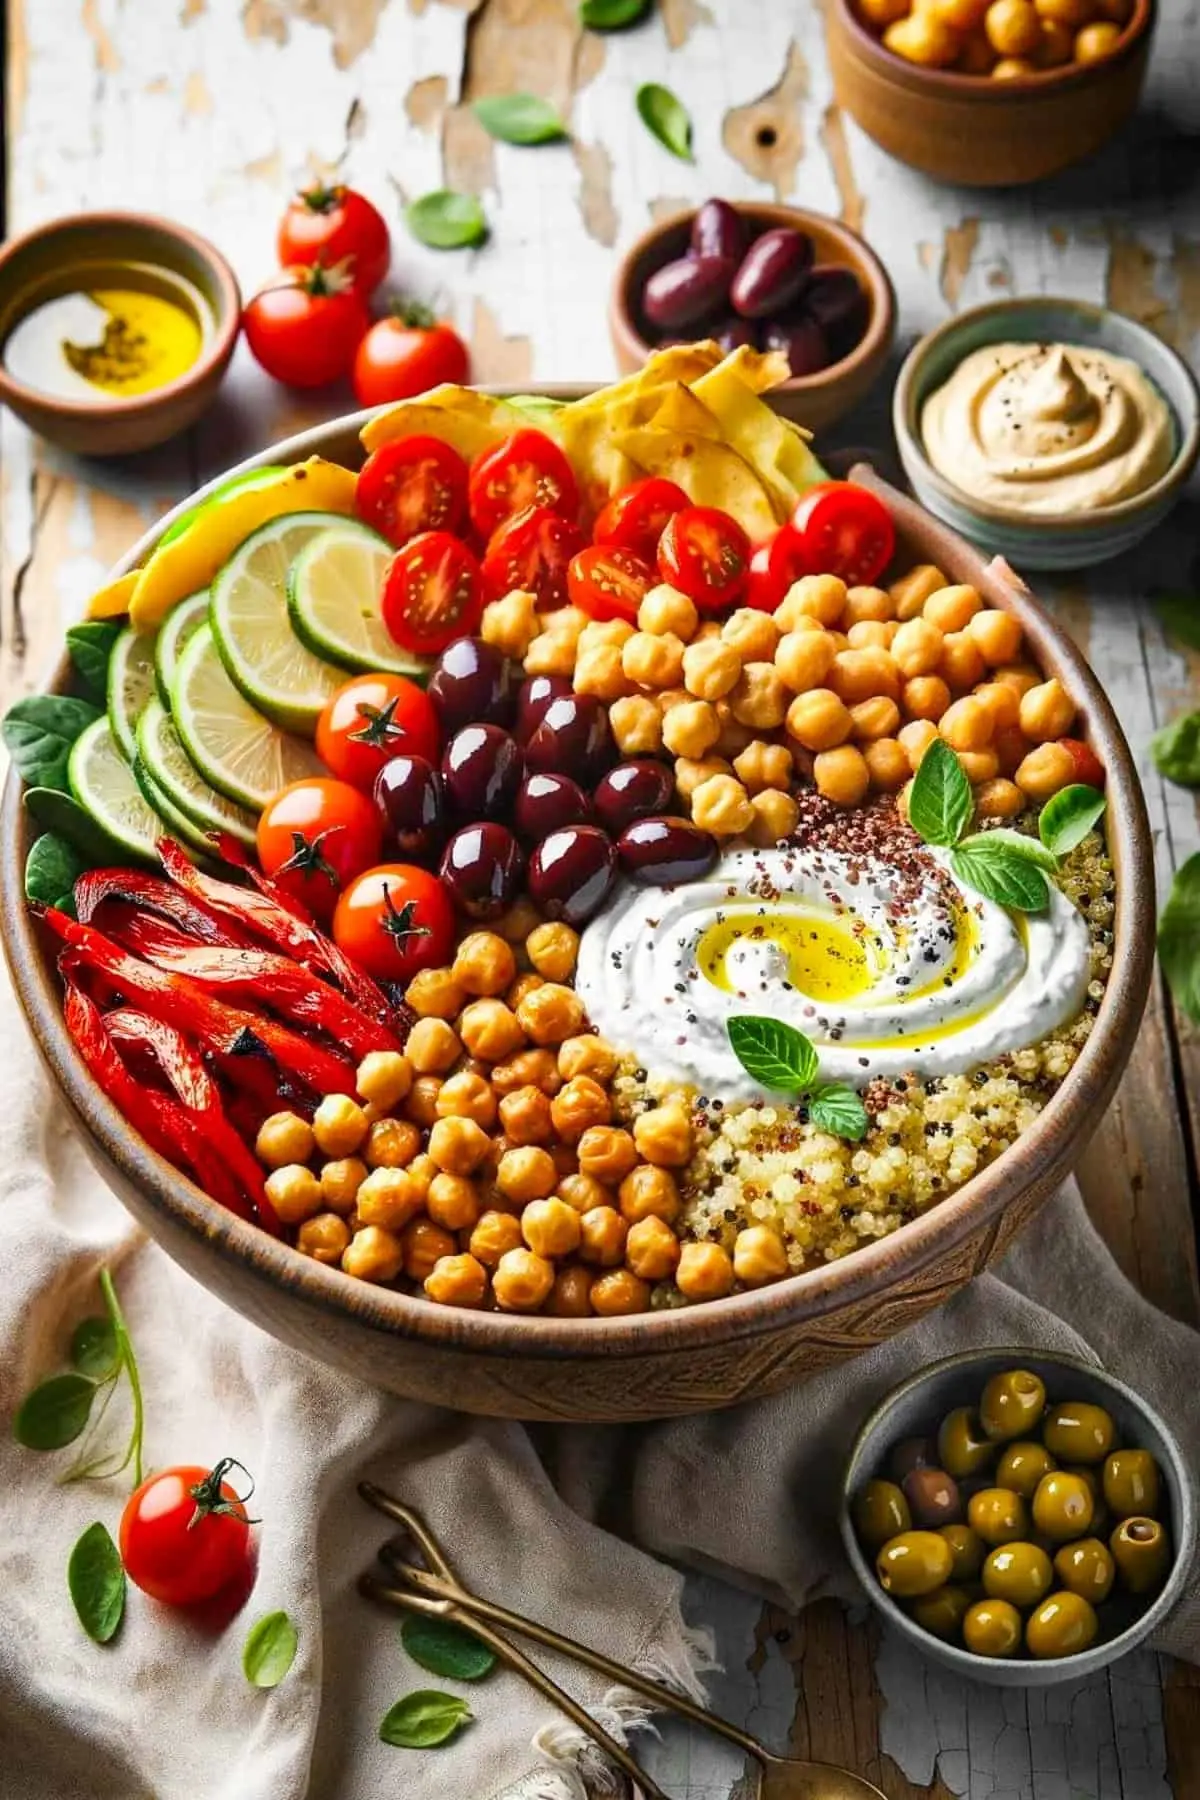
Mediterranean Bowl
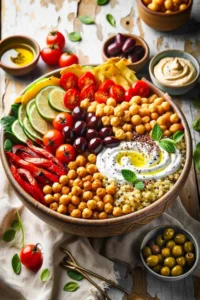
This Mediterranean bowl recipe is perfect for meal prep, made with quinoa, chickpeas, roasted veggies, homemade tzatziki, hummus, tomatoes, and olives. They are so flavorful and nutritious – you have to try them!
- For the quinoa: 1 cup quinoa, 1¾ cups water, ½ teaspoon sea salt, 2 tablespoons olive oil, 2 tablespoons lemon juice, ½ cup chopped fresh parsley
- For the toasted chickpeas: 15 ounce can chickpeas, drained and dried with a paper towel, 1 tablespoon olive oil, 1 teaspoon Sea salt, 1 teaspoon ground cumin
- For the roasted veggies: 1 eggplant, cut into ½ inch cubes, 3 red bell peppers, cut into thin strips, 2 tablespoons olive oil, 1½ teaspoons sea salt, 1 teaspoon freshly ground black pepper
- For the tzatziki: 1 cup Greek yogurt, ½ large English cucumber, cut into paper-thin slices, 2 tablespoons chopped fresh dill, ¼ cup olive oil
- To assemble: 1 cup pitted olives, Kalamata or black, 18 cherry tomatoes, halved, ¾ cup hummus, ½ cup chopped fresh parsley
- 1For the quinoa: In a small pot, place the quinoa, water, and sea salt. Bring the water to a boil before reducing the heat to low. Cover the pot and let simmer for 15 minutes. Remove from the heat and let sit for 10 minutes. Fluff the quinoa with a fork and stir in the olive oil, lemon juice, and chopped fresh parsley.
- 2For the toasted chickpeas: Preheat the oven to 425°F and line a baking sheet with aluminum foil. In a bowl, combine the chickpeas, olive oil, sea salt, and cumin and toss to combine. Spread the chickpeas over the prepared baking sheet and bake for 25 minutes.
- 3For the roasted veggies: Line a baking sheet with aluminum foil. Spread the eggplant and red bell peppers over the baking sheet. Drizzle with olive oil and season with salt and pepper. Toss to coat the veggies. Roast at 425°F for 25 minutes.
- 4For the tzatziki: While the quinoa, chickpeas, and veggies are cooking, make the tzatziki by combining the Greek yogurt, cucumbers, dill, and olive oil in a mixing bowl; stir to incorporate.
- 5To assemble: Divide the quinoa between 6 bowls. Divide the toasted chickpeas, roasted veggies, olives, and cherry tomatoes between the 6 bowls. Spoon a hefty dollop of tzatziki and hummus over each bowl and garnish with chopped fresh parsley. Serve.
Keywords: Mediterranean, Bowl, Quinoa, Chickpeas, Roasted Vegetables, Tzatziki, Hummus, Meal Prep, Lunch, Dinner, Vegetarian
The exact quantities for each ingredient are detailed within the recipe card for your convenience.
Variations
One of the most exciting aspects of this Mediterranean bowl recipe is its inherent versatility. You can easily transform this dish into a completely different culinary experience by making a few strategic substitutions or additions. This adaptability ensures that the recipe never becomes monotonous and can cater to a wide range of dietary needs and taste preferences.
Vegan Delight: To create a delicious vegan version, simply ensure your hummus is plant-based and omit any dairy-based components. For the tzatziki, a creamy cashew-based or coconut yogurt alternative can be used, blended with grated cucumber, garlic, and fresh dill. This substitution maintains the creamy texture and tangy flavor profile without any animal products, making it a delightful option for those following a vegan lifestyle. The rest of the components, including the quinoa, roasted vegetables, chickpeas, olives, and tomatoes, are already vegan-friendly, making this an easy modification.
Low-Carb Power Bowl: For those watching their carbohydrate intake, the quinoa can be replaced with a base of nutrient-rich greens like spinach, kale, or mixed greens. Alternatively, cauliflower rice, lightly sautéed or steamed, offers a fantastic low-carb alternative that absorbs flavors beautifully. Other low-carb additions could include extra avocado, nuts, seeds, or a generous portion of lean protein like grilled chicken or fish. This adjustment allows for a satisfying and nutrient-dense meal that aligns perfectly with a low-carbohydrate eating plan.
Protein-Packed Upgrade: To elevate the protein content, consider adding grilled chicken breast, pan-seared salmon, or even perfectly cooked lentils. Halal cart-style chicken, with its characteristic spices and tender texture, would be a wonderful addition, or perhaps some crispy baked falafel for an extra layer of Mediterranean authenticity. These protein boosts ensure that the bowl is even more filling and can serve as a substantial post-workout meal or a hearty dinner, providing sustained energy throughout the day. The addition of these protein sources transforms the bowl into an even more robust and satisfying meal.
How to Prepare mediterranean bowl recipe
Step 1: Cooking the Quinoa
The foundation of our vibrant Mediterranean bowl is perfectly cooked quinoa. Begin by rinsing one cup of quinoa thoroughly under cold running water in a fine-mesh sieve. This step is crucial to remove any bitterness from saponins, a natural coating on quinoa seeds. Once rinsed, transfer the quinoa to a small saucepan.
Add one and three-quarter cups of water and half a teaspoon of sea salt to the saucepan. Bring the mixture to a rolling boil over medium-high heat. As soon as it starts boiling, reduce the heat to the lowest setting, cover the pot tightly with a lid, and let it simmer undisturbed for precisely fifteen minutes. Resist the temptation to lift the lid during this time, as it allows precious steam to escape, which is vital for even cooking.
After fifteen minutes of simmering, remove the pot from the heat, still keeping the lid on. Allow the quinoa to sit and steam for another ten minutes. This resting period is key to achieving fluffy, separate grains. Once rested, remove the lid and gently fluff the quinoa with a fork. Stir in two tablespoons of olive oil for richness, two tablespoons of fresh lemon juice for a bright, zesty kick, and half a cup of finely chopped fresh parsley for an herbaceous aroma and flavor. Set this beautifully seasoned quinoa aside, ready to form the base of your bowls.
Step 2: Roasting the Chickpeas
Next, we’ll prepare the crispy, flavorful chickpeas that add a delightful textural contrast to the bowls. Preheat your oven to a hot 425°F (220°C) and line a large baking sheet with aluminum foil for easy cleanup. Ensure your chickpeas are well-drained and, most importantly, thoroughly dried using paper towels or a clean kitchen towel. Excess moisture is the enemy of crispiness.
In a medium-sized bowl, combine one 15-ounce can of drained and dried chickpeas with one tablespoon of olive oil. Season generously with one teaspoon of sea salt and one teaspoon of ground cumin. Toss everything together thoroughly until each chickpea is evenly coated with the oil and spices. The cumin provides a warm, earthy flavor that beautifully complements the nutty taste of the chickpeas.
Spread the seasoned chickpeas in a single layer on the prepared baking sheet. Avoid overcrowding the pan, as this will lead to steaming rather than roasting. Place the baking sheet in the preheated oven and roast for approximately 25 minutes. Keep an eye on them towards the end; you’re looking for them to be golden brown and satisfyingly crispy. Once roasted, remove them from the oven and set aside to cool slightly.
Step 3: Roasting the Vegetables
Now it’s time to bring some color and tender, roasted goodness to our bowls with eggplant and bell peppers. Line another large baking sheet with aluminum foil, just like you did for the chickpeas, to simplify the post-cooking cleanup process. Dice one medium eggplant into uniform ½-inch cubes, ensuring they are roughly the same size for even cooking. Thinly slice three red bell peppers into strips, aiming for a consistent thickness.
Arrange the diced eggplant and sliced bell peppers in a single layer on the prepared baking sheet. Drizzle them with two tablespoons of olive oil, ensuring all the vegetable pieces are lightly coated. Season them generously with one and a half teaspoons of sea salt and one teaspoon of freshly ground black pepper. Use your hands or a spatula to toss the vegetables gently, making sure they are evenly seasoned and oiled.
Place this baking sheet into the same 425°F (220°C) oven. Roast the vegetables for about 25 minutes. You want them to become tender and slightly caramelized at the edges, developing a wonderful depth of flavor. Check for tenderness by piercing a piece of eggplant with a fork; it should yield easily. Once roasted to perfection, remove them from the oven and set them aside with the roasted chickpeas.
Step 4: Preparing the Tzatziki Sauce
While the quinoa, chickpeas, and vegetables are busy in the oven, we’ll whip up a refreshing and creamy tzatziki sauce. This cool, tangy condiment is essential for balancing the warm flavors of the roasted components. In a medium mixing bowl, combine one cup of thick Greek yogurt. The full-fat variety provides the best creamy texture, but a lower-fat version can also work.
Add half of a large English cucumber to the bowl. It’s crucial to grate the cucumber finely or, even better, slice it into paper-thin slices using a mandolin for that signature delicate texture. If you slice it, gently squeeze out any excess moisture from the cucumber slices before adding them to the yogurt; this prevents the tzatziki from becoming watery. Stir in two tablespoons of finely chopped fresh dill, which imparts a wonderfully aromatic and slightly anise-like flavor. Finally, drizzle in about a quarter cup of good quality olive oil.
Mix all the ingredients together thoroughly until well combined and smooth. Taste and adjust seasoning if necessary, perhaps adding a tiny pinch more salt or a squeeze of lemon juice for extra tang. The tzatziki should be thick, creamy, and bursting with fresh, herbaceous flavor. Cover the bowl and refrigerate the tzatziki until you are ready to assemble the bowls, allowing the flavors to meld beautifully.
Step 5: Assembling the Mediterranean Bowls
Now for the most exciting part – bringing all these delicious components together into stunning, cohesive Mediterranean bowls. Divide the fluffy, lemon-herb seasoned quinoa evenly among six serving bowls. This creates a beautiful and flavorful base for everything else. Aim for a generous portion of quinoa in each bowl to ensure a substantial and satisfying meal.
Next, artfully arrange the roasted vegetables, crispy chickpeas, pitted olives (Kalamata or black olives work wonderfully), and halved cherry tomatoes over the quinoa in each bowl. Distribute them so that each serving gets a good mix of all the colorful and textural elements. The vibrant reds of the tomatoes, the deep purple of the olives, the golden chickpeas, and the tender roasted vegetables create a visually appealing mosaic.
To finish, spoon a generous dollop of the homemade tzatziki sauce and a spoonful of hummus over each bowl. The cool, creamy tzatziki and the smooth, rich hummus add essential moisture and decadent flavor. Garnish each bowl with a sprinkle of chopped fresh parsley for an extra burst of freshness and a final touch of vibrant green. Serve immediately and enjoy the explosion of Mediterranean flavors.
Step 6: Serving and Enjoying
These Mediterranean bowls are designed to be enjoyed fresh, allowing you to experience the full spectrum of textures and temperatures. The warm quinoa and roasted vegetables contrast beautifully with the cool, creamy tzatziki and the fresh burst of cherry tomatoes. Each bite offers a unique combination of savory, tangy, and fresh flavors that dance on your palate.
If you are preparing these for meal prep, it’s best to assemble them just before serving or pack the components separately to maintain optimal texture. The quinoa can be gently reheated, or enjoyed at room temperature, while the roasted vegetables and chickpeas are delicious either warm or at room temperature. The tzatziki and hummus are best served cold.
Take a moment to appreciate the visual appeal of the bowl before diving in. The layers of color and texture are a testament to the fresh ingredients used. Savor the combination of the fluffy quinoa, the satisfying crunch of the chickpeas, the tender vegetables, the briny olives, and the bright sweetness of the tomatoes, all brought together by the creamy sauces. This is more than just a meal; it’s a healthy, flavorful celebration of Mediterranean cuisine.
Pro Tips for mediterranean bowl recipe
- Don’t Skip the Quinoa Rinse: Always rinse your quinoa thoroughly before cooking. This essential step removes saponins, a natural coating that can impart a bitter or soapy taste to your finished dish, ensuring a clean and neutral base for all the other flavors.
- Dry Chickpeas for Crispiness: For the crispiest roasted chickpeas, ensure they are as dry as possible after draining. Pat them thoroughly with paper towels or a clean kitchen towel. Moisture is the enemy of crispiness, so a good drying session is paramount for achieving that delightful crunch.
- Uniform Vegetable Cuts: When cubing eggplant and slicing bell peppers, strive for pieces of similar size. This ensures that all the vegetables cook evenly in the oven, preventing some pieces from becoming overcooked and mushy while others remain underdone.
- Season Generously: Don’t be shy with the salt and pepper, especially for the vegetables and chickpeas. Roasting can mellow flavors, so proper seasoning is key to bringing out the best in each ingredient. Taste and adjust as needed, especially for the tzatziki, which can benefit from a little extra tang.
- Meal Prep Smartly: To keep your bowls tasting their best throughout the week, store the components separately in airtight containers. Assemble them just before eating, or store the dressings (tzatziki and hummus) separately to prevent the other ingredients from becoming soggy. This simple strategy ensures freshness and optimal texture.
Serving Suggestions for mediterranean bowl recipe
Decoration
Elevate the visual appeal of your Mediterranean bowls with thoughtful garnishes. A sprinkle of fresh, finely chopped parsley or cilantro adds a vibrant pop of green and a fresh aroma. A few toasted sesame seeds or pumpkin seeds can introduce a subtle nutty flavor and a delicate crunch. For a touch of elegance, a swirl of high-quality olive oil or a small cluster of fresh mint leaves can make the bowls truly restaurant-worthy.
Side Dishes
While these bowls are a complete meal in themselves, they can be wonderfully complemented by a few simple side dishes. Warm, crusty pita bread is perfect for scooping up any leftover hummus or tzatziki. A light side salad with a lemon-herb vinaigrette can add extra freshness. For those who enjoy a bit more crunch, a small bowl of marinated olives or pickled red onions can provide a delightful textural and flavor contrast.
Creative Serving Ideas
Move beyond the standard bowl and get creative with your presentation. Layer the ingredients in attractive glasses or jars for a portable and visually stunning lunch. Serve the components buffet-style, allowing each person to build their own custom bowl, which is perfect for gatherings. You can also arrange the ingredients artfully on a large platter for a shared dining experience, turning these individual bowls into a communal feast that guests can pick and choose from.
Preparation & Storage
Storing Leftovers
To store any leftover Mediterranean bowls, it’s best to allow all the cooked components to cool down to room temperature first. This prevents condensation from forming inside your storage containers, which can lead to sogginess. Once cooled, you have two excellent options for storage. You can either assemble individual portions in airtight containers, ensuring a grab-and-go meal for later, or store each component separately in its own container. Storing them separately allows you to combine them fresh when you’re ready to eat, preserving the texture of each element.
Properly stored leftovers can be kept in the refrigerator for up to 4 days. This makes these bowls an exceptional choice for meal prepping lunches or dinners for the entire work week. When packing them separately, keep the wetter ingredients like tzatziki and hummus apart from the drier components like quinoa and roasted vegetables to maintain their ideal textures.
Freezing
While many components of this Mediterranean bowl recipe freeze reasonably well, it’s important to manage expectations regarding texture, especially for certain ingredients. The quinoa, roasted vegetables (like eggplant and peppers), and chickpeas can be frozen. However, the tzatziki sauce, due to its yogurt and cucumber base, is generally not recommended for freezing, as it can become watery and lose its creamy consistency upon thawing. Fresh elements like cherry tomatoes and olives are also best added fresh after thawing.
If you wish to freeze parts of the meal, cool each component completely. Store the quinoa, roasted vegetables, and chickpeas in airtight, freezer-safe containers or bags. Ensure they are well-sealed to prevent freezer burn. These components can typically be stored in the freezer for up to 1-2 months. Remember to plan to make fresh tzatziki and add fresh toppings when you are ready to consume the meal.
Reheating
When it’s time to enjoy your prepped or leftover Mediterranean bowls, reheating is straightforward. If you’ve stored components separately, you can choose to gently reheat some elements while keeping others cold. The quinoa can be reheated in a microwave-safe bowl for 1-2 minutes, or on the stovetop with a splash of water, until warmed through. The roasted vegetables and chickpeas can also be reheated in the microwave or briefly in a skillet over medium heat.
Alternatively, if you have assembled bowls with components that can be reheated, you can warm the entire bowl in the microwave. Heat in 30-second intervals, stirring in between, until everything is heated to your liking. Be cautious not to overheat, as this can make the vegetables mushy. For the best experience, it’s often recommended to reheat the grains and roasted items, then add the fresh toppings like hummus, tzatziki, and cherry tomatoes after warming, preserving their vibrant flavors and textures.
Frequently Asked Questions
-
Can I make the components of the Mediterranean bowl ahead of time for meal prep?
Absolutely! This Mediterranean bowl recipe is an absolute star when it comes to meal prepping. You can cook the quinoa, roast the vegetables and chickpeas, and prepare the tzatziki sauce up to 3-4 days in advance. Store each component in separate airtight containers in the refrigerator. This makes assembling a fresh and delicious bowl incredibly quick and easy during the busy week, ensuring you always have a healthy meal ready to go.
-
What are some good substitutions for quinoa if I don’t have any on hand or prefer a different grain?
There are many excellent alternatives to quinoa that will work beautifully in this Mediterranean bowl. Brown rice, wild rice, or a mix of grains like farro or barley are fantastic options that offer a different texture and nutty flavor. For a lower-carbohydrate choice, cauliflower rice, lightly sautéed or steamed, is an increasingly popular and healthy substitute. Couscous, especially whole wheat couscous, also cooks quickly and absorbs flavors wonderfully. Even a bed of mixed greens or spinach can serve as a base for a lighter, salad-style bowl.
-
How can I make the roasted chickpeas extra crispy?
Achieving super crispy roasted chickpeas is all about ensuring they are dry before roasting and not overcrowding the baking sheet. After draining and rinsing your can of chickpeas, pat them extremely dry with paper towels or a clean kitchen towel. Removing as much moisture as possible is critical. Then, toss them with your olive oil and spices. Spread them in a single layer on your baking sheet, giving them plenty of space. Roasting at a higher temperature, like 425°F (220°C), also helps them crisp up nicely. If they aren’t as crispy as you’d like after the initial roasting time, you can even leave them in the oven for an additional 5-10 minutes, keeping a close eye on them to prevent burning.