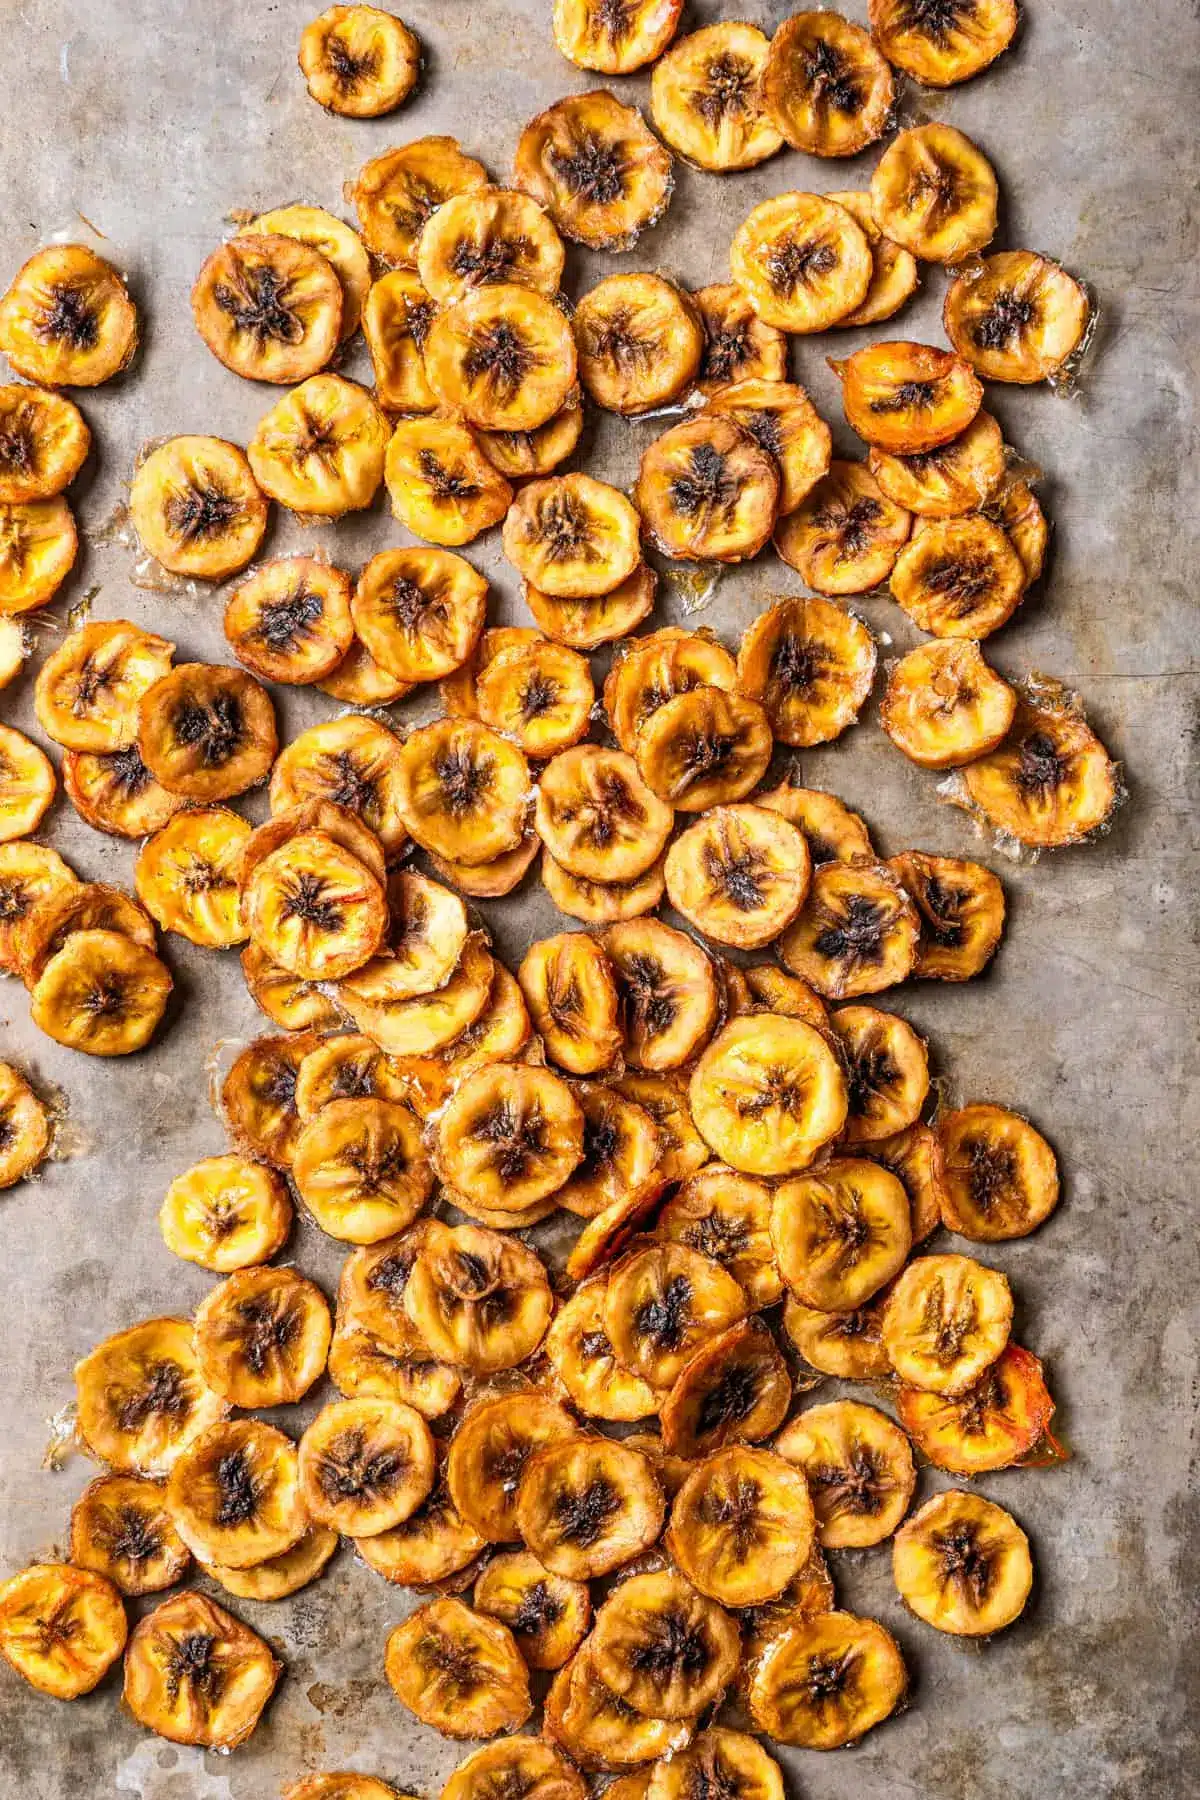
How to Make Banana Chips
Craving a snack that’s both satisfyingly crunchy and delightfully sweet, without the guilt? Look no further than these incredibly easy baked banana chips. They are the perfect solution for those moments when a sweet tooth strikes, offering a healthier alternative to many processed snacks.
The simple magic of transforming ripe bananas into crispy delights in your own oven is truly something special. You’ll find yourself reaching for these homemade gems more often than you might expect, especially when you consider how effortlessly they come together.
Why You Will Love This Recipe
- Healthy Alternative: Enjoy a naturally sweet and guilt-free snack that’s a fantastic substitute for fried or sugary treats, making it a great addition to a balanced lifestyle.
- Simple Ingredients: With just a couple of readily available items, you can create a delicious snack that requires minimal fuss and preparation.
- Customizable Flavor: While delicious on their own, these chips are a perfect canvas for adding your favorite spices like cinnamon or even a hint of chili for a sweet and spicy kick.
- Perfectly Portable: Once baked and cooled, these banana chips are ideal for packing in lunchboxes, taking on hikes, or keeping in your bag for an on-the-go energy boost.
- Satisfying Crunch: Achieve that addictive crispiness that mimics traditional chip textures, providing a delightful sensory experience with every bite.
Ingredients You Need
Creating these delightful baked banana chips relies on the simplicity and quality of just a few key ingredients. The inherent sweetness of ripe yet firm bananas forms the core of this snack, ensuring a naturally delicious flavor profile. Opting for freshly squeezed lemon juice is crucial; its bright acidity not only prevents browning but also adds a subtle, refreshing zest that perfectly complements the banana’s sweetness, elevating the overall taste experience significantly.
Baked Banana Chips

Deliciously sweet, guilt-free baked banana chips make a perfectly portable, light, and tasty snack to have on hand in case a craving strikes!
- 10 ripe but firm bananas, thinly sliced
- Freshly squeezed lemon juice (1 lemon is plenty)
- 1Preheat the oven to 200ºF. Cover a sheet pan with foil and lightly grease it with cooking spray.
- 2Toss the banana slices in lemon juice. Arrange the bananas in a single layer on the prepared baking sheet.
- 3Bake for 1 hour; check to see if the tops are firm and starting to turn color. If so, flip the slices with a metal spatula and continue to bake for 1 hour longer or until desired crispness.
- 4Remove from the oven and transfer the banana chips to a wire rack to cool completely. The longer they cool, the crunchier they will get. Store in an airtight container.
Keywords: banana chips, baked banana chips, healthy snack, fruit chips, oven-baked
- ripe but firm bananas: select bananas that are yellow with perhaps a few brown spots, but still firm to the touch, as overly soft bananas will become mushy rather than crispy.
- freshly squeezed lemon juice: this is vital for preventing oxidation and adding a subtle brightness that enhances the banana’s natural sweetness without overpowering it.
The precise quantities for these ingredients are detailed within the provided recipe card, ensuring you have all the exact measurements needed for success.
Variations
For those seeking a vegan delight, this recipe is already perfectly suited, requiring no modifications whatsoever. The natural sweetness of the bananas and the subtle tang of lemon juice create a universally appealing treat that aligns beautifully with a vegan diet.
If you’re following a low-carb lifestyle, consider pairing these banana chips with other low-carb snacks. While bananas themselves have natural sugars, these baked chips can still be enjoyed in moderation as part of a carefully managed dessert or snack rotation, perhaps alongside some berries or a handful of nuts.
Introducing a savory twist can also be incredibly rewarding. Before baking, try tossing the banana slices with a sprinkle of smoked paprika, a pinch of garlic powder, and a tiny dash of cayenne pepper for a surprisingly complex flavor profile. These can then be served alongside chicken dishes or enjoyed as a unique appetizer.
How to Prepare baked banana chips
Step 1: Preparing the Bananas for Baking
The initial step in creating perfect baked banana chips involves selecting the right kind of bananas and preparing them for their transformation. It’s essential to choose bananas that are ripe but still firm to the touch. Overly ripe bananas will lack the structural integrity needed to hold their shape during the baking process, leading to a mushy texture rather than the desired crispness. You’re looking for bananas that are mostly yellow, perhaps with a few small brown spots, but not yet soft or bruised.
Once you have your ideal bananas, the next crucial step is to slice them uniformly. The thickness of your slices will directly impact the final texture and baking time. Aim for slices that are approximately 1/8 to 1/4 inch thick. Using a sharp knife or a mandoline slicer can help ensure consistent thickness, which is key for even baking. Uneven slices will result in some chips being perfectly crisp while others remain too soft or become overly browned and burnt.
After slicing, the bananas need to be protected from browning and seasoned subtly. Place the sliced bananas in a medium-sized bowl. Gently pour freshly squeezed lemon juice over the slices. The acidity of the lemon juice acts as a natural preservative, preventing the bananas from oxidizing and turning brown too quickly in the oven. It also imparts a very light, pleasant tang that balances the sweetness of the banana. Toss the slices gently to ensure each piece is lightly coated.
Step 2: Arranging the Banana Slices
With the bananas prepped and lightly coated in lemon juice, the next phase is to arrange them on your baking sheet for optimal airflow and even cooking. Line a large baking sheet with parchment paper or aluminum foil; this not only prevents sticking but also makes cleanup significantly easier. Lightly greasing the lining with a cooking spray can provide an extra layer of non-stick protection, especially important for delicate fruit slices.
Carefully place the banana slices onto the prepared baking sheet in a single layer. It is absolutely critical that the slices do not overlap. Overlapping will trap moisture, leading to steaming rather than baking, and the chips will not achieve the desired crispness. Ensure there is a small amount of space between each banana slice to allow hot air to circulate freely around every piece.
If you find you have too many slices to fit comfortably on one baking sheet without overcrowding, it’s far better to use a second baking sheet or bake in batches. Overcrowding is a common mistake that leads to disappointing results. Patience at this stage ensures that each chip has the best possible environment to dehydrate and crisp up beautifully in the oven.
Step 3: The Initial Baking Phase
Now, it’s time to begin the slow and gentle baking process that will transform the soft banana slices into delightful chips. Preheat your oven to a low temperature, typically around 200°F (95°C). This low temperature is crucial for dehydrating the bananas slowly, allowing the moisture to evaporate without burning the sugars in the fruit. A high temperature would simply cook the bananas, making them soft and unappealing.
Place the prepared baking sheet into the preheated oven. The first stage of baking usually lasts for about 60 minutes. During this time, the bananas will begin to soften and release some of their moisture. You should check on them periodically, especially towards the end of this hour, to gauge their progress. The edges might start to look slightly drier and perhaps take on a faint golden hue.
After the initial hour, it’s time to assess the state of your banana slices and prepare for the next crucial step. The goal here is not to achieve full crispness yet, but to encourage a degree of firmness. The slices should feel somewhat dry to the touch and be starting to firm up, indicating that the dehydration process is well underway. This sets the stage for the flipping and further baking that will lead to the ultimate crisp texture.
Step 4: Flipping and Continued Baking
Once the initial hour of baking is complete, it’s time to flip the banana slices. This step is vital for ensuring that both sides of each chip dry out evenly and achieve a uniform crispness. Carefully use a thin, flexible metal spatula to gently lift each banana slice and turn it over. Take care not to tear or break the slices, as they will still be relatively delicate at this stage.
After flipping all the slices, return the baking sheet to the oven for another hour, or potentially longer, depending on the thickness of your slices and your desired level of crispness. This second baking period is where the magic truly happens, allowing the chips to become wonderfully crunchy. Continue to monitor them closely during this phase. Different ovens can have slightly different temperatures, and the thickness of the banana slices can vary.
You are looking for the chips to reach your preferred level of crispness. They should feel firm and dry, with a satisfying snap when gently bent. Some edges might start to show a deeper golden brown color, but be careful to avoid burning. If some chips are done before others, it’s best to remove them from the baking sheet so they don’t overcook while the rest continue to bake. This attention to detail ensures a perfect batch every time.
Step 5: Cooling for Maximum Crispness
As soon as your banana chips have reached the desired crispness, remove the baking sheet from the oven. The cooling process is just as important as the baking itself, as it allows the chips to fully set and develop their signature crunch. Immediately transfer the hot banana chips from the baking sheet onto a wire cooling rack. This prevents the bottoms of the chips from becoming soggy by allowing air to circulate all around them.
Ensure that the chips are spread out in a single layer on the wire rack. Resist the urge to stack them or place them too closely together, as this will impede airflow and can lead to them losing their crispness. The longer they cool completely, the crispier they will become. This might take anywhere from 30 minutes to an hour, or even longer, depending on the ambient humidity and room temperature.
Patience during the cooling phase is key to achieving that perfect, addictive crunch. As they cool, you will notice them becoming progressively more brittle and firm. Once they are completely cool to the touch and feel dry and crisp, they are ready to be enjoyed or stored.
Step 6: Checking for Doneness and Adjustments
Throughout the latter stages of baking, keen observation is your best tool. Oven temperatures can fluctuate, and banana slice thickness is rarely perfectly uniform. Therefore, it’s essential to check on your chips regularly, especially after the first hour of flipping. Look for signs of dryness and a slight golden hue developing on the edges and undersides of the slices.
If you notice that some banana chips are becoming crisp and golden while others are still soft and pale, it’s important to act. Carefully remove the finished chips from the baking sheet and place them on the wire rack to cool. You can then return the remaining less-cooked slices to the oven to continue baking. This selective removal prevents any chips from burning while others are still achieving their ideal texture, ensuring a consistently good result.
Should you find that after the recommended baking times, your chips still have a slight chewiness or don’t feel crisp enough, don’t despair. You can always return them to the oven for an additional 10-15 minutes. Always keep a close eye on them during these extra intervals, as they can go from perfectly crisp to burnt very quickly at this stage. The goal is a delightful crispness, not a carbonized state.
Pro Tips for baked banana chips
Even Slicing is Key: The most critical factor for uniformly crispy banana chips is cutting them to an even thickness. Invest in a mandoline slicer if you plan to make these frequently, as it guarantees consistent results far better than a knife can. This ensures every chip receives the same amount of heat exposure, preventing some from burning while others remain chewy.
Low and Slow Wins the Race: Resist the temptation to increase the oven temperature. Baking at a low temperature, around 200°F (95°C), is essential for dehydrating the bananas properly rather than cooking them. This slow process allows the moisture to evaporate gradually, leading to a crisp texture that holds up well.
Don’t Overcrowd the Pan: Give each banana slice ample space on the baking sheet. Overcrowding will trap steam, hindering the drying process and resulting in soggy chips. If necessary, use multiple baking sheets or bake in batches; it’s worth the extra time for perfect results.
Cooling is Crucial: Allow the chips to cool completely on a wire rack. This step is non-negotiable for achieving maximum crispness. As they cool, they will continue to dehydrate slightly and firm up. Storing them while warm will lead to condensation and loss of crunch.
Listen for the Snap: The best indicator of perfectly baked banana chips is the sound they make. When you gently try to break one, it should snap cleanly with a satisfying crispness. If it bends or feels pliable, it needs a little more time in the oven or on the cooling rack.
Serving Suggestions for baked banana chips
Decoration
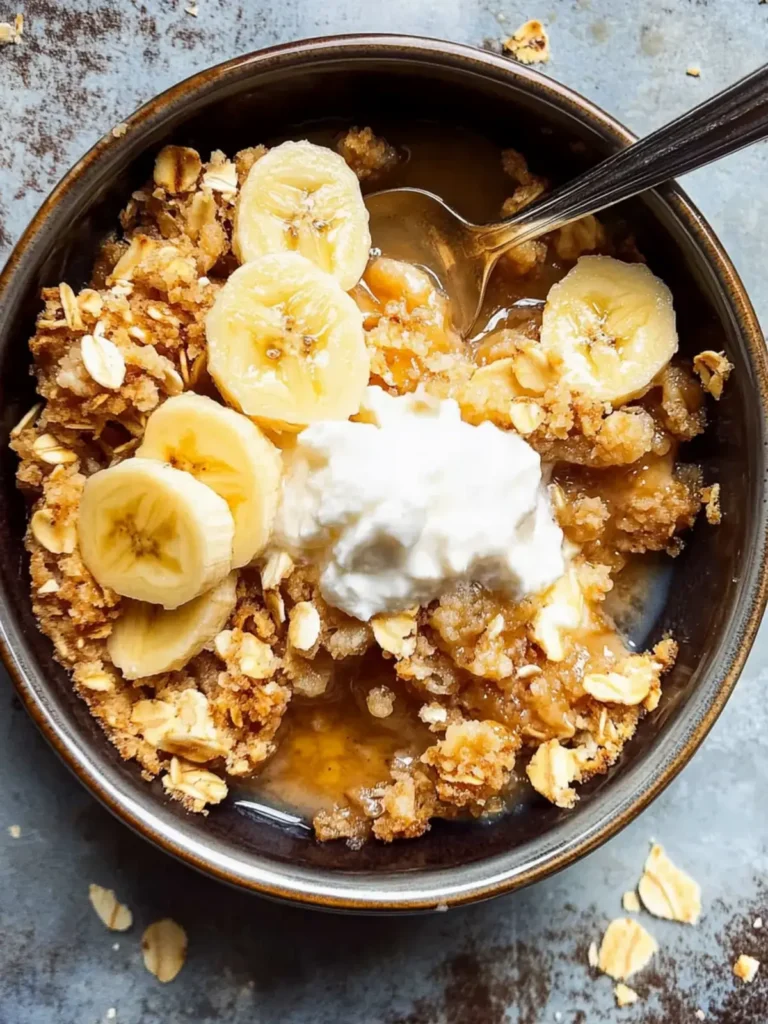
While these banana chips are perfectly delicious on their own, they can also serve as an attractive and edible garnish. Sprinkle them over breakfast dishes like yogurt parfaits or smoothie bowls for added texture and visual appeal. Their natural sweetness and appealing golden color make them a delightful topping that enhances the overall presentation of your meal.
Side Dishes
These baked banana chips are an excellent accompaniment to a variety of meals, offering a sweet and crunchy contrast. They pair wonderfully with savory dishes, providing an unexpected yet delightful textural element. Consider serving them alongside grilled chicken or fish for a balanced flavor profile.
Creative Serving Ideas
For a truly unique experience, try incorporating these banana chips into other baked goods. Crush them slightly and use them as a topping for muffins or quick breads, adding a delightful crunch and a hint of banana flavor. They can also be finely crushed and mixed into cookie dough or used to decorate the edges of a tart for an artistic touch.
Another inventive use is to create a “trail mix” by combining them with other dried fruits, nuts, and seeds. This makes for an energizing and satisfying snack that’s perfect for hiking or long journeys. A sprinkle over ice cream or a fruit salad can also elevate these simple desserts with an added layer of delightful crunch and natural sweetness. Explore the Pinterest board for more inspiration on how to use these versatile chips.
Preparation & Storage
Storing Leftovers
Properly stored, your delicious baked banana chips can maintain their crispness for a considerable amount of time. Once completely cooled, transfer them into an airtight container. This is crucial to prevent them from absorbing moisture from the air, which would compromise their crunchy texture. Avoid using plastic bags unless they are specifically designed to be airtight, as they often allow air to permeate.
When stored correctly in a cool, dry place, these homemade banana chips can last at room temperature for up to three weeks. Check them periodically to ensure they remain as crisp as when you first stored them. If you notice any softening, it might indicate that the container isn’t fully airtight or that humidity levels have increased.
It’s always best to store them away from direct sunlight or heat sources, as these can also contribute to spoilage or a loss of texture. An opaque container can help protect them from light. By following these simple storage guidelines, you can enjoy your homemade snack for an extended period.
Freezing
While not the primary method of preservation, freezing banana chips is possible, though it may slightly affect their ultimate crispness upon thawing. If you have an abundance of chips and wish to store them for an even longer duration, freezing can be a viable option. Ensure the chips are completely cooled before proceeding with freezing to prevent ice crystal formation.
To freeze, place the cooled banana chips in a single layer on a baking sheet and freeze until solid, which usually takes about 1-2 hours. This step, known as flash-freezing, prevents the chips from clumping together once they are transferred to a storage bag or container. After they are solid, carefully transfer them into a freezer-safe airtight container or a heavy-duty freezer bag, removing as much air as possible before sealing.
Frozen banana chips can typically last for up to 6 months. When you are ready to use them, it’s best to let them thaw completely at room temperature on a wire rack to help them regain some of their crispness. They might not be as perfectly crunchy as freshly baked ones, but they will still be a delicious and convenient snack.
Reheating
If your baked banana chips have lost some of their crispness due to humidity or storage, or if you’ve thawed them from frozen, reheating is an excellent way to restore their satisfying crunch. The key is to use a low temperature to gently dry them out again without burning them. A conventional oven or a toaster oven is ideal for this purpose.
Preheat your oven or toaster oven to a very low temperature, around 200°F (95°C). Spread the slightly softened banana chips in a single layer on a baking sheet lined with parchment paper. Place the baking sheet in the preheated oven and bake for about 10-15 minutes, or until they feel crisp again. Keep a very close eye on them, as they can go from crisp to burnt quite quickly.
Alternatively, for a smaller batch, a microwave on a low power setting or even a few minutes in a dry skillet over low heat can sometimes help revive their crispness, though these methods can be trickier to control. The oven method is generally the most reliable for restoring that perfect crunch. Allow them to cool slightly on a wire rack after reheating before enjoying.
Frequently Asked Questions
-
Can I make these baked banana chips without lemon juice?
While you can technically make the chips without lemon juice, it is highly recommended that you do not skip this ingredient. The lemon juice serves a dual purpose: it helps prevent the banana slices from browning excessively during the low-and-slow baking process, ensuring a more appealing appearance, and it adds a subtle brightness that balances the natural sweetness of the bananas. Without it, the slices may turn a darker brown or even black, and the overall flavor profile might be less vibrant and appealing. If you absolutely cannot use lemon juice, you could try a very light misting of a different acidic juice like lime, but lemon is preferred for its classic flavor synergy with bananas.
-
Why are my banana chips not crispy?
There are several common reasons why baked banana chips might not achieve the desired crispness. The most frequent culprit is insufficient baking time or a temperature that was too high, which cooks the bananas rather than dehydrating them. Ensure your oven is set to a low temperature, around 200°F (95°C), and be patient; the process can take several hours. Another major factor is the thickness of the banana slices; if they are too thick, they won’t dry out properly. Overcrowding the baking sheet is also a prime offender, as it prevents adequate airflow, trapping moisture. Finally, failing to cool them completely on a wire rack after baking can lead to a loss of crispness, as they continue to dehydrate and firm up during the cooling process.
-
Can I use greener or riper bananas for this recipe?
Using greener bananas is generally not recommended for this particular recipe. While greener bananas are firmer, they lack the natural sugars that contribute to the sweet flavor and caramelization during baking. They may also be more starchy and less palatable when baked. On the other hand, overly ripe bananas, which are very soft and heavily spotted, are also problematic. While they are sweet, their high moisture content and lack of firmness mean they are more likely to break apart easily during slicing and handling, and they will struggle to achieve a crisp texture, often becoming chewy or mushy instead. The ideal banana for this recipe is ripe but still firm, typically yellow with perhaps a few small brown spots; this provides the best balance of sweetness, flavor, and structural integrity for achieving crispy baked chips.