Michelada Cocktail Bar Setup Cinco de Mayo Easy Clamato Lime Drink Ideas
It was Cinco de Mayo last year, and I decided to host a casual backyard hangout with friends. I wanted something more exciting than just the usual beer or margaritas, but nothing too complicated to whip up between rounds of tacos and guacamole. That’s when the idea hit me: a Michelada cocktail bar setup with clamato, lime, and Tajín. I’d always loved Micheladas at little taquerias but had never tried making a whole spread for guests to customize their own.
The result? An instant crowd-pleaser, full of tangy, spicy, and refreshing flavors that perfectly matched the fiesta vibe. Since then, I’ve made this setup my go-to for Cinco de Mayo (and honestly, any casual gathering that calls for a fun drink). The mix of clamato juice’s savory punch, fresh lime juice’s brightness, and Tajín’s zesty kick makes for a Michelada that’s not just a drink but an experience. My friends loved mixing their own, trying different spice levels, and the clamato lime base keeps it fresh and lively without feeling heavy. Plus, setting up a DIY bar means everyone gets exactly what they want—which is a win in my book.
Why You Will Love This Recipe
- Customizable Flavor: Guests can adjust spice levels and garnishes to create their perfect drink, ensuring everyone finds a combination they adore.
- Effortless Elegance: While interactive, the setup itself is simple to assemble, requiring minimal fuss and allowing you to enjoy your guests.
- Bold & Refreshing Taste: The unique blend of savory clamato, tangy lime, and spicy Tajín offers a complex yet incredibly thirst-quenching flavor profile.
- Social Centerpiece: The DIY bar encourages interaction and conversation, making it a fun focal point for any gathering.
- Quick Preparation: Most of the preparation involves setting out ingredients, with the actual drink assembly taking mere moments per guest.
Ingredients You Need
The beauty of this Michelada cocktail bar lies in its accessible ingredients, which combine to create an explosion of flavor. Focusing on quality for a few key items, like using fresh lime juice and a good clamato, makes a significant difference in the final taste. You can find many of these items in your local grocery store, with specialty ingredients readily available at Latin markets.
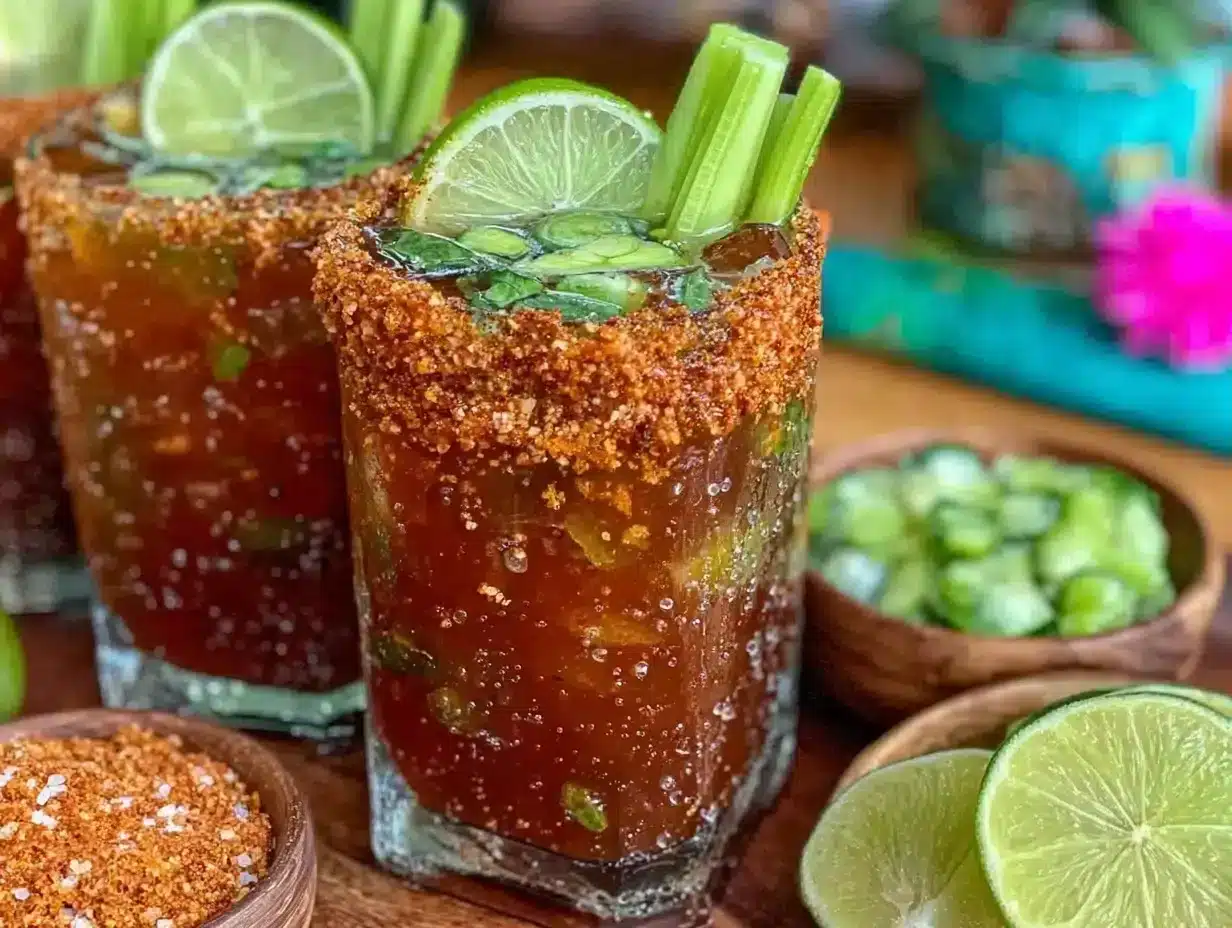
Michelada Cocktail Bar Setup
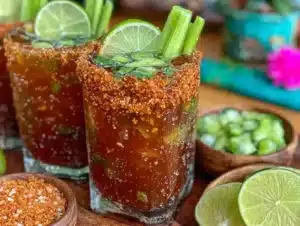
A festive and customizable Michelada cocktail bar setup featuring a savory clamato lime base, Tajín-rimmed glasses, and a variety of garnishes, perfect for Cinco de Mayo or casual gatherings.
- 4 cups (1 liter) Clamato juice
- 1 cup (240 ml) fresh lime juice (about 6-8 limes)
- 2 tablespoons Worcestershire sauce
- Hot sauce (to taste, e.g., Valentina or Cholula)
- 1 teaspoon Maggi seasoning (optional)
- Salt (for rimming glasses and to taste in mix)
- Tajín seasoning (for rimming glasses)
- 12 oz (355 ml) beer per serving (light Mexican lagers like Corona, Modelo Especial, or Pacifico)
- Lime wedges (for garnish)
- Optional garnishes: celery sticks, cucumber slices, pickled jalapeños, shrimp
- Ice
- 1Prepare the rim: Pour Tajín into a shallow bowl. Rub a lime wedge around the rim of each glass, then dip it into the Tajín to coat evenly. Set aside.
- 2Make the Michelada base: In a pitcher, combine clamato juice, freshly squeezed lime juice, Worcestershire sauce, a few dashes of hot sauce (start with 1 tsp), and a pinch of salt. Stir well to combine. Taste and adjust hot sauce or Worcestershire as needed. Add Maggi seasoning if desired.
- 3Add ice to glasses: Fill each rimmed glass about halfway with ice cubes.
- 4Pour the base and beer: Fill each glass about two-thirds full with the clamato lime mixture. Top off with beer gently to maintain fizz. Give a light stir to combine.
- 5Garnish and serve: Add a lime wedge, celery stick, or pickled jalapeño on the rim or inside the glass. Serve immediately.
Keywords: Michelada, cocktail, clamato, Cinco de Mayo, Mexican drink, lime, Tajín, beer cocktail, spicy drink, DIY cocktail bar
These are the core components; exact quantities for individual servings are detailed within the recipe card for easy reference and preparation.
Variations
For those seeking a departure from the classic, several enticing variations can elevate your Michelada experience. These twists offer new flavor dimensions while retaining the spirit of a customizable, refreshing drink.
Consider a Michelada Negra for a richer profile. This involves swapping a traditional light lager for a darker Mexican beer like Negra Modelo. The deeper, slightly sweeter notes of the dark beer create a more complex and robust flavor that complements the savory clamato base beautifully, offering a sophisticated twist for those who appreciate a richer taste.
Another delightful option is the Spicy Mango Michelada. By adding about half a cup of mango juice to the base mix, you introduce a sweet, tropical counterpoint to the inherent spice and tang of the Michelada. This variation is incredibly popular for summer gatherings, offering a vibrant, fruity dimension that is both unexpected and highly enjoyable, appealing to a wide range of palates.
For a lighter, non-alcoholic version, simply omit the beer and top the clamato lime base with sparkling water or club soda. This creates a wonderfully refreshing mocktail that captures the signature savory and citrusy notes of a Michelada, making it accessible for all guests, including designated drivers or those abstaining from alcohol. It’s a brilliant way to ensure everyone can partake in the festive flavors.
How to Prepare Michelada cocktail bar
Step 1: Prepare the Glass Rims
The signature Tajín rim is crucial for the authentic Michelada experience, adding a salty, tangy, and slightly spicy kick to every sip. This step is all about creating that perfect flavor barrier between the glass and your lips, setting the stage for the delicious drink to come.
Begin by pouring a generous amount of Tajín seasoning into a shallow bowl or plate. You’ll want enough to comfortably coat the rim of your glasses without being too sparse. For each glass, take a fresh lime wedge and run it around the entire outer rim. Ensure the rim is well-moistened with lime juice; this is what allows the Tajín to adhere properly.
Once the rim is sufficiently coated with lime juice, carefully invert the glass and dip the moistened rim into the Tajín. Gently rotate the glass to ensure an even coating. Set the prepared glasses aside on a clean surface while you move on to the next step. This simple process transforms a regular glass into a flavor-infused vessel, ready to hold your magnificent Michelada.
Step 2: Mix the Michelada Base
This is where the heart of your Michelada comes to life. The base is a harmonious blend of savory, tangy, and slightly spicy elements that form the foundation of the cocktail. It’s important to get this mix right, as it will be the dominant flavor profile before the beer is added.
In a large pitcher or bowl, combine the clamato juice, freshly squeezed lime juice, Worcestershire sauce, and your chosen hot sauce. Start with a modest amount of hot sauce—perhaps a teaspoon or two—as you can always add more later to suit individual preferences. A pinch of salt is also added at this stage to enhance the overall flavor profile.
Stir the mixture thoroughly until all ingredients are well incorporated. Now comes the crucial tasting and adjusting phase. This is your chance to fine-tune the balance of flavors. Add more hot sauce if you desire more heat, extra Worcestershire for added depth, or a bit more salt if needed. If you’re feeling adventurous and want an extra layer of umami, a teaspoon of Maggi seasoning can work wonders here, adding a subtle savory complexity akin to soy sauce but with a unique character.
Step 3: Add Ice to Glasses
Ice is not just for chilling; it plays a role in the dilution and overall refreshment of the Michelada. Using ample ice ensures that your drink stays cold for longer, preventing it from becoming watery too quickly as you enjoy it.
Take your prepared, Tajín-rimmed glasses and fill them about halfway with ice cubes. Crushed ice can also be used for a different texture and faster chilling, but standard cubes are perfectly fine and more common for this style of cocktail. The coldness of the ice will immediately start to chill the glass and prepare it for the liquid ingredients.
Ensure the ice is distributed evenly within the glass. This cold foundation is essential for keeping the final drink crisp and invigorating, especially in warmer weather or during lively gatherings. It also provides a pleasant aesthetic, with the clear ice cubes contrasting nicely with the vibrant red liquid that will soon fill the glass.
Step 4: Pour the Base and Beer
This is the exciting step where the core components of the Michelada come together. The ratio of clamato base to beer is key to achieving the perfect balance of savory and crisp.
Carefully pour the prepared clamato lime mixture into each ice-filled glass, filling it about two-thirds of the way full. This leaves enough room for the beer without overflowing. The vibrant red of the clamato base should be visually appealing against the ice and the Tajín rim.
Gently top off each glass with your chosen beer. The goal is to preserve as much of the beer’s carbonation as possible, so pour slowly and steadily. A light stir with a spoon or a stirring stick is then recommended to meld the beer with the clamato base, ensuring every sip is a cohesive blend of flavors. Avoid over-stirring, which can dissipate the fizz.
Step 5: Garnish and Serve
Garnishes are the crowning glory of any well-made cocktail, and the Michelada is no exception. They add visual appeal, extra flavor dimensions, and a touch of interactive fun for your guests. This is where the creativity truly shines.
Begin with a classic garnish: a fresh lime wedge perched on the rim of the glass or dropped inside. This provides an extra burst of citrus whenever the drinker desires. Other popular garnishes include a crisp celery stalk, which adds a refreshing crunch and a subtle vegetal note that cuts through the richness. Slices of cucumber can offer a cool, mild flavor, while pickled jalapeño slices provide an additional spicy kick for those who enjoy extra heat.
Don’t be afraid to get creative! For a more elaborate presentation, consider adding a skewer of olives, a few cooked shrimp for a surf-and-turf twist, or even a slice of crisp bacon. The options are nearly endless, allowing each guest to personalize their drink to their exact liking. Serve immediately to ensure the drink is perfectly chilled and the beer remains effervescent. The festive look and invigorating taste will surely be a hit at your gathering.
Step 6: Facilitate Guest Customization
The true magic of a Michelada cocktail bar lies in its do-it-yourself nature, empowering guests to craft their perfect drink. This interactive element transforms a simple beverage into a memorable experience, fostering conversation and allowing for individual taste preferences.
Ensure that all your garnishes, extra hot sauces, lime wedges, and even additional Tajín are readily accessible on the bar. Clearly label any separate bowls of seasonings or garnishes to guide your guests. Provide a small station where guests can rim their own glasses if they prefer, or offer to do it for them, giving them the choice.
Encourage experimentation! Let your guests know they can add more hot sauce, extra lime, or try different garnish combinations. This freedom to customize is what makes the Michelada bar so enjoyable and unique. It’s a fun way to involve everyone in the drink-making process, turning your party into a collaborative culinary adventure.
Pro Tips for Michelada cocktail bar
Elevate your Michelada experience with these expert insights, honed through countless happy hour sessions and backyard fiestas. These tips will help you achieve that perfect balance of flavor and presentation every time.
Chill Everything: For the ultimate refreshing experience, make sure your clamato juice, beer, and even your glasses are thoroughly chilled before you begin assembling. A warm Michelada is simply not the same; proper chilling is paramount.
Taste and Adjust: Always taste your Michelada base before adding beer. This is your opportunity to fine-tune the spice, saltiness, and tanginess. You can always add more spice or lime, but you can’t easily take it away.
Don’t Over-Dilute: While ice is essential, avoid using too much in the final drink if it means over-diluting the flavor. Fill the glass about two-thirds with ice, then add the liquids, allowing the ice to do its job without sacrificing taste.
Garnish Creatively: Beyond the standard lime and celery, consider offering other interesting garnishes like pickled jalapeños, cucumber slices, or even a few cooked shrimp for a truly adventurous twist. These extras make your Michelada bar stand out.
Prepare in Batches: If you’re expecting a crowd, prepare the clamato base in larger batches ahead of time. This saves you time during the party and ensures you won’t run out of the essential mix.
Serving Suggestions for Michelada cocktail bar
Decoration
To enhance the festive atmosphere, consider a vibrant décor. Think colorful papel picado banners strung across the yard or patio, a brightly colored tablecloth for your bar area, and perhaps some small sombreros or maracas as table centerpieces. Even simple touches like fresh flowers in terracotta pots can add a cheerful, inviting feel.
For the bar itself, arrange your ingredients in an organized and appealing manner. Use attractive bowls for garnishes, clearly label your spice options, and perhaps place a small chalkboard sign with a playful “Build Your Own Michelada” message. Good lighting is also key if your gathering extends into the evening, creating a warm and welcoming ambiance.
Side Dishes
A Michelada is a fantastic accompaniment to a variety of flavorful dishes, especially those with a Mexican or Latin American flair. Consider serving classic dinner favorites like street tacos with various fillings, sizzling fajitas, or a hearty bowl of chili. Chips and guacamole, salsa, and pico de gallo are essential for any fiesta-style gathering and pair perfectly with the tangy, spicy notes of the drink.
For something a bit more substantial, consider dishes that can soak up the bold flavors of the Michelada. Spicy shrimp ceviche, a rich and cheesy chicken enchilada casserole, or even some grilled corn on the cob (elote) make excellent complements. The contrast of flavors and textures will keep your guests engaged and satisfied throughout the event.
Creative Serving Ideas
Beyond the standard glass, think about how to present your Micheladas uniquely. Consider serving smaller, shooter-style Micheladas as an appetizer, allowing guests to sample different flavor combinations without committing to a full drink. You could also offer a “Michelada Flight,” with three different variations of the drink for guests to compare.
For a truly memorable touch, create custom drink stirrers or personalized coasters. If you’re serving food that can be paired directly with the drink, like skewers of marinated meat or spicy grilled shrimp, incorporate them as part of the garnish. The goal is to make the drinking experience as engaging and enjoyable as the taste itself, turning each serving into a miniature work of art.
Preparation & Storage
Storing Leftovers
If you happen to have any leftover clamato base mix, it can be stored in an airtight container in the refrigerator for up to 24 hours. Give it a vigorous stir before serving again, as some separation may occur. It’s best to store any unused beer separately in its original container, properly capped, to maintain its carbonation.
Prepared garnishes, such as sliced limes or celery, can also be stored in airtight containers in the fridge. However, for optimal freshness and crispness, it’s best to slice them on the day of your event or as close to serving time as possible. Avoid storing rimmed glasses with Tajín for extended periods, as the seasoning can become soft and lose its appeal.
Freezing
Freezing Michelada base is generally not recommended, as the texture of the clamato juice and other liquid ingredients can change significantly upon thawing. It might become watery or develop an unpleasant consistency. For the best results, it’s always better to prepare the base fresh or store it refrigerated for a short period.
Similarly, freezing beer is not advisable, as it can alter its flavor profile and carbonation. Garnishes like lime wedges or celery are also best kept fresh in the refrigerator rather than being frozen. The key to enjoying a Michelada is its fresh, vibrant character, which is best maintained through refrigeration.
Reheating
Since Micheladas are served cold and are meant to be refreshing, there is no reheating process involved. The clamato base should be kept chilled in the refrigerator until ready to be mixed with ice and beer. If you have leftover base, ensure it is properly cooled and hasn’t been sitting out at room temperature for too long before chilling it again.
When preparing for your event, ensuring all components—the base mix, the beer, and the glasses—are well-chilled is the most critical step. This guarantees that your guests will receive a perfectly cold and invigorating beverage, from the first sip to the last. If a guest finds their drink has warmed up too much, they can always add a few more ice cubes.
Frequently Asked Questions
-
Can I make Micheladas without clamato juice?
Yes, it’s possible to make a version of a Michelada without clamato juice, though it will have a different flavor profile. The key savory element in clamato is the combination of tomato juice and clam broth, which provides a unique umami depth. If you can’t find clamato or prefer to omit it, you can create a similar savory base by mixing regular tomato juice with a splash of clam broth or even a few drops of fish sauce or Worcestershire sauce to replicate that depth. You would then proceed with adding fresh lime juice, hot sauce, and seasonings as you would for a traditional Michelada. While it won’t be an exact replica, it can still yield a very delicious and refreshing drink that captures the essence of a Michelada.
-
How spicy should my Michelada be?
The ideal spice level for a Michelada is entirely subjective and depends on individual preference, which is precisely why the DIY cocktail bar approach is so effective. I strongly recommend starting conservatively when preparing the base clamato mix. A few dashes of your favorite hot sauce (like Valentina or Cholula) are usually sufficient for a moderate heat. This allows guests the opportunity to further customize their drink at the bar. Provide various hot sauce options, ranging from mild to extra spicy, so each person can achieve their desired level of heat. Some guests may prefer a very mild, citrus-forward drink, while others might want a fiery kick, and the bar setup caters to all these preferences beautifully.
-
Can I prepare the Michelada base ahead of time?
Absolutely, preparing the Michelada base ahead of time is a brilliant strategy for party hosts. The clamato juice, lime juice, Worcestershire sauce, and hot sauce mixture can be made up to 24 hours in advance. Store it in an airtight container in the refrigerator. When you’re ready to serve, simply give the base a good stir, as some natural separation might occur. This makes serving much quicker and smoother during your event. It’s crucial, however, not to add the beer to the base until just before serving, as this will preserve the beer’s carbonation and prevent the drink from becoming flat. Chilling the base thoroughly is key for a refreshing final product.