Irresistible Homemade Amaretto
Are you ready to indulge in a sweet, nutty treat that you can savor anytime? Homemade Amaretto is more than just a liqueur; it’s a delightful experience that can elevate your beverages or desserts. This homemade version captures the essence of the traditional Italian liqueur, giving you control over the flavors and sweetness.
Have you ever wondered how easy it is to create your own flavored spirits that can wow your guests? Imagine the satisfaction of serving a drink or dessert enhanced with your very own Homemade Amaretto, a testament to your culinary creativity and attention to detail.
Why You Will Love This Recipe
- Rich Flavor: The exquisite balance of sweet, nutty, and incredibly smooth notes makes every single sip an absolutely irresistible pleasure, leaving you craving more.
- Easy to Make: With a straightforward set of steps designed for simplicity, any aspiring home chef can confidently create their own delightful liqueur right in their own kitchen.
- Versatile Uses: Whether you’re crafting sophisticated cocktails, enhancing your morning coffee, or infusing desserts with a unique flair, it adds an unmistakable touch of elegance to any occasion.
- Gift-Worthy: This beautifully crafted homemade treat serves as a wonderfully thoughtful and personal gift for friends and family, showcasing your care and culinary prowess.
- Customizable: You have the power to precisely adjust the sweetness and the intensity of the nutty flavor, ensuring it perfectly suits your individual taste preferences.
Ingredients You Need
The quality of your ingredients plays a pivotal role in the final taste of your Homemade Amaretto. Opt for a good quality vodka as its neutral base will allow the almond and sugar flavors to truly shine through. Similarly, using pure almond and vanilla extracts will provide a more authentic and vibrant flavor profile than imitation versions.
Homemade Amaretto

A delightful homemade liqueur with a sweet, nutty flavor that enhances drinks and desserts, perfect for gifting or personal enjoyment. This recipe is easy to make, customizable, and cost-effective, offering a purer taste than store-bought versions.
- 1 cup vodka
- 1 cup white sugar
- 1/2 cup brown sugar
- 1 cup water
- 1 tablespoon almond extract
- 1 teaspoon vanilla extract
- 1/4 cup brandy (Optional)
- 1Gather all ingredients.
- 2In a saucepan, combine white sugar, brown sugar, and 1 cup of water. Heat over medium heat, stirring constantly until the sugars dissolve completely to create a simple syrup.
- 3Once the sugars have dissolved, remove the saucepan from heat and allow the syrup to cool to room temperature.
- 4In a large bottle, combine the cooled simple syrup with vodka, almond extract, vanilla extract, and brandy if using.
- 5Seal the bottle tightly and shake gently to mix all the ingredients thoroughly.
- 6Place the sealed bottle in a cool, dark place to age for at least two weeks.
- 7Taste after two weeks and adjust sweetness if necessary by adding more simple syrup.
- 8Serve Homemade Amaretto over ice, mix it into coffee, or use it in various desserts.
Keywords: Amaretto, Homemade Liqueur, Italian Liqueur, Nutty Flavor, Sweet Drink
- vodka: a clean, neutral spirit forms the backbone of your liqueur.
- white sugar: provides sweetness and contributes to the smooth texture.
- brown sugar: adds a subtle depth of flavor and a hint of caramel.
- water: used to create the simple syrup base.
- almond extract: the star ingredient, delivering that signature nutty amaretto taste.
- vanilla extract: complements the almond and adds a layer of warmth and complexity.
- brandy (optional): for an extra layer of richness and a more complex flavor profile.
The precise quantities for these ingredients can be found within the accompanying recipe card, ensuring you have all the necessary measurements for success.
Variations
For those seeking a decadent chocolate experience, infuse your Homemade Amaretto with rich cocoa powder or even a small amount of melted dark chocolate during the mixing stage. This transforms the classic liqueur into a luscious, dessert-like spirit that is perfect for sipping on its own or enhancing chocolate-themed cocktails and baked goods.
A refreshing herbal twist can be achieved by infusing fresh herbs like mint or rosemary into the simple syrup as it cooks. Strain out the herbs before cooling the syrup to impart a subtle, aromatic note that adds a surprising complexity to the amaretto, making it ideal for creative cocktails and as a palate cleanser.
To cater to different palates and dietary needs, consider creating a coffee-infused version by adding a shot of strong espresso or a teaspoon of instant coffee granules to the mixture. This results in a delightful coffee amaretto that is a perfect companion to your morning coffee or a delightful addition to tiramisu and other Italian desserts.
Elevating the simple syrup is also a fantastic way to introduce unique flavors. Try simmering a cinnamon stick or a few star anise pods in the water and sugar mixture before straining. This subtle infusion adds a warm, spiced dimension that is particularly wonderful during the cooler months and pairs beautifully with baked apples or as a flavouring in mulled wine.
Another delightful variation involves using different types of sugar for the simple syrup. While white and brown sugars are standard, experimenting with demerara or turbinado sugar can introduce subtle molasses notes and a slightly richer caramel undertone. This minor change can significantly alter the liqueur’s character, lending it a more robust and complex flavour profile.
For those who enjoy a bit of zest, incorporating the zest of an orange or lemon peel into the syrup during the cooking process can add a bright, citrusy note. This zesty infusion cuts through the sweetness and nuttiness, creating a more balanced and refreshing liqueur that is perfect for summer cocktails or as a flavour enhancer in lemon-based desserts.
How to Prepare Homemade Amaretto
Step 1: Gather and Measure Your Ingredients
The foundation of any successful homemade liqueur lies in meticulous preparation. Begin by gathering all the necessary components, ensuring each ingredient is precisely measured according to the recipe. This includes the high-quality vodka, the specific amounts of white and brown sugar, pure almond extract, pure vanilla extract, and any optional brandy you choose to include for added depth and complexity.
Having everything pre-measured and ready to go streamlines the entire process, minimizing the chances of error and allowing you to focus on the delicate steps of syrup creation and flavor infusion. This organized approach ensures that the final product will have the intended balance and richness.
Step 2: Prepare the Simple Syrup Base
In a medium saucepan, combine the white sugar and brown sugar with exactly one cup of fresh water. Place the saucepan over medium heat on your stovetop. It is crucial to stir the mixture constantly and patiently as it heats up. Your goal is to ensure that all the sugar crystals dissolve completely into the water, forming a clear, homogenous liquid.
Continue to heat the mixture gently until it reaches a gentle simmer. Avoid allowing it to boil vigorously, as this can lead to an overly thick syrup or even caramelization, which can impart unwanted bitterness. The simmering should be just enough to ensure all the sugar is fully integrated and the syrup begins to develop a slightly thicker consistency.
Once the sugar has completely dissolved and the syrup has achieved a smooth, slightly viscous texture, remove the saucepan from the heat source immediately. This careful temperature control is essential for preventing the sugar from burning or becoming too concentrated, which could negatively impact the delicate flavor profile of your amaretto. The resulting liquid should be a clear, moderately thick simple syrup, ready for the next crucial step.
Step 3: Allow the Syrup to Cool Completely
This step is absolutely critical for the integrity of your Homemade Amaretto. Once you have removed the simple syrup from the heat, it is imperative that you allow it to cool down to room temperature before proceeding. Placing hot syrup directly into alcohol can cause the alcohol to evaporate prematurely, diminishing its potency and altering the final flavor profile of your liqueur.
Patience is key here; rushing this cooling process is a common mistake that can lead to a less flavorful and less potent end product. You can speed up the cooling process slightly by placing the saucepan in a larger bowl filled with ice water, but direct contact of hot syrup with cold water should be avoided. Ensure the syrup is no longer warm to the touch before mixing it with the other ingredients.
The completely cooled simple syrup will maintain its integrity and allow the alcohol and extracts to meld beautifully without any loss of essential volatile compounds. This ensures that the nuanced flavors of the almond and vanilla extracts are preserved and can fully develop during the aging process, leading to a truly superior Homemade Amaretto experience.
Step 4: Combine All the Ingredients
Select a large, clean glass bottle or jar that has a tight-fitting lid or stopper. This container should be substantial enough to comfortably hold all of your ingredients. Carefully pour the completely cooled simple syrup into this chosen bottle. Next, add the measured amount of high-quality vodka to the syrup.
Following the vodka, precisely measure and add the pure almond extract and the pure vanilla extract. If you have decided to include brandy for an extra layer of richness, now is the time to add that as well. Ensure all additions are accurately measured to achieve the intended flavor balance.
The act of combining these elements is where the magic truly begins to happen, as the sweet syrup and the potent alcohol start the process of becoming a harmonious liqueur. A well-sealed container is vital at this stage to prevent any spillage or evaporation during the crucial resting period that follows.
Step 5: Seal the Bottle and Shake Vigorously
Once all the ingredients are inside the bottle, secure the lid or stopper firmly. Ensure it is tightly sealed to prevent any leakage. Now, it’s time to thoroughly mix everything together. Hold the bottle securely and shake it vigorously for at least 30-60 seconds. This vigorous shaking is essential for ensuring that the simple syrup, the vodka, the almond extract, and the vanilla extract are completely and evenly combined.
The goal is to create a homogenous mixture where no distinct layers of liquid are visible. Proper emulsification at this stage is crucial for the flavors to begin their integration process effectively. A well-shaken mixture allows the alcohol to start extracting and blending with the flavors of the extracts and sugars efficiently.
After the initial thorough shaking, give the bottle another gentle shake every few days during the aging process. This repeated agitation helps to ensure that the flavors continue to meld evenly and prevents any potential settling of ingredients, contributing to a smoother and more consistent final product. This step is a vital part of developing the complex flavor profile of your Homemade Amaretto.
Step 6: Allow the Amaretto to Age and Develop Flavors
This is arguably the most important step in creating truly exceptional Homemade Amaretto, requiring patience and a suitable resting environment. Place the securely sealed bottle in a cool, dark place. A pantry, a cupboard away from heat sources, or even a dedicated wine cellar are ideal locations. Direct sunlight and heat can degrade the quality of the liqueur and interfere with the flavor development.
You must let the mixture rest for a minimum of two weeks. During this period, the alcohol acts as a solvent, gradually drawing out and blending the almond and vanilla essences with the sweetness of the sugar syrup. This slow, natural infusion process allows the sharp edges of the alcohol to mellow and the distinct flavors to harmonize into a rich, complex profile.
For an even richer and smoother taste, you can extend the aging period to four weeks or even longer. The longer the amaretto ages, the more the flavors will deepen and meld, resulting in a more sophisticated and well-rounded liqueur. This patient aging process is what transforms a simple mixture of ingredients into a truly delicious and artisanal spirit.
Step 7: Taste and Adjust for Perfect Sweetness
After the initial resting period of at least two weeks has passed, it’s time for the exciting part: tasting your creation! Carefully open the bottle and pour a small amount of the amaretto into a small glass or shot glass. You can enjoy this initial taste neat, over ice, or mixed with a splash of water to better discern the flavor nuances.
Savor the taste and evaluate the sweetness and the intensity of the almond flavor. Based on your personal preference, you can make adjustments. If you find it not sweet enough, you can prepare a small additional batch of simple syrup (using the same proportions of sugar and water) and let it cool completely before adding it to the main bottle. Remember to add it gradually and re-shake to combine.
Conversely, if you find it too sweet, it is more challenging to correct, which is why starting with the recommended sugar quantities is advisable. You can slightly dilute it with a bit more vodka if the sweetness is overpowering, though this will also dilute the flavor intensity. This tasting and adjustment phase ensures that your Homemade Amaretto is perfectly balanced to your liking, making it truly your own.
Step 8: Serve and Enjoy Your Homemade Masterpiece
Congratulations! Your Homemade Amaretto is now ready to be enjoyed in a multitude of ways. The most straightforward and classic method is to serve it chilled, over ice, in a rocks glass. The coolness enhances the smoothness and allows the complex flavors to be fully appreciated. It makes for a perfect after-dinner digestif.
Beyond sipping it neat, this versatile liqueur can elevate a wide array of beverages and culinary creations. Add a generous splash to your morning coffee or an evening espresso for a delightful nutty warmth. It is also a star ingredient in numerous cocktails, from classic Amaretto Sours to creamy White Russians or even innovative mixed drinks. Explore online cocktail recipes for inspiration.
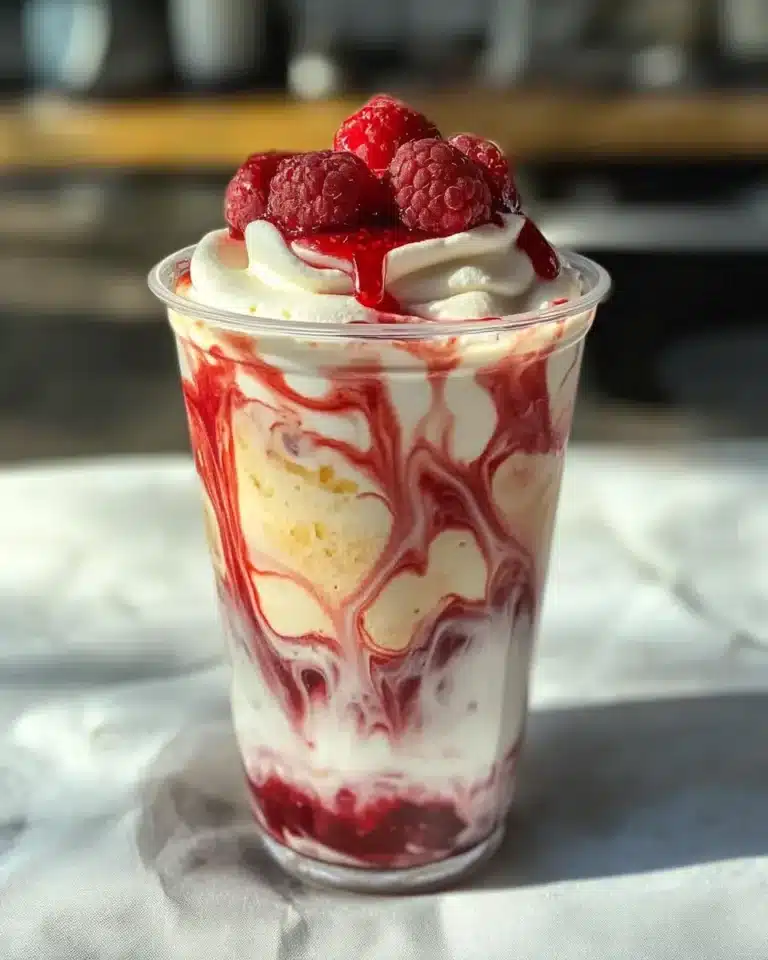
In the kitchen, Homemade Amaretto can transform desserts. Drizzle it over ice cream, incorporate it into cakes, cookies, or cheesecakes, or use it to soak fruits for trifles. Its sweet, nutty essence adds a professional touch and a memorable flavor dimension to any sweet treat. Share your homemade creation with pride!
Pro Tips for Homemade Amaretto
Quality is Paramount: Always opt for the highest quality vodka, almond extract, and vanilla extract you can find. The better the base ingredients, the more refined and delicious your Homemade Amaretto will be; imitation extracts can result in a harsh or artificial taste.
Patience for Flavor: Do not be tempted to shorten the resting period. The minimum two weeks is crucial for the alcohol to mellow and for the flavors to fully integrate and harmonize. Longer aging periods often yield even more complex and smoother results.
Start Simple with Additions: When experimenting with variations, begin with subtle additions. A touch of another extract or a single spice infusion is a good starting point. You can always build upon successful flavor combinations in future batches.
Proper Bottling Matters: Use clean, airtight glass bottles for storage. This not only preserves the liqueur’s freshness and prevents evaporation but also makes it look appealing if you plan to gift your Homemade Amaretto. Dark glass bottles can offer additional protection from light.
Label with Love: If you make multiple batches or variations, be sure to label each bottle clearly with the date and any specific flavorings used. This is particularly helpful for gifting, as recipients will know what they are enjoying and when it was made.
Serving Suggestions for Homemade Amaretto
Decoration
Garnish your Homemade Amaretto creations with a maraschino cherry for a classic touch, or a twist of orange peel to complement its nutty sweetness. A dusting of cocoa powder on top of a creamy amaretto cocktail can add visual appeal and an extra layer of flavor. For desserts, a sprinkle of slivered almonds or shaved chocolate offers a delightful textural contrast and reinforces the liqueur’s core flavors.
Side Dishes
Homemade Amaretto pairs exceptionally well with Italian-inspired desserts such as biscotti or panna cotta. Its nutty profile also makes it a wonderful accompaniment to rich chocolate cakes, tiramisu, or crème brûlée. For a savory contrast, consider pairing it with a sharp aged cheddar or a creamy blue cheese, allowing the sweetness of the amaretto to cut through the richness.
Creative Serving Ideas
Infuse coffee or hot chocolate with a generous shot of Homemade Amaretto for a warming and indulgent beverage. It can be used to deglaze pans for desserts like poached pears or baked apples, adding a sophisticated depth of flavor. Mix it into a simple syrup to brush onto cake layers, or use it as the liquid base for homemade ice cream or sorbet for a truly unique treat.
Preparation & Storage
Storing Leftovers
To maintain the optimal flavor and quality of your Homemade Amaretto, store it in a cool, dark place, much like you would a fine wine or commercial liqueur. A pantry or a dedicated liquor cabinet away from direct sunlight and heat sources is ideal. Ensure the bottle is always tightly sealed to prevent oxidation and evaporation, which can affect both the taste and alcohol content over time.
Freezing
While the high alcohol content of Homemade Amaretto prevents it from freezing solid like water, you can still use it in frozen applications. Pouring the liqueur into ice cube trays and freezing them creates flavored amaretto ice cubes. These are perfect for chilling cocktails without dilution or for adding a subtle nutty flavor to drinks as they melt. Keep these cubes in a sealed bag or container in the freezer.
Reheating
Homemade Amaretto is typically enjoyed at room temperature or chilled, but it can be gently warmed if desired, particularly for use in hot beverages. To reheat, simply pour the desired amount into a small saucepan over very low heat, stirring gently until warmed through. Alternatively, add it directly to hot coffee or other warm drinks; the heat of the beverage itself will be sufficient to blend the flavors.
Frequently Asked Questions
-
What is the typical shelf life of Homemade Amaretto, and how should it be stored to maximize its longevity?
When stored correctly in a cool, dark place with a tightly sealed bottle, Homemade Amaretto can maintain its quality and flavor for several months, often up to a year or even longer. The alcohol content acts as a natural preservative. Over time, the flavors may even continue to meld and deepen, potentially improving its character. Always ensure the bottle is resealed immediately after use to prevent evaporation and oxidation, which are the main culprits in degrading its quality. If you notice any cloudiness or off-smell, it’s best to discard it, but this is rare with proper storage.
-
Can I create a non-alcoholic version of Amaretto, and if so, what adjustments would be necessary?
Yes, you can absolutely create a delicious non-alcoholic Amaretto substitute. Instead of vodka, use a base of pure water. Combine this water with the sugars and heat to create your simple syrup. To replicate the flavor, you’ll need to rely heavily on high-quality almond extract and vanilla extract, potentially increasing the amounts slightly to compensate for the absence of alcohol’s flavor-carrying properties. You might also consider adding a touch of almond extract to an almond-flavored syrup or a simple syrup infused with toasted almonds to enhance the nutty notes. Adjust sweetness to your preference, as the alcohol itself does not contribute to sweetness.
-
What are the key indicators that my Homemade Amaretto is ready to drink, and can it be aged for an extended period?
The primary indicator that your Homemade Amaretto is ready is through taste. After the recommended resting period of at least two weeks, sample a small amount. You should notice that the initial harshness of the alcohol has softened considerably, and the almond and vanilla flavors have integrated smoothly with the sweetness. The flavors should be well-balanced and harmonious. Yes, your Homemade Amaretto can certainly be aged for an extended period. Many enthusiasts find that aging it for four to six weeks, or even several months, further mellows the alcohol and deepens the complexity of the flavors, resulting in a richer, smoother, and more nuanced liqueur. Store it in its cool, dark place for continuous aging.