Philadelphia Zitronen Torte – Erfrischend, Einfach und Lecker – Muma’s Kitchen
Imagine a dessert that perfectly balances creamy richness with a zesty, refreshing zing – a treat that’s both elegant enough for a special occasion and delightfully simple to make. This Philadelphia lemon cake embodies that very ideal, offering a no-bake marvel that will become your go-to for any gathering, especially during the sun-drenched days of summer.
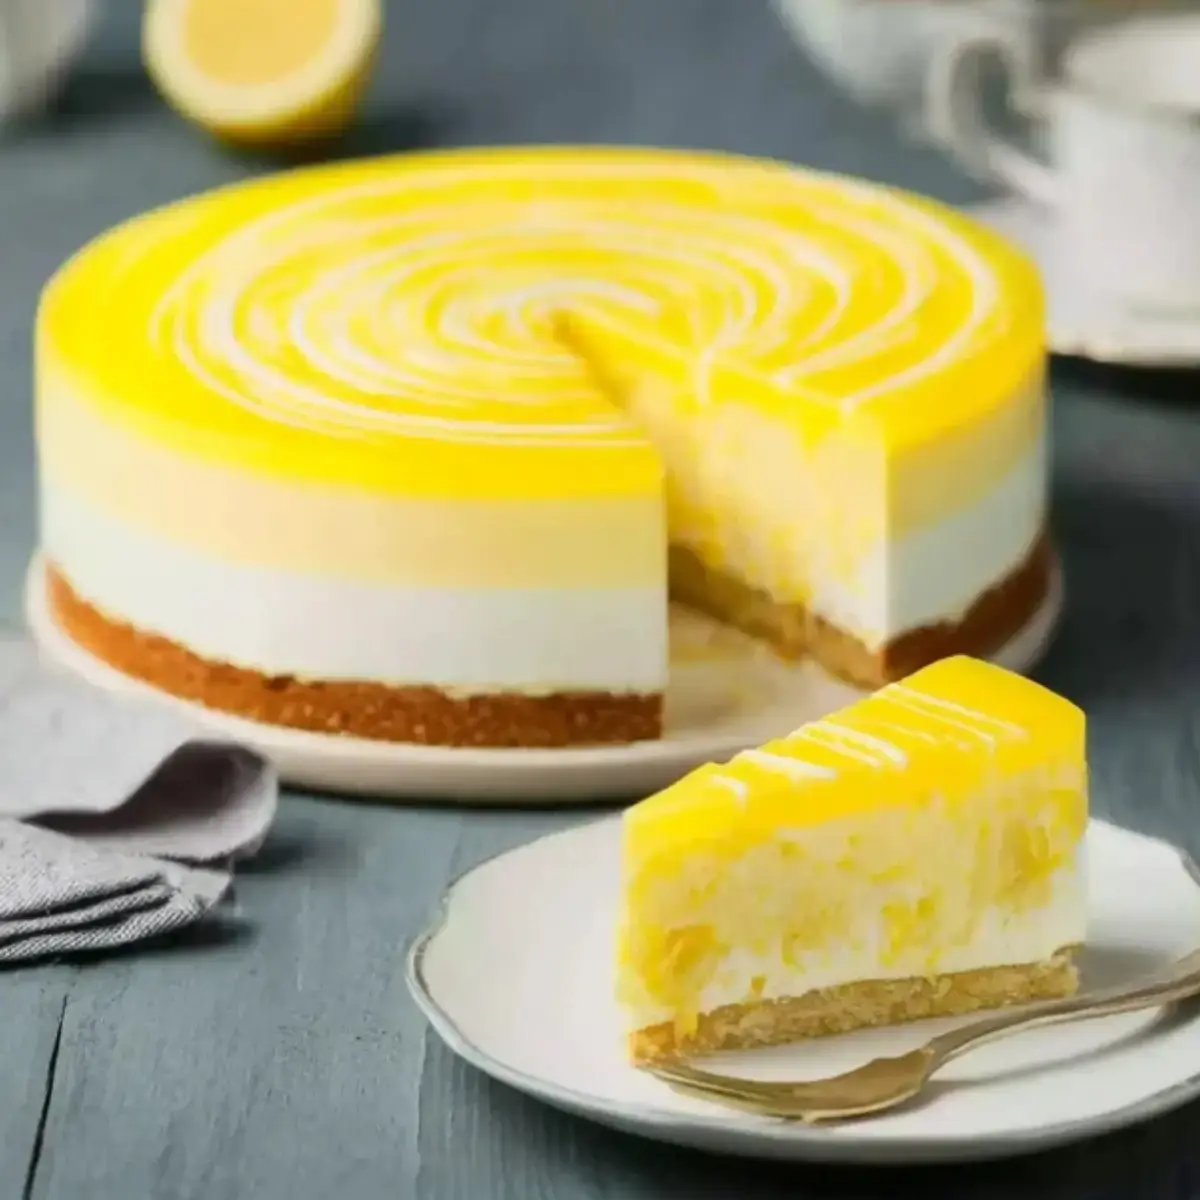
It’s a symphony of textures and flavors: a crisp biscuit base providing a satisfying crunch, a luscious, velvety lemon-infused cream cheese filling, and a shimmering, tangy glaze to top it all off. This dessert is designed to impress without the fuss, a testament to the fact that truly exceptional treats don’t always require hours in the oven. Let’s embark on a culinary journey to recreate this delightful masterpiece.
Why You Will Love This Recipe
- Effortless Preparation: This dessert is a no-bake wonder, meaning you can skip the oven and achieve fantastic results with minimal stress, perfect for busy bakers.
- Bright, Refreshing Flavor: The star of the show is the vibrant lemon, expertly balanced with the smooth creaminess of Philadelphia cream cheese for a truly invigorating taste experience.
- Versatile Crowd-Pleaser: Its elegant presentation and delightful flavor profile make it suitable for everything from casual afternoon teas to more formal dinner parties, ensuring it’s always a hit.
- Make-Ahead Convenience: Designed to be prepared in advance, this cake allows you to save time on the day of your event, letting the flavors meld beautifully in the refrigerator.
- Adaptable to Dietary Needs: With simple substitutions, you can easily adapt this recipe to be gluten-free or even lighter, catering to a wider range of preferences.
Ingredients You Need
The success of any exquisite dessert hinges on the quality of its components, and this Philadelphia lemon cake is no exception. We’ve selected ingredients that are readily available and work harmoniously to create that signature taste and texture. Each element plays a crucial role, from the buttery foundation to the bright, creamy heart and the glistening finish.
Philadelphia Lemon Cheesecake

A no-bake, refreshing lemon cheesecake with a crunchy biscuit base and a glossy lemon glaze. Perfect for warm summer days and easy to prepare ahead.
- 125 g Butter
- 150 g Ladyfingers
- 200 g Philadelphia® Cream Cheese
- 75 ml Lemon Juice
- 75 g Sugar
- 500 g Cold Whipped Cream
- 3 sachets Dr. Oetker Gelatine fix
- 1 packet Dr. Oetker Clear Cake Glaze
- 3 tbsp Sugar
- 150 ml Water
- 100 ml Lemon Juice
- Dr. Oetker Yellow Food Coloring (optional)
- 1Preparation: Place a sheet of baking paper on a cake plate and set the springform ring (without the base) on top.
- 2Prepare the Biscuit Base: Melt the butter and crush the ladyfingers. Mix them with the melted butter and press the mixture into the springform ring. Chill the base in the refrigerator for at least 20 minutes.
- 3Prepare the Cream Cheese Filling: Combine the Philadelphia® Cream Cheese, lemon juice, and sugar in a mixing bowl. Mix with a hand mixer until smooth. Whip the cold heavy cream with Gelatine Fix until stiff peaks form and gently fold it into the cream cheese mixture.
- 4Add the Filling to the Base: Spread the cream cheese filling evenly over the biscuit base and smooth the top.
- 5Prepare the Cake Glaze: Prepare the cake glaze according to package instructions using sugar, water, and lemon juice. Optionally, color it with yellow food coloring. Let the glaze cool for about 2 minutes, then spread it over the cream cheese filling. Use a fork to create a marbled pattern.
- 6Chill: Refrigerate the cake for at least 2 hours to allow it to set.
- 7Finish: Carefully remove the springform ring and serve the cake.
Keywords: Lemon Cheesecake, No-Bake, Cream Cheese, Dessert, Summer, German
The precise quantities for each ingredient are detailed within the recipe card for your convenience. Here’s a glimpse of what you’ll be working with: the richness of butter, the essential crispness of digestive biscuits, the smooth and tangy Philadelphia cream cheese that gives the cake its name, freshly squeezed lemon juice for that indispensable zest, granulated sugar to balance the tartness, and heavy cream to create an airy, delightful filling. You’ll also need gelatin fix to ensure a stable yet delicate set, and a clear glaze mix with accompanying sugar, water, and more lemon juice for that beautiful, glossy topping. An optional touch of yellow food coloring can enhance the visual appeal.
Variations
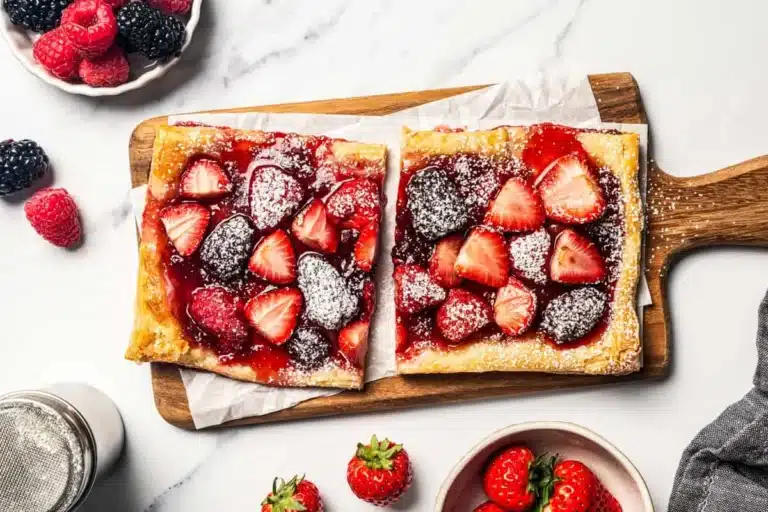
While the classic Philadelphia lemon cake is undeniably delicious, its inherent versatility opens doors to exciting variations that can cater to different tastes and dietary preferences. Imagine enhancing the summery feel by introducing a medley of fresh berries. Juicy raspberries, plump blueberries, or even sliced strawberries can be artfully arranged on top, adding not only visual appeal but also bursts of complementary fruitiness that play wonderfully with the lemon and cream cheese.
For those seeking a lighter touch, consider incorporating subtle herbal notes. A whisper of fresh mint, finely chopped, can add an unexpected layer of coolness and sophistication to the creamy filling, elevating the overall refreshment factor. This botanical addition pairs exceptionally well with the citrusy brightness of the lemon, creating a more complex and nuanced flavor profile that’s perfect for warm weather indulgence. It transforms the cake into an even more invigorating treat.
Gluten-free enthusiasts can rejoice, as this recipe is easily adapted. By simply swapping out traditional digestive biscuits for your favorite gluten-free variety, you can create a delightful base that’s entirely safe and just as delicious. Ensure that all other ingredients used, such as any additional flavorings or sweeteners, are also certified gluten-free to maintain the integrity of the dish. This thoughtful substitution allows everyone to enjoy a slice of this summery delight without compromise.
How to Prepare Philadelphia lemon cake
Step 1: Preparing the Pan and Biscuit Base
The foundation of our Philadelphia lemon cake begins with meticulous preparation of the baking pan and the creation of its delightful biscuit crust. Begin by lining a springform pan with a circle of parchment paper. This crucial step ensures that your finished cake will release cleanly, preserving its beautiful presentation without any sticking. Place the springform ring directly onto the parchment-lined base.
Next, the biscuit base takes shape. In a medium bowl, melt the unsalted butter until it’s fully liquid and glistening. While the butter is melting, finely crush the digestive biscuits. This can be achieved by placing them in a sturdy zip-top bag and using a rolling pin to break them down into fine crumbs, or by using a food processor for a quicker, more consistent texture. The goal is a fine, sand-like consistency.
Combine the crushed biscuits with the melted butter, mixing thoroughly until every crumb is coated and the mixture resembles damp sand. This buttery binder is key to a cohesive and stable base. Carefully transfer this crumb mixture into the prepared springform ring. Using the bottom of a glass or a flat-bottomed measuring cup, press the crumbs down firmly and evenly against the bottom of the pan. This compacted layer will form a sturdy, delicious crust that holds its shape beautifully when the cake is sliced. Once pressed, place the springform pan into the refrigerator for at least 20 minutes. This chilling period allows the butter to solidify, firming up the crust and preparing it to hold the creamy filling.
Step 2: Crafting the Creamy Lemon Filling
With the biscuit base chilling and firming up, it’s time to focus on the heart of our Philadelphia lemon cake: the lusciously creamy, vibrant lemon filling. In a large mixing bowl, combine the Philadelphia cream cheese, which should be at room temperature to ensure it blends smoothly without lumps, with the freshly squeezed lemon juice and granulated sugar. The tang of the lemon juice is essential here, cutting through the richness of the cream cheese and creating that signature zesty flavor. The sugar provides the necessary sweetness to balance this tartness.
Using an electric mixer, whether a hand-held one or a stand mixer fitted with the whisk attachment, beat these ingredients together until they form a perfectly smooth and homogenous mixture. You’re looking for a consistency that is utterly free of any cream cheese lumps, a silky texture that hints at the delightful creaminess to come. This smooth base is crucial for the overall mouthfeel of the cake. Ensure you scrape down the sides of the bowl periodically to incorporate all the ingredients evenly.
In a separate, clean bowl, whip the cold heavy cream until it forms stiff peaks. This means that when you lift the whisk, the cream holds its shape and the peaks stand upright without drooping. This airy whipped cream is what will give our filling its characteristic lightness and melt-in-your-mouth texture. To achieve this stiffness efficiently and reliably, it’s important that the cream is very cold and the bowl and whisk are also chilled. If using gelatin fix, prepare it according to the package instructions and then gently fold it into the whipped cream to ensure it’s evenly distributed. This stabilizer is key to achieving a clean slice later on.
The final step in creating the filling is to gently fold the whipped cream mixture into the cream cheese and lemon base. Use a spatula and a light, folding motion, being careful not to overmix, as this can deflate the airy whipped cream. The goal is to combine the two mixtures until just incorporated, creating a beautifully light yet rich filling that has a delicate lemon aroma. The color should be a pale, inviting creamy yellow, ready to be poured over the prepared biscuit base.
Step 3: Assembling the Cake
Now that our components are ready, it’s time to bring them together to form the magnificent Philadelphia lemon cake. Retrieve the springform pan with its chilled, firm biscuit base from the refrigerator. Gently pour the luxurious, pale yellow lemon cream cheese filling over the biscuit base. Aim to distribute it as evenly as possible across the surface, using the back of a spatula or a small offset spatula to create a smooth, level top. This even layer is important for the final appearance and for ensuring consistent texture throughout each slice.
Take your time with this step, ensuring the filling reaches all edges of the springform pan, creating a neat border. The creamy mixture should sit snugly atop the crisp biscuit crust. Once the filling is spread evenly and smoothly, gently tap the bottom of the springform pan on the counter a couple of times. This action helps to release any trapped air bubbles within the filling, further contributing to a smooth and professional finish. It’s the small details that elevate a homemade dessert to something truly special.
With the filling in place, the cake is now ready for its final, dazzling flourish. The next stage involves preparing and applying the shimmering lemon glaze. This glaze not only adds a beautiful, glossy sheen but also provides an extra layer of bright, citrusy flavor that complements the filling perfectly. Ensure the cake is stable and the filling has settled slightly before proceeding to the glazing stage, typically after a brief chilling period if needed, although many recipes proceed directly to this step after assembly.
Step 4: Preparing and Applying the Lemon Glaze
The crowning glory of our Philadelphia lemon cake is its lustrous lemon glaze, which provides a final touch of brightness and visual appeal. To begin, prepare the clear glaze according to the instructions on the package. Typically, this involves combining the clear glaze mix with sugar, water, and additional lemon juice in a small saucepan. The lemon juice is key here, not only for flavor but also to contribute to the overall citrus profile of the cake.
Heat this mixture over medium heat, stirring constantly, until the sugar is completely dissolved and the glaze is smooth and clear. It’s important not to boil the glaze vigorously, but rather to bring it to a gentle simmer just long enough for everything to incorporate. Once prepared, remove the saucepan from the heat. If you desire a more intense yellow hue to match the lemon theme, this is the moment to stir in a few drops of yellow food coloring. A little goes a long way, so add it gradually until you achieve your desired shade. Be mindful that the color will appear slightly lighter when it cools.
Allow the glaze mixture to cool slightly for a couple of minutes. You don’t want it to be piping hot, as this could cause it to melt the cream cheese filling beneath it. The ideal temperature is warm, but not excessively so. Once it has cooled sufficiently, carefully and evenly pour the glaze over the chilled cream cheese filling. Use an offset spatula or the back of a spoon to gently spread the glaze, ensuring it covers the entire surface of the cake and drips delicately down the sides, creating a beautiful, lacquered finish.
For an artistic touch, you can use the tip of a skewer or a toothpick to gently swirl the glaze, creating a subtle marbled effect or decorative patterns. This adds a personalized flair to your cake. Once the glaze has been applied and any desired patterns are made, the cake is ready for its final chilling period, allowing the glaze to set and the entire dessert to firm up completely, ready to be served and enjoyed by all.
Step 5: Chilling for Perfection
This crucial chilling phase is where the magic truly happens, allowing the distinct layers of our Philadelphia lemon cake to meld together into a cohesive and delightful dessert. After carefully applying the lemon glaze, gently cover the springform pan. You can use plastic wrap, ensuring it doesn’t touch the surface of the glaze, or a cake dome if you have one. The goal is to protect the cake from absorbing any odors from the refrigerator.
Place the covered cake back into the refrigerator and allow it to chill for a minimum of two hours. During this time, the cream cheese filling will set firmly, and the glaze will harden to a smooth, glossy finish. The flavors will also have the opportunity to deepen and harmonize, creating a more complex and satisfying taste experience. For optimal results, especially if you’re preparing the cake for a special occasion, it’s highly recommended to chill it for at least four hours, or even overnight. This extended chilling period ensures that the cake is perfectly firm and easy to slice, and that the lemon and cream cheese flavors are at their most vibrant.
A longer chill time also guarantees that the delicate structure of the cake holds up beautifully when served. You want each slice to be neat and presentable, showcasing the distinct layers. Don’t rush this process; patience here will be rewarded with a dessert that looks as good as it tastes. The transformation from individual components to a stunning, unified cake is truly remarkable during this resting period.
Step 6: Final Presentation and Serving
The moment of truth has arrived: your beautiful Philadelphia lemon cake is ready to be revealed and shared. Carefully remove the springform pan, which you’ve been patient with throughout the chilling process. Gently release the latch of the springform ring. Slowly and smoothly lift the ring away from the cake. If you’ve lined the pan with parchment paper, the sides of the cake should now be clean and intact. The parchment paper at the base can be left on for serving or carefully slid out from under the cake once it’s on a serving plate, depending on your preference.
Observe the finished product: a beautifully smooth, glossy surface of lemon glaze glistening under the light, a testament to your culinary efforts. The cake should be firm and hold its shape perfectly. For an extra touch of elegance and a burst of freshness, consider a few simple garnishes. A scattering of fresh mint leaves, their vibrant green contrasting with the pale yellow cake, adds a pop of color and a subtle aromatic lift. Alternatively, a few fresh berries, like raspberries or blueberries, can provide additional visual appeal and a complementary tartness.
Using a sharp knife, preferably one that has been dipped in hot water and wiped dry between each cut for the cleanest slices, carefully portion the cake. Serve each slice immediately to your delighted guests. The combination of the crisp biscuit base, the airy, tangy lemon cream cheese filling, and the sweet, tart glaze creates a harmonious and utterly satisfying dessert experience. This no-bake creation is a testament to simple ingredients yielding extraordinary results, perfect for any occasion.
Pro Tips for Philadelphia lemon cake
Achieve a Flawless Base: For an extra-sturdy biscuit base, ensure you press the crumb mixture down firmly and evenly. A loose base can lead to crumbling when slicing, so don’t be shy with the tamper! Using the back of a glass or a measuring cup helps create a compact, professional-looking foundation for your delicious cake.
Room Temperature is Key: Always ensure your Philadelphia cream cheese is at room temperature before you begin mixing the filling. This prevents lumps and guarantees a wonderfully smooth, velvety texture. Cold cream cheese can lead to a grainy filling, so plan ahead and let it sit out for at least an hour before you start.
Whipping Cream Wisely: For the lightest, most stable whipped cream, make sure your cream, bowl, and whisk are all thoroughly chilled. This helps the cream reach stiff peaks more easily and prevents it from becoming buttery or curdled. Over-whipping can also be an issue, so watch it closely once it starts to thicken.
Glaze Temperature Matters: Pouring a glaze that is too hot can melt the cream cheese filling, leading to a messy and unstable cake. Let your prepared glaze cool for a few minutes until it’s warm but not scalding before carefully pouring it over the chilled filling. This ensures a smooth, even setting.
The Magic of Overnight Chilling: While a minimum of two hours is sufficient for the cake to set, allowing it to chill overnight in the refrigerator is a game-changer. This extended period allows the flavors to meld beautifully, resulting in a more intense lemon essence and a perfectly firm texture that slices like a dream. It’s the secret to a truly exceptional dessert.
Serving Suggestions for Philadelphia lemon cake
Decoration
Elevate the visual appeal of your Philadelphia lemon cake with thoughtful decorations. A light dusting of powdered sugar can offer a subtle sweetness and a classic finish. Fresh mint sprigs, with their vibrant green, provide a beautiful color contrast and an inviting aroma, suggesting the cake’s refreshing qualities. Consider using a fine grater to zest an additional lemon directly over the top just before serving, adding a final flourish of citrus fragrance and visual texture.
Side Dishes
Complement the zesty brightness of the lemon cake with carefully chosen side dishes. Fresh berries, such as a mix of raspberries, blueberries, and sliced strawberries, offer a delightful interplay of tartness and sweetness that harmonizes perfectly with the cake’s flavors. A dollop of unsweetened whipped cream or a light crème fraîche can provide a creamy counterpoint, enhancing the overall luxuriousness of the dessert experience. For a truly sophisticated pairing, a small scoop of vanilla bean or lemon sorbet can add an extra layer of chilled, refreshing flavor.
Creative Serving Ideas
Think beyond the traditional slice when serving this delightful cake. For an elegant tea party, cut the cake into smaller, bite-sized portions and arrange them on a tiered stand. This creates an impressive display and allows guests to enjoy smaller, more delicate servings. You can also serve individual portions in clear glasses or small jars, layering the biscuit crumb, cream filling, and glaze for a charming trifle-like presentation. This also makes for an easy-to-handle dessert option for outdoor gatherings or picnics.
Preparation & Storage
Storing Leftovers
Should you be fortunate enough to have leftovers of this delightful Philadelphia lemon cake, proper storage is key to maintaining its freshness and delightful texture. It’s essential to keep the cake refrigerated at all times due to the cream cheese content. Ensure the cake is covered securely, either with plastic wrap that has been gently pressed onto the surface to minimize air exposure, or by placing it in an airtight container. This prevents the cake from drying out and protects it from absorbing any unwanted odors from other foods in the refrigerator.
When stored correctly in the refrigerator, leftovers of the Philadelphia lemon cake will typically remain at their best for approximately 3 to 4 days. While the biscuit base might soften slightly over time, the creamy filling and glossy glaze will retain their delicious qualities. For the best eating experience, allow the cake to sit at room temperature for about 15-20 minutes before serving again, as this slightly softens the filling and brings out the full flavor profile.
Freezing
Freezing this Philadelphia lemon cake is possible, but it requires careful consideration to preserve its delicate textures. It’s generally recommended to freeze the cake *before* the glaze has been applied. Prepare the cake up to the point of adding the glaze, then wrap it tightly in several layers of plastic wrap, followed by a layer of aluminum foil to prevent freezer burn. Label and date the package, and freeze it for up to 1 to 2 months.
When you are ready to serve the cake, it’s best to thaw it overnight in the refrigerator while still wrapped. Once fully thawed and still chilled, you can then prepare and apply the lemon glaze as per the recipe instructions. Freezing the cake with the glaze already applied can sometimes result in a less appealing texture for the glaze upon thawing, as it may become slightly gummy or lose its shine.
Reheating
This Philadelphia lemon cake is designed to be served chilled and does not require reheating. In fact, applying any form of heat would be detrimental to its no-bake structure and creamy texture. The beauty of this dessert lies in its cool, refreshing qualities, making it perfect for warm weather or as a light end to a meal. Ensure it has been properly chilled to achieve the desired firm consistency before serving.
If the cake has been stored in the refrigerator and feels a little too firm, simply allow it to sit at room temperature for about 15-20 minutes. This brief period will slightly soften the cream cheese filling, making it easier to slice and enhancing its creamy mouthfeel. This gentle warming is all that’s needed to bring out the best in this delightful dessert.
Frequently Asked Questions
-
How long does the Philadelphia lemon cake need to chill in the refrigerator to set properly?
For the Philadelphia lemon cake to achieve the perfect consistency and be easily sliced, it requires a minimum chilling time of at least two hours in the refrigerator. This period allows the cream cheese filling to firm up considerably and the glaze to set into a smooth, glossy finish. However, for optimal flavor development and the most stable structure, it is highly recommended to chill the cake for a longer duration, ideally four hours or even overnight. This extended chilling allows the distinct flavors of lemon and cream cheese to meld beautifully, enhancing the overall taste experience and ensuring that each slice is neat and holds its shape perfectly.
-
Can I prepare the Philadelphia lemon cake entirely a day in advance, and if so, how should I store it?
Yes, this Philadelphia lemon cake is an ideal candidate for advance preparation and is perfectly suited to being made a day ahead of your event. In fact, allowing it to chill overnight often results in an even more delicious outcome as the flavors have more time to deepen and harmonize. To store it, ensure the cake is completely finished, including the glaze. Cover it tightly with plastic wrap, making sure the wrap doesn’t touch the glaze directly to prevent sticking, or place it in an airtight container. Store it in the refrigerator. This method will keep the cake fresh and delightful until you’re ready to serve it, making it a stress-free option for entertaining.
-
Is it possible to make the Philadelphia lemon cake without using gelatin, and if so, what are the alternatives?
Gelatin is essential in this recipe for ensuring the cream cheese filling sets firmly enough to be sliced cleanly. If you wish to avoid gelatin, or are looking for a vegetarian or vegan option, you can successfully substitute it. A popular alternative is agar-agar, a plant-based gelling agent derived from seaweed. You would typically use agar-agar in powdered or flake form and prepare it according to package directions, which usually involves dissolving it in liquid and bringing it to a boil briefly before incorporating it into the filling mixture. Another option is to use a commercial vegan gelatin substitute, following its specific instructions. These alternatives can help achieve a similar firm texture, although the precise ratios may need slight adjustments based on the product used.