Irresistible No Bake Cake Batter Protein Balls

Have you ever found yourself craving the sweet, comforting taste of cake batter but simultaneously wanting a nutritious, guilt-free treat? If this sounds like you, then get ready to discover your new favorite snack: No Bake Cake Batter Protein Balls. These delightful little spheres manage to capture the essence of indulging in raw cake batter, but with a wholesome twist that fuels your body and satisfies your sweet tooth.
Imagine a perfectly chewy bite that delivers the classic flavors you adore, all while being packed with beneficial protein and wholesome ingredients. This recipe is designed for ultimate ease and adaptability, ensuring that everyone can whip up a batch of these delicious balls, perfect for a quick energy boost or a satisfying dessert alternative.
Why You Will Love This Recipe
- Effortless Preparation: Forget ovens and lengthy baking times; these balls come together in a matter of minutes, making them perfect for even the busiest schedules.
- Nutrient-Rich Powerhouse: Each ball is designed to provide a good source of protein and healthy fats, contributing to sustained energy and satiety.
- Unmatched Customization: This recipe is a blank canvas for your creativity, allowing you to add your favorite mix-ins, from crunchy nuts to sweet chocolate chips, tailoring them to your precise taste.
- Family-Friendly Fun: They are incredibly appealing to children, not just to eat but also to help make, turning snack preparation into a fun activity for the whole family.
- Craving Crusher: Experience the joy of a dessert-like treat without the usual sugar overload, making them an excellent choice for satisfying those persistent sweet cravings.
Ingredients You Need
The beauty of these No Bake Cake Batter Protein Balls lies in their simplicity and the quality of ingredients used. By focusing on wholesome staples, you create a treat that is as nourishing as it is delicious. The foundational elements are straightforward, but their combination yields a remarkable flavor profile that truly mimics cake batter.
No Bake Cake Batter Protein Balls

Delightful, nutritious snack resembling cake batter, packed with protein and easy to customize. Perfect for a quick energy boost or a guilt-free treat.
- 1 cup vanilla protein powder
- 1/2 cup nut butter (like almond or peanut butter) - Substitute with sunflower seed butter for nut-free
- 1 cup oats - Use certified gluten-free oats for gluten-free version
- 2 tablespoons honey or maple syrup - Choose maple syrup for vegan option
- 1/4 cup chocolate chips (optional)
- 1Gather all your ingredients and measure them accurately.
- 2In a mixing bowl, combine the vanilla protein powder, nut butter, oats, and honey (or maple syrup). Stir until well combined.
- 3Assess the texture of the mixture. If it feels too dry, add a little water or more nut butter until it holds together without being overly sticky.
- 4If you are choosing to include chocolate chips, gently fold them into the mixture.
- 5Roll the mixture into small balls, roughly one inch in diameter, and place them on a baking sheet lined with parchment paper.
- 6Pop the baking sheet into the refrigerator and let the balls chill for about 30 minutes.
- 7After chilling, your No Bake Cake Batter Protein Balls are ready to be enjoyed.
Keywords: dessert, Healthy Snack, No Bake, Nutritious, Protein Balls
You’ll need protein powder, a creamy nut butter, rolled oats, a natural sweetener, and optionally, some delightful chocolate chips for an extra touch of indulgence. Remember, the specific quantities for these ingredients can be found within the recipe card for perfect results.
Variations
The versatility of these No Bake Cake Batter Protein Balls means they can be adapted to suit almost any dietary need or flavor preference. The base recipe provides a fantastic foundation for culinary experimentation.
Vegan Delight: To transform these into a fully vegan treat, simply swap out the honey for maple syrup or agave nectar. Ensure your protein powder is also plant-based, and you’ll have a delightful vegan option that retains all the original charm and flavor. This makes them accessible for a wider audience looking for plant-powered snacks.
Low-Carb Alternative: For those mindful of carbohydrate intake, consider using a low-carb protein powder and replacing the oats with almond flour or coconut flour. You can also use a sugar-free sweetener like erythritol or stevia. This adaptation keeps the cake batter essence while aligning with specific dietary goals, proving that healthy can still be incredibly satisfying.
Gluten-Free Goodness: Achieving a gluten-free version is remarkably simple. The key is to ensure your rolled oats are certified gluten-free, as oats can sometimes be cross-contaminated during processing. Beyond that, the recipe inherently uses gluten-free ingredients, making it easy for individuals with celiac disease or gluten sensitivities to enjoy this delicious snack without worry. This ensures inclusivity for everyone wanting to indulge.
How to Prepare No Bake Cake Batter Protein Balls
Step 1: Gather and Measure Your Ingredients
The first and most crucial step in creating perfect No Bake Cake Batter Protein Balls is to meticulously gather and accurately measure all your required ingredients. This might seem basic, but precision here ensures that the final mixture will have the correct consistency and flavor balance. Having everything measured out and ready to go before you start mixing streamlines the process and prevents any last-minute scrambling or potential errors.
Take out your vanilla protein powder, your chosen nut butter (almond butter or peanut butter are excellent choices for their creamy texture and mild flavor), your rolled oats (ensure they are the old-fashioned kind for the best texture), your sweetener (honey or maple syrup work wonderfully), and any optional add-ins like chocolate chips or sprinkles. Lay them out on your counter, giving you a clear overview of what you’re working with. This organized approach is foundational to a smooth and enjoyable cooking experience.
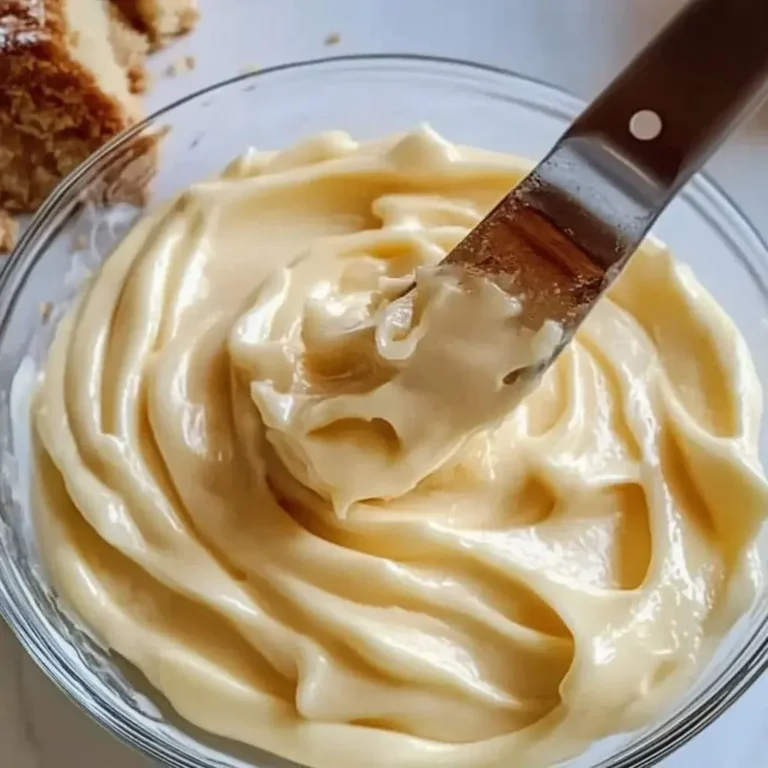
Step 2: Combine the Core Ingredients
Once everything is measured and at the ready, it’s time to begin the mixing process. In a sufficiently large mixing bowl, combine the vanilla protein powder, your selected nut butter, and the rolled oats. These are the foundational components that will give the protein balls their structure and bulk. The protein powder adds the essential nutritional element, the nut butter provides healthy fats and acts as a binder, and the oats contribute fiber and a pleasant chewiness.
Add your chosen sweetener, whether it’s golden honey for its rich flavor or maple syrup for a slightly different profile, to this mixture. Begin to stir everything together. Initially, it might seem like a dry or crumbly collection of ingredients, but as you continue to mix, the nut butter and sweetener will start to bind everything together. Aim for a consistent texture that begins to resemble a thick dough.
Step 3: Achieving the Perfect Dough Consistency
As you stir the initial ingredients together, you’ll need to assess the consistency of your mixture. The goal is to achieve a dough that is pliable enough to roll into balls but not so sticky that it clings excessively to your hands or the bowl. This stage is critical for successfully forming the protein balls without frustration. If the mixture feels too dry and crumbly, it won’t hold together when you try to shape it.
To remedy a dry mixture, gradually add a little more of your nut butter, one tablespoon at a time, stirring thoroughly after each addition. Alternatively, a small splash of water or a dairy-free milk can also help to moisten the ingredients and improve binding. Conversely, if the mixture is too wet or sticky, you can try adding a little more protein powder or a few more oats to absorb excess moisture. The key is to add these ingredients incrementally until the dough is just right – slightly tacky but manageable.
Step 4: Incorporating the Sweet Surprises
This is where you can really personalize your No Bake Cake Batter Protein Balls and add that extra element of delight. If you’ve decided to include optional add-ins, now is the time to gently fold them into the prepared dough mixture. Chocolate chips are a classic choice, offering bursts of rich, melted chocolate that perfectly complement the cake batter flavor. For a more festive look and taste, consider colorful sprinkles, which truly enhance the “cake batter” experience.
You might also want to add other ingredients at this stage, such as chopped nuts for an extra crunch, dried fruit like cranberries or raisins for a chewy texture and added sweetness, or even a pinch of cinnamon for warmth. Be careful not to overmix at this point, especially if you’re using delicate ingredients like sprinkles, as you want them to remain intact within the balls. Gently fold them in until they are evenly distributed throughout the dough.
Step 5: Shaping the Protein Balls
With your delicious, well-combined dough ready, it’s time to transform it into individual protein balls. The standard size for these is typically about one inch in diameter, similar to a small truffle or a large marble. To make this process easier and prevent sticking, it’s highly recommended to line a baking sheet or a plate with parchment paper or wax paper. This creates a non-stick surface for your shaped balls.
Take a small amount of the dough into your hands and roll it between your palms until you form a smooth, compact ball. If the dough is sticking to your hands, you can lightly dampen your hands with water or a tiny bit of oil, or simply dust them with a little extra protein powder or oat flour. Continue this process until all the dough has been shaped into uniform balls. Place each rolled ball onto the prepared baking sheet, ensuring they have a little space between them.
Step 6: Chilling to Perfection
The final active step before enjoying your creation is to chill the protein balls. This step is essential for allowing the ingredients to meld together further and for the balls to firm up, ensuring they hold their shape when handled or stored. It also enhances the overall texture, making them pleasantly chewy rather than overly soft or crumbly.
Place the baking sheet filled with the shaped protein balls into the refrigerator. Allow them to chill for a minimum of 30 minutes. During this time, the nut butter will solidify slightly, and the oats will absorb any residual moisture, binding everything together beautifully. You’ll notice that the balls become firmer and easier to handle once they’ve had sufficient time to chill. Resist the urge to skip this step, as it significantly impacts the final quality and stability of your No Bake Cake Batter Protein Balls.
Step 7: Enjoy Your Homemade Delight
Congratulations! After the chilling period, your delicious and nutritious No Bake Cake Batter Protein Balls are ready to be savored. You’ve successfully created a treat that is both a pleasure to eat and beneficial for your body. These are perfect for a multitude of occasions, offering a convenient and satisfying way to fuel your day.
Serve them as a quick breakfast on the go, a pre- or post-workout snack, a healthier alternative to traditional dessert, or even as a sweet pick-me-up during the afternoon slump. The vibrant taste and satisfying texture will make you proud of your homemade creation. Enjoy the fruits of your labor and the delightful experience of these wholesome, no-bake wonders!
Pro Tips for No Bake Cake Batter Protein Balls
Tip: Quality Protein Powder is Key. Using a good quality vanilla protein powder is paramount. Opt for brands that have a smooth texture and a pleasant, not artificial, vanilla flavor. This directly impacts the final taste and consistency, ensuring that classic cake batter essence shines through without any off-notes.
Tip: Nut Butter Selection Matters. Natural, unsweetened nut butters, especially almond or peanut butter, are ideal. Creamy versions will yield the smoothest texture, while slightly oily natural butters can help bind the ingredients effectively. Avoid peanut butters with added sugars or oils, as these can alter the texture and sweetness undesirably.
Tip: Don’t Overlook the Oats. While old-fashioned rolled oats are recommended for their texture, you can experiment with quick oats if you prefer a softer consistency. For those avoiding gluten, ensure your oats are certified gluten-free to prevent cross-contamination. The oats provide essential fiber and help create that signature chewy texture.
Tip: Sweetener Balance is Crucial. The amount of sweetener can be adjusted based on your personal preference and the sweetness of your protein powder. Start with the recommended amount and taste the dough; you can always add a little more if needed. Remember that sweeteners like honey and maple syrup also contribute to the binding properties of the mixture.
Tip: Prevent Sticking with Moist Hands. If the dough is proving to be quite sticky and difficult to roll, a simple trick is to lightly dampen your hands with water or a touch of coconut oil before shaping. This creates a barrier that prevents the dough from adhering excessively to your skin, allowing for smoother, more uniform balls.
Serving Suggestions for No Bake Cake Batter Protein Balls
Decoration
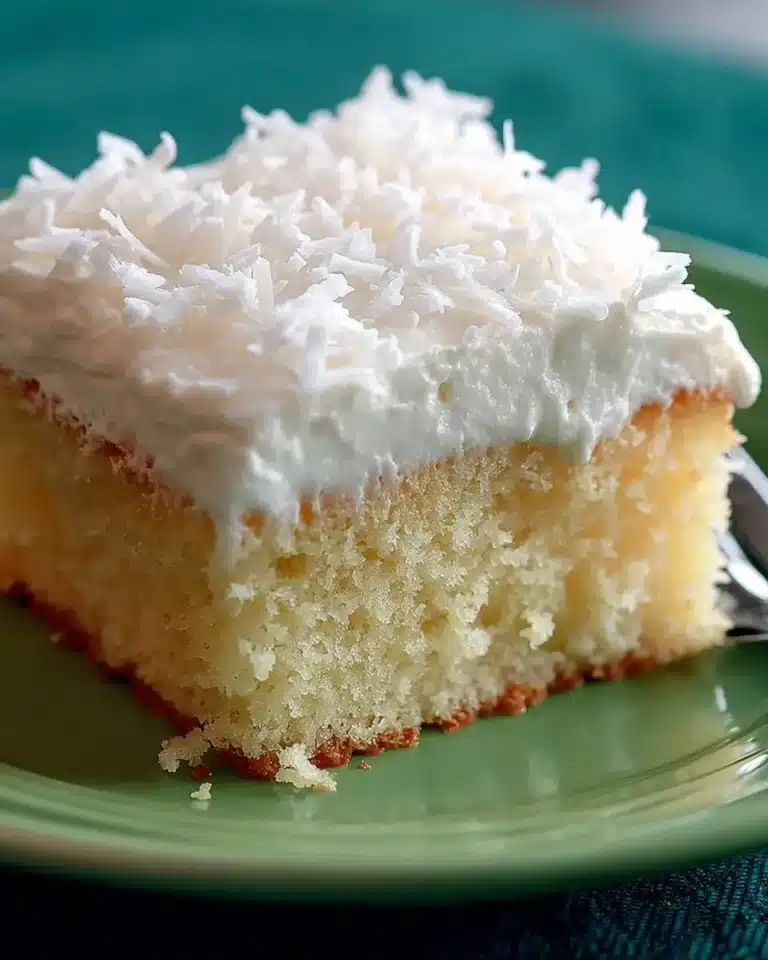
Elevate the visual appeal and fun factor of your No Bake Cake Batter Protein Balls with a few simple decorative touches. A light dusting of colorful sprinkles is an instant mood-lifter and truly embraces the cake batter theme, making them look as festive as they taste. For a more sophisticated look, you could drizzle them with melted white chocolate or a swirl of dark chocolate. Some even like to roll them in shredded coconut or finely chopped nuts for added texture and visual interest.
Side Dishes
These protein balls are wonderfully satisfying on their own, but they can also be paired with other items to create a more complete snack or light meal. Serving them alongside a small bowl of fresh berries, such as strawberries, blueberries, or raspberries, adds a burst of freshness and vitamin C that beautifully complements the sweet, cake-like flavor. A dollop of Greek yogurt or a small serving of cottage cheese can also be a great accompaniment, boosting the protein content even further and adding a creamy contrast.
Creative Serving Ideas
Think beyond just popping them into your mouth! These protein balls are incredibly versatile for creative presentations. Arrange them artfully on a platter for a healthy party appetizer or dessert option. You can also thread them onto skewers, alternating with pieces of fruit, for a fun and easy-to-eat treat. Consider them as a “sweet” component in a bento box for a packed lunch, providing a delightful surprise. For a special occasion, they can even be a delightful addition to a dessert charcuterie board, offering a healthy yet indulgent choice among other sweets.
Preparation & Storage
Storing Leftovers
Should you find yourself with any leftover No Bake Cake Batter Protein Balls, proper storage is key to maintaining their delightful texture and flavor. The best method is to place them in an airtight container. This prevents them from drying out and absorbing any unwanted odors from other foods in your refrigerator. Ensure the container is sealed tightly before refrigerating.
In the refrigerator, these protein balls will typically stay fresh and maintain their best quality for about one week. This makes them an excellent option for meal prepping snacks for the entire week ahead. Always check their appearance and smell before consuming to ensure they are still good to eat, though they are quite stable when stored correctly.
Freezing
For longer-term storage, freezing is an excellent option for your No Bake Cake Batter Protein Balls. This method can preserve their taste and texture for several months, making them a convenient snack to have on hand whenever a craving strikes. It’s ideal for those who like to make larger batches or want to ensure they always have a healthy treat available.
To freeze them effectively, it’s best to wrap each protein ball individually. You can use plastic wrap, parchment paper, or small freezer bags for this purpose. Once individually wrapped, place them all into a larger freezer-safe bag or container. This layering helps prevent freezer burn and ensures they maintain their quality. Properly stored, they can last for up to 2-3 months in the freezer.
Reheating
The beauty of No Bake Cake Batter Protein Balls is that they are designed to be enjoyed cold or at room temperature; reheating is generally not necessary and can alter their desired texture. If they have been stored in the refrigerator, they are ready to eat straight away. Their slightly chilled state often enhances their firm, chewy consistency.
If you’ve frozen your protein balls, simply remove them from the freezer and allow them to thaw. The easiest way is to transfer them to the refrigerator for a couple of hours until they reach a desired temperature. Alternatively, you can let them thaw at room temperature for about 30-60 minutes, depending on how warm your environment is. Once thawed, they will have a similar consistency to those that were refrigerated and are ready to enjoy immediately.
Frequently Asked Questions
-
Can I make these ahead of time and how long do they stay fresh?
Absolutely, these No Bake Cake Batter Protein Balls are fantastic for making ahead. Once prepared and stored correctly in an airtight container in the refrigerator, they will maintain their deliciousness and texture for up to one week. This makes them an ideal component of weekly meal prep, ensuring you always have a healthy snack readily available. For even longer storage, freezing them is an excellent option; individually wrapped balls can last in the freezer for up to 2-3 months, offering a convenient supply for future cravings.
-
What if my protein ball mixture is too dry or too wet, and can I use different types of protein powders?
If your mixture is too dry and crumbly, it means it lacks sufficient binding agent. You can easily remedy this by adding a small amount more of your nut butter, a tablespoon at a time, or a tiny splash of water or milk. Conversely, if the mixture is too sticky or wet, incorporate a bit more protein powder or oats, adding gradually until it reaches a workable, dough-like consistency. You can indeed use different protein powders, but vanilla-flavored ones are highly recommended as they best replicate the classic cake batter taste. Other flavors might significantly alter the intended profile of these specific protein balls.
-
Are these protein balls suitable for children, and what’s the best way to eat them?
Yes, these protein balls are wonderfully suitable for children! They are a healthier alternative to many sugary treats, and kids often love the cake batter flavor and the fun of helping to make them. They are also perfect as a convenient snack for school lunches or after-school activities. The best way to enjoy them is typically straight from the refrigerator, where they have a firm, chewy texture. Some people enjoy them slightly chilled from the freezer, which gives them a firmer bite, or alongside fresh fruit or yogurt for a more balanced and substantial snack. Their versatility means you can enjoy them in a way that best suits your preference and nutritional goals.