How to Make Banana Chips
Discover the simple joy of homemade baked banana chips, a delightful and healthy snack that’s surprisingly easy to whip up in your own kitchen. Forget the store-bought alternatives, often laden with added sugars and oils; this recipe brings you pure, unadulterated banana goodness with a satisfying crunch.
Imagine a treat that satisfies your sweet cravings without the guilt, perfect for on-the-go munching, school lunchboxes, or as a delightful topping for your morning yogurt. These baked banana chips are a testament to how simple ingredients can create something truly special, bringing a taste of sunshine to any moment of your day.
Why You Will Love This Recipe
- Healthy Alternative: Enjoy a guilt-free snack packed with natural sweetness and essential nutrients, making it a fantastic option for health-conscious individuals seeking delicious treats.
- Incredibly Easy Preparation: With just a few simple steps and minimal ingredients, this recipe is perfect for bakers of all skill levels, ensuring a stress-free culinary experience.
- Customizable Flavors: Elevate your banana chips by experimenting with a variety of spices like cinnamon, nutmeg, or even a touch of chili for a sweet and spicy kick.
- Perfect for Meal Prep: Make a large batch and store them in an airtight container for a convenient, ready-to-eat snack that lasts for weeks, ensuring you always have a healthy option available.
- Satisfying Crunch: Achieve that perfect crispy texture reminiscent of your favorite store-bought chips, but with the wholesome goodness of baked fruit, providing a delightful textural experience.
Ingredients You Need
Crafting these delightful baked banana chips is a testament to the magic of simple, high-quality ingredients. The stars of this show are, of course, the bananas themselves; selecting ripe yet firm bananas is crucial for achieving the ideal texture and sweetness. The touch of lemon juice not only adds a subtle brightness but also plays a vital role in preventing browning, ensuring your chips look as good as they taste.
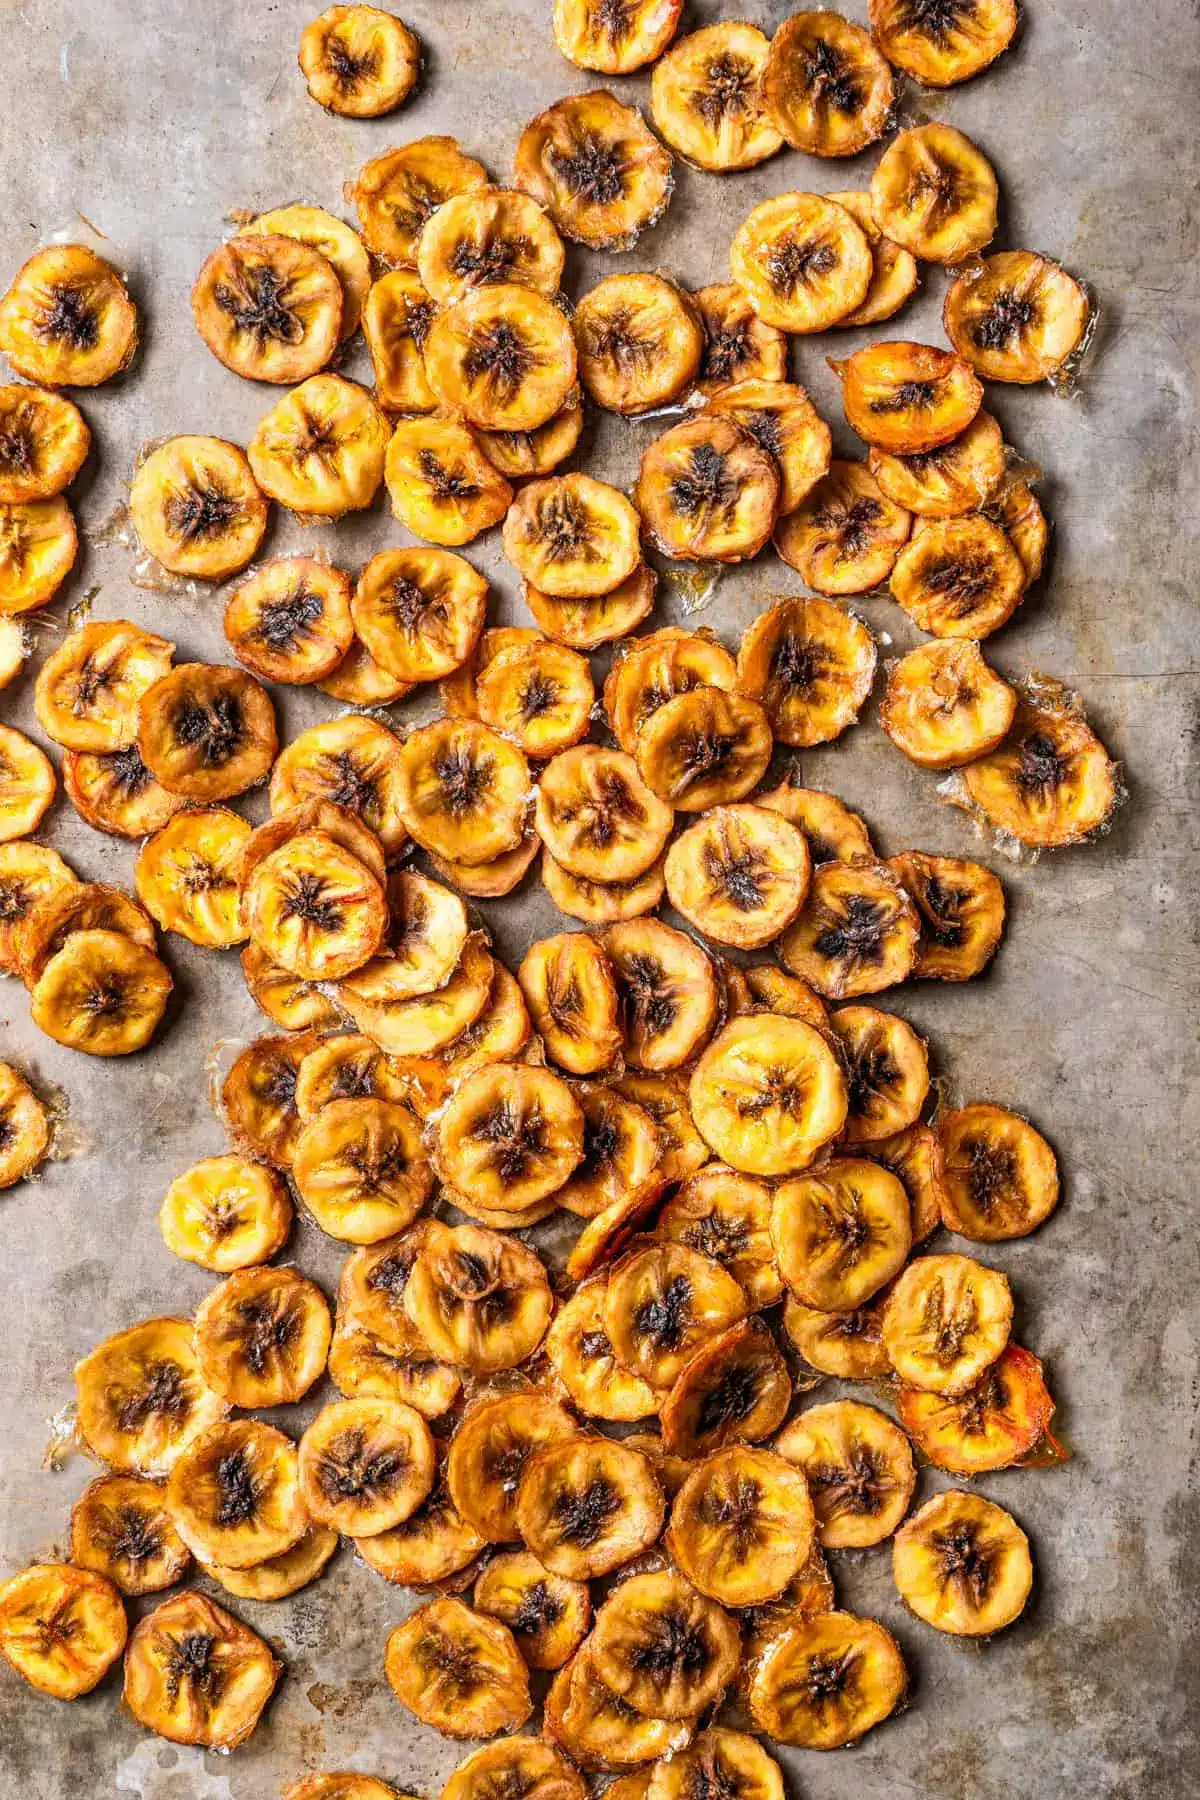
Baked Banana Chips
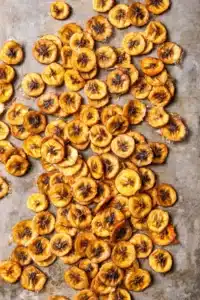
Deliciously sweet, guilt-free baked banana chips make a perfectly portable, light, and tasty snack to have on hand in case a craving strikes!
- 10 ripe but firm bananas, thinly sliced
- Freshly squeezed lemon juice (1 lemon is plenty)
- 1Preheat the oven to 200°F. Cover a sheet pan with foil and lightly grease it with cooking spray.
- 2Toss the banana slices in lemon juice.
- 3Arrange the bananas in a single layer on the prepared baking sheet.
- 4Bake for 1 hour; check to see if the tops are firm and starting to turn color. If so, flip the slices with a metal spatula and continue to bake for 1 hour longer or until desired crispness.
- 5Remove from the oven and transfer the banana chips to a wire rack to cool completely. The longer they cool, the crunchier they will get.
- 6Store in an airtight container.
Keywords: banana chips, baked, healthy snack, fruit chips, oven baked
- ripe but firm bananas: opt for bananas that are yellow with perhaps a few brown spots, indicating ripeness, but still hold their shape firmly when sliced.
- freshly squeezed lemon juice: use juice from a fresh lemon for the best flavor and efficacy in preventing oxidation.
Quantities and precise details for each ingredient can be found in the printable recipe card located below for your convenience.
Variations
To elevate your baked banana chip experience, consider infusing them with warming spices like cinnamon and nutmeg. A gentle dusting before baking can transform these simple chips into a fragrant, autumnal delight, perfect for cozy evenings or as a festive addition to holiday gatherings.
For those seeking a savory twist, a sprinkle of salt and a hint of cayenne pepper can create a surprisingly addictive sweet-and-spicy flavor profile. This variation offers a sophisticated snacking option that will intrigue and delight your taste buds, offering a departure from the usual sweet snacks.
Embrace the versatility of this recipe by exploring a vegan variation. While naturally vegan, you can enhance the sweetness by tossing the banana slices with a touch of maple syrup or agave nectar before baking, adding an extra layer of caramelized depth to their flavor.
How to Prepare baked banana chips
Step 1: Prepare Your Baking Station
Begin by preheating your oven to a low temperature, typically around 200°F (95°C). This gentle heat is essential for slowly dehydrating the banana slices, coaxing out their natural sugars and achieving a crisp texture without burning.
Next, prepare your baking sheet by lining it with parchment paper or aluminum foil. This crucial step prevents the banana slices from sticking to the pan, making both the removal of the finished chips and the subsequent cleanup significantly easier. A light greasing with cooking spray can also be beneficial, providing an extra layer of non-stick security.
Ensuring your baking sheet is properly prepared before you start slicing the bananas will streamline the entire process, allowing you to move efficiently from preparation to baking.
Step 2: Slice the Bananas with Precision
The key to uniformly crispy banana chips lies in the thickness of your slices. Aim for an even thickness of approximately 1/8 to 1/4 inch for the best results. Using a sharp knife or a mandoline slicer will help you achieve consistent slices, which is vital for even baking.
Unevenly sliced bananas will bake at different rates, leading to some chips being perfectly crisp while others remain chewy or even burnt. Take your time with this step; precision here directly translates to a superior final product.
Once sliced, gently transfer the banana rounds to a clean bowl. The goal is to handle them with care to maintain their shape and integrity before the next step in the preparation process.
Step 3: The Lemon Juice Bath
Pour a generous amount of freshly squeezed lemon juice over the sliced bananas in the bowl. This step serves a dual purpose: the acidity of the lemon juice helps to prevent the bananas from oxidizing and turning brown, preserving their appealing golden color.
Furthermore, the lemon juice imparts a subtle tanginess that beautifully complements the natural sweetness of the bananas, adding a layer of complexity to the final flavor profile. Gently toss the banana slices to ensure each piece is lightly coated with the lemon juice.
Allow the banana slices to soak in the lemon juice for no more than 10 minutes. Over-soaking can lead to a mushy texture, so timing is key to benefiting from the lemon juice’s properties without compromising the chip’s integrity.
Step 4: Arrange and Bake to Perfection
Carefully arrange the lemon-kissed banana slices in a single layer on your prepared baking sheet. It is absolutely essential that the slices do not overlap; this allows for proper air circulation around each piece, promoting even drying and crisping.
If your baking sheet is too small to accommodate all the slices in a single layer, it is better to use two baking sheets than to overcrowd one. Overlapping slices will steam rather than bake, resulting in soft, unappealing chips.
Place the baking sheet in the preheated oven and begin the baking process, which will take a significant amount of time. The initial bake is usually set for about one hour. During this first hour, the bananas will begin to soften and release some of their moisture.
Step 5: The Flip and Continue Baking
After the first hour of baking, it’s time to check on your banana slices. Carefully remove the baking sheet from the oven. You should observe that the tops of the banana slices are firming up and may be starting to show a hint of golden-brown color.
Using a thin metal spatula, gently flip each banana slice over. This flipping action is crucial for ensuring that both sides of the banana chips achieve an even level of crispness and develop a desirable golden hue. Be delicate to avoid breaking the delicate slices.
Return the baking sheet to the oven and continue baking for another hour, or potentially longer, depending on the thickness of your slices and the specific performance of your oven. The goal is to achieve your desired level of crispness. It is advisable to check on the chips periodically during this second baking phase, as they can transition from perfectly crisp to burnt quite quickly.
Step 6: Cooling for Ultimate Crispness
Once your banana chips have reached the desired level of crispness, carefully remove the baking sheet from the oven. Immediately transfer the hot banana chips from the baking sheet to a wire cooling rack. This step is critical for achieving maximum crispness.
Leaving the chips on a hot baking sheet can cause them to continue cooking and potentially become overdone, or worse, stick to the pan as they cool. The wire rack allows air to circulate freely around all sides of the chips, facilitating even cooling and drying.
Allow the banana chips to cool completely on the wire rack. As they cool, they will continue to crisp up. Resist the urge to taste them right away; patience during this cooling phase will reward you with perfectly crunchy snacks. The longer they cool, the crunchier they will become.
Pro Tips for baked banana chips
Uniform Slicing is Key: For perfectly even baking and consistent crispness, invest a little extra time in slicing your bananas to the same thickness. A mandoline slicer can be a game-changer here, ensuring uniformity that a knife might struggle to achieve consistently.
Low and Slow is the Motto: Resist the temptation to crank up the oven temperature. The magic of baked banana chips happens through slow dehydration at a low temperature, which gently draws out moisture and concentrates the natural sugars for a delightful crunch without burning.
Watch Them Closely: Ovens can be temperamental, and banana slices vary in moisture content. Keep a watchful eye on your chips during the baking process, especially during the last hour, and remove any that are perfectly crisp even if others need a little more time. This prevents burning and ensures a batch of evenly cooked chips.
Cooling is Crucial: Don’t underestimate the power of the cooling rack. Transferring the chips directly to a wire rack after baking allows air to circulate freely, ensuring they achieve their final, satisfying crispness. They will continue to firm up as they cool down.
Embrace Seasonings: While plain banana chips are delicious, don’t shy away from experimentation. A sprinkle of cinnamon, a dash of nutmeg, or even a touch of chili powder can transform your chips into a unique and flavorful snack. For a sweet-salty contrast, a tiny pinch of sea salt before baking can be surprisingly effective.
Serving Suggestions for baked banana chips
Decoration
Finely crushed baked banana chips can serve as an exquisite textural garnish for cakes, cupcakes, or parfaits. Their natural sweetness and delicate crunch add an elegant finishing touch that elevates any dessert presentation.
Imagine a sprinkle of these golden crumbs over a creamy cheesecake or a rich chocolate mousse, providing a delightful counterpoint to the smooth textures. They also make a visually appealing topping for fruit salads, adding a pop of color and an unexpected crunch.
For a more rustic presentation, larger broken pieces of banana chips can be artfully arranged around the edges of a dessert platter, creating a charming and edible border. This adds both visual interest and an immediate invitation to indulge.
Side Dishes
These delightful banana chips are a superb accompaniment to a variety of dishes, offering a sweet and crispy contrast. They pair wonderfully with creamy yogurts, providing a textural foil that prevents monotony in your breakfast bowl or snack.
Consider crumbling them over a bowl of oatmeal or overnight oats for an added layer of complexity and crunch. They can also be stirred into a smoothie at the end of blending to introduce a subtle texture, or used as a topping for acai bowls, enhancing their visual appeal and flavor profile.
For a more savory application, they can even be incorporated into some salads, offering an unexpected sweet element that balances sharp vinaigrettes or tangy dressings. Their versatility truly shines when paired with creamy or tart components.
Creative Serving Ideas
Transform your baked banana chips into a delightful base for a homemade trail mix, combining them with nuts, seeds, and dried fruits for an energy-boosting snack perfect for hikes or long car rides. The natural sweetness of the banana chips adds a unique flavor dimension to the mix.
Consider using them as a playful edible garnish for cocktails or mocktails. Crushed chips can be pressed onto the rim of a glass, offering both visual flair and a delightful crunch with every sip. This adds an unexpected touch of gourmet appeal to your beverages.
For a unique dessert presentation, layer crushed banana chips with whipped cream, fresh fruit, and a drizzle of chocolate sauce in small glasses to create individual banana chip trifles. This offers a delightful combination of textures and flavors in a charming, single-serving format that is both elegant and delicious.
Preparation & Storage
Storing Leftovers
Once your baked banana chips have cooled completely, it’s crucial to store them in an airtight container to maintain their crispness. Exposure to air will quickly lead to them becoming soft and chewy, negating all your hard work.
A good quality airtight container, whether glass or plastic, will help to seal out moisture and preserve the delightful crunch for an extended period. Ensure the container is completely dry before adding the chips to prevent any condensation buildup.
When stored correctly at room temperature, these homemade banana chips can retain their desirable texture and flavor for up to three weeks, making them a perfect make-ahead snack solution.
Freezing
Freezing baked banana chips is an excellent option for longer-term storage, especially if you’ve made a large batch. The low moisture content of the chips makes them relatively stable for freezing.
To freeze, ensure the chips are completely cooled and then place them in a single layer on a baking sheet and freeze until solid. This pre-freezing step prevents them from clumping together into a large, unmanageable mass once transferred to a storage bag.
Once frozen solid, transfer the chips to a freezer-safe airtight container or a heavy-duty freezer bag, pressing out as much air as possible before sealing. This method helps to prevent freezer burn and maintain their quality for several months.
Reheating
If your banana chips have softened slightly due to humidity or improper storage, or if you’re reheating them from frozen, a brief stint in a low oven can revive their crispness. Preheat your oven to a low temperature, around 200°F (95°C).
Spread the chips in a single layer on a baking sheet and place them in the preheated oven for about 5-10 minutes. Keep a close eye on them, as they can go from perfectly crisp to burnt very quickly.
Allow them to cool completely on a wire rack after reheating, as they will continue to crisp up as they cool. This simple reheating process can effectively restore their delightful crunchy texture, making them enjoyable once again.
Frequently Asked Questions
-
What is the best type of banana to use for baked banana chips?
The best bananas for baking are those that are ripe but still firm. Look for bananas that are bright yellow with maybe a few small brown spots, indicating sweetness, but they should not be overly soft or mushy. Overly ripe bananas will be too soft to slice cleanly and will not achieve the desired crispness. Firmness ensures they hold their shape during slicing and baking, leading to a better texture in the final product.
-
Why are my baked banana chips not crispy?
Several factors can contribute to banana chips not becoming crispy. Firstly, the thickness of the slices is crucial; if they are too thick, they won’t dehydrate properly. Secondly, the oven temperature might have been too high, causing them to brown on the outside before drying out completely. Ensure you are baking at a low temperature (around 200°F or 95°C) for an extended period. Finally, they might not have cooled sufficiently; the chips continue to crisp up as they cool, so complete cooling on a wire rack is essential.
-
Can I add other seasonings to my baked banana chips?
Absolutely! Baked banana chips are a fantastic canvas for a variety of seasonings. For a warm, sweet flavor, a sprinkle of cinnamon, nutmeg, or even a touch of ginger before baking works wonderfully. For a more adventurous palate, consider a pinch of chili powder or cayenne pepper for a sweet and spicy kick, or even a light dusting of sea salt for a delightful sweet-and-salty contrast. Experimenting with different spice blends can lead to exciting new flavor profiles.