Classic Mimosa Recipe – Made In a Pitcher!
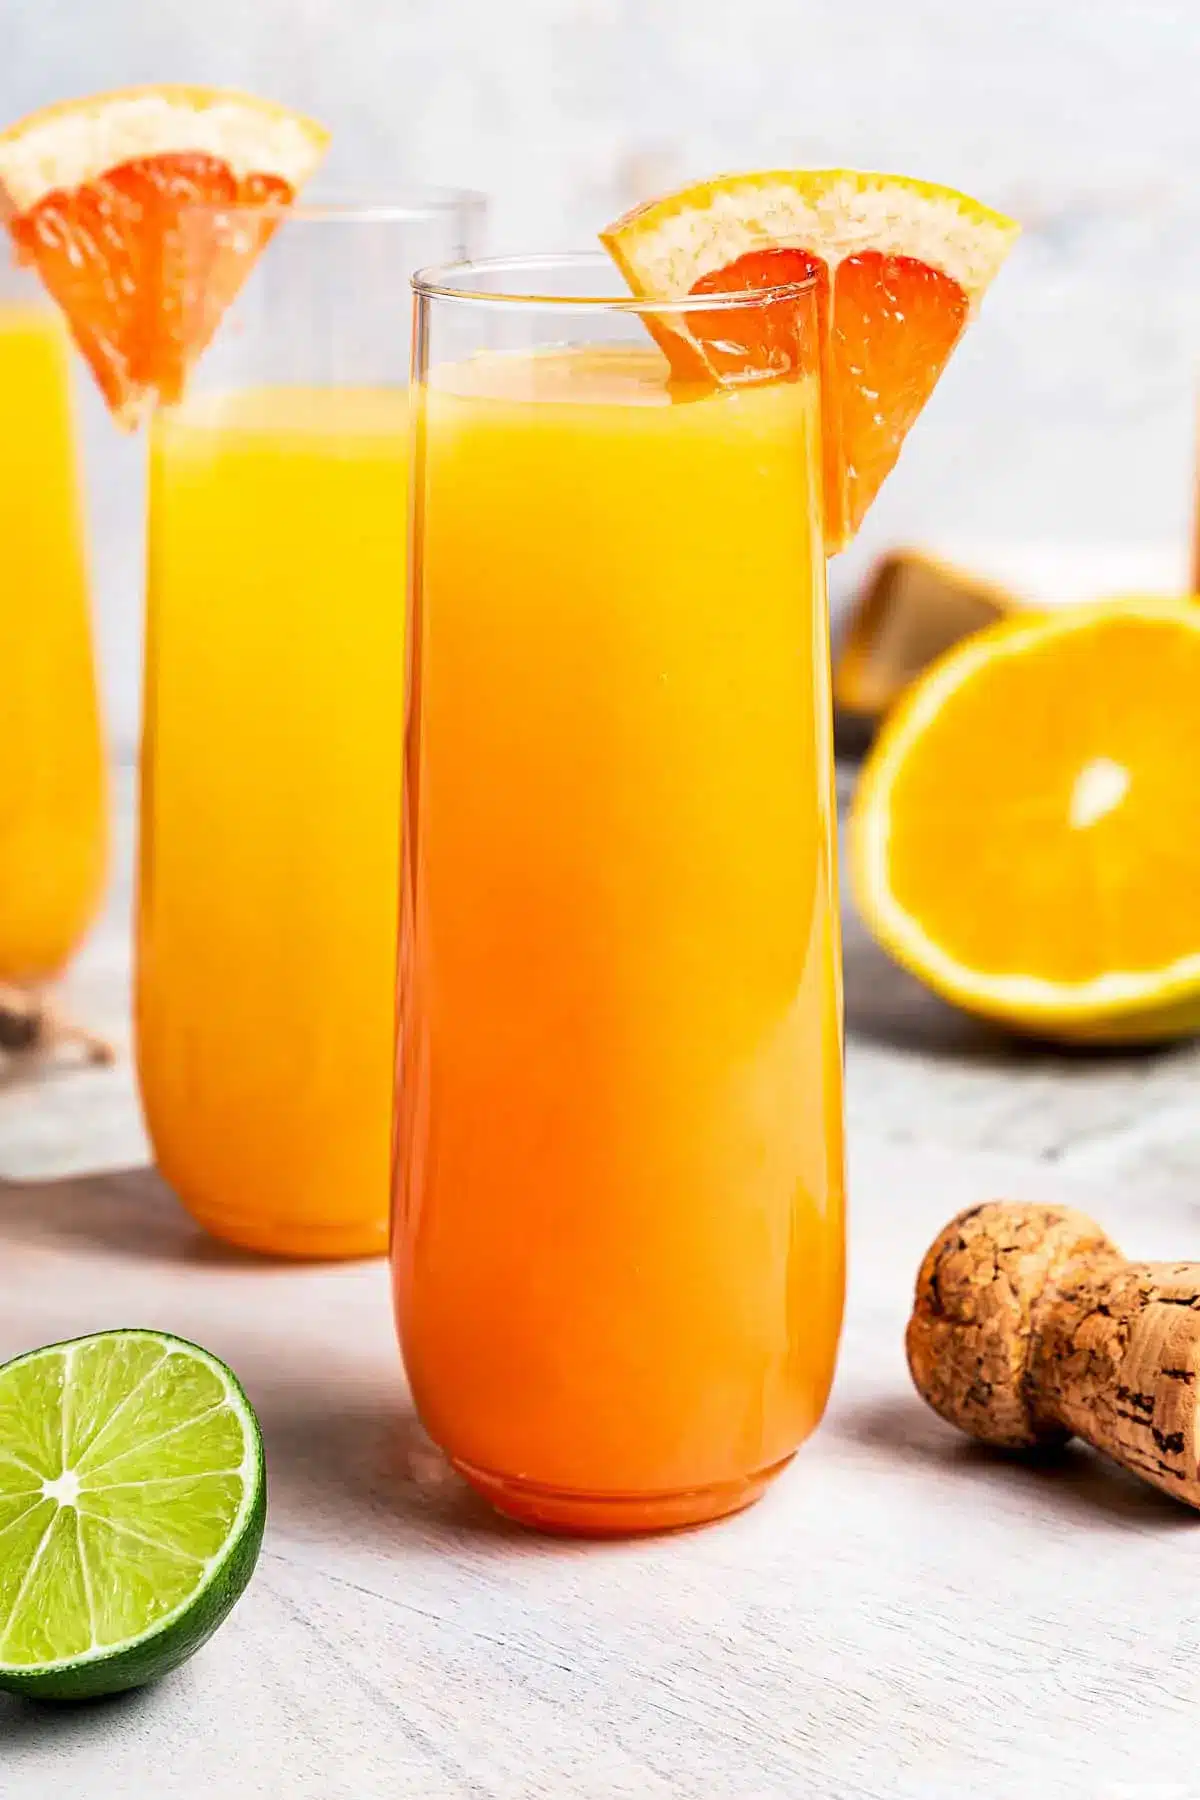
No Sunday brunch is complete without a pitcher of my favorite mimosa recipe! This is a classic cocktail made from orange juice and Prosecco, or Champagne if you prefer. Mix your mimosas in a pitcher with fresh citrus for your next party; I’m sharing all my best tips to ensure yours is a hit.
If you’re looking for more crowd-friendly brunch cocktails to complement your spread, consider trying my Chambord Bellini or a refreshing Happy Hour Vodka Lemonade, both easily mixed in pitchers for effortless entertaining.
Why You Will Love This Recipe
- Effortless Entertaining: Preparing mimosas in a pitcher is the ultimate hack for serving a crowd, minimizing last-minute cocktail mixing and maximizing your time with guests.
- Customizable Delight: While classic, this recipe invites personalization; easily adapt the citrus choices or even introduce new juice blends for a unique twist every time.
- Budget-Friendly Elegance: You don’t need to break the bank for a festive brunch; this recipe proves that quality and celebration can be achieved with accessible ingredients like Prosecco.
- Visually Stunning: The addition of fresh citrus slices transforms a simple drink into a beautiful centerpiece, adding color and zest that guests will admire before they even take a sip.
- Versatile for Any Occasion: Beyond brunch, this pitcher mimosa is perfect for showers, holiday gatherings, or any event where a light, bubbly, and refreshing drink is desired.
Ingredients You Need
The beauty of a mimosa lies in its simplicity and the quality of its core components. Opting for chilled, fresh ingredients is paramount to achieving that perfect effervescence and vibrant flavor. Even budget-friendly options can shine when combined thoughtfully, ensuring a delightful experience for everyone at your gathering. Remember, the ratio is key, and with just a few high-quality items, you’re well on your way to mimosa perfection.
Mimosa Recipe

This classic mimosa recipe is made for a brunch crowd! It's a simple cocktail made with orange juice and Prosecco. Mix it in a pitcher with fresh citrus for your next party!
- 1 bottle (750 mL) Prosecco
- 3-4 cups orange juice (I use 50% less sugar, or you can use freshly squeezed)
- citrus slices (grapefruits, oranges, lemons, limes)
- cranberry Juice (for serving)
- 1Add citrus slices. Fill a pitcher with your choice of sliced citrus.
- 2Add sparkle. Pour the bottle of Prosecco over the fruit.
- 3Add orange juice. Slowly pour in the orange juice to combine with the Prosecco.
- 4Serve. Pour the mimosas into champagne flutes and add a splash of cranberry juice to each. Cheers!
Keywords: mimosa, brunch cocktail, Prosecco, orange juice, party drink, easy cocktail, pitcher drink
- prosecco: a dry, chilled bottle is essential for that signature fizz and crisp taste.
- orange juice: freshly squeezed or a good quality store-bought option, strained for smoothness.
- citrus slices: a colorful assortment like oranges, lemons, and limes adds visual appeal and subtle flavor.
- cranberry juice: a small splash per glass offers a beautiful color contrast and a hint of tartness.
The precise quantities for these components can be found within the comprehensive recipe card.
Variations
Elevate your mimosa game beyond the classic with these exciting variations that cater to different tastes and occasions. Whether you’re seeking a non-alcoholic option, a fall-inspired twist, or a more complex flavor profile, there’s a mimosa variation waiting for you.
For a delightful alcohol-free alternative, swap the Prosecco for sparkling cider, a high-quality soda water, or even a ginger ale. This makes your mimosa inclusive for all guests, regardless of their preference for alcohol, and still offers that festive sparkle.
During the autumn months, consider an apple cider mimosa. This variation swaps orange juice for crisp apple cider and can be enhanced with a cinnamon stick or a star anise in each glass. It’s a warm, comforting take on a classic that pairs beautifully with fall flavors.
For a tropical escape, try a pineapple mimosa. Combine Prosecco with pineapple juice and add a splash of grenadine for a visually stunning “sunrise” effect. A maraschino cherry or a pineapple wedge as a garnish completes this delightful tropical treat, reminiscent of a Dole Whip mimosa.
Another creative idea involves incorporating berry purees. Blend fresh or frozen berries like raspberries or strawberries and add a spoonful to the bottom of each glass before pouring in the mimosa mixture. This adds a burst of color and a vibrant fruitiness that is both delicious and beautiful.
Consider a “mimosa bar” where guests can customize their own. Offer a selection of juices like grapefruit, mango, or pomegranate, alongside various sparkling wines and an array of garnishes such as fresh berries, mint sprigs, and edible flowers. This interactive approach ensures everyone finds their perfect combination and adds an element of fun to your event.
How to Prepare mimosa recipe
Step 1: Gather Your Citrus and Select Your Pitcher
Begin by selecting the freshest citrus fruits you can find. Oranges are classic, but don’t shy away from adding thin slices of grapefruit, lemon, or lime to the mix. The combination of different citrus fruits provides a more complex and refreshing flavor profile. Wash them thoroughly under cool running water, as you’ll be serving them submerged in the drink.
Once washed, slice your chosen citrus fruits into thin rounds. Aim for slices that are about ¼ inch thick, as these will fit nicely into a standard pitcher without being overwhelming. If you’re using lemons or limes, you can even cut them into wedges or half-moons for a different aesthetic. The goal here is to create visually appealing elements that will infuse subtle citrus notes into the base of your mimosa mixture.
Next, choose a pitcher that is large enough to hold your entire batch of mimosas. A 2-liter pitcher is usually a good size for a standard bottle of sparkling wine and sufficient orange juice. Ensure the pitcher is clean and dry before you begin adding your ingredients. The visual appeal of the citrus floating in the pitcher can be quite striking, so consider a clear glass pitcher to showcase this.
Step 2: Infuse the Citrus with Orange Juice
Carefully place your prepared citrus slices into the bottom of the chosen pitcher. Arrange them aesthetically, allowing them to overlap slightly to maximize their surface area and potential for flavor infusion. The vibrant colors of the different citrus fruits will already start to make your pitcher look festive and inviting.
Now, slowly pour the orange juice over the citrus slices in the pitcher. Use a good quality orange juice, preferably freshly squeezed for the best flavor, or a store-bought variety that you know and love. If you prefer a less pulpy drink, strain the orange juice through a fine-mesh sieve before adding it to the pitcher. This step ensures that the orange juice begins to meld with the subtle oils and essences released from the citrus peel.
Allow the orange juice and citrus to sit together for at least 5 to 10 minutes, if time permits. This brief marination period allows the flavors to meld more effectively, creating a more nuanced base for your mimosas. While not strictly mandatory, this small step can significantly enhance the overall taste profile of your final cocktail, making it taste more complex and less like just two ingredients mixed together.
Step 3: Introduce the Sparkling Wine
When you are ready to serve, or just before your guests arrive, it’s time to add the star of the show: the sparkling wine. Gently open a chilled bottle of Prosecco, Champagne, or your preferred sparkling wine. Be sure to chill it thoroughly beforehand; a warm sparkling wine will not only be less enjoyable but will also lose its effervescence more quickly. The colder, the better for maintaining those delightful bubbles.
Slowly and carefully pour the chilled sparkling wine over the orange juice and citrus mixture in the pitcher. Pouring too quickly can cause excessive foaming and a loss of precious bubbles. It’s best to tilt the pitcher slightly as you pour to facilitate a smoother incorporation of the wine. You’ll see the liquid start to bubble and combine, creating the characteristic effervescence of a mimosa.
Stir the mixture very gently with a long spoon or a cocktail stirrer. The goal is to combine the ingredients without agitating the sparkling wine too much, which would dissipate the bubbles. A few gentle stirs should suffice to ensure everything is evenly distributed. Avoid vigorous stirring at all costs, as this will result in a flat drink.
Step 4: The Art of Serving
Now that your pitcher is perfectly mixed, it’s time to serve. Select elegant glassware, traditionally Champagne flutes or coupe glasses, which best showcase the bubbles and color of the mimosa. Ensure the glasses are clean and preferably chilled; chilled glasses help maintain the drink’s temperature and effervescence for longer.
Carefully pour the mimosa mixture from the pitcher into each glass. Fill each glass about three-quarters of the way full, leaving a little room at the top. This leaves space for any optional additions you might choose to make, such as a splash of cranberry juice or a delicate garnish.
For an extra touch of color and flavor, add a small splash of cranberry juice to the bottom of each glass. This is an optional but highly recommended step, as it adds a beautiful visual contrast and a subtle layer of tartness that complements the sweetness of the orange juice and the dryness of the sparkling wine. Watch as the cranberry juice swirls and creates a visually stunning effect.
Step 5: Garnishing and Enjoyment
The final flourish is the garnish, which adds both visual appeal and a hint of aroma. You can place a fresh citrus slice – perhaps a thin orange or grapefruit wheel – on the rim of each glass. Alternatively, a delicate twist of lemon or lime peel can be added directly to the drink.
For a more festive touch, consider adding a fresh berry like a raspberry or a strawberry slice. A small sprig of mint can also add a lovely aroma and a pop of green color. These garnishes are not just for show; they enhance the sensory experience of enjoying the mimosa, engaging sight and smell before the first taste.
Present your beautifully garnished mimosas to your guests and encourage them to savor the crisp, refreshing taste. This pitcher-style mimosa is designed for easy refills, so keep the pitcher accessible. It’s the perfect accompaniment to any breakfast or brunch spread, turning an ordinary meal into a celebratory occasion.
Step 6: The Ongoing Refreshment
As your guests enjoy their mimosas, keep an eye on the pitcher level. The beauty of making mimosas in a pitcher is the ease of topping up glasses without interrupting the flow of conversation or the serving of food. Have a few extra chilled bottles of Prosecco or your chosen sparkling wine ready to replenish the pitcher as needed.
If the citrus slices in the pitcher start to look a bit tired, you can always add a few more fresh slices to keep the visual appeal high. This also helps to maintain a fresh citrus aroma that wafts up as drinks are poured. It’s a simple trick that ensures your mimosas always look and taste their best throughout the gathering.
Remember that sparkling wine is best enjoyed fresh. While you can certainly keep the pitcher topped up, try to consume the entire batch within a few hours of preparation. The effervescence will naturally diminish over time, so aiming to finish it during the main course of your brunch or party is ideal for the optimal drinking experience. Consider this an invitation for guests to enjoy seconds, or even thirds, of this delightful beverage.
Pro Tips for mimosa recipe
Chill Everything Thoroughly: The most crucial tip for a perfect mimosa is to ensure both your sparkling wine and orange juice are ice-cold. This not only enhances the refreshing taste but also helps preserve the precious bubbles. A warm drink will dissipate its fizz far too quickly, leaving you with a flat, unappealing beverage.
Use Quality Sparkling Wine: While you don’t need the most expensive Champagne, opt for a decent quality Prosecco, Cava, or a dry American sparkling wine. The wine contributes significantly to the overall flavor and texture of your mimosa. Avoid overly sweet wines, as they can make the cocktail cloying.
Strain Your Orange Juice: For a silky-smooth mimosa, strain your orange juice to remove pulp and seeds. This creates a more refined drinking experience. If you’re using store-bought juice, check the label to ensure it’s not from concentrate, as fresh is always best for vibrant flavor.
The Ratio Matters: The classic mimosa ratio is 1:1 (equal parts sparkling wine and orange juice). However, feel free to adjust this to your preference. Some enjoy a slightly drier mimosa with more wine, while others prefer it sweeter with more juice. Experiment to find your perfect balance.
Garnish with Flair: Elevate your mimosas with simple yet elegant garnishes. A thin orange slice perched on the rim, a twist of citrus peel, or a fresh berry can add a touch of sophistication and visual appeal. These small details make a big difference.
Pitcher Prep is Key for Crowds: When serving a group, making mimosas in a pitcher is a game-changer. Combine the orange juice and citrus slices in the pitcher ahead of time and refrigerate. Add the chilled sparkling wine just before serving to maintain maximum fizz. This prevents last-minute scrambling and ensures everyone gets a bubbly drink.
Serving Suggestions for mimosa recipe
Decoration
The presentation of your mimosa is just as important as its taste, especially when serving a crowd. Start with elegant glassware; traditional Champagne flutes are ideal for showcasing the bubbles and golden hue. For a more modern twist, coupe glasses can also be used. Ensure all glassware is sparkling clean and, if possible, chilled beforehand to keep your mimosas colder for longer.
Garnishes add a beautiful finishing touch and enhance the sensory experience. A classic orange slice perched on the rim of the glass is always a winner. For added visual interest and a subtle aroma, consider a thin twist of lemon or lime peel dropped into the drink, or even a fresh berry like a raspberry or a strawberry slice. Edible flowers can also add a whimsical and colorful element.
If you’re serving from a pitcher, consider adding some of the fresh citrus slices directly into the pitcher itself. This not only looks attractive but also subtly infuses the entire batch with extra citrus flavor. For a truly festive presentation, especially during holidays, consider rimming the glasses with sugar or colored sanding sugar that complements the occasion.
Side Dishes
Mimosas are the quintessential brunch cocktail and pair beautifully with a wide array of breakfast and brunch dishes. For a classic pairing, consider savory options like fluffy scrambled eggs, crispy bacon, or smoked salmon. The bright, bubbly nature of the mimosa cuts through the richness of these items perfectly.
Sweet treats also make excellent companions. Think about serving mimosas alongside freshly baked pastries, such as croissants, danishes, or cinnamon rolls. A beautiful berry tart or a slice of a decadent German pancake would also be wonderfully complemented by the effervescence of a mimosa.
For a lighter fare, consider fruit salads, yogurt parfaits, or quiches. The refreshing citrus notes of the mimosa harmonize well with lighter, fresher flavors. Don’t forget to offer a variety of options to cater to different dietary preferences and tastes, ensuring everyone at your brunch has something delicious to pair with their drink.
Creative Serving Ideas
Transform your mimosa experience with a “mimosa bar” for a truly interactive and fun gathering. Set out various juices beyond traditional orange, such as grapefruit, mango, pineapple, or even pomegranate. Offer a selection of garnishes like fresh berries, mint sprigs, fruit skewers, and even small umbrellas for a tropical flair.
Consider themed mimosa variations for special occasions. For a holiday gathering, a “pomegranate mimosa” with fresh pomegranate seeds and a sprig of rosemary would be stunning. For a summer party, a “peach mimosa” using peach nectar and a slice of fresh peach would be delightful. You could also experiment with adding a splash of liqueur, like Chambord for a berry twist or elderflower liqueur for a floral note.
Another creative idea is to serve mimosas as part of a tasting flight. Offer small pours of different mimosa variations alongside your main brunch dishes. This allows guests to explore and compare different flavor profiles. Remember to encourage guests to share their favorite combinations on social media, perhaps tagging your event or your Pinterest board for inspiration.
Preparation & Storage
Storing Leftovers
While mimosas are best enjoyed fresh to appreciate their effervescence, leftovers can be stored for a short period. If you have a partially filled pitcher, cover it tightly with plastic wrap or a lid and refrigerate immediately. The key is to minimize air exposure, which will help slow down the loss of carbonation.
However, it’s important to manage expectations; even with careful storage, the sparkling wine will lose some of its fizz. The flavors might meld further, which could be pleasant for some, but the lively bubble sensation will be diminished. Aim to consume any leftover mimosa within 24 hours for the best possible quality and taste.
For individual leftover glasses, simply cover them tightly and refrigerate. Again, the carbonation will be the primary factor affected by storage. If you anticipate having significant leftovers and want to preserve some sparkle, consider storing the unfizzed components (orange juice and citrus) separately and only mixing them with sparkling wine as needed.
Freezing
Freezing mimosas in their traditional liquid form is generally not recommended. The carbonation in the sparkling wine will cause the liquid to expand significantly, potentially cracking containers or creating an unstable frozen mass. Furthermore, when thawed, the texture and effervescence of the sparkling wine are irreversibly altered.
However, you can freeze components of the mimosa for later use. Freeze individual portions of orange juice in ice cube trays. Once frozen, transfer these “mimosa ice cubes” to a freezer bag. When ready to make a mimosa, use these instead of regular ice cubes; they will chill your drink without diluting it as much as water-based ice.
Another creative freezing method is to freeze fruit garnishes. Place fresh berries or citrus slices on a baking sheet and freeze until solid, then transfer them to a freezer-safe container. These frozen garnishes can be added directly to your mimosas, providing both a chill and visual appeal.
Reheating
Reheating mimosas is not a typical or recommended practice, as the key appeal of this cocktail lies in its chilled, refreshing nature and effervescence. Warming the drink would eliminate the bubbles entirely and likely result in a syrupy, unappetizing beverage.
If you have leftover components that need to be brought back to a drinkable temperature, it’s best to do so individually and then reassemble. For example, if you stored orange juice and citrus, you would chill them thoroughly before mixing with freshly opened, chilled sparkling wine.
In the rare instance that you have a pitcher of mimosa that has been refrigerated and you want to serve it again, the best approach is to add more chilled sparkling wine to revitalize some of the fizz. Serve immediately to capture any remaining effervescence. This is more of a “refreshing” than “reheating” process and is best done only once.
Frequently Asked Questions
-
Why is it called a mimosa, and what is the traditional ratio?
The name “mimosa” is believed to have originated in London around 1925 at the Buck’s Club, where it was named after the mimosa flower, whose color resembles the drink’s golden hue. Some also credit its naming to Alfred Hitchcock. The traditional and most widely accepted ratio for a mimosa is 1:1, meaning equal parts chilled sparkling wine (like Champagne or Prosecco) and chilled orange juice. This balance ensures the crispness of the wine is complemented by the sweetness and slight tartness of the juice without one overpowering the other, creating a perfectly harmonious and refreshing cocktail that is easy to remember and replicate.
-
Can I make mimosas ahead of time, and if so, how should I store them?
Yes, you can prepare mimosas ahead of time, especially for a large gathering, by using the pitcher method. The best practice is to combine the orange juice and any citrus slices in the pitcher and refrigerate them for up to 24 hours. This allows the flavors to meld beautifully. However, it is crucial to add the chilled sparkling wine to the pitcher *just* before you plan to serve. This ensures that the effervescence remains as lively as possible. If you add the sparkling wine too early, the carbonation will dissipate, resulting in a flat drink. Store any unused pre-mixed juice base in an airtight container in the refrigerator.
-
What are the best sparkling wine alternatives to Champagne for mimosas, and are there non-alcoholic options?
Absolutely! You don’t need expensive Champagne for a delicious mimosa. For excellent alternatives, consider Prosecco, which is a dry Italian sparkling wine that offers a crisp, fruity profile often at a more budget-friendly price point. Spanish Cava is another fantastic option, providing a similar quality and complexity. Many American wineries also produce excellent dry sparkling wines that work wonderfully. For non-alcoholic versions, you can substitute the sparkling wine with sparkling cider, club soda, or a ginger ale for a refreshing, bubbly beverage that captures the spirit of a mimosa without the alcohol. These alternatives ensure everyone can enjoy a festive drink.