Texas Roadhouse Rolls – Easy Copycat Recipe!
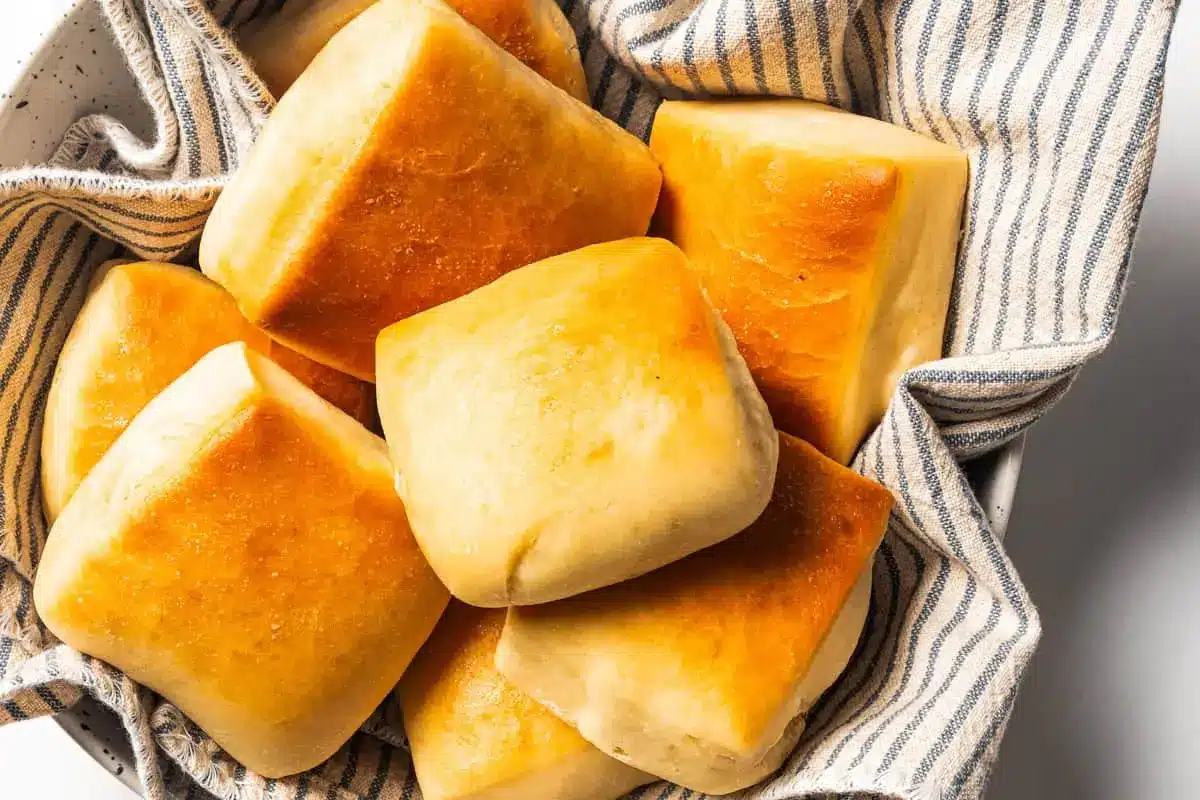
If you’ve ever craved that signature sweet, soft, and impossibly fluffy roll served at Texas Roadhouse, then prepare yourself for a treat. This copycat recipe aims to capture that magical essence, allowing you to recreate that beloved dining experience right in your own kitchen. Get ready to impress yourself and your loved ones with these golden-brown delights, perfect for any meal.
These rolls are more than just a side dish; they are a comforting embrace, a testament to the simple joy of freshly baked bread. Their tender crumb and subtle sweetness make them incredibly versatile, whether paired with a hearty stew or drizzled with a decadent cinnamon butter. Embarking on this baking journey is remarkably straightforward, promising a rewarding outcome even for novice bakers.
Why You Will Love This Recipe
- Incredibly Soft & Fluffy Texture: Each bite delivers a cloud-like experience, a hallmark of perfectly proofed and baked dough.
- Simple Ingredient List: You’ll be amazed at how few common pantry staples are needed to achieve such outstanding results.
- Quick Preparation Time: Despite the delightful outcome, the active preparation is surprisingly swift, fitting easily into a busy schedule.
- Customizable Sweetness: Easily adjust the sugar or embrace the traditional cinnamon butter pairing for a truly personalized taste.
- Homemade Perfection: Bypass store-bought or frozen options; this recipe offers superior freshness and flavor that’s hard to beat.
Ingredients You Need
The beauty of these Texas Roadhouse rolls lies in their simplicity, utilizing everyday ingredients that most home bakers already have on hand. The key to their success is in the quality of these basic components and the careful attention to temperature during the yeast activation and dough mixing phases. Ensure your ingredients are fresh, especially the yeast, for the best possible rise and texture.
Copycat Texas Roadhouse Rolls

These copycat Texas Roadhouse rolls are soft and fluffy, and you can serve them warm with homemade cinnamon butter as a side with any meal. They are better fresh from the oven and require only 7 ingredients.
- 2 teaspoons active dry yeast
- ½ teaspoon granulated sugar
- ¼ cup warm water (between 100ºF and 110ºF)
- 1 cup milk (lukewarm, about 105˚F)
- 2 tablespoons unsalted butter, melted and cooled
- 1 large egg
- 1 teaspoon salt
- 3¾ cup all purpose flour
- 1½ tablespoons unsalted butter, melted and cooled (for brushing)
- Cinnamon butter (recipe in notes)
- 1Bloom the yeast: Add the active dry yeast and sugar to a bowl. Add the warm water and stir. Cover and let stand for 5-10 minutes, or until foamy.
- 2Add wet ingredients: In the bowl of a stand mixer, combine the warm milk, melted butter, and the foamy yeast mixture. Add the egg and salt, and mix until well combined.
- 3Add flour: Attach the dough hooks and gradually add the flour while mixing. The dough should start to pull away from the sides of the bowl. Add a little more flour if the dough is too sticky.
- 4Rise the dough: Transfer the dough to a lightly oiled bowl, cover with a clean kitchen towel, and let rise in a warm place for 1½ hours, or until doubled in size.
- 5Roll out and cut the dough: Punch down the dough and roll it into a ½-inch thick rectangle. Line a large baking sheet with parchment paper. Cut the dough into 15 squares or rectangles and transfer them to the prepared baking sheet.
- 6Second rise: Cover the rolls with a clean kitchen towel and let them rise until doubled in size, about 30 to 45 minutes.
- 7Bake: Preheat your oven to 350ºF. Bake the rolls for 20 minutes.
- 8Serve: Immediately after baking, brush the rolls with the additional melted butter. Let them cool for 5 to 10 minutes before serving. Serve warm with cinnamon butter.
Keywords: Texas Roadhouse Rolls, Copycat Recipe, Dinner Rolls, Homemade Bread, Yeast Rolls, Side Dish
The exact quantities for these components are detailed within the accompanying recipe card, ensuring precision for flawless execution. However, knowing the core ingredients provides a clear picture of the minimal effort required for this delightful bake.
Variations
While the classic Texas Roadhouse roll is undeniably delicious, its inherent adaptability opens doors to exciting variations that cater to diverse tastes and dietary preferences. Consider these creative twists to elevate your next batch.
For a delightful Vegan Texas Roadhouse Roll, the substitutions are quite straightforward. You can replace the dairy milk with an unsweetened plant-based milk like almond, soy, or oat milk; ensure it’s warmed to the correct temperature, just as you would with dairy. The egg can be substituted with a flax egg (1 tablespoon ground flaxseed mixed with 3 tablespoons water, allowed to sit for 5 minutes) or a commercial egg replacer. The butter can be swapped for a high-quality vegan butter or a neutral-flavored oil like melted coconut oil or vegetable oil. These simple swaps will yield a similarly tender and delicious roll, perfect for those following a vegan lifestyle.
If you’re seeking a Low-Carb or Keto-Friendly Texas Roadhouse Roll, the approach involves embracing alternative flours. Almond flour and coconut flour are excellent choices for reducing carbohydrate content. You’ll likely need to adjust the liquid ratios as these flours absorb moisture differently than traditional all-purpose flour. Xanthan gum can be a helpful binder to mimic the gluten structure, contributing to a better texture. Consider incorporating a touch of sweetener like erythritol or stevia to maintain that subtle sweetness. This variation requires a bit more experimentation with the flour blend and hydration levels, but the result can be a satisfying, guilt-free roll.
Embrace the savory side with Garlic Herb Texas Roadhouse Rolls. Before the second rise, gently press minced fresh garlic and finely chopped herbs like rosemary, thyme, or parsley into the tops of the rolls. You can also brush the tops with melted garlic-infused butter after baking. This variation transforms the rolls into an irresistible accompaniment for Italian dishes, hearty stews, or even as a standalone appetizer. The aromatic herbs and garlic create a sophisticated flavor profile that complements the soft, pillowy bread beautifully, making them a crowd-pleaser for any occasion.
How to Prepare texas roadhouse rolls
Step 1: Bloom the Yeast
Begin by ensuring your yeast is active and ready to work its magic. In a small bowl, combine the active dry yeast with a teaspoon of granulated sugar. Gently stir in the warm water, making sure the temperature is between 100°F and 110°F; too hot and you risk killing the yeast, too cool and it won’t activate properly.
Cover the bowl with a clean kitchen towel or plastic wrap and let it sit undisturbed for about 5 to 10 minutes. You are looking for a visibly foamy or bubbly layer to form on the surface, which indicates that the yeast is alive and eager to begin the fermentation process. If, after 10 minutes, there’s no sign of activity, it’s a clear indicator that your yeast might be expired or dead, and you should start this step over with a fresh packet.
This blooming stage is crucial as it jumpstarts the yeast, ensuring a good rise and a light, airy texture in your final rolls. It’s a simple yet vital step that sets the foundation for the entire baking process, transforming humble ingredients into something truly special. Paying close attention to the temperature of the water is paramount here, as even a few degrees can make a significant difference in the yeast’s performance and, consequently, the outcome of your rolls.
Step 2: Combine the Wet Ingredients
Once your yeast has successfully bloomed, it’s time to bring together the other liquid components that will form the base of your dough. In the bowl of a stand mixer fitted with the dough hook attachment, pour in the lukewarm milk. The milk should be around 105°F, pleasantly warm to the touch but not hot, which is also essential for yeast activity.
Next, add the melted and slightly cooled unsalted butter to the milk. It’s important that the butter isn’t piping hot, as this can also inhibit the yeast. Then, gently pour in the foamy yeast mixture from the first step. To this collection of liquids, add the large egg, which contributes richness and helps bind the dough, and the teaspoon of salt, which not only enhances flavor but also controls yeast activity.
Give everything a good whisk or a brief initial mix with the dough hook on a low speed to thoroughly combine all the wet ingredients. This ensures that the flavors and components are evenly distributed before you introduce the flour. A well-emulsified wet base is key to developing a smooth and pliable dough later on. This step is where the foundational flavors and moisture content are established, setting the stage for the flour to work its magic.
Step 3: Incorporate the Flour and Knead the Dough
Now it’s time to transform the liquid mixture into a cohesive dough by gradually adding the all-purpose flour. With the stand mixer running on a low speed, begin adding the flour, about a cup at a time. Allow the flour to incorporate fully before adding more, observing how the dough starts to come together.
Continue adding flour until the dough begins to pull away from the sides of the mixing bowl. This indicates that the dough has reached a good consistency and has absorbed enough flour. If the dough seems excessively sticky and is still clinging heavily to the bowl after most of the flour has been added, you can add a tablespoon or two more of flour at a time, being careful not to add too much, which can result in dry, tough rolls.
Once the dough starts to come together, increase the mixer speed slightly and let it knead for about 5 to 7 minutes. The dough should become smooth, elastic, and slightly tacky, but it shouldn’t stick excessively to your fingers when lightly touched. Proper kneading develops the gluten structure, which is essential for the characteristic soft and fluffy texture of these rolls. A well-kneaded dough will feel supple and resilient.
Step 4: First Rise (Bulk Fermentation)
Transfer the kneaded dough from the stand mixer bowl to a clean, lightly oiled bowl. Gently roll the dough around in the bowl to coat it lightly with oil; this prevents a dry crust from forming on top as it rises. Place the oiled dough ball into the bowl, ensuring it has enough room to expand significantly.
Cover the bowl securely with a clean kitchen towel or plastic wrap. Find a warm, draft-free spot in your kitchen to let the dough rise. This can be on your countertop, especially if your kitchen is warm, or even in a slightly warmed (then turned off) oven. The ideal temperature for rising is around 75-80°F, but ambient kitchen warmth is usually sufficient.
Allow the dough to rise for approximately 1.5 hours, or until it has doubled in size. This period of bulk fermentation is where the yeast works its magic, producing carbon dioxide gas that inflates the dough and develops flavor. You’ll notice the dough becoming visibly larger, lighter, and more airy. Patience during this stage is rewarded with superior texture and taste in the final product.
Step 5: Shape the Rolls
Once the dough has doubled in size, gently punch it down to release the accumulated gases. Turn the dough out onto a lightly floured surface. For these rolls, you’ll want to roll the dough out into a rectangle. Aim for a thickness of about ½ inch; this thickness is key to achieving the perfect height and soft interior.
Using a sharp knife or a pizza cutter, carefully cut the rolled-out dough into approximately 15 equal squares or rectangles. The size can be adjusted based on your preference, but aim for pieces that will bake up into generously sized rolls. Ensure your cuts are clean and swift to avoid tearing the dough, which can affect the final appearance and texture.
Prepare a large baking sheet by lining it with parchment paper. This prevents sticking and makes cleanup a breeze. Carefully transfer the cut dough pieces to the prepared baking sheet, spacing them about an inch or two apart to allow for their second rise and to prevent them from baking together into one large mass. Precision in cutting and spacing ensures uniform baking and presentation.
Step 6: Second Rise and Baking
After shaping and placing the dough pieces on the baking sheet, cover them once more with a clean kitchen towel. Let them rise in a warm spot for another 30 to 45 minutes, or until they have visibly puffed up and appear airy and nearly doubled in their current size. This second rise, or proofing, is critical for achieving that signature pillowy softness.
While the rolls are undergoing their second rise, preheat your oven to 350°F (175°C). Ensuring the oven is at the correct temperature before baking is essential for even cooking and proper browning. Once the rolls have completed their second rise and the oven is preheated, it’s time to bake them.
Bake the rolls for approximately 20 minutes, or until they are golden brown on top and sound hollow when tapped on the bottom. As soon as they come out of the oven, brush the tops generously with melted unsalted butter. This not only adds a delicious sheen and flavor but also helps keep the crust tender. Let them cool slightly on the baking sheet for about 5 to 10 minutes before serving warm; this allows the internal structure to set, ensuring a perfect texture.
Pro Tips for texas roadhouse rolls
Use a Kitchen Scale for Flour: For the most consistent results, especially with baking, measuring your flour by weight using a kitchen scale is highly recommended. All-purpose flour can vary significantly in density when scooped, leading to inconsistent dough consistency and texture. Precisely measuring 450 grams ensures you achieve the ideal dough hydration, which is key to tender rolls.
Monitor Ingredient Temperatures Carefully: The success of yeast-based recipes hinges on temperature control. Ensure your water and milk are within the specified ranges (100-110°F for water, around 105°F for milk). Overly hot liquids will kill the yeast, preventing the dough from rising, while liquids that are too cool will slow down or inhibit the yeast’s activity. A reliable kitchen thermometer can be an invaluable tool for this.
Don’t Overwork the Dough: While kneading is essential for gluten development, over-kneading can make the dough tough. Aim for a smooth, elastic dough that pulls away from the sides of the bowl. Once it reaches this stage, let it rest and rise. Resist the temptation to keep adding flour if it feels slightly sticky; a little tackiness is often desirable for soft rolls.
Embrace the Warm Rising Environment: Yeast thrives in warmth. If your kitchen is cool, consider using the “oven trick”: heat your oven to its lowest setting (or around 200°F) for just 2 minutes, then turn it off. Place the covered dough inside the residual warmth to rise. This creates a consistently warm and humid environment ideal for optimal fermentation and a good rise.
Serve Warm with Cinnamon Butter: The Texas Roadhouse experience is incomplete without their signature cinnamon butter. Prepare it by creaming softened butter with honey, powdered sugar, and a touch of cinnamon. Serving the rolls warm, with a generous dollop of this sweet, spiced butter, truly elevates them from simple bread to an unforgettable treat.
Serving Suggestions for texas roadhouse rolls
Decoration
For a touch of rustic elegance, a light brushing of melted butter immediately after the rolls emerge from the oven provides a beautiful sheen and enhances their golden-brown crust. You can also sprinkle a few flakes of sea salt over the buttered tops for a subtle savory contrast to the inherent sweetness of the roll. If you’re aiming for a slightly richer presentation, consider adding a sprinkle of finely chopped fresh parsley or chives to the melted butter before brushing, offering a hint of green and an aromatic flourish.
Side Dishes
These Texas Roadhouse rolls are exceptionally versatile and serve as a perfect accompaniment to a wide array of main courses. They are an ideal companion for hearty soups and stews, their soft texture perfect for soaking up rich broths. Consider pairing them with comforting dishes like chili, pot roast, or barbecue pulled pork, where their slight sweetness balances the savory flavors. They also pair wonderfully with roasted chicken or fish, acting as a palate cleanser and a satisfying carb element to the meal.
Creative Serving Ideas
Beyond the classic pairing with cinnamon butter, consider a savory twist. Melted garlic butter infused with fresh herbs like rosemary and thyme makes for an irresistible appetizer or side for Italian-inspired dinners. For a more robust flavor profile, whip up a batch of cowboy butter, which often includes ingredients like cilantro, lime, and a hint of spice, offering a Southwestern flair. You can also serve them as part of a brunch spread, perhaps alongside a savory German pancake or a breakfast casserole, offering a comforting bread option.
Preparation & Storage
Storing Leftovers
To keep your delicious Texas Roadhouse rolls fresh for as long as possible, proper storage is key. Once they have cooled completely, store them in an airtight container or a resealable plastic bag at room temperature. This method will help maintain their softness and prevent them from drying out. Properly stored, these rolls can remain wonderfully fresh for up to 3 to 4 days, making them perfect for enjoying over several meals.
Freezing
If you find yourself with an abundance of these delightful rolls or want to prepare ahead, freezing is an excellent option. Allow the baked rolls to cool completely before proceeding. Wrap each roll individually and tightly in plastic wrap to prevent freezer burn. Then, place the individually wrapped rolls into a heavy-duty freezer bag or an airtight container. They can be stored in the freezer for up to 3 months, ensuring you always have a batch of warm, homemade rolls ready when you need them.
Reheating
Reheating your Texas Roadhouse rolls is simple and effective in restoring their fresh-baked warmth and texture. For a quick reheat, place the desired number of rolls on a baking sheet and warm them in a preheated oven at 300°F (150°C) for about 5 to 10 minutes, or until heated through. Alternatively, if you have only a few rolls, you can gently warm them in a microwave for 15-30 seconds, though this may result in a slightly chewier texture. For frozen rolls, it’s best to thaw them at room temperature overnight before reheating using the oven method.
Frequently Asked Questions
-
Why are my Texas Roadhouse rolls not rising properly?
Several factors can contribute to a lack of rise in your dough. The most common culprits are expired or inactive yeast, or water that was too hot or too cold during the activation phase. Ensure your yeast is fresh by checking the expiration date and perform the bloom test before mixing; if it doesn’t foam, replace the yeast. Also, double-check the temperature of your water and milk using a thermometer to confirm they are within the optimal range for yeast activity. Over-kneading can also make the dough tough and hinder its ability to rise effectively.
-
Can I make the dough for these rolls ahead of time and refrigerate it?
Yes, you can prepare the dough ahead of time, which is a great strategy for busy schedules. After the first rise, punch down the dough, then cover it tightly and refrigerate it for up to 24 hours. When you’re ready to bake, let the refrigerated dough sit at room temperature for about 30-60 minutes to warm up slightly before shaping and allowing the second rise. This slow fermentation in the refrigerator can even develop deeper flavors in the dough.
-
What is the best way to achieve the signature soft and fluffy texture of these rolls?
The key to achieving that incredibly soft and fluffy texture lies in several factors: the proper hydration of the dough (not too much, not too little flour), adequate kneading to develop gluten, and allowing sufficient time for both the first and second rises in a warm environment. Using milk in the dough also contributes to a softer crumb than water alone. Finally, don’t overbake them; a golden-brown exterior and a tender, slightly moist interior are ideal. Brushing with melted butter immediately after baking also helps keep the crust tender and adds richness.