Sheet Pan Chicken Dinner – Easy Meal Prep Idea!

Embark on a culinary adventure that promises ease, flavor, and minimal cleanup with this exceptional Sheet Pan Chicken recipe. Designed for the modern home cook, it transforms simple ingredients into a stunning meal that’s perfect for busy weeknights or relaxed weekend dinners.
Imagine a symphony of tender, seasoned chicken breasts nestled alongside perfectly roasted potatoes and a medley of vibrant vegetables, all kissed by the oven’s heat in a single pan. This dish is not just a meal; it’s a testament to how straightforward cooking can yield incredibly satisfying results, bringing deliciousness to your table with remarkable efficiency.
Why You Will Love This Recipe
- Effortless Preparation: With just a few simple steps, you can have a complete, balanced meal ready to serve, making it ideal for even the most time-crunched evenings.
- Minimal Cleanup: The beauty of a sheet pan dinner lies in its one-pan approach, dramatically reducing the number of dishes you’ll need to wash afterwards.
- Flavorful and Juicy: Each component is seasoned to perfection, ensuring that the chicken remains moist and tender while the vegetables achieve a delightful caramelization.
- Versatile and Customizable: This recipe serves as a fantastic base, allowing you to easily swap out vegetables or seasonings to suit your personal preferences or what you have on hand.
- Excellent for Meal Prep: The components hold up exceptionally well when stored, making this a top choice for preparing healthy lunches or dinners for the week ahead.
Ingredients You Need
The success of any dish begins with the quality of its ingredients, and this sheet pan chicken is no exception. Opting for fresh, vibrant produce and good quality chicken will elevate the final taste and texture. This recipe’s beauty lies in its simplicity, allowing the natural flavors of each component to shine through beautifully when roasted together.
Sheet Pan Chicken
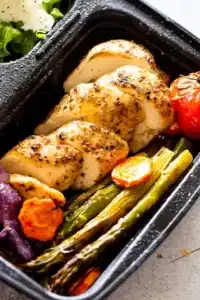
This flavorful sheet pan chicken recipe is ready in under an hour, with juicy seasoned chicken breasts, tender potatoes, and vegetables all baked together. It's perfect for an easy weeknight chicken dinner, and I love it as a meal prep idea!
- 4 boneless, skinless chicken breasts (about 1 to 1½ pounds total)
- 3 cups diced potatoes
- 1 pound asparagus, ends trimmed
- 2 large carrots, diced or thinly sliced
- 1 large red onion, quartered
- 2 cups cherry tomatoes (optional)
- 2 tablespoons olive oil, divided
- 2 cloves garlic, minced, divided
- 1 teaspoon garlic powder
- 1½ teaspoons dried rosemary, divided
- 1½ teaspoons dried thyme, divided
- salt and freshly ground black pepper, to taste
- 1 tablespoon butter, cut into 4 pats
- 1Preheat oven to 425°F. Line a large sheet pan with parchment paper or foil; set aside.
- 2Cut up the potatoes, Brussels sprouts, asparagus, carrots, and red onion. Place each in a separate corner of the prepared sheet pan. Do not add the cherry tomatoes yet.
- 3Drizzle olive oil over the veggies. Season with garlic powder, ½ teaspoon dried rosemary, ½ teaspoon dried thyme, salt, and pepper.
- 4Place 2 chicken breasts over a large piece of parchment paper. Rub both sides of the chicken with a bit of olive oil, and season with salt, pepper, ½ teaspoon rosemary, ½ teaspoon thyme, and half of the minced garlic.
- 5Place a pat of butter on top of each chicken breast and tightly seal the parchment paper around the chicken breasts. Repeat the same process with the remaining 2 chicken breasts.
- 6Bake for 30 minutes, or until the chicken is cooked through. Chicken is done when its internal temperature reaches 165°F.
- 7Optionally, 10 minutes before it’s done cooking, add cherry tomatoes to the sheet pan.
- 8Remove from oven and let stand 5 minutes. Unwrap the chicken and serve.
Keywords: sheet pan chicken, easy chicken dinner, weeknight meal, meal prep, healthy recipe
Quantities for each ingredient are detailed in the printable recipe card below.
Variations
One of the greatest strengths of this sheet pan chicken recipe is its inherent adaptability. By making small, strategic changes, you can create entirely new flavor profiles and cater to different dietary needs.
Consider a delightful Vegan twist by replacing the chicken with firm tofu or substantial portobello mushrooms, ensuring they are pressed dry and seasoned generously. The vegetables can remain the same, or you could introduce hearty root vegetables like parsnips and sweet potatoes for an earthier profile. For the marinade, a flavorful blend of soy sauce, maple syrup, garlic, and ginger would be superb, mimicking the savory notes often found in chicken dishes.
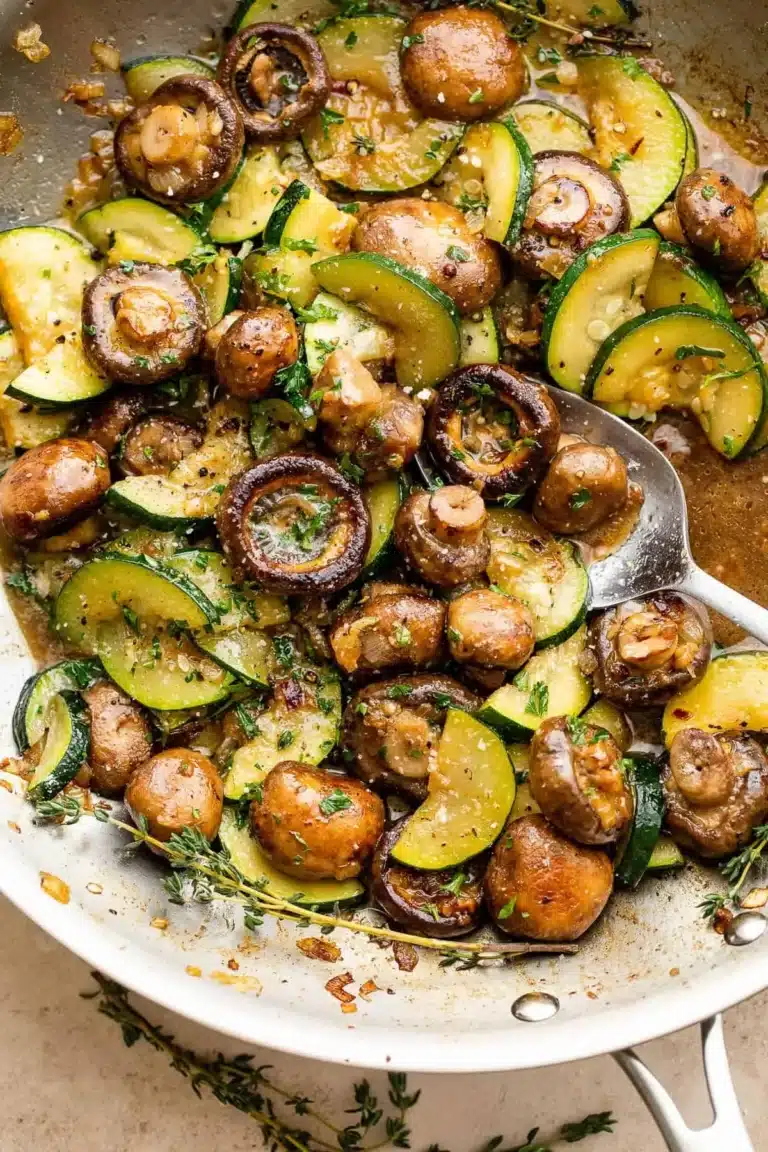
For those following a Low-Carb approach, the potatoes can be omitted entirely. Instead, focus on an abundance of non-starchy vegetables such as broccoli, cauliflower, Brussels sprouts, bell peppers, and zucchini. These vegetables roast beautifully and absorb the chicken’s juices, offering a satisfying crunch and plenty of fiber. You might also consider adding a sprinkle of cheese, like feta or parmesan, in the final minutes of baking for added richness.
Another exciting variation involves infusing an Asian-inspired flavor. Marinate the chicken in a mixture of soy sauce, sesame oil, rice vinegar, honey, and grated fresh ginger before placing it on the sheet pan. Alongside the chicken, roast vegetables like broccoli florets, snap peas, sliced bell peppers, and carrots. A final drizzle of sriracha or a sprinkle of sesame seeds before serving would complete this vibrant and flavorful dish.
How to Prepare Sheet Pan Chicken
Step 1: Prepare the Oven and Pan
Begin by preheating your oven to a robust 425°F (220°C). This high temperature is crucial for achieving those delightful roasted edges on both the chicken and the vegetables, creating a beautiful caramelization. Simultaneously, prepare a large, rimmed baking sheet by lining it with parchment paper or aluminum foil. This step is vital for two reasons: it prevents sticking, making cleanup a breeze, and it also helps to contain the cooking juices, allowing them to mingle and impart flavor.
The parchment paper or foil creates a barrier that ensures even cooking and prevents the ingredients from directly adhering to the metal surface. If you choose foil, ensure it’s a heavy-duty variety to prevent tearing during the cooking process. Having the pan ready before you start chopping vegetables ensures a smooth transition into the roasting phase, minimizing any waiting time that could cause moisture loss from the ingredients.
This initial preparation sets the stage for a perfectly cooked meal. A well-prepared pan and accurately preheated oven are foundational steps that contribute significantly to the overall success of the sheet pan dinner. It’s a small investment of time that pays dividends in flavor and ease of cleanup later on.
Step 2: Cut and Arrange the Vegetables
Now, it’s time to attend to the vibrant assortment of vegetables that will accompany your chicken. Begin by washing and thoroughly drying all your chosen vegetables. Proper drying is essential, as excess moisture can lead to steaming rather than roasting, hindering the development of crispy edges and deep flavor. For the potatoes, ensure they are diced into roughly uniform 1-inch cubes; this uniformity ensures they cook evenly alongside the other ingredients, preventing some from becoming mushy while others remain undercooked.
The Brussels sprouts should be halved, allowing for a greater surface area to crisp up. Asparagus spears require a simple trim to remove their woody ends, making them tender and palatable. Carrots can be diced or thinly sliced into rounds, depending on your preference for texture and cooking time. Red onions are best quartered, which allows them to soften and sweeten beautifully during the roasting process. Arrange these prepared vegetables in distinct sections on the prepared baking sheet. Avoid overcrowding the pan, as this can also lead to steaming; if necessary, use two baking sheets.
Crucially, do not add the cherry tomatoes at this stage. These delicate fruits cook much faster than the denser root vegetables and sturdier greens. Adding them too early would result in them bursting and becoming overly soft, losing their desirable pop of freshness. They will be introduced later in the cooking process to ensure they retain their shape and vibrant flavor. This strategic timing is key to achieving a balanced texture and taste across all components of the dish.
Step 3: Season the Vegetables
With the vegetables neatly arranged on the baking sheet, it’s time to imbue them with flavor. Drizzle approximately half of the olive oil evenly over all the chopped vegetables, ensuring each piece is lightly coated. This oil acts as a conductor for heat and helps to achieve that desirable roasted texture, creating slightly crisped edges and tender interiors.
Next, season the vegetables generously with the garlic powder, a portion of the dried rosemary and thyme, and a good pinch of salt and freshly ground black pepper. The garlic powder provides a foundational savory aroma, while the herbs contribute an earthy, aromatic depth. Salt is essential for enhancing all the other flavors, and black pepper adds a subtle hint of warmth. Toss the vegetables gently with your hands or a spatula to ensure the seasonings and oil are evenly distributed. Every piece should have a light coating, promising a burst of flavor with every bite.
The remaining olive oil and seasonings will be used for the chicken, creating a harmonious flavor profile across the entire dish. This careful seasoning of each component before combining them on the pan ensures that no element is bland or overpowered, leading to a well-balanced and delicious final product. This step is where the magic of simple ingredients begins to transform.
Step 4: Prepare and Season the Chicken
Now, let’s turn our attention to the star of the show: the chicken breasts. Place two of the boneless, skinless chicken breasts onto a large piece of parchment paper. This method of cooking the chicken separately within its own parchment packet is a game-changer for ensuring maximum moisture and flavor retention. Rub both sides of each chicken breast with a small amount of the remaining olive oil, ensuring they are lightly coated.
Season the chicken generously with salt, freshly ground black pepper, the remaining dried rosemary, and the remaining dried thyme. Sprinkle half of the minced fresh garlic over the chicken breasts as well. The fresh garlic will infuse the chicken with a potent, aromatic flavor as it roasts. Once seasoned, place a pat of butter on top of each chicken breast. This butter will melt during cooking, basting the chicken and adding an incredible richness and succulence, locking in moisture and preventing dryness. Tightly seal the parchment paper around the chicken breasts, creating a packet that will trap steam and keep the chicken incredibly moist.
Repeat this entire process with the remaining two chicken breasts on another piece of parchment paper. This individual wrapping ensures that each chicken breast cooks evenly and remains exceptionally juicy throughout the baking process. The combination of the olive oil, herbs, garlic, and butter creates a flavorful foundation that will make the chicken incredibly tender and delicious. This step is where the chicken transforms into a succulent centerpiece, ready to be baked to perfection.
Step 5: Bake and Add Tomatoes
Carefully place the parchment-wrapped chicken packets into the center of the prepared baking sheet, nestled amongst the seasoned vegetables. Ensure there is some space between the chicken and the vegetables to allow for proper air circulation and even roasting. The preheated oven at 425°F (220°C) is now ready to work its magic, transforming these raw ingredients into a delicious meal. Bake for approximately 30 minutes. This duration is a guideline and can vary slightly depending on the thickness of your chicken breasts and the efficiency of your oven. The goal is for the chicken to be cooked through and for the vegetables to become tender and slightly caramelized.
As the chicken and vegetables begin to roast, their aromas will fill your kitchen, promising a delightful meal. If you are using the optional cherry tomatoes, now is the time to introduce them to the pan. Approximately 10 minutes before the end of the total baking time, carefully scatter the cherry tomatoes around the vegetables on the sheet pan. They will soften and burst slightly, adding a burst of sweet acidity and vibrant color to the dish without becoming overcooked. Returning the pan to the oven for these final minutes allows the tomatoes to gently cook and meld with the other flavors.
While the sheet pan is in the oven, you can prepare your serving dishes or a simple side salad. It’s also a good time to check on the chicken. The best way to ensure the chicken is perfectly cooked is to use an instant-read meat thermometer. Insert it into the thickest part of a chicken breast; it should register an internal temperature of 165°F (74°C). This ensures that the chicken is safely cooked through while remaining wonderfully moist and tender.
Step 6: Rest and Serve
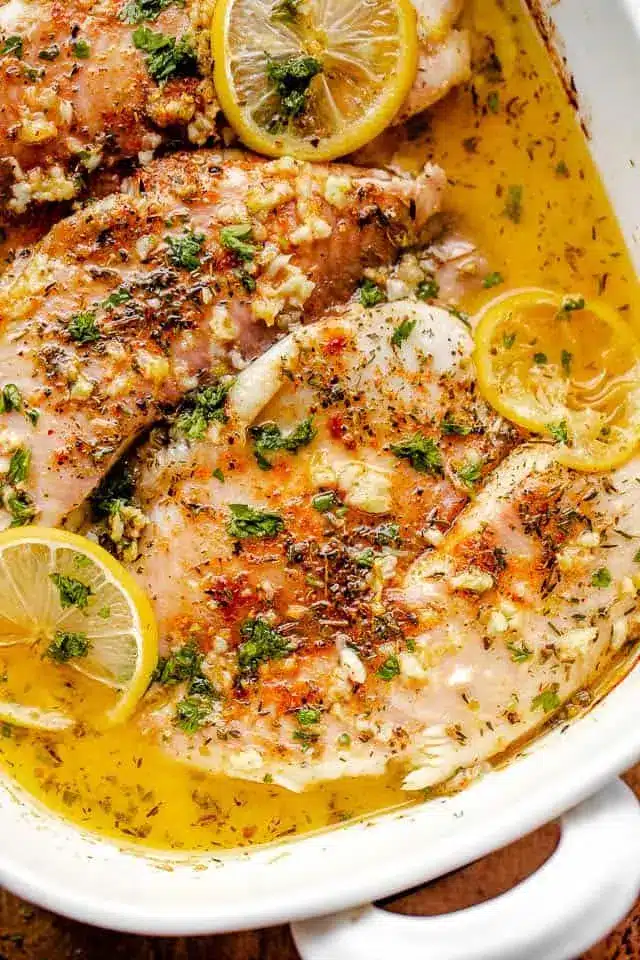
Once the chicken has reached the desired internal temperature of 165°F (74°C) and the vegetables are tender and lightly browned, it’s time to remove the baking sheet from the oven. The aromas that will greet you are truly enticing, a testament to the simple yet effective cooking method. Carefully remove the hot baking sheet from the oven and place it on a heatproof surface, such as a wire rack or a sturdy trivet. Allow the chicken packets to rest, still sealed, for approximately 5 to 10 minutes. This resting period is absolutely critical for allowing the juices within the chicken to redistribute throughout the meat.
During resting, the muscle fibers relax, and the juices that have been pushed to the center during cooking are able to flow back out into the rest of the breast. Skipping this step can result in a dry chicken breast as the juices simply run out onto the pan when you cut into it. After the resting period, carefully unwrap the parchment packets. Be cautious, as there will be hot steam released. The chicken should look incredibly juicy and the vegetables should be tender and flavorful. You can now serve the chicken breasts whole, or slice them into medallions or cubes, depending on your preference.
Serve the delicious sheet pan chicken alongside the roasted vegetables directly from the pan, or arrange them artfully on plates. This final presentation brings together the culmination of your culinary efforts, showcasing a healthy, flavorful, and satisfying meal that was remarkably easy to prepare. It’s a testament to the power of simple ingredients and a well-executed cooking technique, proving that gourmet meals don’t always require complex methods.
Pro Tips for Sheet Pan Chicken
Even Vegetable Sizing is Key: For optimal roasting, cut your vegetables into uniform, bite-sized pieces, generally around 1-inch cubes. This ensures that everything cooks at roughly the same rate, preventing some pieces from becoming burnt while others remain undercooked. Think of it as creating a balanced symphony of textures and flavors on your pan.
Don’t Overcrowd the Pan: Giving your ingredients space on the baking sheet is crucial for achieving that desirable roasted, slightly caramelized texture. If the pan is too crowded, the vegetables and chicken will steam rather than roast, leading to a less appealing texture and flavor. If you have a lot of ingredients, it’s better to use two pans than to sacrifice the quality of the roast.
High Heat is Your Friend: Roasting at a high temperature, such as 425°F (220°C), is essential for developing rich flavors and achieving a beautiful golden-brown sear on the chicken and vegetables. This temperature helps to evaporate moisture quickly, leading to crispier edges and more concentrated tastes. It mimics the intense heat of a professional kitchen oven for superior results at home.
Embrace Herbs and Spices: Don’t be shy with your seasonings! Dried herbs like rosemary and thyme, along with garlic powder, salt, and pepper, form a fantastic base. You can also experiment with other dried herbs such as oregano or basil, or add a pinch of paprika for a touch of color and smokiness. A sprinkle of red pepper flakes can add a welcome hint of heat.
Consider a Marinade for Extra Flavor: For an even more intense flavor, consider marinating the chicken for at least 30 minutes (or up to a few hours in the refrigerator) before placing it on the sheet pan. Simple marinades with olive oil, lemon juice, garlic, herbs, and spices can significantly elevate the chicken’s taste and tenderness. A quick marinade is a fantastic way to elevate this dish from good to extraordinary.
Serving Suggestions for Sheet Pan Chicken
Decoration
Elevate the visual appeal of your sheet pan chicken with a final flourish of fresh garnishes. A sprinkle of chopped fresh parsley or cilantro adds a vibrant pop of green and a burst of freshness that complements the roasted flavors beautifully. A few lemon wedges placed artfully around the plate or on the side can provide a bright, zesty accent that guests can use to brighten their individual servings. For a touch of elegance, a very light drizzle of balsamic glaze over the vegetables can add a sophisticated sheen and a hint of sweet tanginess.
Side Dishes
This versatile sheet pan chicken pairs wonderfully with a variety of complementary side dishes, depending on the occasion and desired level of heartiness. A fluffy bed of jasmine rice or fragrant quinoa can absorb the delicious pan juices and provide a satisfying base. For a lighter option, a simple green salad with a light vinaigrette offers a refreshing contrast to the roasted flavors. If you’re craving something a bit richer, consider serving it with a side of creamy mashed potatoes or garlic butter noodles for an indulgent touch.
Creative Serving Ideas
Transform your sheet pan chicken into exciting new meals with a few creative touches. The cooked chicken, once cooled slightly, can be shredded or diced and used as a filling for wraps or pita pockets, layered with crisp lettuce and a dollop of your favorite sauce. It also makes a fantastic topping for a hearty grain bowl, alongside your chosen grains, a variety of fresh vegetables, and a zesty dressing. For a more substantial meal, the chicken and vegetables can be incorporated into a savory bake or a flavorful pasta dish, bringing deliciousness to a wider range of culinary creations.
Preparation & Storage
Storing Leftovers
Properly storing your sheet pan chicken and vegetables is key to enjoying them for days to come. Once the dish has cooled down to room temperature, transfer the leftovers into an airtight container. This prevents the food from drying out and protects it from absorbing any unwanted odors from the refrigerator. Store the container in the refrigerator, where it should remain fresh and safe to consume for up to 5 days. Ensure the container is well-sealed to maintain optimal freshness and prevent any spoilage.
Freezing
This sheet pan chicken recipe is also wonderfully freezer-friendly, making it an excellent candidate for advanced meal preparation. Allow the cooked chicken and vegetables to cool completely before portioning them into freezer-safe containers or heavy-duty freezer bags. Remove as much air as possible from the packaging to prevent freezer burn. Properly stored, these leftovers can be kept in the freezer for up to 2 months, providing you with convenient, ready-to-heat meals whenever you need them. Labeling the containers with the date of freezing is always a good practice.
Reheating
When you’re ready to enjoy your stored leftovers, reheating is straightforward and ensures the food is brought back to its delicious best. The most common method is to microwave the food on a microwave-safe plate, covering it loosely to retain moisture, until it is heated through. Alternatively, you can reheat the chicken and vegetables in a skillet on the stovetop over medium-low heat, adding a tablespoon or two of water or broth to help prevent drying. For a more evenly heated result that can help re-crisp some of the vegetables, reheating in the oven at a moderate temperature (around 350°F or 175°C) is also an excellent option, though this may take slightly longer.
Frequently Asked Questions
-
Can I substitute chicken thighs for chicken breasts in this recipe?
Absolutely! Chicken thighs are a fantastic alternative and often remain even more moist and tender than chicken breasts due to their higher fat content. However, keep in mind that chicken thighs, especially bone-in varieties, may require a slightly longer cooking time to reach the safe internal temperature of 165°F (74°C). It’s always best to use a meat thermometer to confirm doneness. The flavor of thighs also lends itself beautifully to roasting, developing a rich, succulent taste that complements the vegetables wonderfully.
-
What are the best vegetables to use if I want to avoid potatoes?
If you’re looking to skip the potatoes, there are numerous delicious and healthy vegetable options that roast beautifully on a sheet pan. Excellent choices include broccoli florets, cauliflower florets, Brussels sprouts (halved or quartered), asparagus (trimmed), bell peppers (sliced or chopped), zucchini (chunked), red onions (quartered), and even chopped sweet potatoes or butternut squash if you’re looking for a slightly sweeter starch alternative. For quicker-cooking vegetables, such as cherry tomatoes or green beans, you can add them to the pan during the last 10-15 minutes of cooking to prevent them from becoming mushy.
-
How can I make this sheet pan chicken recipe spicier?
There are several ways to introduce heat to this sheet pan chicken recipe, catering to different spice preferences. You can add a pinch of red pepper flakes directly to the vegetable seasoning mix before roasting for a subtle warmth throughout. For a more pronounced kick, consider adding a swirl of sriracha or a dash of cayenne pepper to the chicken marinade or drizzle it over the chicken and vegetables in the last few minutes of cooking. Some people also enjoy serving the finished dish with a side of hot sauce or a spicy aioli for an extra layer of heat and flavor.