Ultimate Zesty Radish Relish: Deliciously Tangy and Easy
As I chopped through a vibrant bunch of red radishes the other day, I couldn’t help but think about how versatile and underrated this crunchy veggie can be. Enter my Zesty Radish Relish—a quick, easy pickle that adds an irresistible tang to everything from sandwiches to grilled meats.
Not only does it help me utilize those extra radishes piling up in the fridge, but it also offers a delicious way to elevate any meal. With just a little prep and a refrigerator wait, you’ll have a condiment that lasts up to three weeks, making it perfect for meal prep or last-minute gatherings. Ready to discover how this fresh delight can transform your dishes? Let’s dive into the recipe and make your taste buds dance!
Why You Will Love This Recipe
- Quick Preparation: This relish comes together in under 30 minutes of active time, making it perfect for busy schedules.
- Versatile Flavor: Its zesty, tangy profile complements a wide array of dishes, from simple sandwiches to gourmet tacos.
- Long Shelf Life: Properly stored, this relish can last in the refrigerator for up to three weeks, offering convenience and reducing food waste.
- Healthy Boost: Packed with fresh vegetables, it adds a nutritious element to your meals without compromising on taste.
- Customizable Heat: You can easily adjust the amount of jalapeño to suit your preference for spiciness, ensuring everyone can enjoy it.
Ingredients You Need
The success of Zesty Radish Relish hinges on the freshness and quality of its core ingredients. Opting for crisp, firm radishes and aromatic red onions will provide the best foundation for this vibrant condiment. Each component plays a crucial role in building the complex flavor profile that makes this relish so delightful and addictive, so choosing wisely will truly elevate the final outcome.
Zesty Radish Relish
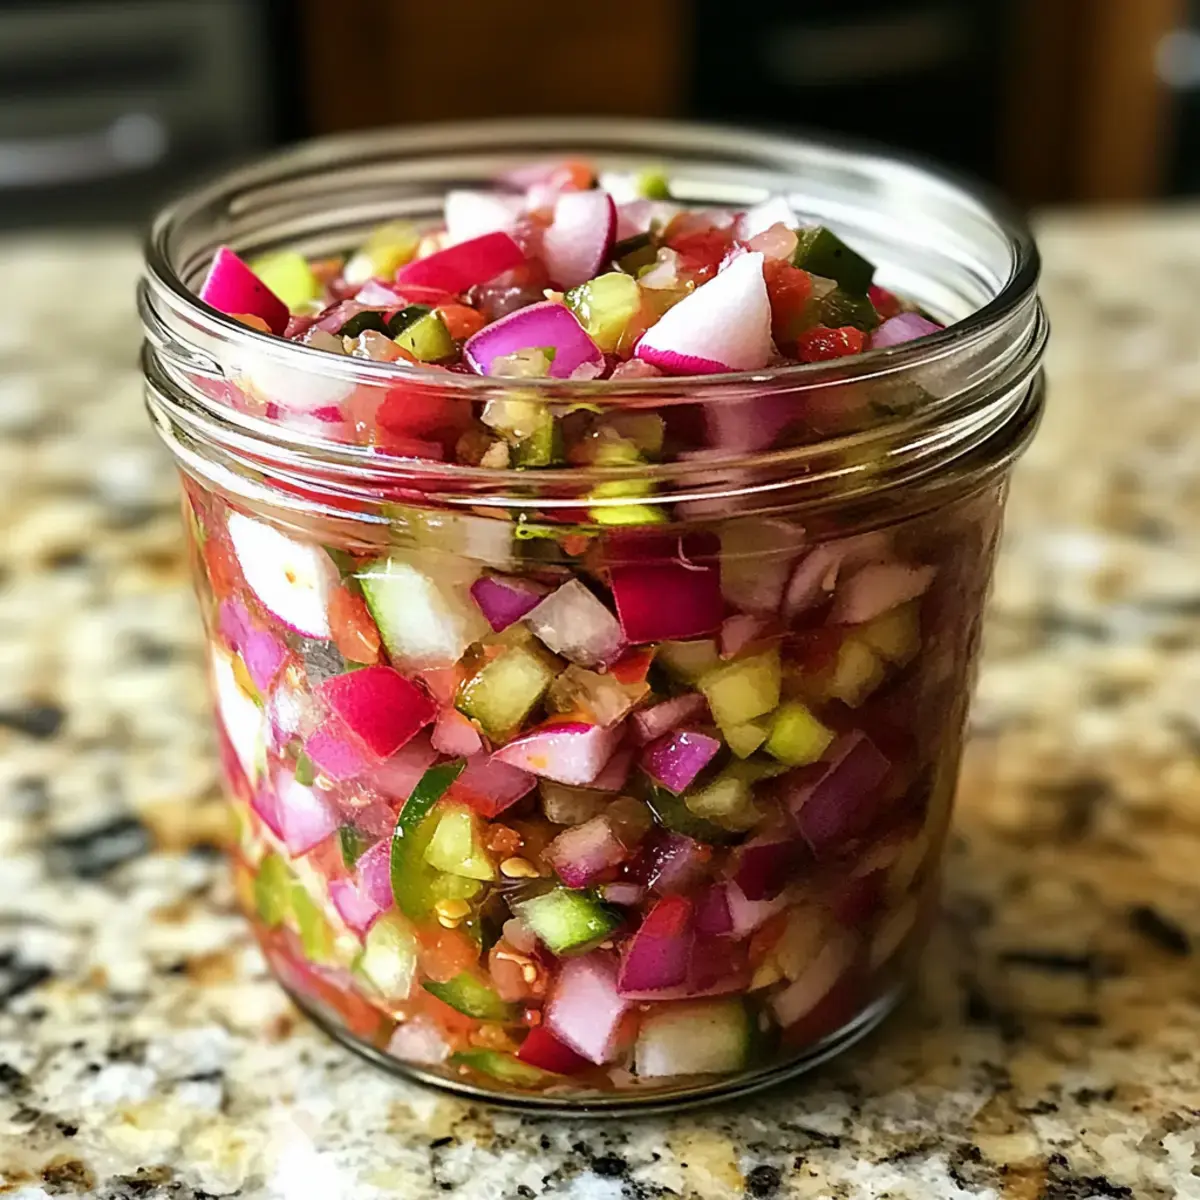
Elevate your sandwich game with this quick and easy Zesty Radish Relish. This versatile pickle adds an irresistible tang to sandwiches, tacos, grilled meats, and more, lasting up to three weeks in the refrigerator.
- 1 bunch radishes
- 1 medium red onion
- 1 small jalapeño
- 1 cup vinegar
- 1 tablespoon sugar
- 2 cloves garlic
- 1 teaspoon salt
- 1 teaspoon mustard seeds
- 1 teaspoon celery seeds
- 1 tablespoon dill weed
- 1Wash the radishes, red onion, and jalapeño under cold water. Slice thinly, about 1/8 inch.
- 2Transfer the sliced vegetables into a blender or food processor. Pulse until finely chopped but not puréed, roughly the consistency of chunky salsa.
- 3In a medium-sized stockpot, add the chopped vegetable mixture along with vinegar, sugar, garlic, salt, mustard seeds, celery seeds, and dill weed. Stir everything together.
- 4Bring the pot to a gentle boil over medium heat, allowing the ingredients to mingle and the sugar to dissolve, which may take around 2-3 minutes.
- 5Once boiling, reduce the heat to medium-low, stirring occasionally. Allow the mixture to simmer for about 10-12 minutes until it thickens slightly and the radishes become tender but retain a crunch.
- 6Remove the pot from heat and let the mixture cool for about 5-10 minutes.
- 7Carefully transfer the cooled mixture into a clean, airtight jar, ensuring all the delicious liquid is included.
- 8Seal the jar tightly and place it in the refrigerator for at least 24 hours before using to allow flavors to develop.
Keywords: radish relish, pickle, condiment, sandwich, vegetarian, quick, easy, meal prep, German
- radishes: for freshness and crispness; can substitute with French Breakfast or Watermelon radishes for a varied flavor.
- red onion: adds sweetness and depth; no substitutions suggested, as it’s essential for flavor balance.
- jalapeño: provides heat and flavor; substitute with bell pepper for a milder relish.
- vinegar: acts as the pickling agent; while white vinegar is standard, apple cider vinegar can enhance flavor.
- sugar: balances the acidity of the vinegar; try using honey or a sugar substitute for a different sweetness.
- garlic: adds aromatic flavor; fresh garlic is best, but powdered garlic can be used in a pinch.
- salt: enhances all the other flavors; adjust according to your taste preference.
- mustard seeds: introduce a subtle crunch and warmth; no direct substitute, but you can omit them if needed.
- celery seeds: complement the other spices with a unique flavor; can be replaced with fennel seeds for a fun twist.
- dill weed: essential for authentic pickle flavor; substitute with fresh dill if you have it on hand.
The exact quantities for these ingredients are detailed within the accompanying recipe card, ensuring you have all the precise measurements needed for perfect results.
Variations
For a delicious vegan twist, simply ensure your sugar choice is vegan-friendly, such as agave nectar or maple syrup, and enjoy this relish as is, as all other ingredients are plant-based.
To create a low-carb version, significantly reduce or omit the sugar and consider using a sugar substitute like erythritol or stevia, adjusting to achieve the desired balance with the vinegar.
If you’re looking for a spicier kick, incorporate an extra jalapeño or add a pinch of red pepper flakes to the mixture during the cooking process, allowing the heat to infuse wonderfully.
Another exciting variation involves incorporating finely diced sweet bell peppers alongside the jalapeño. This adds a lovely sweetness and a beautiful burst of color, making the relish even more visually appealing and offering a delightful textural contrast to the radishes.
Consider adding a tablespoon of finely chopped fresh ginger when combining the ingredients in the stockpot. This introduces a warm, slightly pungent note that pairs exceptionally well with the tanginess of the vinegar and the crispness of the radishes, offering a truly unique flavor dimension.
How to Prepare Zesty Radish Relish
Step 1: Prepare the Vegetables
Begin by thoroughly washing the radishes, red onion, and jalapeño under cold, running water to remove any dirt or debris. This initial step is crucial for ensuring the cleanliness and safety of your final product. The vibrant colors of these fresh vegetables are a testament to the wholesome goodness you’re about to create.
Next, carefully slice the radishes and red onion thinly, aiming for a thickness of about 1/8 inch. This uniform thinness is key, as it allows the vegetables to absorb the pickling liquid more effectively and results in a pleasant, yielding texture once the relish is prepared. Precision in slicing contributes significantly to the overall harmony of flavors and textures.
Proceed to cut the jalapeño into small pieces, adjusting the quantity based on your personal preference for heat. If you prefer a milder relish, remove the seeds and membranes before chopping, as these are where most of the capsaicin resides. Arrange all these beautifully prepped vegetables on your cutting board, admiring the array of colors and anticipating the delicious results.
Step 2: Chop the Mixture
Once your vegetables are meticulously prepared, it’s time to bring them together in a way that facilitates flavor infusion. Transfer the sliced radishes, red onion, and jalapeño into the bowl of a food processor or a sturdy blender. Ensure your appliance is clean and dry before adding the produce.
Now, pulse the vegetables until they are finely chopped but importantly, not puréed into a paste. You are aiming for a consistency that resembles a chunky salsa or a coarse relish, where the individual textures of the vegetables are still discernible. This usually takes between 15 to 30 seconds, depending on the power of your machine; keep a close eye to avoid over-processing.
The resulting mixture should be a visually appealing tapestry of colors—reds from the radishes, white from the onion, and hints of green from the jalapeño. It will also be wonderfully fragrant, emitting a fresh, slightly pungent aroma that hints at the zesty flavors to come. This beautifully chopped medley is the perfect foundation for the next stages of relish creation.
Step 3: Combine Ingredients in Stockpot
Transition to your stovetop with a medium-sized stockpot, ready to bring all the elements together. Add the finely chopped vegetable mixture from your food processor directly into the pot. This forms the bulk of your flavorful relish, promising a delightful crunch and tang.
To this vibrant mixture, introduce the liquid components and seasonings that will transform it into a delicious relish. Pour in the vinegar, which acts as the primary pickling agent, bringing its signature tang. Follow this with the sugar, which beautifully balances the acidity, and then add the minced garlic, salt, mustard seeds, celery seeds, and dill weed. Each addition plays a specific role in creating the complex flavor profile.
Stir all these ingredients together thoroughly with a spoon or spatula, ensuring everything is well combined. You want a harmonious blend of flavors before any heat is applied. Once mixed, place the stockpot over medium heat and bring the contents to a gentle boil. This initial boiling stage helps to meld the flavors and begin the process of softening the vegetables, typically taking around 2 to 3 minutes for the sugar to fully dissolve.
Step 4: Cook the Mixture
With the mixture now gently boiling, it’s time to reduce the heat and allow the flavors to develop through simmering. Lower the heat to medium-low, just enough to maintain a steady, gentle simmer without vigorous bubbling. This controlled cooking is essential for achieving the right texture and depth of flavor.
Stir the mixture occasionally as it simmers, making sure to scrape the bottom of the pot to prevent any sticking or burning. The sugars can caramelize, and burnt bits will impart an unpleasant taste to your relish. Constant vigilance ensures an even cook and a superior final product. The aroma emanating from the pot at this stage is truly intoxicating.
Allow the relish to simmer for approximately 10 to 12 minutes. During this time, the vegetables will become tender but should retain a pleasant crunch, which is a hallmark of good relish. You will also notice the liquid begin to thicken slightly as the ingredients meld. Enjoy the tantalizing aroma that fills your kitchen as the flavors of your Zesty Radish Relish are intensifying and harmonizing.
Step 5: Cool and Transfer
Once the simmering period is complete and the relish has reached your desired consistency and tenderness, remove the stockpot from the heat source. This is a critical step in preserving the crispness of the radishes, ensuring they don’t become too mushy.
Allow the hot mixture to cool in the pot for about 5 to 10 minutes. This brief cooling period makes it safer to handle and allows some of the steam to dissipate, which also helps to maintain a better texture in the final relish. It’s important not to rush this step, as hot liquids can be difficult to manage and can sometimes steam-dry ingredients.
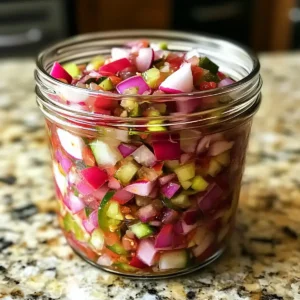
After the slight cooling, carefully transfer the Zesty Radish Relish into a clean, airtight jar. Ensure you scoop out all the delicious liquid along with the solid ingredients. Using a jar that seals well is paramount for proper storage and for allowing the flavors to develop correctly in the refrigerator. A wide-mouthed jar often makes this transfer process easier and less messy.
Step 6: Refrigerate and Allow Flavors to Develop
The final and perhaps most crucial step in achieving the perfect Zesty Radish Relish is patience. Once the relish is safely in its airtight jar, seal it tightly. This ensures that no air gets in, which could lead to spoilage and affect the quality of the relish.
Place the sealed jar into the refrigerator. It is imperative that you allow the relish to rest and develop its flavors for at least 24 hours before you consider using it. This resting period is not just a suggestion; it’s essential for the magic to happen, allowing the acidity of the vinegar to mellow, the spices to fully infuse, and the vegetables to absorb all the wonderful savory and sweet notes.
After this minimum resting period, your Zesty Radish Relish will be ready to unleash its full potential. It will have transformed from a freshly made mixture into a complex, zesty, and utterly delicious condiment. It’s the perfect addition to elevate your sandwiches, tacos, grilled meats, or any dish that craves a vibrant, tangy lift, truly making your meals sing with flavor.
Pro Tips for Zesty Radish Relish
Slice Thinly: Ensuring your radishes are sliced very thinly, around 1/8 inch, is paramount. This thinness allows them to absorb the pickling liquid more efficiently, which permeates the entire relish with flavor and contributes to a more tender yet still crisp texture.
Cool Before Mixing: While the recipe calls for bringing the mixture to a boil, some home cooks prefer to let the vinegar mixture cool slightly before adding the chopped vegetables. This technique can help maintain an even crisper texture in the final product, so experiment to see which method you prefer.
Sterilize for Canning: If you plan on canning your relish for long-term storage, it is absolutely vital to properly sterilize your jars and lids. This prevents spoilage, ensures safety, and allows you to enjoy your homemade goodness for much longer periods, often up to a year.
Fresh is Best: Always opt for fresh, high-quality spices and herbs whenever possible. Old, stale spices can significantly dull the taste of your relish, leaving it less vibrant and flavorful than intended. Fresh dill weed, in particular, makes a noticeable difference.
Taste as You Go: Don’t be afraid to taste and adjust the seasoning during the preparation process, especially the salt and sugar levels. Your personal preference is key to achieving the perfect balance for your palate; this tasting ensures your relish is exactly to your liking.
Consider Adding a Pinch of Something Extra: For an advanced flavor boost, consider adding a pinch of ground coriander or a tiny dash of smoked paprika to the spice mix. These additions can introduce subtle layers of complexity that complement the radishes and vinegar beautifully.
Serving Suggestions for Zesty Radish Relish
Decoration
A sprinkle of finely chopped fresh chives or parsley atop the relish in its serving bowl can add a lovely touch of green and a fresh, herbaceous aroma. This simple garnish elevates the visual appeal and hints at the freshness within.
For a more vibrant presentation, consider adding a few thinly sliced radish rounds or a small sprig of fresh dill directly onto the relish. These small touches make the condiment look more inviting and appealing, whether it’s on a buffet table or as part of a plated meal.
Side Dishes
This zesty relish is an absolute revelation alongside grilled or roasted meats, providing a bright, acidic counterpoint to richer flavors. Try it with pork chops, roasted chicken, or even a simple grilled steak. The crunch and tang cut through the richness beautifully.
It also pairs wonderfully with seafood, particularly firm white fish like cod or halibut, or even grilled shrimp. The relish adds a refreshing zest that complements the delicate flavors of the ocean without overpowering them. Think of it as a quick, homemade tartar sauce with an exciting twist.
Consider serving it alongside a cheese board or charcuterie platter. The relish offers a fantastic contrast to creamy cheeses and savory cured meats, cleansing the palate and adding an exciting layer of flavor to each bite. It’s a sophisticated yet simple addition that guests will rave about.
Creative Serving Ideas
Transform your everyday sandwiches into gourmet creations by generously layering this relish onto your favorite bread. It’s particularly stunning with roast beef, turkey, or ham sandwiches, adding a much-needed zing that elevates them beyond the ordinary.
Stuffing it into grilled cheese sandwiches is another delightful trick. The warm, melted cheese combined with the cool, zesty relish creates an irresistible textural and flavor combination that is surprisingly addictive and incredibly satisfying.
Use it as a vibrant topping for burgers or hot dogs. Instead of traditional ketchup or mustard, spoon a generous amount of this relish over your grilled patties or sausages for an instant upgrade. It provides a complex flavor profile that will impress any burger aficionado.
Mix it into potato salad or coleslaw for an unexpected burst of flavor. It adds a delightful tang and crunch, turning a classic side dish into something extraordinary. This simple addition can make your picnic or barbecue staples truly memorable.
Finally, try incorporating it into a vibrant rice bowl or a grain salad. It adds a refreshing zest and a pleasing crunch that complements the grains and other toppings, making for a healthy and flavorful meal. It’s a versatile condiment that proves its worth in countless culinary applications.
Preparation & Storage
Storing Leftovers
To keep your Zesty Radish Relish at its peak freshness, store it in a clean, airtight container or the original jar in the refrigerator. Ensuring the lid is tightly sealed is crucial to prevent the ingress of air, which can lead to a loss of flavor and texture over time.
When stored correctly in the refrigerator, this relish can maintain its delicious tang and crispness for up to three weeks. It’s always a good idea to use a clean spoon or fork each time you access the relish to avoid introducing any contaminants that could shorten its shelf life.
The flavors of this relish often deepen and intensify after a day or two in the refrigerator, so the leftovers are frequently even more delicious than when first made. This makes it an excellent candidate for meal prepping, ensuring you always have a flavorful condiment on hand.
Freezing
While fresh is always best, Zesty Radish Relish can indeed be frozen for longer-term storage if needed. Before freezing, ensure the relish has completely cooled to room temperature. Transferring warm relish into a freezer container can lead to condensation and ice crystal formation, affecting texture.
Use freezer-safe airtight containers or heavy-duty freezer bags for this purpose. When filling bags, press out as much air as possible to minimize freezer burn. It’s also a good idea to leave a little headspace in containers, as liquids expand when frozen.
When properly frozen, your Zesty Radish Relish can last for up to three months. To use it after freezing, transfer the container from the freezer to the refrigerator and allow it to thaw overnight. The texture might be slightly softer after thawing, but the flavor will largely remain intact, making it suitable for most applications.
Reheating
Fortunately, Zesty Radish Relish is designed to be served cold or at room temperature, so reheating is generally not necessary. In fact, heating the relish would likely diminish its fresh, zesty character and could make the radishes mushy, which is undesirable for its intended use.
If, for some specific culinary reason, you wish to gently warm the relish, do so with extreme caution. A very brief, low-heat warming in a saucepan or microwave might be considered, but be mindful of overcooking. This is usually reserved for unique recipe applications rather than standard serving.
The best way to enjoy this relish is to take it out of the refrigerator a few minutes before serving to allow it to come closer to room temperature. This brings out its full flavor complexity and ensures the best possible taste and texture experience, making it a perfect, ready-to-use condiment.
Frequently Asked Questions
-
What type of radishes should I use for the best flavor and texture in my Zesty Radish Relish?
For the most vibrant flavor and satisfying crunch, fresh red round radishes are highly recommended as your primary choice. Their crispness is essential for the relish’s texture. However, the recipe is quite forgiving and also accommodates variations; you can explore using French Breakfast radishes, which are typically longer and slightly milder, or Watermelon radishes, known for their striking pink interiors and sweeter, less peppery taste. The key is to ensure whatever radish variety you choose is firm, fresh, and free from blemishes, as this will directly impact the overall quality and delightful sensory experience of your relish. Always choose radishes that feel heavy for their size and have firm, unblemished skin.
-
How should I properly store my Zesty Radish Relish, and what is its approximate shelf life?
To ensure your Zesty Radish Relish retains its delightful tang and crispness, it’s imperative to store it in an airtight container or the original jar in the refrigerator. Make absolutely certain that the lid is sealed tightly after each use; this prevents air exposure, which can lead to a loss of freshness and flavor. When stored this way, the relish typically maintains its excellent quality for up to three weeks. Interestingly, many find that the flavors meld and deepen beautifully after the first 24-48 hours, making the leftovers even more appealing than when first prepared, so don’t hesitate to let it sit for a bit before diving in.
-
Can I freeze Zesty Radish Relish to extend its shelf life for long-term storage, and if so, what is the best method?
Absolutely, freezing is a viable option for long-term storage of your Zesty Radish Relish, allowing you to enjoy its flavors well beyond its fresh refrigerated lifespan. Before freezing, allow the relish to cool completely to room temperature to avoid excess condensation. Then, transfer the relish into freezer-safe airtight containers or heavy-duty freezer bags, making sure to press out as much air as possible to minimize freezer burn. It’s also advisable to leave a small amount of headspace in the containers, as liquids expand when they freeze. Properly frozen, your Zesty Radish Relish can last for up to three months. To use it, simply thaw the container overnight in the refrigerator; while the texture might be slightly softer upon thawing, the flavor will largely remain intact and enjoyable for various culinary uses.