Vegan Chickpea Recipes: 5 Reasons to Love This Dish
Chickpeas, those unassuming legumes, possess a remarkable ability to transform into incredibly satisfying and flavorful dishes. Their inherent texture and subtle nutty taste make them a cornerstone of plant-based cuisine, offering both health benefits and culinary versatility. This recipe celebrates the humble chickpea, proving that delicious and nutritious meals can be wonderfully simple to prepare, bringing joy to vegans and omnivores alike.
Imagine a snack that’s not only delightful to eat but also guilt-free, packed with nutrients that nourish your body. This is precisely what Vegan Chickpea Recipes: 5 Reasons to Love This Dish delivers. It’s a testament to how a few well-chosen ingredients and a bit of culinary care can create something truly special. Get ready to explore the simple elegance and profound satisfaction that comes from harnessing the power of chickpeas in your kitchen.
Why You Will Love This Recipe
- Exceptional Flavor: The careful selection of spices creates a vibrant taste profile that perfectly complements the natural earthiness of the chickpeas. Each bite is a burst of savory goodness.
- Remarkable Simplicity: Requiring only a handful of common ingredients and minimal active preparation time, this recipe is incredibly accessible for cooks of all skill levels. It’s ideal for busy schedules.
- Nutritional Powerhouse: Chickpeas are an excellent source of plant-based protein and dietary fiber, making this dish both filling and beneficial for digestive health. They offer sustained energy.
- Incredible Versatility: Enjoy these chickpeas as a standalone snack, a delightful addition to salads, or even as a textural element in wraps and other savory dishes. Their adaptability is a major plus.
- Crowd-Pleasing Appeal: The satisfying crunch and bold seasoning make this recipe a hit with both children and adults, proving that healthy eating can be undeniably delicious. It’s a guaranteed favorite.
Ingredients You Need
The beauty of this recipe lies in its reliance on readily available, wholesome ingredients. Opting for high-quality chickpeas and fresh spices will elevate the final flavor profile significantly. These core components form the foundation of a dish that is both nourishing and incredibly satisfying, demonstrating the power of simple, good food.
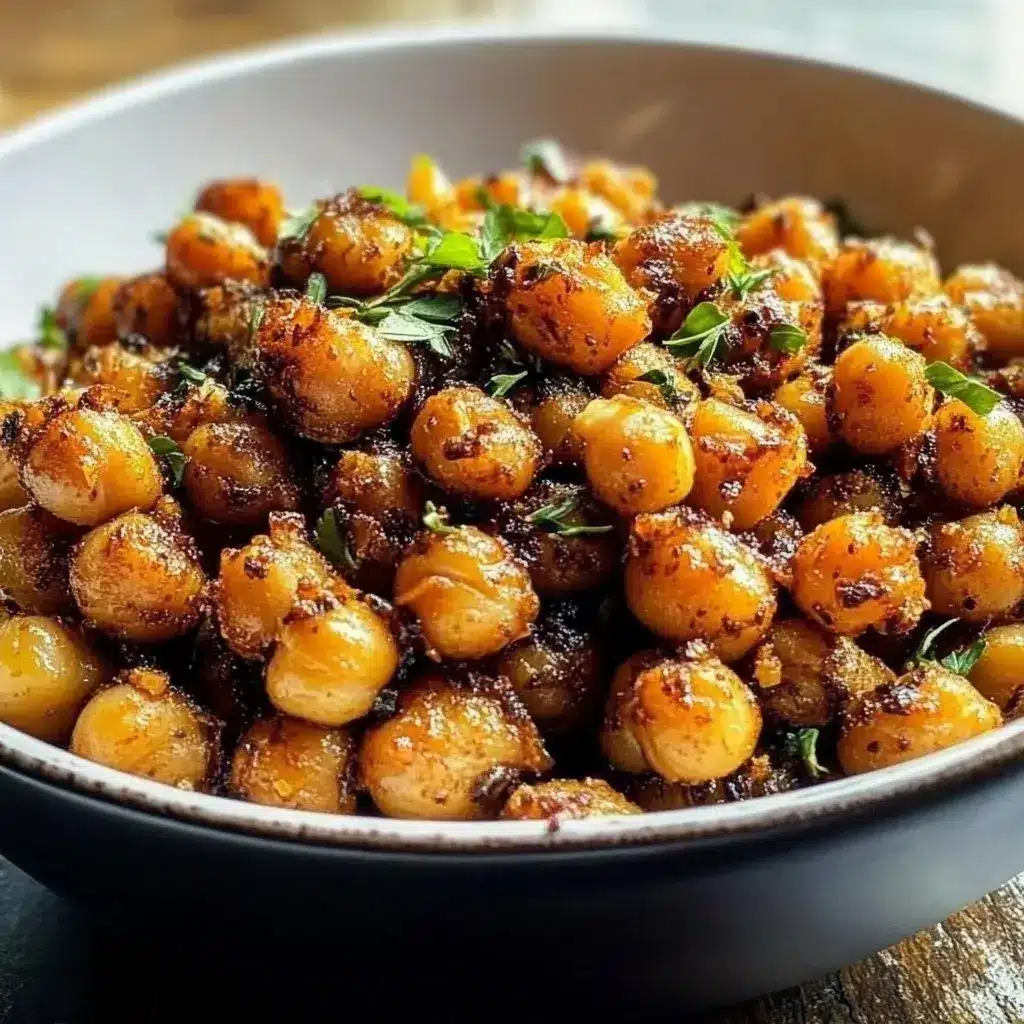
Crispy Roasted Chickpeas

These crispy roasted chickpeas, seasoned to perfection, are not only delicious but also packed with nutrition, making them an ideal snack or salad topper. This recipe is simple, versatile, and family-friendly.
- 1 can chickpeas, drained and rinsed
- 1 tablespoon olive oil
- 1 teaspoon garlic powder
- 1 teaspoon cumin
- Salt to taste
- 1/2 teaspoon black pepper
- 1/2 teaspoon paprika
- Fresh parsley for garnish
- 1Gather and measure all your ingredients. Rinse and drain the chickpeas thoroughly.
- 2In a large bowl, combine the drained chickpeas with the olive oil. Toss gently to coat.
- 3Sprinkle garlic powder, cumin, salt, black pepper, and paprika over the chickpeas, and stir well.
- 4Spread the seasoned chickpeas on a baking sheet in a single layer.
- 5Preheat your oven to 400°F (200°C).
- 6Bake for 25-30 minutes, stirring halfway through for even browning.
- 7Once golden brown and crispy, remove from the oven and let cool.
- 8Garnish with freshly chopped parsley before serving. Enjoy as a snack, salad topper or in wraps.
Keywords: Easy Vegan Recipe, Healthy Snack, High Protein, Roasted Chickpeas, Vegan Chickpeas
- chickpeas, drained and rinsed: These form the hearty base of our dish, providing essential protein and fiber.
- olive oil: A small amount helps to crisp the chickpeas and carry the flavors of the seasonings.
- garlic powder: This adds a pungent, savory depth that is essential for a well-rounded flavor.
- cumin: Lending an earthy, slightly smoky note, cumin is key to the characteristic taste of many delicious dishes.
- salt: Crucial for enhancing all the other flavors and bringing out the best in the chickpeas.
- black pepper: A touch of freshly ground black pepper provides a gentle warmth and complexity.
- paprika: This spice contributes a beautiful color and a mild, sweet pepper flavor.
- fresh parsley for garnish: Adds a final touch of brightness and a fresh visual appeal.
Detailed quantities for each ingredient are readily available in the linked recipe card for your convenience.
Variations
For those seeking to explore beyond the classic, several exciting variations can transform these already delightful chickpeas into entirely new culinary experiences. Adjusting the spice blend or incorporating different flavor profiles opens up a world of possibilities.
Consider a “Spicy Fiesta” variation by adding a pinch of cayenne pepper and a touch of smoked paprika for a bolder kick. You could also introduce a teaspoon of chili powder or a dash of hot sauce during the seasoning stage. This creates an irresistible warmth that is perfect for those who enjoy a bit of heat in their snacks. It’s a fantastic way to add excitement to a simple dish.
Another creative avenue is the “Herbal Mediterranean” twist. Infuse the chickpeas with dried oregano, thyme, and a hint of rosemary before baking. A squeeze of lemon juice after they are done cooking can add a bright, zesty finish. This variation evokes the fresh flavors of the Mediterranean coast, making for a wonderfully aromatic and flavorful snack that feels both healthy and indulgent. It’s reminiscent of flavors found in dishes from regions like lunch and light dinners.
For a sweet and savory option, try a maple-dijon glaze. After seasoning with salt and pepper, toss the chickpeas with a tablespoon of maple syrup and a teaspoon of Dijon mustard before baking. This creates a delightful sweet and tangy coating with a subtle crunch. It’s an unexpected combination that works surprisingly well, offering a unique flavor profile that is both intriguing and delicious. This could even be a delightful component for a sophisticated appetizer.
How to Prepare Vegan Chickpea Recipes
The preparation of these vegan chickpeas is designed to be straightforward, ensuring that even novice cooks can achieve perfectly crispy and flavorful results. Every step is crucial for maximizing texture and taste, from the initial rinsing to the final seasoning.
Step 1: Gathering and Preparing the Chickpeas
Begin by meticulously gathering all the necessary ingredients. This initial step ensures that you have everything at hand, streamlining the entire cooking process and preventing last-minute scrambles. Having all your components ready before you start significantly contributes to a smooth and enjoyable cooking experience. Proper organization is indeed key to culinary success.
Next, it is absolutely crucial to thoroughly rinse and drain the canned chickpeas. This step is paramount as it removes the starchy canning liquid and any residual sodium. A proper rinse not only improves the flavor but also plays a vital role in achieving that desirable crispy texture during the roasting process. Do not skip this essential part of the preparation.
Step 2: The Crucial Coating Process
In a generously sized mixing bowl, combine the thoroughly rinsed and drained chickpeas with the specified amount of olive oil. Ensure that the oil is distributed evenly across all the chickpeas. This coating is essential for several reasons, including preventing them from drying out and helping the seasonings adhere properly.
Gently toss the chickpeas and oil together, ensuring that each individual chickpea is lightly and evenly coated. This gentle tossing motion helps to avoid crushing the delicate legumes. A uniform coating is the first step towards achieving that perfect crispness and ensuring every bite is infused with flavor. Take your time with this step.
Step 3: Infusing with Flavorful Spices
Now, it’s time to introduce the star players: the spices. Sprinkle the garlic powder, cumin, salt, black pepper, and paprika directly over the oil-coated chickpeas in the bowl. The quantities here are important, but feel free to adjust them slightly based on your personal preference for intensity.
Stir everything together with enthusiasm and care. The goal is to ensure that the spices are distributed as evenly as possible across every single chickpea. You want each little legume to be a flavor-packed morsel, ready to deliver a delicious punch. Use a spoon or your hands (if you don’t mind getting a little messy) to achieve this.
Step 4: Preparing for the Heat
Select a sturdy baking sheet that is large enough to accommodate the chickpeas without overcrowding. Line it with parchment paper if desired, which can help with cleanup and prevent sticking, although it’s not strictly necessary for this recipe. The goal is to create a canvas for our flavorful legumes.
Carefully spread the seasoned chickpeas onto the prepared baking sheet in a single, even layer. This step is critical for ensuring that the chickpeas roast properly rather than steam. Overcrowding will lead to softer, less crispy results, so give them ample space to breathe and brown. A single layer allows hot air to circulate freely around each chickpea.
Step 5: Preheating for Optimal Roasting
While you are busy preparing and seasoning the chickpeas, it’s essential to preheat your oven. Set the temperature to 400 degrees Fahrenheit (200 degrees Celsius). A hot oven is absolutely crucial for achieving the desired roasted texture and delightful crunch in the chickpeas. Do not compromise on the oven temperature.
Ensure your oven has reached the preheated temperature before you plan to place the baking sheet inside. Using an oven thermometer can be helpful to confirm accuracy. A consistently hot oven environment is what transforms a simple chickpea into a crispy, savory delight. Allow the oven ample time to reach its target temperature fully.
Step 6: The Roasting Transformation
Once the oven is fully preheated, carefully place the baking sheet laden with seasoned chickpeas onto the center rack. Allow them to bake for approximately 25 to 30 minutes, transforming them into a golden-brown, crispy treat. Keep an eye on them as ovens can vary in temperature and intensity.
About halfway through the baking time, remove the baking sheet from the oven and give the chickpeas a good stir. This stirring action is vital for ensuring even browning and consistent crisping on all sides of the chickpeas. It prevents any one batch from becoming overcooked or undercooked. Return the tray to the oven to complete the roasting process.
Step 7: The Cooling and Crisping Phase
As soon as the chickpeas have reached a beautiful golden-brown color and a satisfying crispness, carefully remove the baking sheet from the hot oven. The transformation from soft legume to crispy snack is nearly complete. It is important to remove them promptly to avoid any risk of burning.
Allow the roasted chickpeas to cool directly on the baking sheet for a few minutes. This cooling period is just as important as the baking itself. As the chickpeas cool, they will continue to crisp up further, achieving that perfect, satisfying crunch. Resist the urge to taste them immediately; patience will be rewarded with superior texture.
Step 8: The Final Touch and Enjoyment
Just before you are ready to serve your masterpiece, sprinkle a generous amount of freshly chopped parsley over the cooled, crispy chickpeas. This not only adds a vibrant splash of green color but also introduces a wonderfully fresh, herbaceous aroma and flavor that complements the savory spices perfectly.
Your delicious, crispy vegan chickpeas are now ready to be enjoyed in a multitude of ways. Serve them as a standalone snack, sprinkle them over your favorite salads for added texture, or incorporate them into wraps and bowls. They are incredibly versatile and a fantastic addition to any meal or occasion. Dive in and savor the simple perfection!
Pro Tips for Vegan Chickpea Recipes
To elevate your vegan chickpea creations from good to absolutely outstanding, consider these expert tips. They are designed to enhance flavor, improve texture, and ensure consistent success every time you prepare them.
Ensure Maximum Crispness: For the crispiest results, always ensure your chickpeas are thoroughly dried after rinsing and before adding oil. Patting them down with paper towels is an effective method. Moisture is the enemy of crispiness.
Don’t Crowd the Pan: As mentioned in the preparation steps, spreading the chickpeas in a single layer on the baking sheet is non-negotiable. Overcrowding causes them to steam, leading to a softer texture. Give them space to roast properly.
Experiment with Spices: While the provided spice blend is fantastic, don’t be afraid to get creative. Consider adding smoked paprika for depth, a pinch of cayenne for heat, or even a touch of curry powder for an exotic twist. Nutritional yeast can also add a delightful cheesy flavor, popular in vegan cooking, offering a satisfying umami note.
Spice Toasting Trick: For an even more intense flavor, lightly toast your dry spices in a dry skillet over medium heat for about 30-60 seconds until fragrant. Let them cool slightly before tossing them with the chickpeas and oil. This awakens their aromatic compounds.
Consider the Chickpea Source: While canned chickpeas are convenient, some chefs prefer using dried chickpeas that have been soaked and cooked from scratch. This often results in a firmer texture that can be even better for roasting, though it requires more planning.
Serving Suggestions for Vegan Chickpea Recipes
Decoration
The visual appeal of your roasted chickpeas can be significantly enhanced with simple garnishes. Freshly chopped herbs like parsley, cilantro, or chives add a vibrant pop of color and a burst of freshness. A sprinkle of sesame seeds or a drizzle of tahini can also add visual interest and complementary flavors.
Side Dishes
These crispy chickpeas are incredibly versatile and can accompany a wide array of dishes. They make a fantastic crunchy topping for vibrant lunch salads, adding texture and protein. Consider serving them alongside hearty lentil soups or vegetable stews for added substance and a delightful textural contrast. They also pair wonderfully with grain bowls, adding a satisfying crunch.
Creative Serving Ideas
Think outside the box for truly unique serving experiences. They can be incorporated into homemade trail mix for a savory component, offering a satisfying alternative to nuts. Another idea is to use them as a crunchy filling for vegan wraps or tacos, providing a delightful textural element. For a party appetizer, serve them in small decorative bowls with toothpicks for easy grabbing, perhaps alongside a variety of dips like hummus or a vegan aioli.
Preparation & Storage
Storing Leftovers
If you happen to have any delicious roasted chickpeas left over, proper storage is key to maintaining their quality. Store them in an airtight container at room temperature. This method is best for preserving their crispiness for a short period. Avoid refrigerating them if crispness is your priority, as the humidity can make them soft.
Freezing
Unfortunately, roasted chickpeas do not freeze particularly well. The freezing and thawing process tends to make them soggy and lose their desirable crunchy texture. It’s generally recommended to prepare only the amount you plan to consume within a few days to ensure the best eating experience.
Reheating
Should your chickpeas lose a bit of their crispness during storage, they can be easily revived. Reheat them in a preheated oven at around 350°F (175°C) for 5-10 minutes, or until they are warm and crispy again. This simple reheating process will bring back their satisfying crunch, making them almost as good as freshly made.
Frequently Asked Questions
-
Can I prepare the chickpea mixture ahead of time?
Yes, you can definitely prepare the chickpea mixture, including rinsing, draining, and seasoning, a day in advance. Store it in an airtight container in the refrigerator. However, it is best to spread them on the baking sheet and roast them just before serving to ensure maximum crispness. This prep-ahead strategy can save valuable time on busy days.
-
Are there any alternatives to olive oil for this recipe?
Absolutely! While olive oil works wonderfully, you can substitute it with other neutral oils like avocado oil or grapeseed oil. For a slightly different flavor profile, melted coconut oil can also be used, though it might impart a subtle coconut note. If you’re aiming for an oil-free version, some people have success by tossing the seasoned chickpeas with a tablespoon or two of vegetable broth or aquafaba (the liquid from canned chickpeas) to help the spices adhere before roasting, though the texture might be slightly less crispy.
-
How can I make these chickpeas spicier or less spicy?
To increase the spiciness, add a pinch of cayenne pepper, red pepper flakes, or a dash of your favorite hot sauce to the seasoning mix. For a milder flavor, you can simply reduce or omit the spicier elements like black pepper and paprika, or even add a touch more of a milder spice like garlic powder. The key is to adjust the seasonings incrementally until you achieve your desired taste profile, ensuring a delicious outcome for everyone.