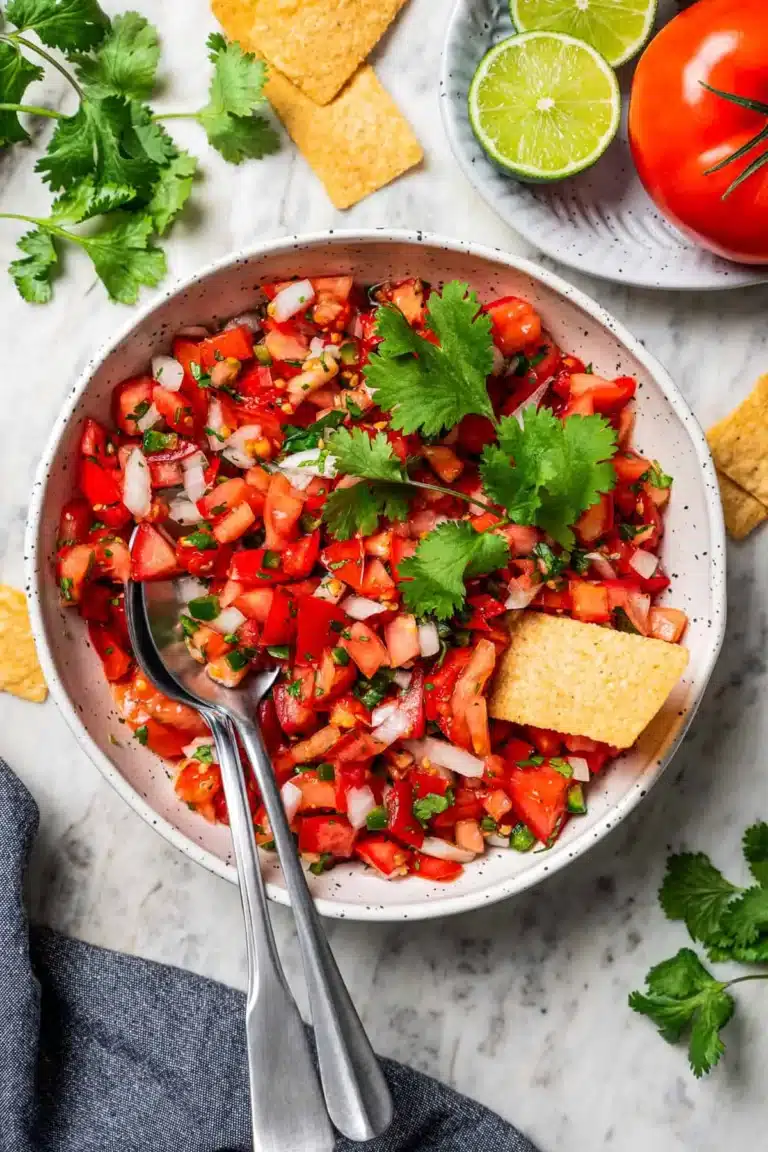
Summer BBQ Sheet Pan Shrimp Recipe Easy Garlic Butter Dinner for Busy Weeknights
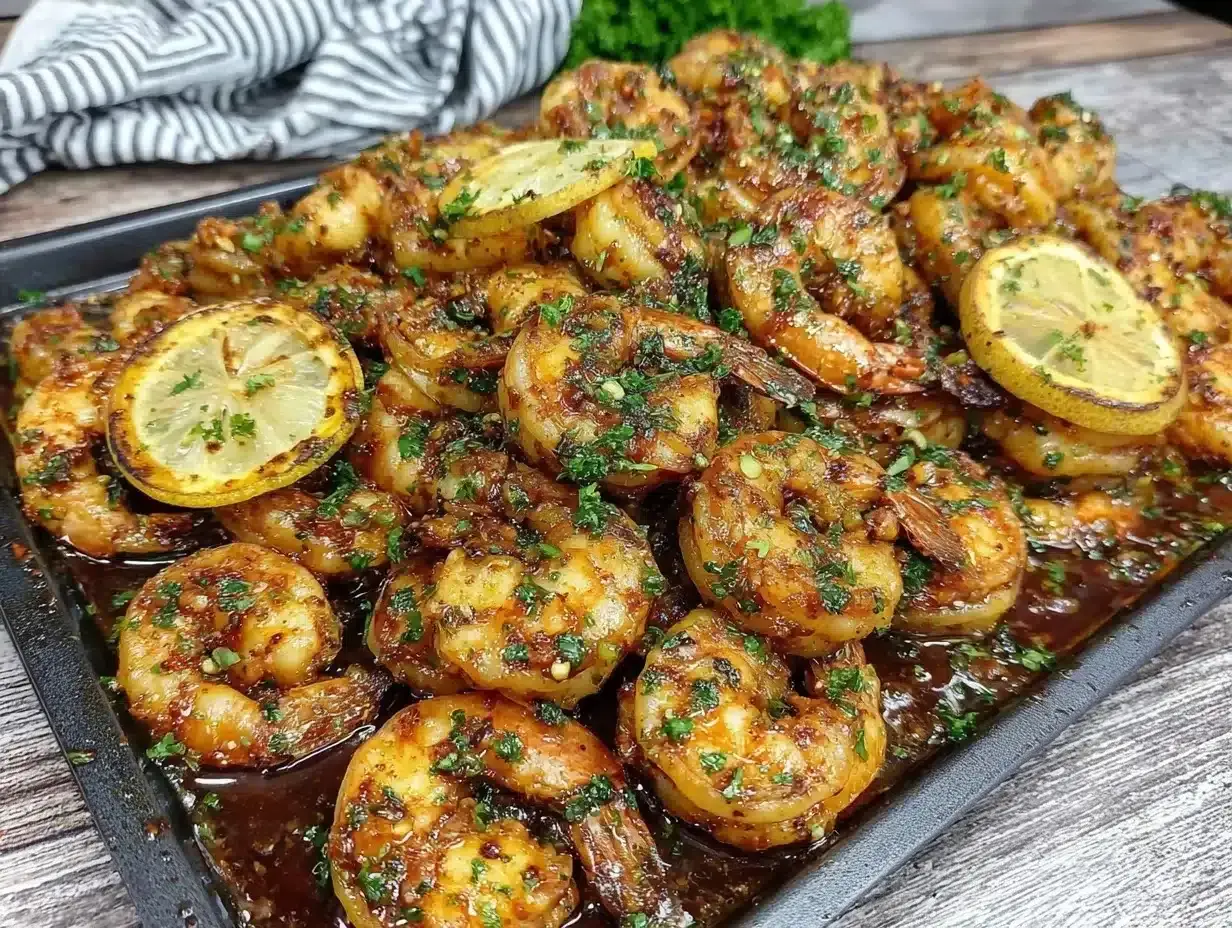
One scorching summer evening last July, I found myself staring at a fridge full of shrimp, a head full of garlic, and less than 30 minutes to make dinner before my family’s soccer practice. I knew I wanted something that tasted like a backyard BBQ but without the fuss of firing up the grill or babysitting a pan.
That’s when I threw together this Summer BBQ Sheet Pan Shrimp with Garlic Butter—and honestly, it changed my weeknight dinner game forever. The beauty of this recipe is how it turns a handful of simple ingredients into something smoky, buttery, and downright addictive, all with minimal cleanup. I’ve made this dish dozens of times since, and it’s become my go-to when I want dinner fast but crave those summer BBQ vibes.
Why You Will Love This Recipe
- Speedy Cleanup & Cooking: Toss everything on one sheet pan, slide it into the oven, and you’re free to multitask or sneak a quick shower. No juggling pots and pans, no standing over the stove, making this an absolute lifesaver on busy nights.
- Flavor That Feels Fancy: The garlic butter sauce isn’t just any butter sauce; it’s infused with smoked paprika and a touch of chili powder, giving that smoky, subtly spicy BBQ flavor without needing an actual grill. The shrimp soak it up beautifully, making every bite pop with vibrant taste.
- Minimal Ingredients, Maximum Impact: You don’t need a pantry full of exotic spices or sauces, just basic garlic, butter, shrimp, and a few pantry staples. I always have these on hand, so I can whip this dinner up on a whim, ensuring a delicious meal is always within reach.
- Perfectly Tender Shrimp: Overcooked shrimp is the worst, right? This recipe nails the timing so that they’re juicy and tender every single time, thanks to the precise sheet pan method that helps them cook evenly and soak up all that glorious buttery sauce.
- Flexible & Crowd-Pleasing: Whether it’s a solo dinner, a family meal, or a casual summer gathering, this shrimp dish fits right in. It’s light enough for summer but satisfying enough to fill you up after a long day, making it a versatile go-to for any occasion.
Ingredients You Need
This recipe is all about bringing big flavor with simple, accessible ingredients, making it a weeknight wonder. We’re focusing on quality where it counts, ensuring every bite is packed with taste and texture. The goal is a dish that feels special but requires absolutely no advanced culinary skills.
Summer BBQ Sheet Pan Shrimp with Garlic Butter
A quick and easy sheet pan shrimp recipe with a smoky garlic butter sauce, perfect for busy weeknights and minimal cleanup. This dish delivers tender shrimp with rich, zesty BBQ flavors without needing a grill.
- 1.5 pounds large shrimp, peeled and deveined
- 4 tablespoons unsalted butter
- 4 large garlic cloves, minced
- 1 teaspoon smoked paprika
- 1/2 teaspoon chili powder
- 2 tablespoons lemon juice
- 2 tablespoons fresh parsley, chopped
- Salt and freshly ground black pepper, to taste
- Optional: 1 cup cherry tomatoes
- Optional: 1 cup sliced bell peppers (red or yellow)
- Optional for serving: crusty bread or cooked rice
- 1Preheat your oven to 425°F (220°C) and prep your sheet pan by lining it with foil or parchment paper and lightly oiling it to prevent sticking.
- 2In a small saucepan over low heat, melt the butter. Add minced garlic, smoked paprika, and chili powder. Stir frequently and cook gently for about 3 minutes until fragrant but not browned. Remove from heat and stir in lemon juice.
- 3Pat the shrimp dry with paper towels. If using cherry tomatoes or sliced bell peppers, toss them on the sheet pan with a drizzle of olive oil and salt.
- 4Place the shrimp in a mixing bowl and pour about two-thirds of the garlic butter sauce over them. Toss gently to coat each shrimp evenly. Reserve the remaining sauce for finishing.
- 5Arrange the shrimp in a single layer on the sheet pan over the veggies or directly on the foil if no veggies are used, ensuring they are not crowded.
- 6Roast in the oven for 7-9 minutes, checking at 7 minutes. Shrimp should be pink, opaque, and slightly curled but not overcooked.
- 7Remove from oven and immediately drizzle the reserved garlic butter sauce over the shrimp. Sprinkle with fresh chopped parsley and a pinch of black pepper.
- 8Serve immediately with crusty bread or rice to soak up the garlic butter sauce.
Keywords: shrimp, sheet pan, garlic butter, BBQ, quick dinner, easy recipe, weeknight meal, summer recipe
- large shrimp, peeled and deveined: Opt for about 1.5 pounds; wild-caught offers superior flavor, but farmed shrimp works perfectly well. Ensure they are completely thawed if frozen and thoroughly patted dry to help the sauce adhere beautifully.
- unsalted butter: You’ll need about 4 tablespoons to create a rich, luscious flavor base for your sauce. Using unsalted allows you to control the saltiness precisely, ensuring a balanced taste in every bite.
- garlic cloves, minced: Generous amounts of fresh garlic, around 4 large cloves, are essential for that signature aromatic punch. Freshly minced garlic provides a depth of flavor that garlic powder simply cannot replicate in this vibrant sauce.
- smoked paprika: A teaspoon of this spice is your secret weapon for that authentic BBQ smokiness without any grilling involved. If smoked paprika isn’t available, regular paprika can be used, though it won’t impart the same depth of flavor.
- chili powder: Half a teaspoon adds a gentle warmth that awakens the palate without overwhelming the delicate shrimp. Feel free to adjust this amount based on your personal preference for spice, making the dish perfectly tailored to your taste.
- lemon juice: Two tablespoons of fresh lemon juice will brighten the buttery sauce and cut through its richness beautifully. Freshly squeezed lemon juice offers the most vibrant, zesty flavor, though bottled can be a convenient substitute.
- fresh parsley, chopped: Two tablespoons of fresh parsley add a delightful pop of color and a hint of freshness as a garnish. Keeping a small pot of parsley on hand is a chef’s trick that elevates many dishes with minimal effort.
- salt & freshly ground black pepper: Season generously to taste, remembering that you can always add more but can’t take it away. I always recommend seasoning lightly initially and adjusting after the shrimp are cooked to perfection.
The quantities for all these fantastic ingredients are readily available in the linked recipe card, ensuring you have everything you need for a successful and delicious meal. These simple components, when combined, create a symphony of flavors that will have everyone asking for seconds. They are the building blocks for a truly unforgettable dish that’s both easy and impressive.
Variations
Once you’ve mastered the basic Summer BBQ Sheet Pan Shrimp, the possibilities for culinary creativity are endless, allowing you to tailor this fantastic dish to suit any dietary need or flavor preference. Experimenting with different flavor profiles can transform this weeknight staple into a new adventure every time you make it.
Vegan Delight: For a plant-based twist, swap out the shrimp for king oyster mushroom stems cut into shrimp-like pieces, or use firm tofu cubes that have been pressed and then coated in cornstarch for crispiness. The garlic butter sauce can be easily adapted by using vegan butter or a good quality olive oil, and you can boost the umami with a splash of tamari or soy sauce and perhaps some nutritional yeast for a cheesy note.
Low-Carb & Keto Friendly: This recipe is already quite low in carbohydrates, especially if served without traditional accompaniments like rice or bread. To enhance its low-carb appeal, consider adding more non-starchy vegetables such as asparagus spears, broccoli florets, or thinly sliced zucchini to the sheet pan. Serve it alongside a simple avocado salad or cauliflower rice for a complete and satisfying keto meal that’s packed with flavor and healthy fats.
Spicy Sriracha Kick: If you crave a bit more heat and a different kind of spice, replace the chili powder with a tablespoon or two of sriracha sauce, adjusting to your heat tolerance. You could also add a pinch of red pepper flakes for an extra layer of warmth. This variation adds a bold, fiery dimension that pairs wonderfully with the garlic and butter, creating a truly exhilarating flavor experience.
Mediterranean Flavors: Introduce some Mediterranean flair by adding cherry tomatoes, Kalamata olives, and capers to the sheet pan. A sprinkle of dried oregano or fresh dill before roasting will further enhance the regional taste. This adaptation brings a delightful briny and herbaceous complexity to the dish, reminiscent of sun-drenched coastal cuisines.
Global Fusion Adventures: Think outside the box with flavors from other cuisines. A hint of ginger and a splash of soy sauce can take it towards an Asian-inspired direction, while a touch of cumin and coriander could lean it towards a Middle Eastern profile. These global twists allow you to explore a world of tastes using the same simple sheet pan method, making dinner exciting and educational.
How to Prepare Summer BBQ Sheet Pan Shrimp
Step 1: Preheat Oven and Prepare Sheet Pan
Begin by setting your oven to a robust 425°F (220°C), ensuring it’s thoroughly preheated to achieve that perfect roast. Position the oven rack in the center to guarantee even heat distribution for all the ingredients on the pan.
For an easier cleanup, which is a major perk of this recipe, consider lining your sheet pan with aluminum foil or parchment paper. A light spray or brush of olive oil directly onto the lining will prevent the shrimp from sticking and make post-meal tidying a breeze. This preparation step is crucial for ensuring your shrimp cook without clinging to the pan.
Properly preparing the pan means you can focus more on enjoying your meal and less on the scrubbing afterward. This simple step sets the stage for a smooth cooking process and a stress-free end to your culinary endeavor. It’s all about setting yourself up for success from the very beginning.
Step 2: Craft the Flavorful Garlic Butter Sauce
In a small saucepan, gently melt your unsalted butter over low heat, being careful not to let it brown. Add the finely minced garlic cloves to the melted butter, along with the smoked paprika and chili powder. Stir these aromatics frequently to prevent the garlic from burning, allowing them to infuse the butter for approximately 3 minutes until wonderfully fragrant.
This gentle cooking process coaxes out the deep, savory flavors of the garlic and spices without introducing any bitterness. The key is low and slow heat to ensure that the garlic becomes tender and releases its full aromatic potential into the butter base. The vibrant colors of the paprika will also begin to deepen, signaling that the flavors are melding beautifully.
Once the fragrant mixture is ready, remove the saucepan from the heat. Stir in the fresh lemon juice; this addition provides a crucial burst of acidity that brightens the entire sauce, cutting through the richness of the butter and adding a zesty counterpoint. This sauce is the heart of your BBQ shrimp, infusing every bite with incredible taste.
Step 3: Prepare Shrimp and Optional Vegetables
Take your peeled and deveined shrimp and pat them thoroughly dry with paper towels. This is a critical step, as excess moisture will lead to steaming rather than roasting, resulting in a less desirable texture. Dry shrimp crisp up beautifully and absorb the sauce more effectively.
If you’re incorporating optional vegetables like cherry tomatoes or sliced bell peppers, now is the time to add them to the sheet pan. Toss these veggies with a light drizzle of olive oil and a pinch of salt directly on the pan. Spread them out evenly, giving them a head start on roasting so they become tender and slightly caramelized.
Ensuring the shrimp are dry and the vegetables are seasoned and spread out creates a foundation for perfectly cooked ingredients. This attention to detail in the preparation phase directly contributes to the final quality and deliciousness of your Summer BBQ Sheet Pan Shrimp. It’s about setting up each component for optimal cooking and flavor development.
Step 4: Coat the Shrimp in Garlic Butter
Place the thoroughly dried shrimp into a mixing bowl. Pour about two-thirds of the prepared garlic butter sauce over the shrimp. Reserve the remaining sauce for later; this will be used to enhance the flavor and moisture just before serving.
Gently toss the shrimp with tongs or a spatula, ensuring that each piece is evenly coated with the luscious garlic butter mixture. The goal is to get a thin, even layer of the flavorful sauce on every single shrimp, ensuring consistent taste throughout the dish. Avoid over-mixing, which could break the delicate shrimp.
This coating process is where the magic truly begins to happen, infusing the shrimp with the smoky, garlicky, and slightly spicy flavors of the sauce. Properly coating each shrimp guarantees that every bite will be a burst of deliciousness, making this step fundamental to the recipe’s success. It’s the key to bringing that delicious BBQ essence to your meal.
Step 5: Arrange Shrimp and Vegetables on the Sheet Pan
Carefully arrange the garlic-butter-coated shrimp in a single layer on the prepared sheet pan. If you’ve included vegetables, place the shrimp on top of them, or if you’re going without vegetables, place them directly onto the foil-lined pan. It’s essential that the shrimp are not overlapping or crowded; they need space to roast properly.
Overcrowding the pan will cause the shrimp to steam instead of roast, negating the goal of achieving that slightly crisp, perfectly cooked texture. Give each shrimp a little breathing room so that the hot oven air can circulate around them effectively. This even distribution is vital for uniform cooking and developing beautiful caramelization.
Taking a moment to ensure an even, single layer of shrimp and vegetables contributes significantly to the overall quality of the dish. This careful arrangement ensures that every piece of shrimp cooks at the same rate and achieves the desired tender, succulent texture that makes this recipe so irresistible. It’s a small step that yields a big impact on the final outcome.
Step 6: Roast to Perfection
Slide the fully prepared sheet pan into the preheated 425°F (220°C) oven. Set a timer for 7 to 9 minutes, and begin checking for doneness at the 7-minute mark. The shrimp should be opaque, pink, and have begun to curl slightly, indicating they are perfectly cooked.
It is crucial not to overcook the shrimp, as they can quickly transition from perfectly tender to disappointingly rubbery. Keep a close eye on them during the final minutes of cooking; ovens can vary, and yours might cook them a minute or two faster or slower than expected. The visual cues of pinkness and slight curling are your best indicators.
Once the shrimp have reached their ideal state, carefully remove the sheet pan from the oven. The brief cooking time is what ensures they remain succulent and bursting with flavor, embodying the essence of summer BBQ in every bite. This rapid cooking is key to achieving that desirable tender texture that makes this dish a standout.
Step 7: Finish and Serve
As soon as the sheet pan is out of the oven, immediately drizzle the reserved garlic butter sauce over the hot shrimp. This final flourish adds an extra layer of rich, buttery flavor and ensures the shrimp remain moist and glistening.
Sprinkle the shrimp generously with freshly chopped parsley for a vibrant burst of color and a hint of fresh herbaceousness. Finish with a grind of fresh black pepper to enhance all the savory notes. These final touches elevate the presentation and the overall taste experience, making the dish as appealing to the eye as it is to the palate.
Serve this delightful Summer BBQ Sheet Pan Shrimp immediately while it’s hot and at its most flavorful. It pairs wonderfully with crusty bread for soaking up every last drop of that delicious garlic butter sauce, or over fluffy steamed rice for a more substantial meal. This rapid assembly from oven to table is what makes this recipe an absolute weeknight lifesaver, delivering a taste of summer without the fuss.
Pro Tips for Summer BBQ Sheet Pan Shrimp
Don’t Skip Drying Your Shrimp: This might seem like a minor detail, but it’s incredibly important for achieving the right texture. Wet shrimp will steam in the oven instead of roasting, leading to a mushy, rubbery consistency that we definitely want to avoid. Thoroughly patting them dry with paper towels ensures they get that slightly seared, tender finish that makes this dish so delightful.
Embrace Fresh Garlic: While dried garlic powder is convenient, it simply won’t deliver the same aromatic depth and richness as fresh, minced garlic in this particular recipe. The gentle sautéing of fresh garlic in butter is what builds the foundation for that incredible flavor profile. You can use a garlic press for speed, or a sharp knife for a fine mince, but fresh is non-negotiable for the best results.
Master the Cook Time: Shrimp cook incredibly fast, and there’s a very fine line between perfectly done and overcooked. Always start checking at the lower end of the suggested cooking time, usually around 7 minutes. They should be pink and just beginning to curl; if they look tightly coiled, they’re likely already past their prime. Remember, they continue to cook slightly from residual heat after being removed from the oven.
Save Some Butter for Finishing: Don’t pour all that glorious garlic butter sauce onto the shrimp before they go into the oven. Reserve a portion to drizzle over the cooked shrimp right after they come out. This extra boost of fresh, warm butter adds a beautiful sheen and an intensified buttery flavor, ensuring the shrimp stay moist and incredibly delicious.
Adjust the Heat to Your Liking: The chili powder in this recipe provides a gentle warmth, but you can easily customize the spice level. If you prefer a milder dish, simply reduce or omit the chili powder. For those who love a fiery kick, consider adding a pinch of cayenne pepper or a few red pepper flakes along with the chili powder. Taste the sauce before coating the shrimp if you’re unsure about the heat level.
Vegetable Additions for Extra Goodness: This recipe is a fantastic canvas for adding other quick-cooking vegetables. Cherry tomatoes burst with sweetness when roasted, while sliced bell peppers add a lovely crunch and vibrant color. Other great additions include asparagus spears, snap peas, or even thinly sliced zucchini, all of which cook quickly alongside the shrimp and add nutritional value and visual appeal.
Serving Suggestions for Summer BBQ Sheet Pan Shrimp
Decoration
A sprinkle of fresh, vibrant chopped parsley is the quintessential garnish for this dish, adding a bright green contrast that signals freshness and herbaceousness. It not only enhances the visual appeal but also provides a subtle, refreshing flavor counterpoint to the rich garlic butter sauce.
For an extra touch of elegance and a pop of color, consider a few thin slices of lemon or lime artfully placed around the serving platter. A light dusting of extra smoked paprika can also reinforce the BBQ theme and add a subtle reddish hue.
If you’ve added cherry tomatoes or bell peppers to the sheet pan, ensure they are visible in the final presentation. Their colors will naturally enhance the dish, making it look even more appetizing and homemade.
Side Dishes
Crusty Bread: This is arguably the best companion for soaking up every last drop of the decadent garlic butter sauce. A warm baguette or any crusty artisan loaf will be a welcome addition to the table, ensuring no flavor goes to waste.
Fluffy Rice: Steamed white or brown rice provides a neutral yet satisfying base that allows the bold flavors of the shrimp and sauce to shine. It creates a heartier meal and is excellent for catching any stray buttery goodness.
Green Salad: For a lighter, refreshing contrast, a simple green salad tossed with a lemon vinaigrette or a light Caesar dressing is ideal. The crispness of the greens and the zesty dressing cut through the richness of the shrimp, creating a well-balanced meal.
Roasted Vegetables: If you didn’t include them on the sheet pan, consider serving alongside roasted asparagus, broccoli, or green beans. These complement the flavors of the shrimp beautifully and add more fiber and nutrients to your meal.
Pasta Salad: A light, herb-infused pasta salad can also be a fantastic accompaniment, offering a different textural element and a chance to incorporate more fresh herbs like basil or dill.
Creative Serving Ideas
Shrimp Tacos or Lettuce Wraps: Gently reheat the shrimp and serve them in warm tortillas or crisp lettuce cups with your favorite taco toppings like shredded cabbage, avocado salsa, or a drizzle of crema. This transforms the sheet pan meal into a fun, interactive appetizer or light lunch.
Over Polenta or Grits: Serve the garlic butter shrimp atop creamy, cheesy polenta or smooth grits for a comforting and elevated meal. The creamy starch provides a luxurious base for the flavorful shrimp and sauce.
Shrimp Skewers: If you have larger shrimp, you can thread them onto skewers after coating them in the sauce and roast them, making them easier to handle and serve individually at a BBQ or party.
Pasta Toss: Toss the cooked shrimp with your favorite cooked pasta, a little extra olive oil, and maybe some fresh cherry tomatoes or spinach for a quick and elegant pasta dish. This is a fantastic way to use leftovers or to create a more substantial main course.
As a Salad Topper: For a light yet protein-rich meal, simply serve the warm shrimp over a bed of mixed greens, adding your favorite salad vegetables and a simple dressing. It’s a quick and healthy way to elevate a simple salad into a satisfying main course.
Preparation & Storage
Storing Leftovers
If you find yourself with any delicious leftovers of the Summer BBQ Sheet Pan Shrimp, store them in an airtight container in the refrigerator. It’s best to consume them within 1 to 2 days to ensure the best quality and texture. As shrimp can sometimes dry out when refrigerated, you might want to add a tiny splash of water or an extra dab of butter when reheating.
Freezing
While this particular recipe is best enjoyed fresh, and freezing cooked shrimp can sometimes alter their texture, making them a bit mushy upon thawing, it is possible. If you must freeze, ensure they are completely cooled and placed in a freezer-safe airtight container or heavy-duty freezer bag. However, I generally advise against freezing this dish, as the delicate shrimp are prone to textural changes. It’s much better to plan to eat it within a couple of days.
Reheating
To reheat your leftover shrimp and preserve their succulence, opt for gentle methods. The best approach is to warm them gently in a skillet over low heat with a little added butter or olive oil. This helps to rehydrate them and prevent them from becoming tough or rubbery. Avoid using the microwave, as it tends to overcook shrimp rapidly and can result in a chewy, unappealing texture.
Another reheating option is to very gently warm them in the oven at a low temperature, perhaps around 300°F (150°C), for a few minutes, again with a touch of added fat. The goal is to bring them back to temperature without cooking them further. If you’ve added vegetables, they will also reheat well with these methods.
For a quick meal prep idea, gently reheated shrimp can be added to salads, pasta, or grain bowls. Just ensure they are warmed through but not overcooked. The key takeaway for reheating is to be patient and use low heat to maintain that tender, juicy quality.
Frequently Asked Questions
-
Can I use frozen shrimp for this recipe?
Absolutely! Using frozen shrimp is perfectly fine for this recipe, and often more convenient. The most critical step is to ensure they are completely thawed before you begin. You can thaw them overnight in the refrigerator, or for a quicker method, place them in a colander under cold running water until they are pliable. Once thawed, it’s essential to pat them thoroughly dry with paper towels. This step is vital because any excess moisture will cause the shrimp to steam in the oven rather than roast, which can lead to a less desirable, rubbery texture. Properly dried shrimp will absorb the garlic butter sauce beautifully and cook up to a delightful tenderness.
-
What if I don’t have smoked paprika? Can I use regular paprika?
Yes, you can certainly use regular paprika if smoked paprika is not readily available in your pantry. However, it’s important to note that you will miss out on that distinctive smoky essence that gives this dish its signature “BBQ without the grill” character. To try and mimic that smokiness, you could experiment with adding a very small dash of liquid smoke to the sauce, or if you have it on hand, a tiny pinch of chipotle powder which offers both smoke and heat. Regular paprika will still provide color and a mild flavor, but the overall profile will be less complexly smoky than when using its smoked counterpart.
-
How do I prevent the shrimp from overcooking?
Preventing overcooked shrimp is all about timing and observation, especially when using a high-heat oven like the 425°F (220°C) required for this recipe. Shrimp cook extremely quickly, and the margin between perfectly done and rubbery is quite narrow. I highly recommend starting to check the shrimp for doneness at the lower end of the cooking time, which is typically around 7 minutes. You’re looking for them to turn opaque pink and curl slightly; they should not be tightly curled, as this indicates they are overcooked. Remember that shrimp will continue to cook a little from residual heat even after you remove them from the oven, so it’s always better to pull them out slightly before they reach what you think might be their absolute peak, rather than risk them becoming tough. Watching them closely during those final few minutes is key to achieving perfectly tender shrimp every time.