Irresistible Mini Hawaiian Guava Cake for Tropical Delight
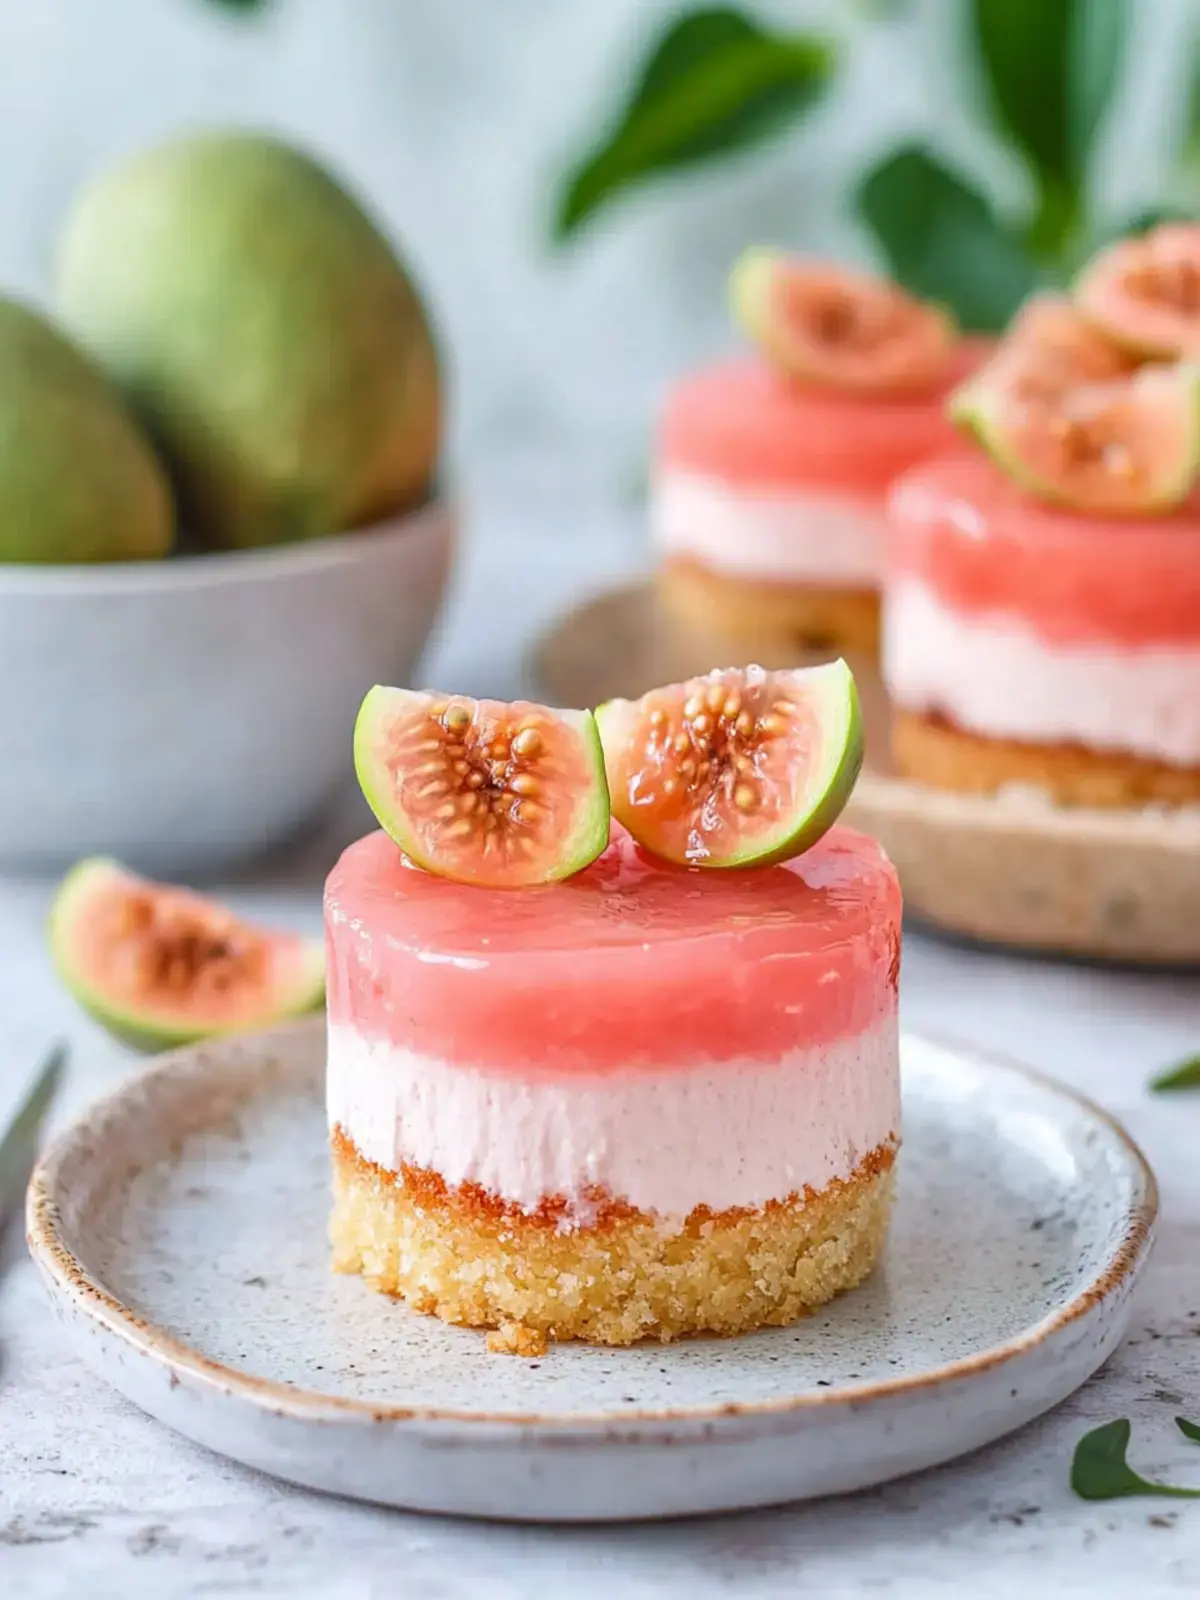
The gentle breeze carrying the sweet scent of ripe guavas is a quintessential part of any Hawaiian vacation, and now you can capture that same tropical essence in your own kitchen. These Mini Hawaiian Guava Cakes are a delightful tribute to the islands, offering a burst of sunshine and exotic flavor in every bite. They are more than just a dessert; they are a mini escape, a reminder of sandy beaches and vibrant sunsets, perfect for sharing with loved ones or savoring as a personal treat.
Imagine the joy of biting into a soft, moist cupcake topped with a luscious cream cheese frosting and a glistening guava glaze, all in a perfectly portioned mini size. This recipe takes the beloved flavors of traditional Hawaiian guava cake and transforms them into charming, individual treats that are as beautiful as they are delicious. Get ready to embark on a culinary journey that will transport your taste buds to paradise with these exquisite mini cakes.
Why You Will Love This Recipe
- Tropical Flavor Explosion: Experience the unique and enchanting taste of guava perfectly balanced with creamy sweetness, transporting you straight to the shores of Hawaii.
- Light and Fluffy Texture: The strawberry cake base offers a delightful lightness, while the rich cream cheese frosting provides a decadent counterpoint, creating a harmonious blend of textures in every bite.
- Charming Mini Size: Perfect for parties, potlucks, or individual indulgence, these mini cakes are easy to handle and delightfully portioned for maximum enjoyment without any fuss.
- Visually Stunning Presentation: The vibrant colors of the cake, the smooth white frosting, and the glistening guava gel topping create an irresistible visual appeal that will impress any guest.
- Effortless Elegance: Despite their sophisticated appearance, these mini cakes are surprisingly straightforward to make, allowing even novice bakers to achieve impressive and delicious results.
Ingredients You Need
Crafting these delightful Mini Hawaiian Guava Cakes begins with selecting the freshest, highest-quality ingredients available. The interplay between the sweet, slightly tart guava and the rich, creamy elements is crucial for achieving that authentic tropical bliss. Using good quality components ensures that every layer of flavor shines through, making each bite a truly memorable experience for you and your guests.
Mini Hawaiian Guava Cake

Delightful Mini Hawaiian Guava Cupcakes for Tropical Bliss. These cupcakes feature a soft strawberry sponge cake base, rich cream cheese frosting, and a glossy guava gel topping, offering a taste of paradise.
- For the Cupcakes:
- 1 box Strawberry Cake Mix (can substitute with vanilla or other flavored cake mix)
- 1 cup Guava Juice/Nectar (can use passion fruit juice for a twist)
- 3 large Eggs (use room temperature for best mixing)
- 1/3 cup Coconut Oil (substitute with vegetable oil or melted butter if preferred)
- For the Cream Cheese Frosting:
- 8 oz Cream Cheese (use room temperature for smoother consistency)
- 1 cup Sugar (adjust to taste for preferred sweetness)
- 1 tsp Vanilla Extract (use pure vanilla for best flavor)
- 8 oz Cool Whip (can substitute with whipped cream but adjust sugar)
- For the Guava Gel Topping:
- 2 cups Guava Juice
- 2 tbsp Cornstarch
- 1/2 cup Sugar (adjust to taste for balance)
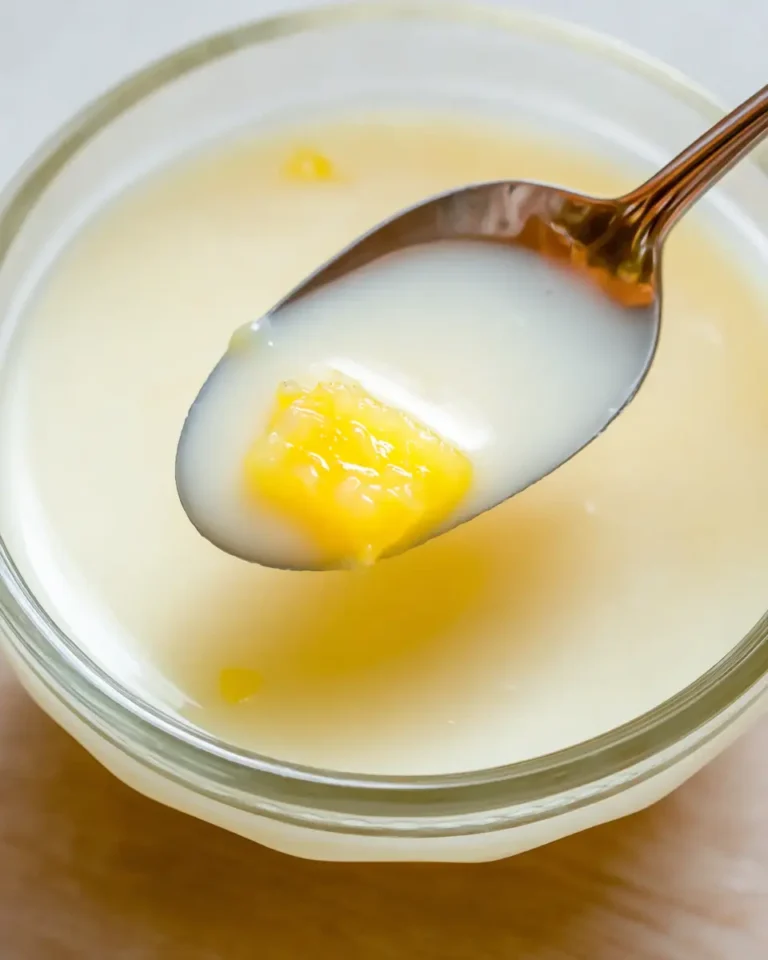
- 1Make Guava Gel: In a saucepan, boil 2 cups of guava juice with 1/2 cup sugar until it starts to bubble. Mix 2 tbsp cornstarch with a bit of water, then add it to the boiling juice and stir until thickened. Chill in the refrigerator until set.
- 2Prepare Cupcake Batter: In a large mixing bowl, combine 1 box strawberry cake mix, 1 cup guava juice/nectar, 3 large eggs, and 1/3 cup coconut oil. Mix on medium speed for about 2 minutes, until the batter is smooth and well blended. Fill your cupcake liners about ⅓ full with this batter.
- 3Bake: Preheat your oven to 350°F (175°C). Bake the cupcakes for 19-22 minutes or until they're lightly golden and a toothpick inserted comes out clean. Let them cool on a wire rack.
- 4Make Frosting: In a bowl, beat 8 oz room temperature cream cheese until fluffy. Gradually add 1 cup sugar and 1 tsp vanilla extract, mixing until smooth. Gently fold in 8 oz Cool Whip, then refrigerate until ready to spread on the cupcakes.
- 5Assemble Cupcakes: Once the cupcakes are completely cool, spread the cream cheese frosting generously on top. Then drizzle the prepared guava gel over each one. Refrigerate until ready to serve.
Keywords: Guava Cake, Hawaiian Cake, Tropical Dessert, Cupcakes, Strawberry Cake, Cream Cheese Frosting, Fruit Gel, Mini Cakes
- strawberry cake mix: this forms the tender, moist base of your mini cakes, offering a subtle sweetness and a lovely pink hue.
- guava juice/nectar: the star ingredient, providing that signature tropical flavor and essential moisture for a wonderfully tender crumb.
- large eggs: acting as binders and enrichers, these help create a stable cake structure and add to the overall richness.
- coconut oil: imparts a delicate coconut aroma and contributes to the cake’s moistness, a classic pairing with tropical fruits.
- cream cheese: softened and ready to be whipped into a lusciously smooth and tangy frosting that complements the fruity cake beautifully.
- sugar: sweetens the frosting and the guava glaze to perfection, balancing the tartness of the fruit and the richness of the cream cheese.
- vanilla extract: a classic flavor enhancer that rounds out the taste profile of both the cake and the frosting, adding depth and warmth.
- cool whip: lightens the cream cheese frosting, making it airy, fluffy, and incredibly spreadable for that perfect finishing touch.
- guava juice: used for the glossy topping, this concentrates the tropical flavor and provides a beautiful, shimmering finish.
- cornstarch: essential for thickening the guava juice into a perfect, spoonable gel that clings beautifully to the frosted cupcakes.
The precise quantities for each ingredient are detailed in the accompanying recipe card, ensuring you have everything you need for a perfect bake.
Variations
To elevate your Mini Hawaiian Guava Cake experience even further, consider exploring some exciting variations that cater to different palates and dietary preferences. These creative twists ensure that everyone can enjoy a taste of tropical paradise, no matter their taste or restrictions.
For those seeking a dairy-free or vegan option, transforming these cupcakes is remarkably simple. You can opt for a dairy-free cream cheese alternative and use whipped coconut cream instead of Cool Whip for the frosting. Ensure your cake mix is also vegan-friendly, and you’ll have a delightful treat that accommodates a wider range of guests without sacrificing flavor or texture.
If you’re a fan of vibrant citrus notes, consider adding a touch of zest to the cake batter. Finely grated lime or orange zest, about a teaspoon or two, can introduce a bright, zesty counterpoint to the sweet guava, reminiscent of fresh tropical fruits found in a bustling island market. This subtle addition enhances the overall flavor complexity.
To introduce a delightful textural contrast and an extra layer of tropical flavor, a sprinkle of toasted shredded coconut over the finished frosting is a fantastic idea. The toasting process brings out the nutty sweetness of the coconut, and its slight crunch offers a pleasing sensation against the soft cake and creamy frosting.
For the adventurous palate, a hint of spice can add an unexpected yet welcome dimension. Incorporating a small amount of finely minced jalapeño or a pinch of cayenne pepper into the cake batter can create a thrilling sweet-and-spicy profile. This daring combination plays on the natural sweetness of the guava and cake, offering a unique taste sensation that is both intriguing and delicious.
Another exciting variation involves experimenting with the frosting itself. Infusing the cream cheese frosting with a tablespoon of passion fruit puree or a dash of coconut extract can amplify the tropical theme. These additions provide nuanced layers of flavor that complement the guava beautifully, making each bite a more complex and satisfying experience.
Finally, for a touch of decadence, a drizzle of white chocolate ganache or a simple chocolate syrup over the finished cupcakes can add an element of indulgence. The creamy sweetness of the chocolate pairs surprisingly well with the tropical guava, creating a fusion of flavors that is both comforting and exotic, making these mini cakes suitable for any occasion.
How to Prepare Mini Hawaiian Guava Cake
Step 1: Crafting the Exquisite Guava Gel Topping
The journey to creating your Mini Hawaiian Guava Cakes begins with the preparation of the signature guava gel topping, the glistening crown that will adorn your delightful creations. This step is crucial for achieving that authentic tropical aesthetic and a burst of pure guava flavor. You will need a medium-sized saucepan for this process, ensuring there’s enough room to stir the mixture without splashing.
Begin by pouring your specified amount of guava juice into the saucepan. Add the sugar, ensuring it is evenly distributed throughout the juice. Heat this mixture over medium heat, stirring occasionally, until it reaches a gentle boil. It’s important to observe this stage closely; you want the sugar to fully dissolve and the juice to become fragrant and slightly reduced.
While the guava juice is heating, prepare your thickening agent. In a small, separate bowl, combine the cornstarch with a small amount of cold water. Whisk this mixture thoroughly until the cornstarch is completely dissolved and no lumps remain. This slurry is key to achieving a smooth, glossy gel without any grainy texture. A well-prepared cornstarch slurry ensures an even and effective thickening process.
Once the guava juice is bubbling gently, slowly pour the cornstarch slurry into the boiling juice while continuously whisking. Continue to stir and cook the mixture for another minute or two until it thickens to a consistency resembling a pourable jelly or a thin syrup. The gel should coat the back of a spoon nicely. Remove the saucepan from the heat immediately to prevent over-thickening.
Transfer the thickened guava gel into a clean bowl. Allow it to cool to room temperature, and then cover it with plastic wrap, pressing the wrap directly onto the surface of the gel to prevent a skin from forming. Place the bowl in the refrigerator and let it chill until it is fully set. This chilling process is vital for the gel to achieve its desired glossy, spoonable texture, ready to be drizzled over your frosted cupcakes.
The consistency of the gel is paramount; it should be thick enough to not run off the cupcakes but fluid enough to be drizzled elegantly. If, upon cooling, it seems too thick, you can gently warm it slightly and whisk in a tiny bit more guava juice or water. Conversely, if it remains too thin after chilling, you might need to gently reheat it with a bit more cornstarch slurry, being careful not to make it gummy. Patience during the chilling phase will ensure a perfect topping.
Step 2: Whisking Together the Vibrant Cupcake Batter
With the guava gel chilling, it’s time to focus on creating the delightful cake batter that will form the foundation of your Mini Hawaiian Guava Cakes. This stage requires a large mixing bowl, a whisk or an electric mixer, and your carefully measured dry and wet ingredients. The goal here is to achieve a smooth, homogenous batter that bakes up light and moist.
In your large mixing bowl, combine the contents of the strawberry cake mix. This pre-made mix simplifies the process significantly, providing the essential flour, leavening agents, and flavor base. Next, add the guava juice or nectar, which will infuse the cake with its signature tropical essence and contribute moisture. Ensure you are using the amount specified in the recipe to maintain the correct batter consistency.
Introduce the eggs to the mixture. It’s often recommended to have your eggs at room temperature for better emulsification and a more uniform batter. Room temperature eggs incorporate more smoothly into the batter, leading to a finer crumb and better volume. Finally, pour in the coconut oil. This adds a wonderful richness and moisture, a delightful pairing with the tropical guava flavor.
Using a whisk or an electric mixer set to medium speed, begin to combine all the ingredients. Mix for approximately two minutes, or until the batter is smooth and well-blended. It’s important not to overmix the batter at this stage, as this can develop the gluten in the flour too much, resulting in tougher cakes. A gentle, thorough mix is all that is needed to bring everything together into a cohesive, pourable batter.
The consistency of the batter should be smooth and free-flowing, with no dry pockets of cake mix visible. It will likely have a beautiful pinkish hue from the strawberry cake mix, hinting at the fruity goodness within. Once mixed, the batter is ready to be portioned into your prepared cupcake liners, setting the stage for the baking process.
Before you proceed to fill the liners, it’s a good practice to give the batter a final gentle stir to ensure all ingredients are perfectly incorporated. This is also the moment to consider any optional additions like a touch of lime zest if you’re exploring variations. A well-mixed batter is the first crucial step towards achieving perfectly baked, flavorful cupcakes.
Step 3: Baking the Mini Cakes to Golden Perfection
Now that your vibrant cupcake batter is ready, it’s time to bake these mini delights into perfectly golden, fragrant treats. This step requires a preheated oven and your trusty cupcake pans lined with paper liners. Ensuring your oven is at the correct temperature is vital for even baking and the proper rise of your cakes.
Preheat your oven to 350 degrees Fahrenheit (175 degrees Celsius). While the oven is heating up, prepare your cupcake pans by lining each cup with paper liners. This prevents the cakes from sticking and makes them easy to remove once baked. You can use standard-sized cupcake liners or mini ones, depending on the size of cakes you desire; adjust baking time accordingly.
Carefully spoon the prepared batter into each cupcake liner, filling them approximately one-third full. Overfilling the liners can cause the batter to overflow during baking, resulting in unevenly shaped cakes. It’s better to have slightly underfilled liners than to risk a messy baking sheet. Distribute the batter as evenly as possible among all the cups to ensure consistent baking results.
Once your cupcake pans are filled, carefully place them into the preheated oven. Bake for a duration of 19 to 22 minutes. The exact baking time may vary slightly depending on your oven and the size of your cupcakes. You’ll know they’re done when they are lightly golden brown around the edges and a toothpick inserted into the center of a cupcake comes out clean, with no wet batter clinging to it.
As soon as the cupcakes are baked, remove the pans from the oven. Let them sit in the pan for a few minutes to firm up slightly before transferring them to a wire rack. This brief resting period helps prevent them from breaking when you move them. Once they are stable enough, carefully remove the cupcakes from the pan and place them directly onto the wire rack to cool completely. Complete cooling is absolutely essential before proceeding to the frosting stage.
Allowing the cupcakes to cool thoroughly on the wire rack ensures that no steam is trapped, which could make the bottoms soggy. It also prevents the frosting from melting when it’s applied. This patience will pay off in the final presentation and texture of your beautiful Mini Hawaiian Guava Cakes. The aroma filling your kitchen at this stage is simply heavenly.
Step 4: Whipping Up the Luscious Cream Cheese Frosting
While your cupcakes are cooling to perfection, it’s time to prepare the luscious cream cheese frosting, a creamy, tangy complement to the sweet guava cake. This frosting is wonderfully simple to make, requiring just a few key ingredients and a bowl. Using room temperature ingredients is absolutely critical for achieving a smooth, lump-free frosting that’s easy to spread.
Begin by placing the softened cream cheese into a medium-sized mixing bowl. Using an electric mixer or a sturdy whisk, beat the cream cheese until it becomes completely smooth and fluffy. This step is crucial for eliminating any lumps and creating a creamy base for your frosting. Ensure the cream cheese has softened adequately; if it’s too cold, it will be difficult to achieve a smooth consistency.
Once the cream cheese is smooth, gradually add the sugar. Continue to mix, scraping down the sides of the bowl as needed, until the sugar is fully incorporated and the mixture is smooth and well-combined. Taste a small amount of the frosting at this point to gauge its sweetness. You can add a touch more sugar if you prefer a sweeter frosting, or a little less if you like it tangier.
Next, add the vanilla extract to the cream cheese and sugar mixture. Mix until it’s fully incorporated. The vanilla extract enhances the overall flavor profile, adding a warm depth that complements the tangy cream cheese and sweet guava. Ensure it’s evenly distributed throughout the frosting for a consistent taste in every bite.
The final step for the frosting is to gently fold in the Cool Whip. This ingredient lightens the frosting, making it airy, fluffy, and much easier to spread. Be sure to fold it in gently rather than beating it vigorously, as this helps maintain its airy texture. Continue folding until the Cool Whip is just combined, creating a smooth, luscious frosting that’s ready to adorn your cupcakes.
After the frosting is made, cover the bowl tightly and place it in the refrigerator. This allows the frosting to firm up slightly, making it easier to pipe or spread onto the cooled cupcakes. Chilling the frosting ensures it holds its shape beautifully when you assemble your Mini Hawaiian Guava Cakes, preventing it from becoming too soft or runny.
Step 5: Assembling the Tropical Masterpieces
With your Mini Hawaiian Guava Cakes perfectly cooled and your luscious cream cheese frosting chilled, the final assembly begins – the moment where all your hard work comes together to create these stunning tropical treats. This is where the visual appeal truly comes to life, transforming simple cupcakes into miniature works of art.
Take your completely cooled cupcakes from the wire rack. Ensure they are at room temperature or cooler; frosting warm cupcakes will lead to a melted, messy outcome. Using an offset spatula or a butter knife, spread a generous amount of the chilled cream cheese frosting evenly over the top of each cupcake. Aim for a smooth, even layer that covers the entire surface, creating a beautiful white canvas.
Once each cupcake is frosted, it’s time to add the glistening guava gel topping. Take your chilled guava gel from the refrigerator. Give it a gentle stir to ensure it has a smooth, drizzle-able consistency. If it seems too stiff, you can warm it slightly in the microwave for a few seconds, or stir in a teaspoon of warm water until it reaches your desired fluidity. Be careful not to overheat it.
Using a spoon or a piping bag with a fine tip, carefully drizzle the guava gel over the cream cheese frosting on each cupcake. You can create swirls, lines, or simply a beautiful, glossy sheen. The vibrant, translucent amber color of the guava gel provides a stunning contrast against the white frosting, enhancing the tropical appeal of your mini cakes.
For an extra touch of visual interest and texture, consider adding optional garnishes at this stage. Toasted coconut flakes offer a delightful crunch and a more pronounced tropical aroma. A small mint leaf or a thin slice of fresh guava could also be used for an elegant finish. These little details can elevate your cupcakes from delicious to truly spectacular, making them perfect for any occasion.
After assembly, place the finished cupcakes back into the refrigerator. Allowing them to chill for at least 30 minutes before serving helps the frosting and gel to set properly. This step ensures that the flavors meld together and that the cupcakes maintain their beautiful presentation. Chilled, these mini cakes are incredibly refreshing, making them a perfect dessert for warmer days or any time you need a taste of paradise.
Step 6: The Final Touch and Presentation
The culmination of your baking journey is the presentation of your Mini Hawaiian Guava Cakes, turning them into irresistible treats that will delight both the eyes and the palate. Each step has led to this moment, where the visual appeal matches the exquisite tropical flavors.
Ensure that the guava gel has set slightly after drizzling, creating a beautiful, glossy finish. The contrast between the creamy white frosting and the translucent, jewel-toned guava topping is visually striking. If you’ve opted for any additional garnishes like toasted coconut flakes or a mint sprig, ensure they are securely in place.
When serving, arrange the cupcakes attractively on a platter or a tiered stand. Their mini size makes them ideal for displaying in abundance, creating an inviting dessert table. Consider serving them slightly chilled, as this enhances the refreshing qualities of the guava and the creaminess of the frosting, offering a delightful sensory experience.
These mini cakes are perfect as a standalone dessert, a sweet ending to a meal, or as part of a larger dessert spread. Their tropical theme makes them particularly well-suited for summer gatherings, luaus, or any celebration where a touch of island flair is desired. The individual portions also make them convenient for guests to select and enjoy without fuss.
The sweet, exotic aroma that wafts from these cakes is an invitation in itself, promising a delightful taste of Hawaiian sunshine. As guests bite into them, they will experience the soft texture of the strawberry cake, the rich tang of the cream cheese frosting, and the sweet burst of guava, creating a harmonious symphony of tropical flavors.
Remember that the goal is to create a memorable dessert experience. These Mini Hawaiian Guava Cakes are designed to be a conversation starter, a beautiful and delicious way to share a bit of paradise. Their charming size and delightful flavor profile make them a guaranteed hit, leaving everyone craving another taste of the islands.
Pro Tips for Mini Hawaiian Guava Cake
To ensure your Mini Hawaiian Guava Cakes are an absolute triumph, a few expert tips can elevate them from good to absolutely unforgettable. Paying attention to these details will guarantee a superior texture, flavor, and appearance.
Room Temperature is Key: For both the cream cheese frosting and the cake batter, using ingredients at room temperature is paramount. This ensures smooth incorporation, preventing lumps in the frosting and creating a well-emulsified, tender cake crumb. Take your cream cheese and eggs out of the refrigerator at least 30-60 minutes before you plan to start mixing.
Don’t Overmix the Batter: Overmixing the cupcake batter can lead to tough, dense cakes. Mix just until the ingredients are combined and the batter is smooth. A few small lumps are acceptable; overworking the gluten will compromise the delicate texture you’re aiming for.
Cool Completely Before Frosting: This is a non-negotiable step. Frosting warm cupcakes will cause the frosting to melt into a greasy mess. Allow the cupcakes to cool completely on a wire rack for at least an hour, or until they are no longer warm to the touch, before you even think about frosting them.
Adjust Guava Gel Sweetness: The sweetness of guava juice can vary. Taste the guava gel mixture before it thickens significantly and adjust the sugar accordingly. You want a pleasant sweetness that complements, rather than overpowers, the fruit’s natural flavor.
Experiment with Frosting Texture: If you find your cream cheese frosting too soft after chilling, you can whip it again for another minute or two. If it’s too stiff, gently warm the bowl over a pot of warm water for a few seconds while whisking until it reaches a more spreadable consistency. Patience and slight adjustments go a long way.
Consider a Piping Bag: While spreading frosting with a spatula is perfectly fine, using a piping bag with a star tip can create a more professional and decorative finish. This allows for beautiful swirls and rosettes that add an extra layer of elegance to your Mini Hawaiian Guava Cakes.
Storage Savvy: Store your frosted cupcakes in an airtight container in the refrigerator. This not only keeps them fresh but also helps the frosting and glaze to set firmly, ensuring they look as good as they taste when served. Bringing them to room temperature for a few minutes before serving can soften the frosting slightly for a better mouthfeel.
Serving Suggestions for Mini Hawaiian Guava Cake
Decoration
To make your Mini Hawaiian Guava Cakes truly shine, consider a few simple yet effective decorative touches. The goal is to enhance their tropical theme and visual appeal, making them irresistible to guests. A final drizzle of the glossy guava gel, perhaps in a delicate swirl pattern, creates a beautiful sheen that catches the light.
For added texture and a more pronounced tropical essence, a sprinkle of toasted shredded coconut is highly recommended. Toasting the coconut brings out its nutty sweetness and adds a lovely crunch that contrasts wonderfully with the soft cake and creamy frosting. You can also add a small, fresh mint leaf or a tiny edible flower to the top of each cupcake for a pop of color and a touch of elegance.
Side Dishes
These delightful mini cakes pair wonderfully with a variety of refreshing accompaniments that complement their tropical flavors. A vibrant tropical fruit salad, featuring mango, pineapple, kiwi, and papaya, offers a burst of fresh acidity and complementary sweetness that balances the richness of the cake and frosting.
Creamy coconut rice can also serve as an intriguing, subtly sweet base that harmonizes with the cake’s tropical notes, creating a cohesive flavor profile for a special meal or dessert tasting. For beverages, a pitcher of chilled homemade lemonade or a refreshing iced tea infused with a hint of mint or ginger will cut through the sweetness and cleanse the palate beautifully between bites.
Creative Serving Ideas
Beyond just placing them on a plate, get creative with how you present your Mini Hawaiian Guava Cakes. Arrange them on a tiered dessert stand for a show-stopping centerpiece at parties or potlucks. For a more whimsical touch, serve them in small, decorative paper cups or nestled amongst fresh tropical flowers on a platter.
Consider offering a “dessert flight” where these mini cakes are paired with other small tropical-themed treats, like coconut macaroons or mango sorbet. This allows guests to sample a range of flavors and textures, truly immersing them in a tropical culinary experience. You could also serve them as a delightful accompaniment to a luau-themed feast, adding an authentic touch of Hawaiian sweetness to the celebration.
For a unique presentation, especially at children’s parties, consider creating mini “cake pops” by crumbling the unfrosted cake and mixing it with a small amount of frosting, rolling into balls, and dipping in melted white chocolate, then drizzling with the guava glaze. This playful approach transforms the cake into a fun, bite-sized treat that’s easy to handle and highly appealing to younger guests.
Another creative idea is to incorporate them into a larger dessert display, perhaps around a centerpiece fruit arrangement or a tropical-themed cake. Their small size allows them to fill gaps and add color and variety to a dessert buffet, ensuring there’s a sweet option for everyone. The versatility of these mini cakes makes them a standout addition to any gathering, big or small.
Finally, for a more intimate setting, serve each Mini Hawaiian Guava Cake individually on small dessert plates, perhaps with a light dusting of powdered sugar or a sprig of mint. This thoughtful presentation elevates the experience, making each guest feel special and appreciated. The delicate balance of flavors and textures in these cakes makes them a perfect individual indulgence.
Preparation & Storage
Storing Leftovers
Properly storing any leftover Mini Hawaiian Guava Cakes is essential to maintain their freshness and delightful texture. Once the cupcakes have been frosted and glazed, they are best kept in an airtight container. This prevents them from drying out and protects them from absorbing any unwanted odors from the refrigerator. Store the container in the refrigerator, where the cakes should remain fresh and delicious for up to 3 days.
If you find that the frosting becomes too firm after refrigeration, allow the cupcakes to sit at room temperature for about 15-20 minutes before serving. This will soften the frosting to a more pleasant, spreadable consistency, enhancing the overall eating experience. Unfrosted cupcakes, if you have any, can be stored in an airtight container at room temperature for up to 2 days.
Freezing
For longer-term storage, freezing is an excellent option to preserve the quality of your Mini Hawaiian Guava Cakes. It is highly recommended to freeze the cupcakes *before* frosting and glazing them. This prevents the toppings from becoming soggy or affected by freezer conditions. Arrange the unfrosted cupcakes in a single layer on a baking sheet lined with parchment paper.
Once the cupcakes are firm to the touch (this usually takes about 1-2 hours in the freezer), carefully wrap each individual cupcake tightly in plastic wrap. Then, transfer the wrapped cupcakes into a freezer-safe airtight container or a heavy-duty freezer bag. This double layer of protection helps prevent freezer burn. Properly frozen unfrosted cupcakes can be stored for up to 3 months.
Reheating
When you’re ready to enjoy your frozen Mini Hawaiian Guava Cakes, the thawing process is quite straightforward. For the best results and to maintain the cake’s texture, it’s recommended to thaw them overnight in the refrigerator. Simply transfer the frozen, wrapped cupcakes from the freezer to the fridge and let them thaw slowly.
Once thawed, you can then proceed with frosting and glazing them as per the recipe. If you’re in a hurry or prefer a slightly warmer treat, you can gently reheat individual frosted cupcakes. Place a frosted cupcake on a microwave-safe plate and heat on low power for very short intervals, about 10-15 seconds at a time. Be cautious not to overheat, as this can melt the frosting and compromise the cake’s texture. The goal is to warm it through, not cook it further.
Frequently Asked Questions
-
How do I choose ripe guava for my Mini Hawaiian Guava Cake?
Selecting ripe guavas is key to achieving the best flavor in your cakes and glaze. Look for fruits that yield slightly when gently squeezed, indicating ripeness. They should also have a fragrant, sweet aroma – the stronger, the better. The skin should be smooth and free from significant blemishes or dark spots, though a few minor imperfections are usually fine. If fresh guavas are unavailable or out of season, high-quality guava juice or nectar is an excellent and convenient substitute, often providing a concentrated flavor suitable for both the cake and the topping.
-
What’s the best way to store leftover cupcakes?
Storing leftover Mini Hawaiian Guava Cakes properly is crucial for maintaining their freshness and delightful texture. For frosted cupcakes, the best method is to place them in an airtight container and refrigerate them. This helps prevent them from drying out and protects the frosting and glaze from external contaminants. They will typically remain fresh and enjoyable for up to 3 days when stored this way. If you have unfrosted cupcakes, they can be stored in an airtight container at room temperature for up to 2 days, or frozen for longer preservation.
-
Can I freeze Mini Hawaiian Guava Cake?
Absolutely! Freezing is a fantastic method to extend the life of your Mini Hawaiian Guava Cakes, especially if you’ve made a larger batch. For optimal results, it’s best to freeze the cupcakes *before* they are frosted and glazed. This prevents the toppings from becoming compromised by the freezing and thawing process. To freeze, place the unfrosted cupcakes in a single layer on a baking sheet until they are firm, then wrap each one securely in plastic wrap, followed by a layer of aluminum foil or placing them in a freezer-safe airtight container. Properly stored, they can maintain their quality for up to 3 months. Thaw them overnight in the refrigerator for the best texture and flavor.