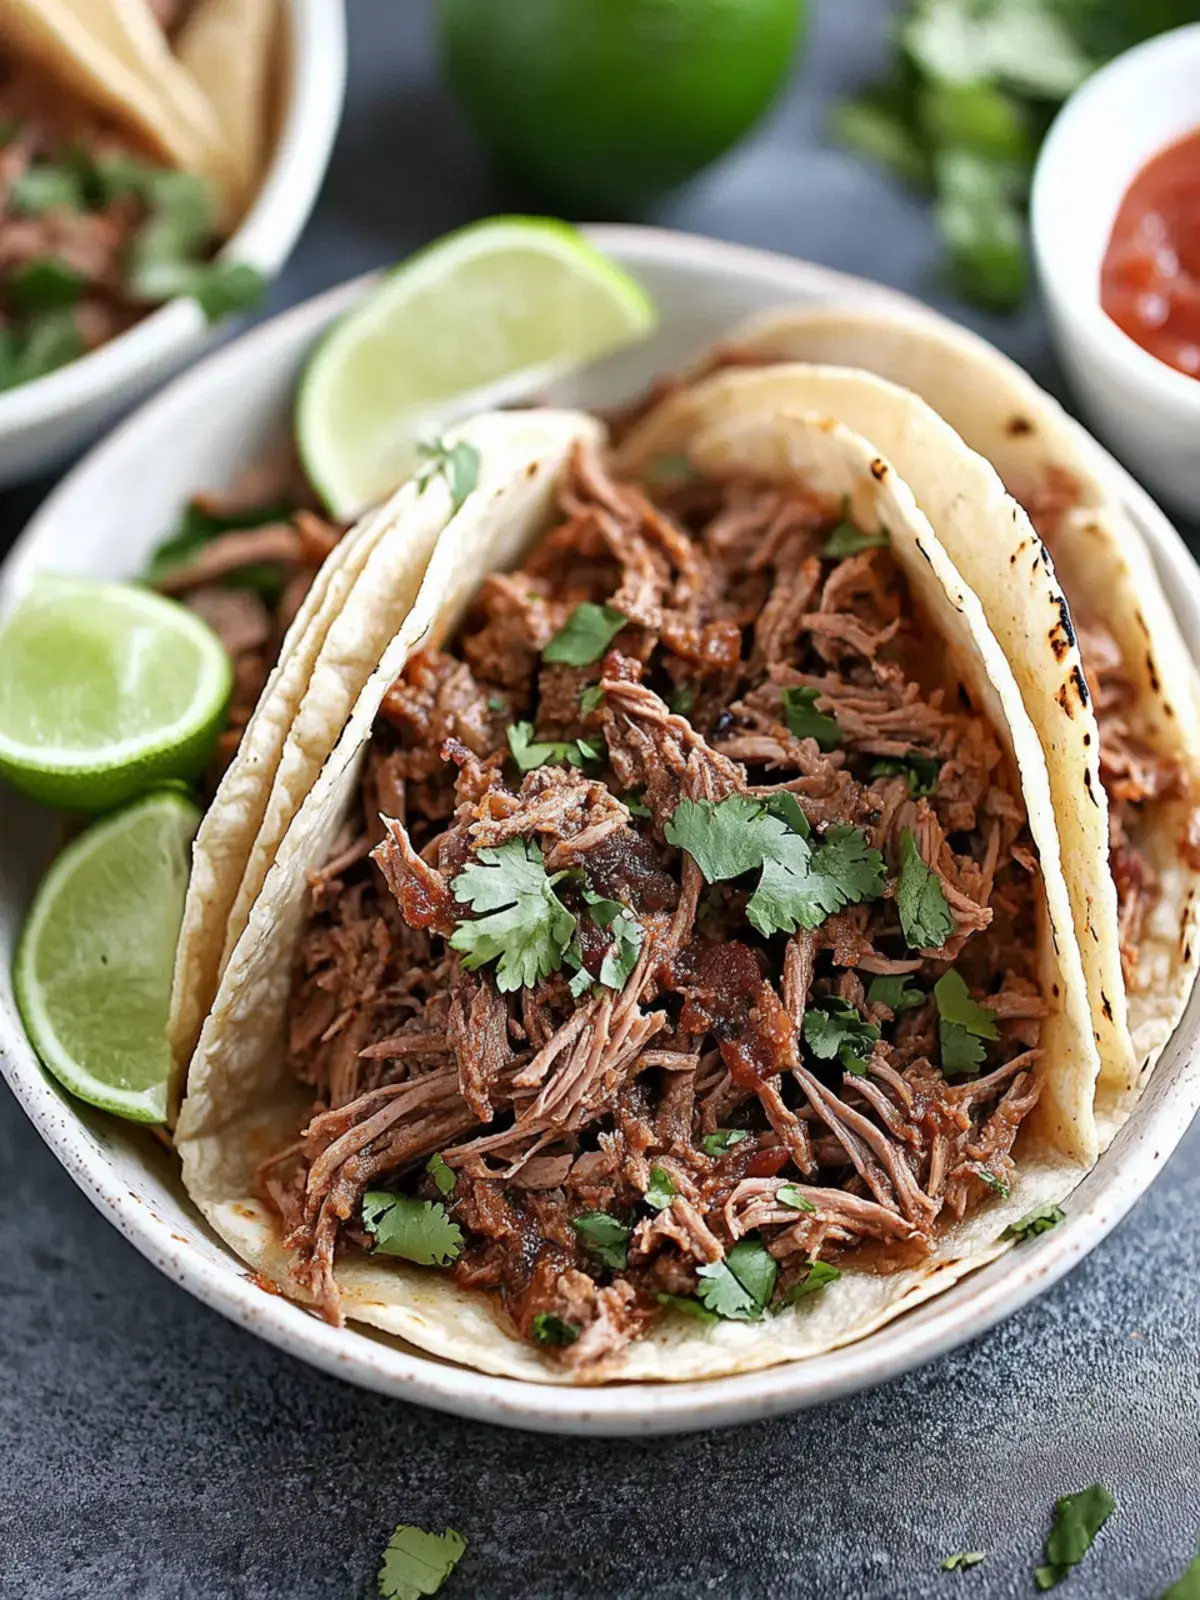
Easy Mexican Shredded Beef for Delicious Tacos at Home
The moment the rich aroma of spices envelops my kitchen, I know something wonderful is about to unfold. This Mexican Shredded Beef recipe is my secret weapon for transforming ordinary weeknight dinners into flamboyant feasts bursting with flavor.
I stumbled upon this culinary gem while experimenting with my Dutch oven, and it has since become a staple in my home, perfect for everything from taco Tuesdays to cozy burrito nights. Imagine tender, juicy beef that practically melts in your mouth, highlighted by the zesty kicks of lime and the warmth of cumin, making every bite an explosion of taste. Not only is it delightfully easy to whip up, but it’s versatile enough to adapt for various dishes, whether you crave hearty tacos, indulgent burritos, or crispy chimichangas, truly a dish for every occasion. Plus, it aligns perfectly with Keto, Paleo, and Whole 30 diets, making it a hit among family and friends, ensuring everyone can enjoy this delicious meal. So let’s dive into this delightful recipe and elevate your next meal to unforgettable heights, a culinary adventure awaits!
Why You Will Love This Recipe
- Rich, Flavorful Experience: Transform ordinary meals into extraordinary ones with this savory shredded beef, perfect for tacos and more, boasting deep, satisfying flavors that will have you coming back for seconds.
- Incredibly Versatile: Ideal for tacos, burritos, or even chimichangas, this recipe adapts beautifully to any of your cravings, serving as the perfect base for a multitude of delicious dishes.
- Easy Preparation: A straightforward cooking process in a Dutch oven or Instant Pot makes weeknight dinners a breeze, allowing you to create a gourmet meal with minimal stress and effort.
- Diet-Friendly Option: It fits seamlessly into Keto, Paleo, and Whole 30 lifestyles, so everyone can indulge without guilt, making it a go-to for health-conscious households.
- Mouthwatering Toppings: Pair it with fresh ingredients like Pico de Gallo and guacamole to elevate each bite, creating a symphony of textures and tastes that perfectly complement the rich beef.
- Impressive Crowd-Pleaser: Serve this dish at your next gathering, and watch as it quickly disappears—everyone will be asking for seconds, solidifying its status as a go-to party favorite.
Ingredients You Need
The foundation of any exceptional dish lies in the quality of its ingredients, and this Mexican Shredded Beef is no exception. We aim for fresh, vibrant components that will meld together to create an unforgettable culinary experience. Selecting the right cut of beef is paramount, as it dictates the tenderness and succulence of the final shredded product, ensuring a truly melt-in-your-mouth texture. The supporting cast of aromatics and spices are carefully chosen to build layers of authentic Mexican flavor, creating a depth that is both comforting and exciting.
Mouthwatering Mexican Shredded Beef for Epic Tacos at Home

This Mexican Shredded Beef recipe transforms weeknight dinners into flavorful feasts, perfect for tacos, burritos, and more. It's incredibly versatile, easy to prepare, and diet-friendly, making it a crowd-pleaser for any occasion.
- 3 lbs Beef Chuck Roast
- 1 can Diced Tomatoes & Green Chiles
- 4 cloves Garlic, minced
- 1 medium Yellow Onion, quartered
- 1 can Canned Green Chiles
- 1 tsp Whole Peppercorns
- 1 cup Water
- 1/2 cup Cilantro, chopped
- 3 tbsp Lime Juice
- 2 tbsp Cumin
- 1 tbsp Chili Powder
- 1Heat a large Dutch oven over medium-high heat. Add the beef chuck roast and sear until all sides are browned, about 4-5 minutes per side.
- 2Add the diced tomatoes, green chiles, minced garlic, quartered onion, whole peppercorns, and water to the pot. Stir gently to combine.
- 3Bring the mixture to a boil, then reduce the heat to low. Cover and simmer for about 2.5 hours, flipping the meat halfway through until it becomes fork-tender.
- 4Carefully remove the beef from the pot and transfer it to a bowl, reserving the cooking liquid. Use two forks to shred the beef into bite-sized pieces.
- 5Return the shredded beef to the pot and stir in the lime juice, chopped cilantro, 1 cup of the reserved cooking liquid, cumin, and chili powder. Mix well to ensure the beef is coated in flavorful seasonings.
- 6Cover the pot and simmer for an additional 15-20 minutes, allowing the flavors to meld together. Adjust seasoning as needed, and add more reserved liquid if the beef appears too dry.
- 7For crispy taco shells, heat oil in a skillet and fry corn tortillas until they bubble and brown. For soft tacos, simply warm flour tortillas in a skillet or oven until pliable.
Keywords: Mexican Shredded Beef, Tacos, Burritos, Dutch Oven, Slow Cooker, Instant Pot, Keto, Paleo, Whole 30, Beef Recipe, Dinner
- beef chuck roast: a well-marbled cut that promises incredible tenderness and juiciness when slow-cooked to perfection.
- diced tomatoes & green chiles: these form the savory base of the braising liquid, infusing the beef with moisture and a gentle heat that awakens the palate.
- garlic: freshly minced garlic is essential for its pungent aroma and deep flavor, contributing significantly to the overall savory profile of the dish.
- yellow onion: when quartered and simmered, the onion imparts a subtle sweetness and savory depth that enhances all the other ingredients.
- canned green chiles: these offer an adjustable level of mild heat, allowing you to customize the dish’s spiciness to your personal preference.
- whole peppercorns: their subtle peppery notes infuse the braising liquid with a gentle warmth that complements the other spices beautifully.
- water: this is crucial for the braising process, ensuring the beef cooks evenly and remains incredibly moist throughout the extended cooking time.
- cilantro: a generous amount of fresh cilantro adds a burst of herbaceous brightness and a vibrant green hue, perfect for finishing.
- lime juice: fresh lime juice is indispensable for cutting through the richness of the beef and adding a zesty tang that elevates every bite.
- cumin: this warm, earthy spice is a hallmark of Mexican cuisine, providing that signature aroma and deeply satisfying flavor.
- chili powder: a good quality chili powder adds a layer of rich, mild heat and a beautiful color, deepening the complexity of the beef’s seasoning.
The exact quantities for each ingredient are conveniently detailed in the recipe card, ensuring you have everything you need for success.
Variations
This Mexican Shredded Beef is a chameleon in the kitchen, readily adapting to various dietary needs and flavor preferences. For those following a ketogenic lifestyle, swapping out traditional tortillas for low-carb alternatives or serving the flavorful beef over a bed of seasoned cauliflower rice offers a satisfying and compliant meal. You can also embrace the Paleo way by opting for fresh tomatillos instead of canned tomatoes and chiles, and perhaps enriching the dish with a dollop of creamy avocado. For individuals with gluten sensitivities, ensure your chosen serving vessels are gluten-free, such as corn tortillas or even a hearty salad bowl topped with all your favorite Mexican fixings.
To inject an extra layer of excitement, consider adding finely diced jalapeños or a touch of your favorite hot sauce during the simmering stage; this will amplify the heat and provide a thrilling kick. If you’re seeking a plant-based alternative, shredded jackfruit or sautéed mushrooms can beautifully mimic the texture of shredded beef when cooked with the same aromatic spices. For a truly unique taste experience, experiment with a splash of orange juice alongside the lime juice; this unexpected citrus combination adds a delightful sweetness that plays wonderfully with the savory spices. A whisper of smoked paprika or chipotle powder can also transport your shredded beef into the realm of authentic barbacoa, offering a wonderfully smoky dimension that is utterly irresistible.
You might even consider a herbaceous twist by substituting the cilantro with fresh mint or basil; this aromatic switch-up introduces an unexpected, uplifting freshness that can surprise and delight your taste buds. Regardless of how you choose to adapt it, this versatile Mexican Shredded Beef recipe remains a delicious and satisfying cornerstone for any meal. It’s a fantastic option when exploring dinner ideas, proving its worth time and time again.
How to Prepare Mexican Shredded Beef
Step 1: Sear the Beef
Begin by heating a large, heavy-bottomed Dutch oven over medium-high heat. This initial searing step is crucial for developing a rich, deeply browned crust on the beef chuck roast. A well-seared exterior not only adds visual appeal but also locks in moisture and contributes significantly to the overall flavor complexity of the dish.
Carefully place the beef chuck roast into the preheated Dutch oven, ensuring not to overcrowd the pot, which could lead to steaming rather than searing. Allow the roast to brown undisturbed for approximately 4 to 5 minutes per side. You are looking for a deep, mahogany color that signifies a perfect sear. This golden-brown crust is where a significant portion of the dish’s foundational flavor is built.
Once all sides of the beef chuck roast have been beautifully browned, remove it from the Dutch oven and set it aside on a clean plate. This process of searing is the first, vital step in creating tender, flavorful shredded beef, setting the stage for the slow braising that follows. The rendered fat left in the pot will also be used to build the aromatic base for the sauce, so don’t discard it.
Step 2: Combine the Braising Ingredients
With the beef seared and set aside, it’s time to introduce the vibrant ingredients that will transform it into tender, flavorful shredded meat. Into the same Dutch oven, where the delicious beef drippings still reside, add the can of diced tomatoes and green chiles. This canned mixture provides both liquid and a foundational spice that is essential for the braising process.
Next, incorporate the minced garlic and the quartered yellow onion into the pot. The garlic will release its pungent, aromatic oils, infusing the entire dish with its irresistible fragrance, while the onion will soften and impart a subtle sweetness as it cooks. Add the whole peppercorns, which will gently release their subtle peppery notes throughout the long cooking time, adding a layer of nuanced warmth.
Finally, pour in the cup of water. This liquid is essential for the braising process, ensuring the beef has ample moisture to become incredibly tender and fall-apart soft. Stir everything gently to combine all the ingredients, ensuring they are evenly distributed in the pot, creating a savory bath for the beef. This combination of ingredients is the heart of the Mexican flavor profile.
Step 3: Simmer and Tenderize
Now, return the seared beef chuck roast to the Dutch oven, nestling it into the mixture of tomatoes, chiles, garlic, onion, peppercorns, and water. Ensure the roast is mostly submerged in the liquid; if it seems a bit dry, you can add a touch more water or broth, but avoid completely covering the meat. Bring the entire mixture to a rolling boil over medium-high heat, allowing the flavors to begin their magical transformation.
Once boiling, immediately reduce the heat to the lowest possible setting to achieve a gentle simmer. This slow and low cooking method is key to breaking down the tough connective tissues in the chuck roast, rendering it exceptionally tender and succulent. Cover the Dutch oven tightly with its lid to trap the steam and moisture, which are critical for the braising process. You can then let this magical transformation happen for approximately 2.5 hours.
Halfway through the cooking time, it’s beneficial to carefully remove the lid and flip the beef chuck roast. This ensures that all sides of the meat are exposed to the flavorful braising liquid, promoting even cooking and tenderness throughout. Continue to simmer, covered, until the beef is so tender that it easily falls apart when pierced with a fork, indicating it’s perfectly ready for shredding. This long, slow simmer is the secret to its melt-in-your-mouth texture.
Step 4: Shred the Beef
Once the beef chuck roast has reached that incredibly tender, fork-tender stage, carefully remove it from the Dutch oven. It will likely be steaming and incredibly fragrant, a testament to the hours of slow cooking. Transfer the cooked beef to a large heatproof bowl or a sturdy cutting board. It’s important to reserve all the delicious cooking liquid remaining in the Dutch oven; this liquid is packed with flavor and will be crucial for rehydrating and seasoning the shredded beef.
Using two sturdy forks, begin to shred the beef into bite-sized pieces. This is where the magic of the slow braising truly shines, as the meat should practically fall apart with minimal effort. Continue shredding until all the large chunks of beef have been broken down into manageable strands. The texture should be soft, moist, and inviting, ready to absorb more flavor.
Take your time during this shredding process to ensure an even texture. You want pieces that are not too large and not too small, perfect for filling tacos or burritos. The visual of the beautifully shredded beef, glistening with its own juices, is incredibly satisfying. This is the stage where the beef truly becomes “shredded beef,” ready for its final flavorful embrace. This visual is a preview of the delicious meal to come.
Step 5: Mix in the Seasonings
After the beef has been beautifully shredded, return it to the Dutch oven, placing it back into the flavorful braising liquid. This step is crucial for reintroducing moisture and ensuring every strand of beef is coated in the rich, savory broth. The remnants of the tomatoes, chiles, and aromatics will now cling to the shredded meat, enhancing its appeal.
Now, it’s time to amp up the flavor profile with the essential seasonings. Stir in the fresh lime juice; its bright, zesty acidity is vital for cutting through the richness of the beef and adding a refreshing counterpoint. Add the chopped fresh cilantro for a burst of herbaceous brightness and a pop of color that signifies freshness. Incorporate one cup of the reserved cooking liquid, which will help create a delicious sauce and prevent the shredded beef from becoming dry.
Finally, stir in the ground cumin for its characteristic warm, earthy aroma and the chili powder for a touch of deep, mild heat. Mix everything together thoroughly, ensuring that the shredded beef is evenly coated with all the spices and liquids. You want every morsel to be infused with these vibrant Mexican flavors, creating a truly cohesive and delicious dish that is ready for its final warming. This well-mixed blend promises an explosion of taste.
Step 6: Final Simmer and Flavor Melding
With all the shredded beef and seasonings back in the Dutch oven, place the lid back on securely. Return the pot to low heat for a final, brief simmer. This short cooking period, typically 15 to 20 minutes, is essential for allowing all the incredible flavors to meld together harmoniously. It gives the beef time to fully absorb the seasonings and for the sauce to thicken slightly, coating each strand beautifully.
During this final simmer, it’s important to check the consistency of the beef and sauce. If the shredded beef appears to be too dry or the sauce too thick, don’t hesitate to add a little more of the reserved cooking liquid, a tablespoon at a time, until you achieve your desired moistness and consistency. This step ensures the beef remains succulent and flavorful, never dry or clumpy.
Taste the mixture and adjust seasonings as needed. You might want a little more lime juice for brightness, a pinch more chili powder for warmth, or even a touch of salt. This final tasting and adjustment ensures the Mexican Shredded Beef is perfectly balanced and to your liking. Once satisfied, remove it from the heat, and it’s ready to be served, a testament to slow-cooked deliciousness. The anticipation builds for the next step: preparing the perfect vessel to enjoy this magnificent shredded beef.
Pro Tips for Mexican Shredded Beef
Quality Meat is Key: Always select a well-marbled beef chuck roast for your Mexican Shredded Beef. The fat interlaced throughout the meat will render down during the slow cooking process, ensuring your shredded beef is incredibly juicy, tender, and full of flavor. A good marbling is the secret to that melt-in-your-mouth texture that truly defines this dish.
Reserve That Liquid Gold: Never discard the braising liquid after shredding the beef! This liquid is packed with concentrated flavor from the beef and aromatics. When shredding and re-seasoning, using a portion of this liquid is essential for maintaining moisture and preventing the shredded beef from becoming dry, especially when storing leftovers.
The Power of Fresh Lime: Do not underestimate the impact of fresh lime juice in this recipe. It is the magical ingredient that brightens all the rich, savory flavors of the beef and spices, creating a beautifully balanced dish. A generous squeeze right before serving truly elevates every single bite.
Embrace Alternative Cooking Methods: While a Dutch oven works beautifully, consider using a slow cooker or an Instant Pot for even more convenience. Adjust the cooking times accordingly for these methods; slow cookers will require longer, low-heat cooking, while an Instant Pot can significantly reduce the overall time. Regardless of the method, the results will be delicious.
Customize Your Spice Level: This recipe provides a guideline for spice, but feel free to tailor it to your preference. If you love a fiery kick, increase the amount of canned green chiles or add a pinch of cayenne pepper. Conversely, if you prefer milder flavors, reduce the chili powder and chiles, or even omit the peppercorns for a gentler taste.
Tortilla Perfection: The way you prepare your tortillas can make a significant difference in the final presentation and enjoyment of your tacos or burritos. For crispy taco shells, a quick fry in hot oil until bubbly and golden is ideal. For soft tacos, warming flour or corn tortillas in a dry skillet or briefly in the oven until pliable creates the perfect pliable wrap.
Serving Suggestions for Mexican Shredded Beef
Decoration
Elevate the visual appeal of your Mexican Shredded Beef by garnishing it with vibrant, fresh ingredients. A sprinkle of finely chopped fresh cilantro adds a burst of green and a refreshing herbal note that complements the rich beef beautifully. Thinly sliced radishes provide a delightful crunch and a peppery bite, offering a textural contrast that is both visually striking and palate-pleasing. A few slivers of red onion or pickled red onions can add a sharp, tangy counterpoint and a beautiful splash of color, enhancing the overall presentation.
Consider adding a dollop of sour cream or a drizzle of Mexican crema for a creamy finish and visual appeal. For a bit of color and a subtle sweetness, a scattering of corn kernels, whether fresh or roasted, works wonderfully. Avocado slices or cubes, with their creamy texture and appealing green hue, are always a welcome addition, providing both richness and visual interest. A final squeeze of fresh lime juice over everything not only enhances the flavor but also adds a glistening finish that makes the dish look incredibly appetizing and vibrant.
Side Dishes
To create a truly satisfying and complete Mexican feast, pair your shredded beef with complementary side dishes. Savory Mexican black beans, either refried or whole, are a classic and hearty accompaniment that adds protein and fiber. A vibrant cilantro-lime rice or simple white rice provides a neutral base that soaks up all the delicious flavors of the beef and accompanying sauces. Mexican street corn, or esquites, with its creamy, cheesy, and slightly spicy profile, offers a delightful sweet and savory contrast.
A fresh and zesty Pico de Gallo, made with ripe tomatoes, onions, cilantro, and jalapeño, brings a burst of freshness and acidity that cuts through the richness of the beef. Creamy, homemade guacamole or simple sliced avocado adds a luxurious, cooling element and healthy fats that are essential for balancing the meal. For those who enjoy a bit of heat, a side of pickled jalapeños or a spicy salsa verde provides an extra kick that can be added to taste. Consider serving with warm corn or flour tortillas, as these are the perfect vehicles for enjoying all the components together.
Creative Serving Ideas
Beyond traditional tacos and burritos, this Mexican Shredded Beef lends itself to numerous creative culinary applications. Stuff bell peppers or poblano peppers with the shredded beef mixture, top with cheese, and bake for delicious stuffed peppers. Create a flavorful quesadilla by layering the shredded beef and cheese between tortillas and pan-frying until golden and crispy. For a comforting casserole, layer the beef with corn tortillas, beans, cheese, and a savory enchilada sauce before baking.
Build a vibrant nacho platter by spreading tortilla chips, topping generously with the shredded beef, cheese, beans, and your favorite nacho toppings like jalapeños and sour cream. Consider serving it over a bed of crunchy lettuce for a lighter taco salad, or use it as a filling for empanadas or empanaditas for a delightful handheld treat. You can even use it to top loaded baked potatoes or sweet potatoes for a hearty and unexpected meal. For a true comfort food twist, consider making shredded beef tamales, infusing the masa dough with its rich flavor.
Preparation & Storage
Storing Leftovers
Proper storage is crucial for preserving the incredible flavor and texture of your leftover Mexican Shredded Beef. Once the beef has cooled to room temperature, transfer it to an airtight container. This prevents it from drying out and absorbs any unwanted odors from other foods in the refrigerator. Ensure the container is sealed tightly to maintain freshness and prevent spoilage.
When stored correctly in the refrigerator, this delicious shredded beef will remain at its best for up to 5 days. This makes it an excellent candidate for meal prepping, allowing you to enjoy flavorful leftovers throughout the week without compromising on taste or quality. Always label your container with the date of preparation for easy tracking.
Freezing
For longer-term storage, freezing is an excellent option to keep your Mexican Shredded Beef ready for future meals. Allow the cooked beef to cool completely before portioning it into freezer-safe containers or heavy-duty freezer bags. Removing as much air as possible from the packaging is vital to prevent freezer burn, which can affect the texture and flavor of the meat.
You can freeze the shredded beef in meal-sized portions, making it incredibly convenient for quick dinners later on. Properly packaged and frozen, the shredded beef will retain its quality for up to 3 months. This long shelf life ensures you can always have this versatile dish on hand for those busy weeknights or sudden cravings, a true pantry staple.
Reheating
Reheating your Mexican Shredded Beef gently is key to restoring its moisture and flavor. If you’re reheating from frozen, allow the beef to thaw completely in the refrigerator overnight before proceeding. Then, transfer the thawed or refrigerated beef to a skillet or saucepan over low heat.
Add a splash of the reserved cooking liquid, beef broth, or even a little water to the skillet. This moisture is critical for rehydrating the meat and ensuring it doesn’t dry out during reheating. Stir occasionally, allowing the beef to warm through evenly for about 10-15 minutes. Avoid high heat, which can toughen the meat. The goal is to gently coax the flavors and moisture back into the shredded beef, making it as delicious as when it was first prepared.
Frequently Asked Questions
-
How do I choose the best beef for shredding to ensure maximum tenderness and flavor?
Absolutely! For the most tender and flavorful shredded beef, opt for a cut with good marbling, such as beef chuck roast. Look for meat where you can see streaks of fat running through it; this fat renders during slow cooking, basting the meat and ensuring it remains incredibly moist and succulent. While other cuts like top round can be used, they tend to be leaner and may require more careful handling to avoid drying out. A well-marbled chuck roast is undeniably the superior choice for that melt-in-your-mouth texture that defines exceptional shredded beef.
-
What is the best way to store leftover Mexican Shredded Beef to maintain its quality, and how long can it be kept?
Very! To maintain its quality, store your leftover Mexican Shredded Beef in an airtight container in the refrigerator. Ensure the beef has cooled down to room temperature before sealing the container to prevent condensation, which can affect texture. When stored properly, it can be kept in the refrigerator for up to 5 days. For longer preservation, freezing in airtight, freezer-safe bags or containers is recommended, where it can last for up to 3 months. Always label your containers with the date to keep track of freshness.
-
Can I freeze the Mexican Shredded Beef, and if so, what is the best method for freezing and thawing?
Absolutely! Freezing Mexican Shredded Beef is a fantastic way to preserve it for future use. First, allow the cooked beef to cool completely. Then, portion it into freezer-safe bags or containers, pressing out as much air as possible to prevent freezer burn; vacuum-sealed bags are ideal. You can freeze it for up to 3 months. To thaw, the best method is to transfer the frozen beef to the refrigerator overnight. This slow thawing helps retain the moisture and texture. Once thawed, it can be gently reheated on the stovetop or in the oven, ideally with a splash of extra liquid to ensure it remains moist and flavorful.