Melting Potatoes – The Best Roasted Fondant Potatoes!
There’s a magical transformation that happens in the oven, turning humble potatoes into something truly extraordinary. They become the star of the show, a side dish that people talk about long after the meal is over.
This recipe for melting potatoes, also known as fondant potatoes, achieves just that with a simple yet brilliant technique. It’s about coaxing out the best texture and flavor from the potato, creating a dish that is both comforting and sophisticated.
Why You Will Love This Recipe
- Incredible Texture: Experience a delightful contrast between a crispy, golden exterior and an impossibly tender, melt-in-your-mouth interior that defines these potatoes.
- Rich Flavor Infusion: The slow roasting process, combined with butter, herbs, and savory broth, imbues each potato slice with deep, satisfying flavors.
- Effortless Elegance: Despite their gourmet taste and appearance, these potatoes are surprisingly easy to make, making them perfect for both weeknight dinners and special occasions.
- Versatile Pairing: Their deliciousness makes them a perfect companion to a wide array of main courses, from grilled steaks to holiday roasts, elevating any meal.
- Minimal Fuss, Maximum Impact: This recipe requires straightforward steps and common ingredients, yet delivers a truly impressive result that will have guests asking for the recipe.
Ingredients You Need
The beauty of melting potatoes lies in its simplicity, relying on the quality of a few key ingredients to shine. Opting for fresh, high-quality potatoes will make a noticeable difference in the final texture and taste. Similarly, using good olive oil and fresh herbs will enhance the overall flavor profile of this delightful dish.
Melting Potatoes

Golden roasted potatoes smothered in butter, baked until they're golden and crispy outside and melt-in-your-mouth tender inside.
- 2 tablespoons olive oil
- 2 tablespoons melted butter
- salt and freshly ground black pepper, to taste
- 1 pound Yukon gold potatoes
- 1 tablespoon fresh chopped thyme
- ½ cup vegetable broth
- 2 cloves garlic, minced
- 1Melt butter. Add butter to a saucepot and melt it over medium-low heat. Once the butter is melted, stir in olive oil.
- 2Peel and slice the potatoes. Preheat oven to 450ºF. Peel the potatoes. Cut the potatoes into ½-inch thick slices crosswise.
- 3Add the potatoes and thyme to the butter mixture. Toss well to coat the potatoes. Season the potatoes with salt and pepper.
- 4Bake the potatoes. Arrange the potatoes on a rimmed baking sheet in a single layer. Drizzle any remaining butter over the potatoes. Bake the potatoes for 15 minutes. Flip them gently and bake for another 15 minutes.
- 5Add the broth and bake again. Combine vegetable broth with garlic. Pour the vegetable broth mixture over the potatoes. Bake the potatoes for another 15 minutes.
- 6Serve. Drizzle any cooking liquid over the melting potatoes and serve them warm.
Keywords: potatoes, side dish, roasted, butter, garlic, thyme, vegetarian, german
Quantities for each ingredient can be found within the accompanying recipe card, ensuring precision in your culinary creation.
Variations
To cater to different dietary preferences and taste buds, several exciting variations can be explored for these melting potatoes. Imagine transforming this classic dish into something entirely new while retaining its core appeal.
For a delicious vegan rendition, the butter can be effortlessly substituted with a high-quality vegan butter alternative or a generous amount of extra virgin olive oil. Ensure the olive oil is flavorful to compensate for the richness lost from the dairy butter. Using vegetable broth is already standard, so the swap is quite straightforward, resulting in a plant-based side that’s just as decadent.
To embrace a low-carb lifestyle, you might consider substituting the potatoes altogether. While not technically “melting potatoes” anymore, alternatives like thick slices of celeriac or even large, firm parsnips can be roasted using the same butter and broth method. These root vegetables will develop a wonderfully tender texture and absorb the savory liquids beautifully.
Adding a touch of Mediterranean flair is another simple yet impactful variation. Introduce some Kalamata olives, quartered artichoke hearts, or a sprinkle of crumbled feta cheese during the last few minutes of baking. A zest of lemon or a pinch of dried oregano can also be added to the broth mixture for an extra layer of bright, herbaceous flavor.
How to Prepare melting potatoes
Step 1: Prepare the Butter Mixture and Potatoes
Begin by gently melting your butter in a small saucepan over low heat. It’s crucial to avoid scorching the butter, as this can impart an undesirable bitter taste to the final dish. Once the butter has fully liquefied, carefully stir in your olive oil.
This combination of butter and oil is key; the oil raises the smoke point of the butter, allowing for higher roasting temperatures without burning. While the butter mixture is preparing, turn your attention to the potatoes. Preheat your oven to a robust 450°F (230°C), ensuring it reaches the optimal temperature for achieving that desirable crispiness.
When selecting your potatoes, Yukon Gold are often preferred for their creamy texture and slight sweetness, which complement the savory elements beautifully. Russet potatoes can also be used and will yield a fluffier interior. Wash your potatoes thoroughly under cool running water; you can choose to peel them or leave the skins on for added texture and nutrients. The skins, when roasted, become wonderfully tender and slightly chewy.
Next, carefully slice the potatoes into uniform rounds, aiming for a thickness of about ½ inch. Consistent thickness is vital for even cooking; too thin and they may turn to mush, too thick and they might not cook through completely. Place the sliced potatoes into a large bowl, ensuring you have enough space to toss them thoroughly without crushing them.
Finely chop your fresh thyme leaves. The aromatic quality of fresh thyme is unparalleled, offering a warm, slightly peppery, and earthy note that pairs exceptionally well with potatoes. If fresh thyme is unavailable, you can substitute with dried thyme, but use about one-third of the amount, as dried herbs are more concentrated.
Add the chopped thyme to the bowl with the potato slices. This is also the opportune moment to season generously. Sprinkle in your salt and freshly ground black pepper. Don’t be shy with the seasoning; potatoes are quite forgiving and absorb flavors wonderfully. The salt will not only enhance the potato’s natural taste but also help in drawing out moisture, contributing to a crispier texture.
Pour the warm, combined butter and olive oil mixture over the potatoes and thyme. Using your hands or a large spoon, gently toss the potato slices until they are evenly coated with the flavorful oil mixture. Ensure each slice has a glistening sheen, indicating it’s well-prepared for the intense heat of the oven.
Step 2: The Initial Roast
Select a sturdy, rimmed baking sheet or roasting pan. A metal pan is highly recommended, as it distributes heat efficiently and can withstand the thermal shock of adding liquid later. Ensure the sides of the pan are tall enough to contain the liquid without spillage during the roasting process.
Carefully arrange the coated potato slices on the prepared baking sheet. It’s important to place them in a single layer, ensuring that the potatoes are not overlapping. This single layer is crucial for achieving an even, golden-brown crispiness on all sides. Overlapping potatoes will steam rather than roast, preventing the desired texture from developing.
Drizzle any remaining butter and oil mixture from the bowl over the arranged potatoes. This ensures that every surface has been exposed to the flavor-rich coating, further enhancing their taste and promoting browning. The initial roast is where the potatoes begin to soften and develop their first layer of delicious color and texture.
Carefully place the baking sheet into your preheated oven. The intense heat of 450°F (230°C) will immediately begin to work on the potatoes, crisping up the edges and starting the transformation. Set a timer for 15 minutes, as this initial roasting period is critical for setting the stage for the subsequent steps.
Once the 15 minutes have elapsed, carefully remove the baking sheet from the oven. Using a spatula or tongs, gently flip each potato slice. This flipping action is essential for ensuring that both sides of the potato receive equal exposure to the heat, promoting uniform browning and crispiness. Avoid disturbing them too much, as you want to maintain their shape.
Return the flipped potatoes to the oven and continue to bake for another 15 minutes. During this second phase of roasting, the potatoes will continue to deepen in color, becoming more tender on the inside and developing a satisfyingly crisp exterior. The aroma filling your kitchen at this stage will be simply divine, a promise of the deliciousness to come.
Step 3: Infusing with Broth and Garlic
While the potatoes are undergoing their second roasting phase, prepare the flavorful broth mixture. In a small bowl, combine your vegetable broth with the minced fresh garlic. Mincing the garlic finely ensures that its potent flavor is evenly distributed throughout the broth and subsequently infused into the potatoes.
Fresh garlic offers a sharper, more pungent flavor that adds a wonderful depth compared to garlic powder. If you prefer a milder garlic note, you can lightly sauté the minced garlic in a tiny bit of oil before adding it to the broth, though this is an optional step that adds complexity.
Once the potatoes have completed their second 15-minute roast and have been flipped, it’s time to introduce the liquid element that will create the “melting” effect. Carefully remove the baking sheet from the oven, taking care as the pan and potatoes will be very hot.
Gently pour the prepared vegetable broth and garlic mixture evenly over the potatoes. Aim to distribute the liquid across the entire baking sheet, ensuring that each potato slice is partially submerged in the savory liquid. This broth will bubble and steam, helping to cook the potatoes from the inside out while the residual heat from the pan and oven continue to crisp the surfaces.
The garlic, now softened and infused into the broth, will release its aromatic oils, further enhancing the overall flavor profile of the dish. This combination of butter, herbs, broth, and garlic creates a rich, savory base that the potatoes will absorb during their final cooking stage.
Return the baking sheet, now containing the potatoes and broth, to the hot oven. The oven temperature remains at 450°F (230°C). This final roasting period is crucial for tenderizing the potatoes completely and allowing the broth to reduce slightly, concentrating its flavors and creating a luscious sauce.
Step 4: The Final Roast and Reduction
Set your timer for another 15 minutes. During this final stage, the magic truly happens. The potatoes will continue to soften, absorbing the flavorful broth, and the edges will achieve a perfect tenderness that lives up to the “melting” name. The broth itself will reduce, thickening slightly and coating the potatoes in a delicious, savory glaze.
Keep an eye on the potatoes as they finish. You’re looking for them to be incredibly tender when pierced with a fork and for the liquid to have reduced to a luscious, syrupy consistency. The exact time might vary slightly depending on your oven and the thickness of your potato slices, so visual cues are your best guide.
If the liquid seems to be reducing too quickly before the potatoes are fully tender, you can add a tablespoon or two of warm water or more broth to prevent them from drying out. Conversely, if after 15 minutes the liquid is still quite thin, you can leave them in for a few extra minutes, watching carefully to prevent burning.
The aroma that will emanate from your oven during this last 15 minutes is truly intoxicating – a rich blend of roasted potatoes, garlic, and thyme, all enrobed in a buttery, savory essence.
Step 5: Resting and Serving
Once the potatoes have reached their peak tenderness and the broth has reduced to a glossy coating, carefully remove the baking sheet from the oven. The potatoes will be exceptionally delicate at this point, so handle them with care.
Allow the melting potatoes to rest for a few minutes directly on the baking sheet. This brief resting period allows the flavors to meld further and the residual heat to finish the cooking process. It also helps the potatoes hold their shape a little better before serving.
Before plating, you can gently spoon any remaining cooking liquid from the bottom of the pan over the top of the potatoes. This final drizzle of the reduced buttery broth adds an extra layer of richness and moisture, ensuring every bite is succulent.
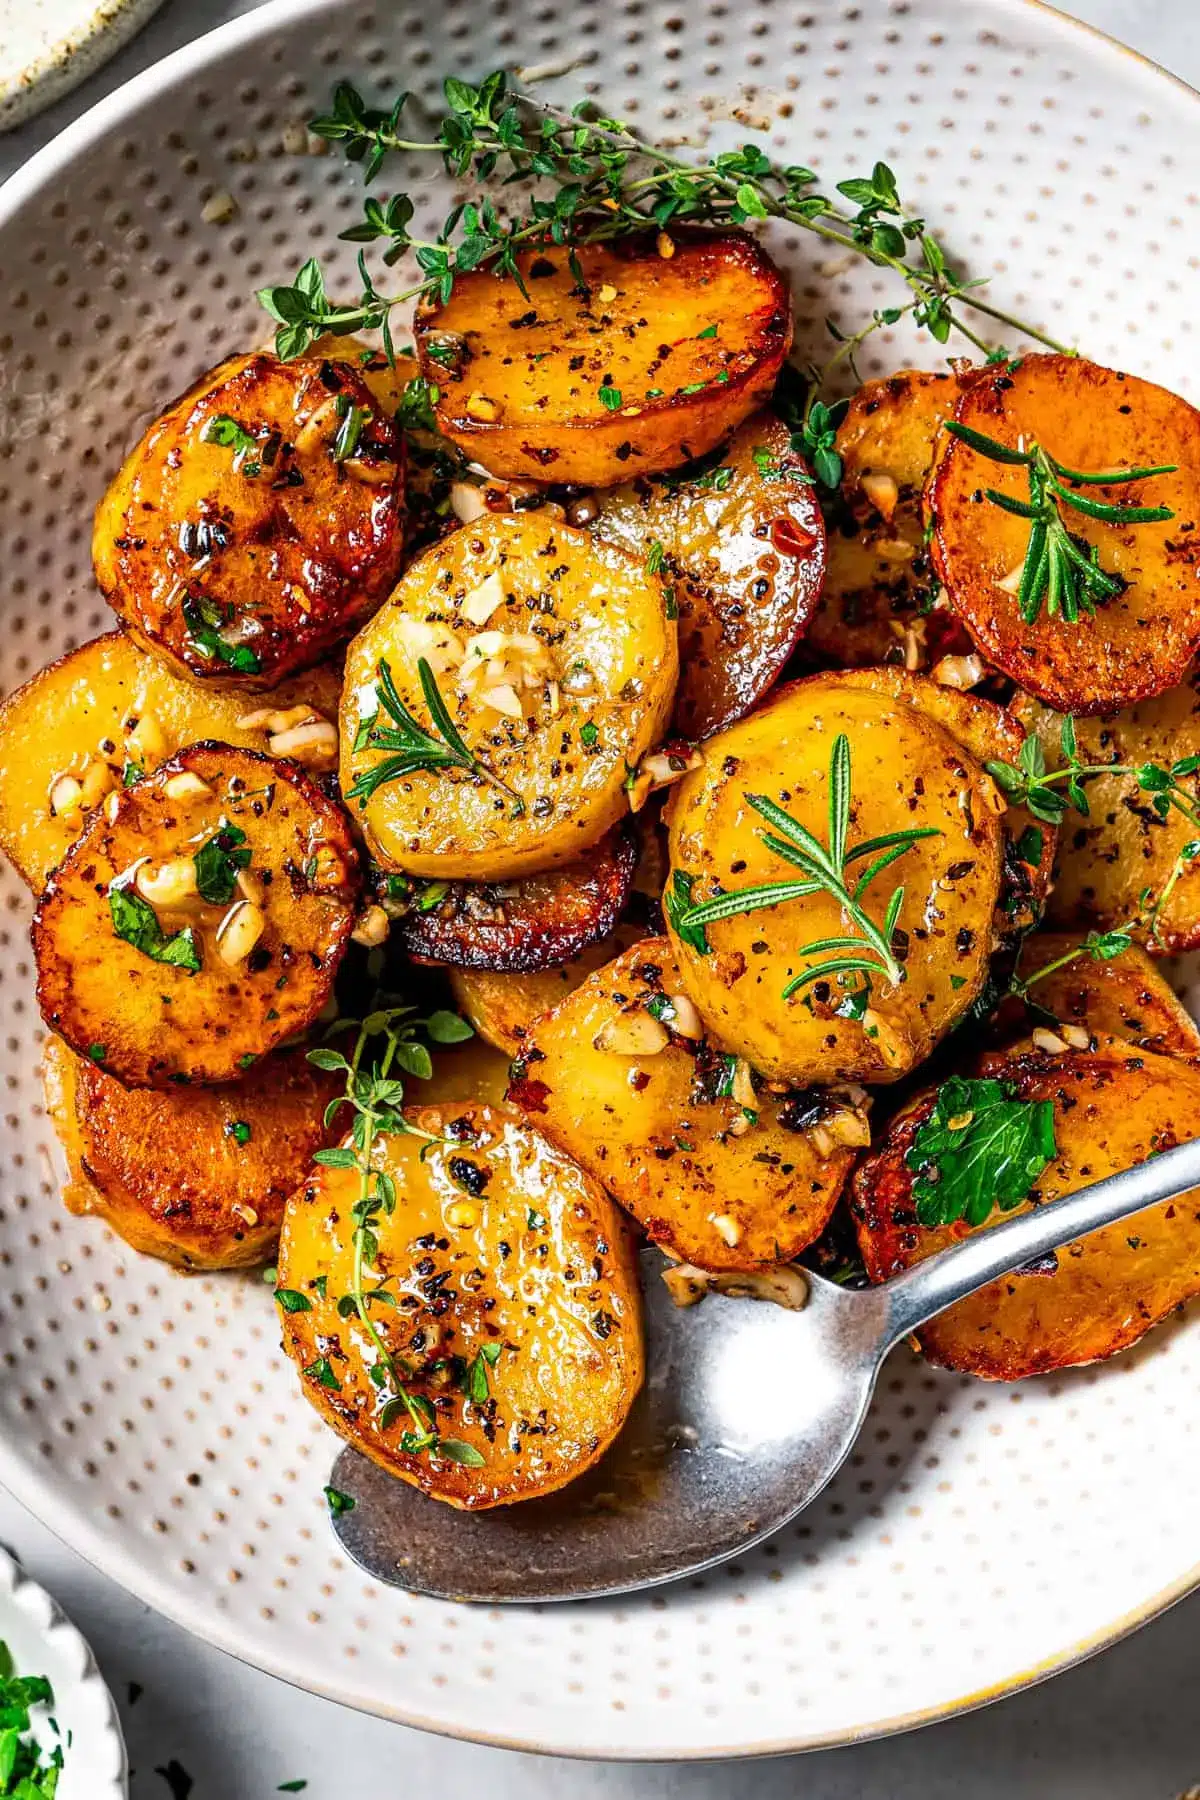
These melting potatoes are best served warm, allowing their tender interior to be fully appreciated. Their luxurious texture and rich flavor make them an ideal accompaniment to a wide range of main courses. They are a testament to how simple ingredients, when treated with care and technique, can create something truly spectacular.
Step 6: Final Presentation
The presentation of melting potatoes can be as simple or as elaborate as you desire. For a casual meal, they can be scooped directly from the baking sheet onto plates. However, for a more refined presentation, you can carefully arrange the potato slices on a serving platter.
A garnish of fresh parsley, finely chopped, can add a vibrant splash of color and a hint of freshness that cuts through the richness of the dish. A few sprigs of fresh thyme can also be placed artfully on top for visual appeal and to echo the flavors within.
Consider drizzling a touch more of the reduced cooking liquid over the potatoes just before serving. This liquid is incredibly flavorful and acts as a natural, rich sauce, enhancing the overall dining experience. The glossy sheen it imparts makes the dish look even more inviting and delicious.
These potatoes are a truly versatile side dish. Their comforting nature and luxurious texture make them suitable for everything from a simple weeknight dinner to a grand holiday feast. They are a testament to the fact that often, the most profound culinary experiences come from mastering simple techniques.
Pro Tips for melting potatoes
Uniformity is Key: For the most consistent results, ensure all your potato slices are cut to the same thickness, ideally around ½ inch. This guarantees that every piece cooks evenly and achieves that perfect melting texture without any undercooked or overcooked sections.
Don’t Skimp on the Fat: The combination of butter and olive oil is crucial for both flavor and preventing the butter from burning. Use good quality ingredients here, as they are front and center in the taste profile of this dish. The richness of the fat is what contributes significantly to the potatoes’ luxurious mouthfeel.
High Heat, Short Time: Roasting at a high temperature, like 450°F (230°C), is essential for achieving that desirable crispy exterior. However, the total cooking time isn’t excessively long, making this an efficient yet impressive side dish to prepare.
The Broth is Your Friend: Don’t shy away from the broth; it’s what creates the signature “melting” quality. Ensure the broth covers at least a portion of the potatoes during the final stage of cooking. The liquid will then reduce and become a flavorful sauce.
Listen to Your Senses: While the recipe provides specific timings, always rely on your eyes and the texture of the potatoes. They should be fork-tender, and the liquid should have reduced to a beautiful glaze. Ovens can vary, so adjust the final cooking time as needed.
Serving Suggestions for melting potatoes
Decoration
A sprinkle of finely chopped fresh parsley or chives adds a lovely pop of green color and a hint of freshness that contrasts beautifully with the rich, golden potatoes. A few sprigs of fresh thyme or rosemary, laid artfully across the platter, can also enhance the visual appeal and echo the herbaceous notes within the dish.
Side Dishes
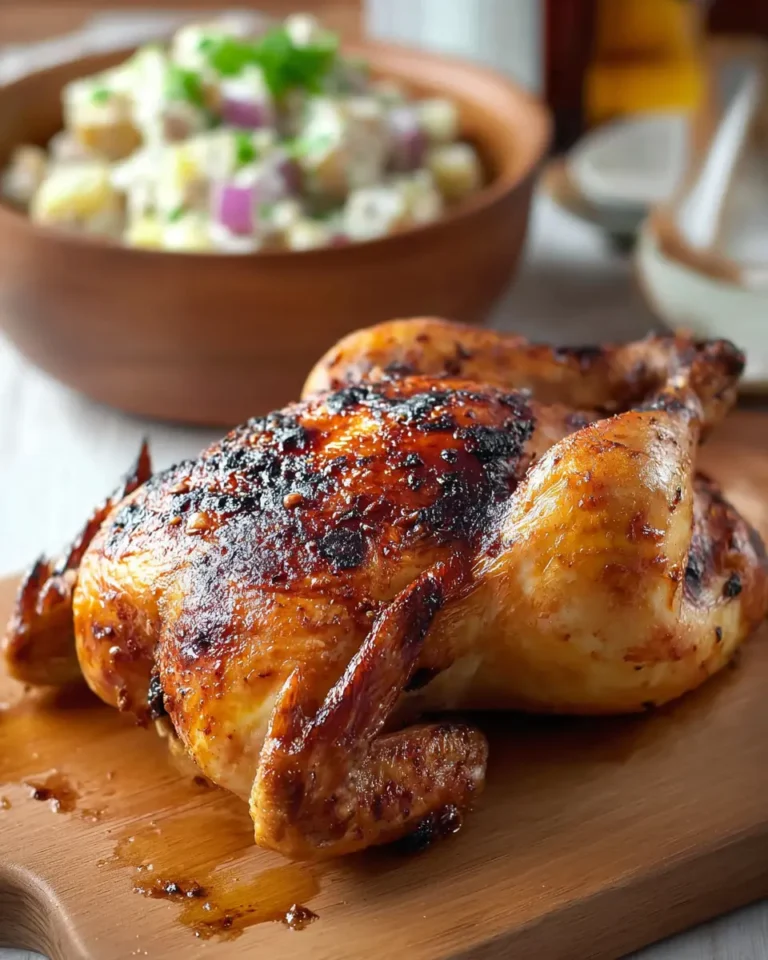
These melting potatoes are the quintessential accompaniment to a perfectly seared steak or a tender roast chicken. They also pair exceptionally well with pan-fried fish, roasted pork tenderloin, or even a hearty lamb shank. For a lighter meal, consider serving them alongside grilled vegetables or a substantial salad, allowing the potatoes to remain the star.
Creative Serving Ideas
Elevate your brunch game by incorporating leftover melting potatoes into a savory breakfast hash, sautéed with onions, peppers, and perhaps some crispy bacon. They can also be added to a frittata or a hearty soup for an extra layer of texture and flavor. Imagine them as a decadent base for a vegetarian dish, perhaps topped with sautéed mushrooms and a drizzle of truffle oil.
Preparation & Storage
Storing Leftovers
Allow the potatoes to cool completely before transferring them to an airtight container. They can be stored in the refrigerator for up to 4-5 days. While they are best enjoyed fresh, they retain much of their flavor and texture when stored properly. The residual butter and broth will solidify slightly, but this doesn’t detract from their deliciousness.
Freezing
Freezing melting potatoes is generally not recommended as the texture can become somewhat mushy upon thawing and reheating. The delicate balance of crispy exterior and tender interior is best preserved when the potatoes are consumed fresh or stored in the refrigerator.
Reheating
The most effective way to reheat these potatoes is in the oven. Spread them in a single layer on a baking sheet, perhaps with a tiny splash of broth or water, and warm them at around 350°F (175°C) for 10-15 minutes, or until heated through. Flipping them halfway can help restore some crispness. Avoid reheating in the microwave, as this will likely result in a soggy texture.
Frequently Asked Questions
-
What is the best type of potato to use for melting potatoes?
The most recommended potatoes for this recipe are Yukon Gold due to their creamy texture and slight sweetness, which blend beautifully with the savory flavors. Russet potatoes are also a good choice, offering a fluffier interior. Regardless of your choice, ensure they are fresh and of good quality for the best results. The key is a potato that has a good balance of starch and moisture to achieve that signature melt-in-your-mouth consistency while still holding its shape during the roasting process.
-
Can I make melting potatoes ahead of time, and if so, how should I store and reheat them?
While melting potatoes are best enjoyed immediately after preparation for optimal texture, they can be made ahead to some extent. You can prepare the potatoes up to the point of adding the broth and store them, covered, in the refrigerator for a few hours before proceeding with the final roasting stage. For reheating fully cooked potatoes, it’s best to use an oven at around 350°F (175°C) for about 10-15 minutes, perhaps with a tiny splash of broth, to help them regain some of their original tenderness and crispness. Microwaving is generally not advised as it can lead to a less desirable, soft texture.
-
What are some popular main dishes that pair well with melting potatoes?
Melting potatoes are incredibly versatile and serve as an excellent side dish for a wide array of main courses. They are a natural fit alongside classic roasts such as beef tenderloin, prime rib, or roast turkey. For poultry lovers, they complement roast chicken, duck, or Cornish game hens beautifully. Seafood also makes a fantastic pairing, with pan-seared salmon, grilled shrimp, or baked cod being excellent choices. Even hearty pasta dishes or rich stews can be elevated by the presence of these delectable potatoes. Their luxurious texture and rich flavor profile ensure they can stand up to robust main dishes while also enhancing more delicate ones.