Lemon Pepper Chicken Recipe – One Skillet and 30 Minutes!

Welcome to a delightful culinary journey where simplicity meets vibrant flavor! This Lemon Pepper Chicken recipe is a testament to how few, high-quality ingredients can transform into an extraordinary meal that will tantalize your taste buds.
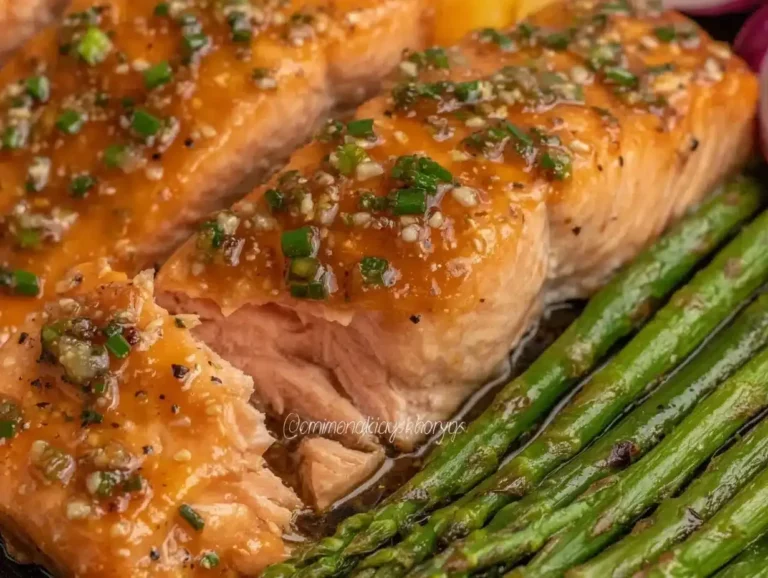
Imagine tender chicken breasts, expertly seasoned and pan-seared to golden perfection, then enveloped in a luscious, buttery sauce kissed with the bright zest of lemon and a hint of pepper. It’s a dish that’s both incredibly easy to prepare and impressively delicious, making it a perfect candidate for busy weeknights or elegant casual dinners.
Why You Will Love This Recipe
- Speedy Preparation: This entire dish comes together in approximately 30 minutes, making it ideal for those evenings when time is of the essence but you still crave a homemade, satisfying meal.
- Pantry Staples: You’ll find that the majority of the ingredients are common household items, meaning you can likely whip this up without a special trip to the grocery store.
- One-Skillet Wonder: The beauty of this recipe lies in its minimal cleanup; everything is cooked and finished in a single skillet, reducing your washing up time significantly.
- Bursting with Flavor: The combination of zesty lemon, pungent pepper, and rich butter creates a harmonious flavor profile that is both invigorating and comforting.
- Versatile Pairing: This chicken dish is incredibly adaptable, happily complementing a wide array of side dishes, from simple steamed vegetables to creamy pasta or fluffy rice.
Ingredients You Need
The success of any dish hinges on the quality of its ingredients, and this Lemon Pepper Chicken is no exception. Opting for fresh, high-quality components will elevate the final taste and texture, transforming a simple meal into something truly special. Look for plump chicken breasts with a good color, fresh lemons for their bright juice and zest, and good quality butter to create that irresistible sauce.
Lemon Pepper Chicken
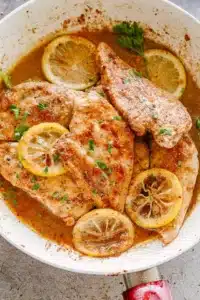
Juicy Lemon Pepper Chicken cooked in one skillet and finished with a buttery garlic and lemon sauce. A quick 30-minute chicken dinner.
- 1 to 1.5 pounds boneless, skinless chicken breasts
- 1 tablespoon lemon pepper seasoning
- 2 tablespoons vegetable oil
- 2 tablespoons butter, divided
- 2 cloves garlic, minced
- 2 teaspoons lemon juice
- freshly chopped parsley, for garnish
- lemon slices, for garnish
- 1In a shallow plate, combine coconut flour, lemon pepper seasoning, lemon zest, and salt.
- 2Place the chicken breasts on a cutting board and, using a chef’s knife, cut the chicken breasts in half, longwise. You should have a total of 8 chicken pieces that are about a 1/4-inch-thick. Toss the chicken breasts in the flour mixture until coated on both sides.
- 3Heat the cooking oil in a large skillet over medium-high heat. Add the chicken breasts to the hot oil in a single layer, and cook for 3 to 4 minutes per side, or until cooked through. Depending on the skillet's size, you may need to cook the chicken in batches. Cooking time will also depend on the size of the chicken breasts. Remove the cooked chicken from the skillet and set it aside on a plate.
- 4Add 1 tablespoon of butter to the skillet, along with the minced garlic, and cook for 30 seconds. Slowly pour in the chicken broth and stir, scraping up the browned bits from the bottom of the skillet. Then stir in the lemon juice and cook for 3 to 4 minutes, or until the sauce has slightly reduced. Add the remaining butter and let it melt through.
- 5Return the chicken breasts to the skillet and cook for 1 minute, or until heated through. Remove from heat. Serve the lemon pepper chicken garnished with parsley and lemon slices.
Keywords: Lemon Pepper Chicken, Skillet Chicken, Quick Dinner, 30-Minute Meal, Easy Chicken
Quantities for each ingredient are conveniently listed in the recipe card above, ensuring you have everything measured precisely for optimal results.
Variations
While this recipe is fantastic as is, the beauty of home cooking lies in its adaptability. You can easily customize it to suit various dietary needs or flavor preferences, ensuring everyone at your table can enjoy this delightful dish.
Vegan Delight: To create a stunning vegan version, swap the chicken breasts for firm or extra-firm tofu. Press the tofu very well to remove excess water, then cut it into bite-sized pieces or thin cutlets. Coat and pan-fry as directed, ensuring a golden crust. For the sauce, use plant-based butter and vegetable broth. You can thicken the sauce with a cornstarch slurry if needed, and don’t forget the fresh lemon juice for that signature tang.
Low-Carb Lover’s Dream: For those watching their carbohydrate intake, this recipe is already quite adaptable. Instead of coconut flour or all-purpose flour for coating, opt for almond flour or finely ground pork rinds for a delightful crunch. Serve the chicken over a bed of cauliflower rice or with a generous portion of steamed or roasted low-carb vegetables like broccoli, asparagus, or zucchini. The rich, buttery sauce pairs beautifully with these lighter options.
Spice It Up: If you enjoy a bit of heat, don’t hesitate to add a pinch of cayenne pepper or red pepper flakes to your flour mixture. You can also increase the amount of black pepper in the lemon pepper seasoning or add a dash of hot sauce to the finishing sauce for an extra kick. This adds a delightful complexity and warmth that complements the bright lemon flavors perfectly.
How to Prepare Lemon Pepper Chicken
Step 1: Prepare the Flour Mixture
The foundation of that perfect crispy coating begins with a well-balanced flour mixture. In a shallow dish, combine your chosen flour – coconut flour offers a slightly nutty flavor and great crispiness, while all-purpose flour is a reliable classic. To this, add the star players: lemon pepper seasoning for its zesty and peppery notes, and a touch of lemon zest to amplify the citrus aroma and taste.
The lemon zest is crucial here; it’s the essence of fresh lemon that infuses the coating with an immediate bright fragrance. A pinch of salt is also essential, not just for seasoning, but to help draw out moisture and promote even browning during the cooking process. Whisk these dry ingredients together thoroughly to ensure the seasoning is evenly distributed throughout the flour, so every piece of chicken gets a uniform flavor infusion.
This step is simple yet profoundly impactful, setting the stage for the deliciousness to come. Ensuring the flour mixture is well-blended means you won’t have pockets of pure seasoning or bland flour on your chicken. Take a moment to appreciate the aromatic blend as you whisk; it’s a preview of the delightful meal you’re about to create.
Step 2: Prepare the Chicken
For optimal cooking and tenderness, boneless, skinless chicken breasts should be prepared properly. The key is to ensure they cook evenly and quickly. Using a sharp chef’s knife, carefully slice each chicken breast horizontally through the middle, effectively creating two thinner cutlets from each breast. This technique significantly reduces the cooking time and prevents the exterior from overcooking before the interior is done.
Aim for cutlets that are roughly a quarter-inch thick. This uniform thickness is vital for achieving that beautiful golden crust without drying out the chicken. You should end up with approximately eight thinner pieces of chicken from a standard 1 to 1.5-pound package of breasts. Having uniformly sized pieces also ensures that each piece cooks at the same rate, leading to a more consistent result across the entire batch.
Once sliced, you can lightly pat the chicken pieces dry with paper towels. This simple step helps the flour mixture adhere better, leading to a crispier coating. Now, your chicken is perfectly prepped and ready to be coated and introduced to the hot skillet, promising a delightful culinary experience.
Step 3: Coat and Cook the Chicken
Now comes the exciting part: coating the chicken and bringing it to life in the hot skillet. Take your prepared chicken cutlets and gently toss them in the lemon pepper flour mixture, ensuring each piece is evenly coated on all sides. Press the flour onto the chicken lightly to help it adhere, creating a nice base for the sear.
Heat your large skillet over medium-high heat and add the vegetable oil. It’s important to get the oil hot but not smoking; you want it shimmering and ready to give the chicken a beautiful, golden-brown sear. Carefully place the coated chicken pieces into the hot oil in a single layer. Be mindful not to overcrowd the pan, as this can cause the chicken to steam rather than sear, hindering the development of that desirable crispy crust.
Cook each side of the chicken for approximately 3 to 4 minutes, or until it’s cooked through and achieves a beautiful golden-brown color. The exact cooking time will depend on the thickness of your chicken cutlets and the heat of your stove. Once cooked, remove the chicken from the skillet and place it on a clean plate. You can tent it loosely with foil to keep it warm while you prepare the luscious sauce.
If you had to cook the chicken in batches, this is where you’d add a little more oil to the skillet if needed before cooking the next set. The goal is to achieve that perfect sear on every piece. Don’t be tempted to move the chicken around too much in the first few minutes; let it develop that gorgeous crust undisturbed. The aroma filling your kitchen at this stage is already a wonderful preview of the delicious meal.
Step 4: Make the Lemon Butter Sauce
With the chicken perfectly seared and set aside, it’s time to create the luscious sauce that will tie this dish together. Return the skillet to medium heat and add 1 tablespoon of butter. As the butter melts, add the minced garlic to the pan. Cook the garlic for about 30 seconds, stirring constantly, until it’s fragrant but not browned, as burnt garlic can impart a bitter taste.
Next, slowly pour in the chicken broth. Use a wooden spoon or spatula to scrape up any delicious browned bits (fond) that have adhered to the bottom of the skillet from cooking the chicken. This fond is packed with flavor and will add incredible depth to your sauce. Bring the broth mixture to a gentle simmer.
Stir in the fresh lemon juice. The bright acidity of the lemon juice will cut through the richness of the butter and deglazing liquid, creating a beautifully balanced sauce. Allow this mixture to cook and reduce for about 3 to 4 minutes, stirring occasionally, until the sauce has slightly thickened. This reduction process concentrates the flavors, making the sauce even more delicious.
Finally, add the remaining 1 tablespoon of butter to the skillet. Swirl the pan or stir until the butter is completely melted and incorporated into the sauce. This final addition of butter emulsifies the sauce, giving it a beautiful sheen and a silky-smooth texture. Taste the sauce and adjust seasoning if necessary, though the lemon pepper seasoning on the chicken should provide ample flavor.
Step 5: Combine and Serve
Now for the grand finale: bringing the perfectly cooked chicken back into contact with its delicious lemon butter sauce. Carefully return the seared chicken cutlets to the skillet with the thickened sauce. Ensure each piece is nestled into the sauce so it can absorb those wonderful flavors.
Allow the chicken to cook in the sauce for just about 1 minute. This short period is enough to heat the chicken through and allow it to fully meld with the sauce without overcooking it. The chicken will continue to absorb the bright, buttery, and peppery notes, becoming even more flavorful and juicy.
Once heated through, remove the skillet from the heat immediately. This prevents the chicken from drying out. For a beautiful presentation, garnish the dish generously with freshly chopped parsley. The vibrant green of the parsley adds a pop of color and a fresh, herbaceous contrast to the rich chicken and sauce. Add a few thin lemon slices around the platter or directly onto the chicken for an extra touch of elegance and citrus aroma.
Serve this exquisite Lemon Pepper Chicken immediately, ensuring each diner receives a generous portion of chicken coated in the delectable sauce. The aroma alone will have everyone eager to dig in. This simple, yet sophisticated dish is a true crowd-pleaser and a fantastic addition to your weeknight meal rotation, proving that incredible flavor doesn’t require hours in the kitchen.
Pro Tips for Lemon Pepper Chicken
Achieve the Perfect Sear: Ensure your skillet is adequately heated before adding the chicken. A hot pan is crucial for developing a beautiful, golden-brown crust. Avoid overcrowding the pan; cook in batches if necessary to maintain the high heat and achieve that desirable crispiness.
Don’t Skip the Zest: While lemon juice provides the tang, lemon zest offers a more concentrated and aromatic citrus punch. Adding it to the flour coating and the sauce ensures a vibrant, fresh lemon flavor throughout the dish that truly defines Lemon Pepper Chicken.
Quality Butter Matters: Using good quality butter will significantly impact the richness and flavor of your sauce. The butter emulsifies with the chicken broth and lemon juice to create a silky, luxurious sauce that coats the chicken perfectly.
Resting is Key: After cooking, allowing the chicken to rest for a minute or two in the sauce before serving helps it reabsorb the juices. This ensures the chicken remains incredibly tender and moist.
Adjust Seasoning to Taste: Lemon pepper seasoning can vary in its salt and pepper content. Always taste your sauce and the chicken before serving and adjust salt, pepper, or lemon juice as needed to achieve your perfect flavor balance.
Serving Suggestions for Lemon Pepper Chicken
Decoration
To elevate the presentation of your Lemon Pepper Chicken, consider a few decorative touches. A generous sprinkle of fresh, finely chopped parsley not only adds a vibrant green color but also a fresh, herbaceous aroma. Thin slices of fresh lemon, artfully arranged on the platter or alongside the chicken, provide a beautiful visual cue to the dish’s bright flavors.
For an extra pop of color and freshness, consider a sprig of fresh dill or chives. A light dusting of paprika could also add a subtle reddish hue. These simple garnishes transform a delicious meal into a visually appealing feast, making it perfect for entertaining guests or simply treating yourself.
Side Dishes
This versatile Lemon Pepper Chicken pairs wonderfully with a myriad of side dishes, catering to various tastes and dietary preferences. For a classic comfort food pairing, creamy mashed potatoes or a simple baked potato soak up the delicious sauce beautifully.
Fluffy white rice or fragrant basmati rice are excellent choices, providing a neutral base that allows the chicken and sauce to shine. For a lighter, lower-carb option, consider serving it over cauliflower rice. Steamed or roasted vegetables like broccoli, asparagus, green beans, or Brussels sprouts offer a healthy and colorful accompaniment.
A crisp Caesar salad or a simple cucumber and tomato salad provides a refreshing contrast to the richness of the chicken. Consider also serving it with crusty bread or garlic bread, perfect for sopping up every last drop of that delectable lemon butter sauce.
Creative Serving Ideas
Move beyond the traditional plate and explore some creative ways to serve your Lemon Pepper Chicken. Consider serving it over a bed of al dente pasta, such as linguine or fettuccine, and tossing the pasta lightly with the lemon butter sauce for a complete pasta dish.
Another delightful option is to create a vibrant chicken salad. Once cooled, dice the chicken and mix it with mayonnaise, chopped celery, red onion, and a bit more lemon juice and pepper. Serve this chicken salad in lettuce wraps, on toasted bread for sandwiches, or over a bed of mixed greens.
For a more substantial meal, transform it into a flavorful grain bowl. Layer cooked quinoa or farro with the Lemon Pepper Chicken, roasted vegetables like bell peppers and zucchini, and a drizzle of extra sauce or a light vinaigrette. This offers a complete, balanced, and visually appealing meal that’s perfect for lunch or a light dinner.
Preparation & Storage
Storing Leftovers
Proper storage is key to enjoying your delicious Lemon Pepper Chicken even after the first meal. Once the chicken has cooled to room temperature, transfer any leftovers into an airtight container. This will help prevent the chicken from drying out and absorbing any unwanted odors from the refrigerator.
These containers are readily available at most home goods stores and come in various sizes to accommodate different amounts of food. Ensure the lid is securely fastened to create a proper seal. Properly stored, the leftovers should remain fresh and safe to consume for up to 3 to 4 days.
It’s always a good practice to label your containers with the date you stored the food. This helps you keep track of how long items have been in the refrigerator and ensures you’re using them within their optimal timeframe. The flavor of the lemon pepper chicken often melds even further overnight, making leftovers a delightful treat.
Freezing
If you find yourself with an abundance of Lemon Pepper Chicken that you won’t be able to consume within a few days, freezing is an excellent option to preserve its quality for later enjoyment. Ensure the chicken is completely cooled before proceeding with the freezing process.
For best results, portion the chicken into individual servings or small batches. This allows for easier thawing and reheating of just the amount you need. Place the chicken and any remaining sauce into freezer-safe bags or airtight containers. Remove as much air as possible from the bags before sealing to prevent freezer burn, which can affect the texture and flavor of the chicken.
Label each package clearly with the contents and the date. Properly frozen Lemon Pepper Chicken can maintain good quality for up to 2 to 3 months. While the texture might be slightly altered upon thawing, the flavor will remain robust and enjoyable. This makes it a convenient option for future quick meals.
Reheating
Reheating your Lemon Pepper Chicken is straightforward and can be done using various methods to restore its delicious flavor and texture. The best method often depends on how you plan to serve it next.
For individual servings, the microwave is a quick option. Place the chicken in a microwave-safe dish, add a tablespoon or two of water or chicken broth to help keep it moist, and heat on medium power in short intervals, stirring occasionally, until heated through. Be careful not to overheat, as this can lead to dryness.
A more preferable method for retaining quality is reheating in a skillet. Place the leftover chicken and sauce in a skillet over medium-low heat. Cook gently, stirring occasionally, until the chicken is heated through and the sauce is warm and slightly re-emulsified. This method often yields a texture closer to freshly made chicken.
If reheating larger batches, the oven is a good choice. Place the chicken in an oven-safe dish, cover it loosely with foil, and bake at around 325°F (160°C) until heated through. Adding a splash of broth or water before covering can help maintain moisture. Remember, reheating frozen chicken requires thawing in the refrigerator overnight first for the most even and safe results.
Frequently Asked Questions
-
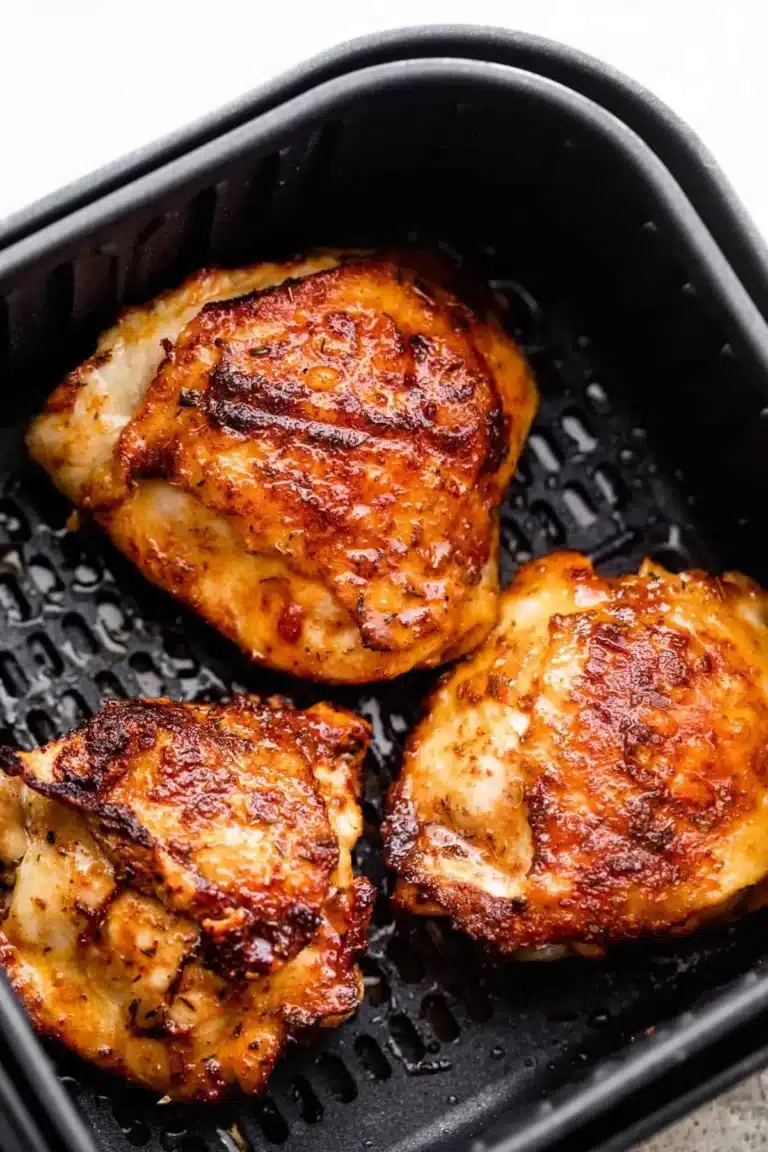
Can I use chicken thighs instead of chicken breasts?
Absolutely! Boneless, skinless chicken thighs are a fantastic alternative to chicken breasts in this recipe. They often turn out even juicier due to their higher fat content, which adds to their inherent tenderness and flavor. When using chicken thighs, you’ll want to cook them until they reach an internal temperature of 165°F (74°C), which might take a few minutes longer than chicken breasts, depending on their size and thickness. Ensure they are cooked thoroughly for safety and optimal texture, and they will absorb the lemon pepper seasoning and buttery sauce wonderfully.
-
What is lemon pepper seasoning made of?
Lemon pepper seasoning is a popular spice blend that brings a bright, citrusy, and slightly pungent flavor to dishes. The core components are typically dried lemon peel, which provides that unmistakable citrus aroma and tang, and coarsely ground black pepper, which adds a warm, spicy kick. Many commercial blends also include salt to enhance the overall flavor profile, and often garlic powder and onion powder to add savory depth. Some artisanal blends might even include other spices like coriander or chili flakes for added complexity. It’s this combination that gives the seasoning its distinctive and universally appealing taste, making it perfect for chicken, fish, vegetables, and even popcorn.
-
How can I ensure my chicken is juicy and not dry?
Achieving juicy chicken is a common goal, and this recipe has several built-in elements to help. Firstly, slicing the chicken breasts horizontally into thinner cutlets ensures they cook quickly and evenly, reducing the risk of overcooking the exterior before the interior is done. Secondly, coating the chicken and searing it in hot oil creates a barrier that helps to seal in the natural juices. Finally, finishing the chicken by gently simmering it in the sauce for just one minute allows it to absorb flavor without losing moisture. If you are concerned about dryness, consider using chicken thighs, which are naturally more forgiving, or ensure you use an instant-read thermometer to pull the chicken from the heat precisely when it reaches 165°F (74°C).