Ultimate Layered Rainbow Jello: A Deliciously Easy Dessert
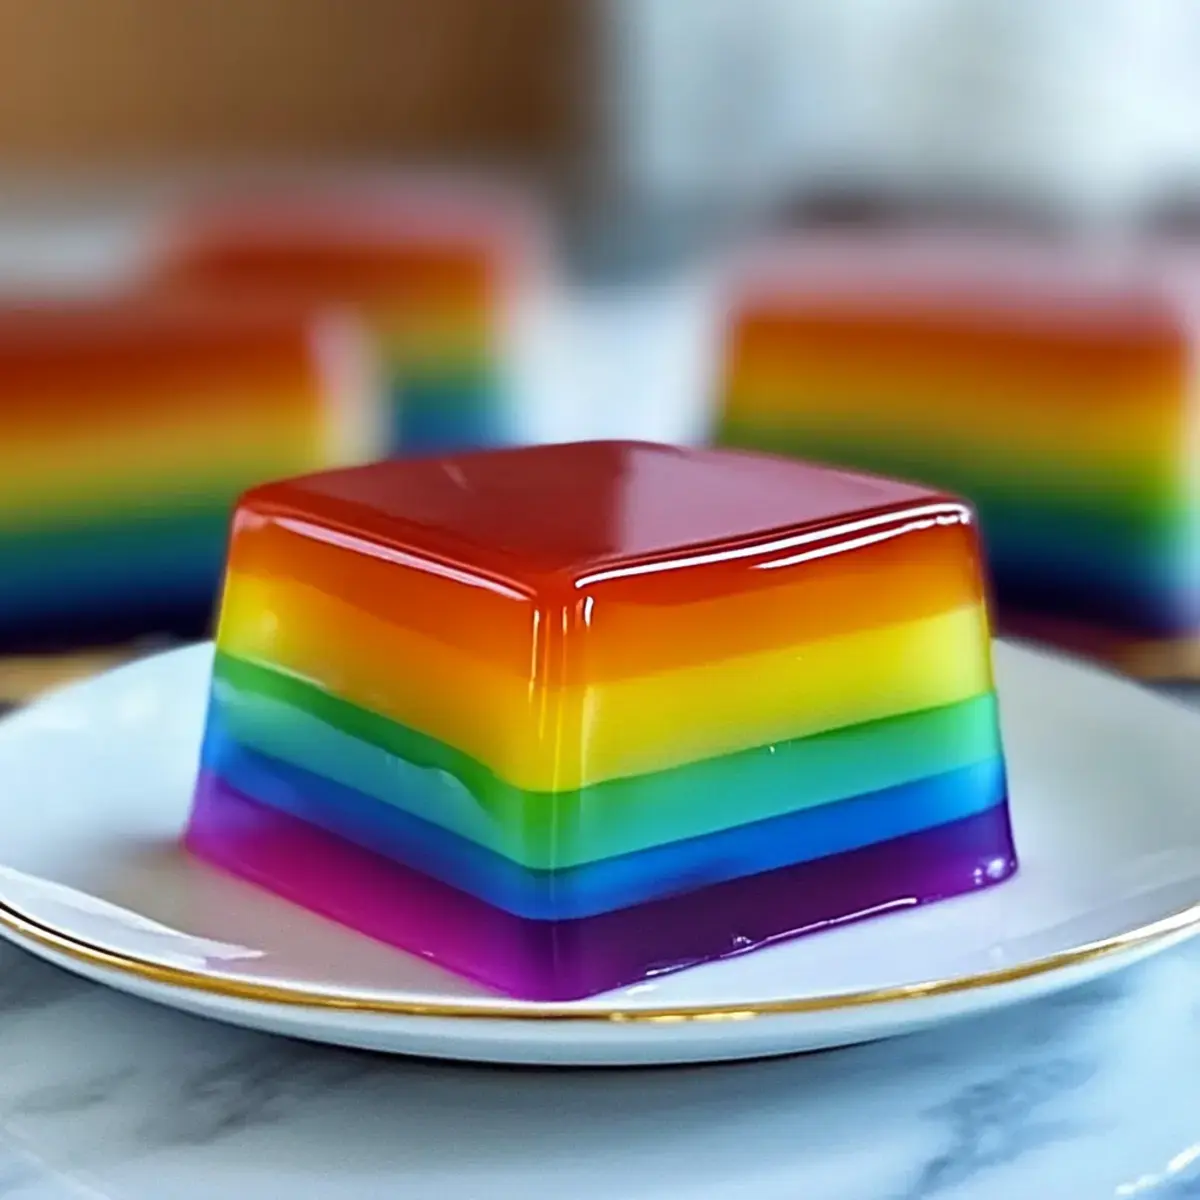
Have you ever found yourself gazing at a rainbow after a storm, wishing you could capture those vibrant hues in your kitchen? That is exactly the feeling I had when I first discovered the joy of making Layered Rainbow Jello. This fun and colorful dessert is not only a visual masterpiece but also an exciting, family-friendly treat that blends playful flavors and textures.
With its simple preparation, it is perfect for everything from festive gatherings to cozy family nights. Plus, the customizable flavors mean everyone can enjoy their favorite combinations—whether it is tangy lime, luscious raspberry, or zesty lemon. Let’s dive into this deliciously easy recipe for a slice of nostalgia that will delight both kids and adults alike.
Why You Will Love This Recipe
- Visual Appeal: The stunning layers create a dessert that is not just delicious but also a true showstopper, perfect for parties and holiday celebrations.
- Family-Friendly Fun: Involving kids in making this colorful treat encourages creativity and provides wonderful bonding time in the kitchen.
- Endless Customization: You can easily mix and match flavors to suit every taste, such as using mango or peach for something truly unique.
- Simple Steps: With a no-fuss preparation method, even novice cooks can impress their guests with this delightful and professional-looking dish.
- Perfect for Any Occasion: Whether it is a bright birthday bash or a quiet dinner, this dessert adapts to every gathering beautifully.
Ingredients You Need
To achieve the best results, always prioritize high-quality gelatin brands and fresh, creamy yogurt for the best flavor balance. Using clear, high-quality ingredients ensures that the vibrant colors of your rainbow shine through each layer. Please refer to the full measurement list provided below to ensure your proportions are perfect for your chosen dish.
Layered Rainbow Jello
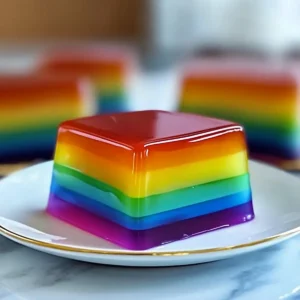
A vibrant and visually stunning layered dessert that is perfect for parties and family gatherings. This fun, colorful treat features alternating layers of fruity gelatin and creamy yogurt, making it a showstopper for any occasion.
- 3 oz Grape gelatin (Can be substituted with any berry-flavored gelatin)
- 3 oz Blueberry gelatin (Consider other blue-hued flavors for variety)
- 3 oz Lime gelatin (Swap with lemon for zing or try different citrus flavors)
- 3 oz Lemon gelatin (Orange gelatin can be an enjoyable sweeter alternative)
- 3 oz Orange gelatin (Peach gelatin can be a nice creative substitute)
- 3 oz Raspberry or strawberry gelatin (Any berry gelatin can also serve as a replacement)
- 1 cup Water (Essential for dissolving the gelatin)
- 1Clear out space in your refrigerator and prepare your workspace with mixing bowls and a clear dish.
- 2In a mixing bowl, dissolve 3 oz of gelatin in 1 cup of boiling water, stirring until fully dissolved. Divide into two bowls.
- 3Mix ½ cup of vanilla yogurt into half of your dissolved gelatin mixture. Pour into a clear dish and refrigerate for 30–35 minutes to set.
- 4Mix the remaining gelatin with ¼ cup of cold water and spoon this layer gently over the yogurt layer. Refrigerate for another 30–35 minutes.
- 5Continue the process by alternating layers of yogurt and clear gelatin, following the color order until all flavors are used.
- 6Chill the entire dish in the refrigerator for a few hours or overnight to allow the flavors to meld and the texture to firm up for clean slicing.
Keywords: Layered Rainbow Jello, colorful dessert, fruit gelatin, family-friendly, party dessert, jelly recipe
- grape gelatin: provides a rich purple base that can be substituted with any berry-flavored gelatin for a fun twist.
- blueberry gelatin: adds a sweet, fruity flavor and evokes a beautiful blue hue, though you can use other blue-toned flavors for variety.
- lime gelatin: offers a refreshing green layer, which can be swapped with lemon for extra zing or other citrus varieties.
- lemon gelatin: brightens the layers with a zesty profile, while orange gelatin serves as an enjoyable, sweeter alternative.
- orange gelatin: introduces warmth and vibrancy to the middle of the spectrum, with peach gelatin being a lovely creative substitute.
- raspberry or strawberry gelatin: delivers a delightful red finish to the top of the stack, though any berry-flavored gelatin works well.
- vanilla yogurt: creates a velvety, creamy texture that beautifully complements the jelly layers, with coconut yogurt serving as a perfect dairy-free alternative.
- water: essential for dissolving the gelatin powder thoroughly to achieve that signature firm yet jiggly consistency.
All exact quantities for these ingredients are listed in the recipe card provided by the shortcode above. Make sure you have all these items measured out before you begin your layering process.
Variations
The Vegan Twist: If you are looking to make this recipe completely plant-based, simply swap the dairy yogurt for a high-quality coconut or almond milk yogurt. Ensure your gelatin substitute is agar-agar based, which is a common seaweed-derived alternative to traditional gelatin.
Low Carb Options: For those following a keto or low-carb lifestyle, look for sugar-free gelatin powders and unsweetened Greek yogurt. By omitting added sugars and using monk fruit sweeteners, you can maintain the beautiful aesthetic without the heavy carbohydrate load.
Fizzy Rainbow Layers: To add a playful texture, substitute half of the cold water in your gelatin mixture with sparkling water. This creates a light, bubbly mouthfeel that elevates the dessert to a more sophisticated, carbonated level.
How to Prepare Layered Rainbow Jello
Step 1: Prepare Your Workspace
Organization is key: Clear out space in your refrigerator to accommodate the specific dish you will be using for the Layered Rainbow Jello. A glass or clear plastic dish is highly recommended because it showcases the vibrant layers beautifully.
Gather your supplies: Ensure you have all your ingredients and necessary tools ready before you start the heat. You will need multiple mixing bowls, a sturdy whisk, and accurate measuring cups for a smooth, efficient process.
Step 2: Dissolve the Gelatin Layers
The base mixture: In a medium mixing bowl, dissolve 3 oz of your first gelatin flavor, such as grape, in exactly 1 cup of boiling water. Stir the mixture vigorously until it is completely dissolved and no visible granules remain at the bottom.
Prepare for layering: After ensuring the gelatin is fully combined, divide the mixture equally into two separate bowls. Keep one bowl reserved for the creamy layer and set the other aside for your clear layer.
Step 3: Create the Creamy Layer
Mixing the cream: In the first bowl, fold in ½ cup of vanilla yogurt into the dissolved gelatin mixture. Stir until the color is fully blended and the texture is consistent throughout.
Initial setting: Pour this creamy mixture into your clear dish, ensuring you create an even, level layer across the bottom. Place the dish into the refrigerator to set for about 30–35 minutes until it is firm to the touch but still jiggly.
Step 4: Add the Clear Gelatin Layer
Adding depth: Once the yogurt layer has firmly set, take your reserved clear gelatin mixture and whisk in ¼ cup of cold water. This helps adjust the temperature and provides a subtle flavor boost.
Gentle layering: Gently spoon this clear layer over the set yogurt, taking extreme care not to disturb the underlying surface. Return the dish to the refrigerator for another 30–35 minutes, allowing it to firm up perfectly before proceeding.
Step 5: Repeat the Layering Process
Building the rainbow: Continue this process by alternating layers of yogurt-gelatin and clear gelatin until all your chosen flavors are used. Follow your predetermined color order—blue, green, yellow, orange, and finally red—to ensure a distinct and vibrant visual result.
Patience is required: Each layer needs exactly 30–35 minutes to set up nicely before you can safely add the next. Consistency in your timing is what creates those sharp, crisp lines that make this breakfast-friendly treat look like a work of art.
Step 6: Chill and Finalize
The final set: Once all layers are complete, chill the entire dish in the refrigerator until you are ready to serve. This final resting period allows the various flavors to meld together perfectly.
Perfecting the texture: Ideally, let the dessert sit for a few hours or even overnight to achieve the best consistency for clean cutting. You can find more inspiration for colorful plating and simple treats by visiting our [Pinterest page](https://www.pinterest.com/easycookfeed/).
Pro Tips for Layered Rainbow Jello
Dissolve Completely: Always ensure the gelatin powder is fully dissolved in boiling water to avoid pesky clumps. This is the secret to a professional, glass-like texture in your final dessert.
Use a Timer: Never guess when it comes to setting times, as 30–35 minutes is the sweet spot. Using a kitchen timer helps you maintain the integrity of each layer without accidentally blending them.
Chill Thoroughly: For the most beautiful, clean cuts, allow the dessert to chill overnight in the refrigerator. This ensures every slice shows off those distinct, vibrant rainbow bands clearly.
Layer with Care: When adding new layers, pour or spoon the liquid slowly against the back of a spoon. This technique prevents the force of the liquid from punching through the layer underneath, keeping your colors separate.
Serving Suggestions for Layered Rainbow Jello
Decoration
A dollop of fresh whipped cream on top adds a rich, airy element that contrasts perfectly with the density of the Jello. You can also sprinkle fresh mint leaves to add a pop of green and a refreshing aroma to the presentation.
Side Dishes
Consider serving this alongside a light, tangy fruit salad composed of melons, citrus segments, and pineapple. The natural acidity of fresh fruit balances the sweetness of the dessert and keeps the entire plate feeling light and clean.
Creative Serving Ideas
If you want to get creative, serve the Jello in individual clear shot glasses for parties. This allows everyone to have their own portion while showing off the beautiful, stratified colors of the rainbow.
Preparation & Storage
Storing Leftovers
To keep your Layered Rainbow Jello fresh, store it in an airtight container within the refrigerator for up to 5 days. Ensure the container is sealed tightly to prevent the gelatin from absorbing other refrigerator odors.
Freezing
Freezing is not recommended for this specific dessert, as the structural integrity of the gelatin will break down during the thawing process. This often leads to a watery, unpleasant texture that ruins the beautiful layering effect.
Reheating
This dish is intended to be served cold, so no reheating is required or suggested. If you want to soften it slightly before serving, simply take it out of the refrigerator about 15 minutes before plating.
Frequently Asked Questions
-
How do I choose the right gelatin flavors for Layered Rainbow Jello?
The beauty of this recipe lies in your ability to mix and match colors and flavors. While traditional options like grape, lime, and lemon provide a clear rainbow spectrum, you can also incorporate tropical flavors like mango or peach. The most important thing is to choose flavors that taste good when combined with creamy yogurt. -
Can I make Layered Rainbow Jello in advance?
Yes, you can absolutely prepare the individual layers up to 24 hours in advance. This flexibility makes it an excellent choice for parties or holidays where you want to minimize last-minute work. Just ensure the dish is covered tightly with plastic wrap to maintain moisture and prevent cross-contamination of scents. -
What should I do if my gelatin layers are not setting properly?
If your layers are staying liquid, you likely did not use enough gelatin or the water ratio was too high. Ensure you are using 3 oz of gelatin per cup of water as specified. If it has been over an hour and they are still soft, double-check your refrigerator temperature, as a warmer fridge will significantly delay the setting process.