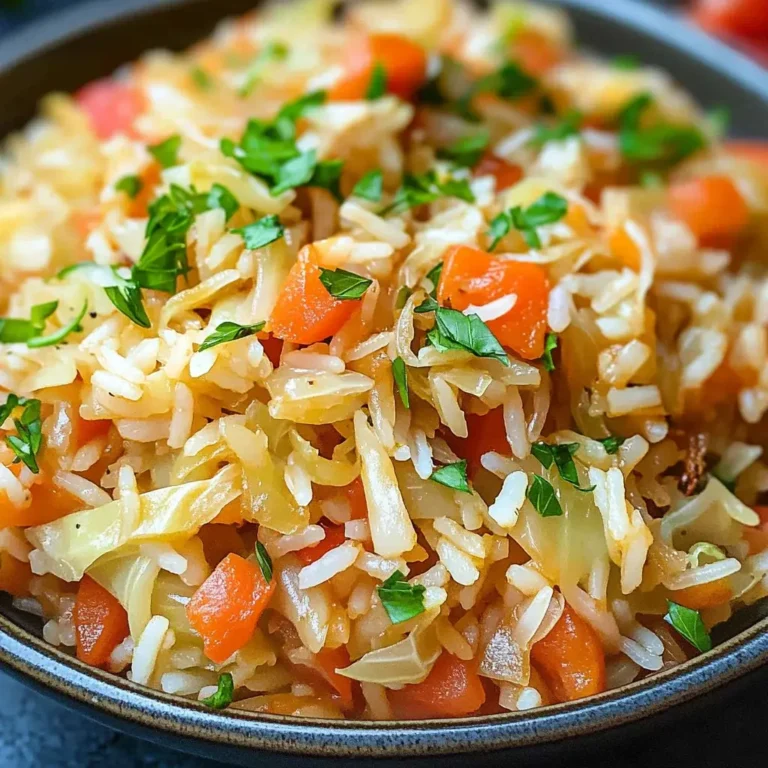
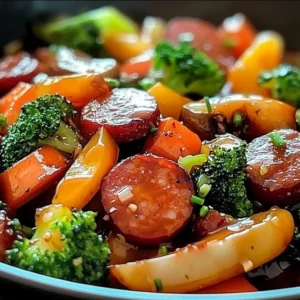
Irresistible Honey Garlic Kielbasa and Veggies
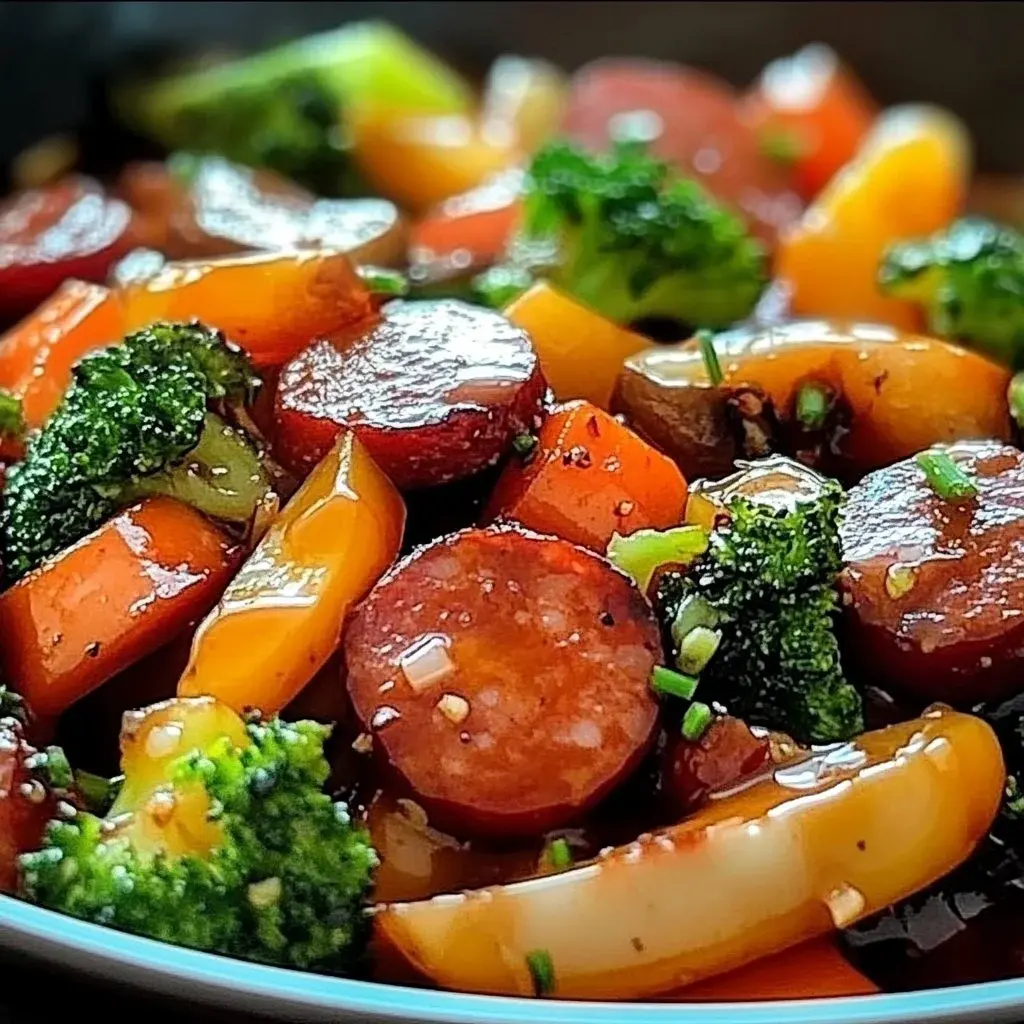
Have you ever found yourself staring into the refrigerator at the end of a long day, wishing for a meal that’s both incredibly satisfying and astonishingly easy to make? Honey Garlic Kielbasa and Veggies is precisely that beacon of culinary hope. This dish masterfully marries the savory, smoky notes of kielbasa with the fresh crunch of assorted vegetables, all coated in a lusciously sweet and tangy honey garlic glaze. It’s a vibrant tapestry of flavors and colors that promises to be a delight for both your taste buds and your eyes.
The true magic of this recipe lies in its deceptive simplicity; it’s a testament to how few ingredients and straightforward steps can produce a truly remarkable meal. You don’t need to be a gourmet chef to master this one; even the most novice cooks will find themselves confidently whipping up this delightful dish. The entire process, from start to finish, can be completed in under half an hour, making it an absolute lifesaver for busy weeknights, unexpected guests, or when you simply crave a delicious home-cooked meal without the fuss. It’s the kind of recipe that quickly becomes a go-to favorite, a reliable star in your recipe repertoire.
Why You Will Love This Recipe
- Effortless Preparation: This dish requires minimal culinary skill and can be prepared in under 30 minutes, making it ideal for busy schedules.
- Flavorful Combination: The sweet and savory balance of the honey garlic sauce perfectly complements the smoky kielbasa and crisp vegetables.
- Versatile Meal: Enjoy it as a complete meal on its own, or serve it alongside rice, noodles, or a fresh salad for a more substantial dining experience.
- Customizable Ingredients: Easily adapt the recipe by swapping out vegetables based on seasonal availability or personal preference, ensuring it always suits your taste.
- Family-Friendly Appeal: The inherently sweet and mild flavor profile makes this dish a hit with children and adults alike, ensuring everyone at the table is happy.
Ingredients You Need
The beauty of Honey Garlic Kielbasa and Veggies is that it relies on readily available ingredients, most of which you likely already have in your pantry or refrigerator. Choosing good quality kielbasa is paramount for flavor, as its smoky depth forms the foundation of this dish. Similarly, selecting fresh, vibrant vegetables ensures a pleasing texture and visual appeal, adding essential nutrients and delightful crunch. The sauce components, while simple, are crucial for creating that signature sweet and savory glaze that brings everything together harmoniously.
Honey Garlic Kielbasa and Veggies
A quick and easy dish featuring savory kielbasa, vibrant vegetables, and a sweet honey garlic sauce, perfect for busy weeknights or meal prep.
- 1 lb kielbasa, sliced (Choose high-quality kielbasa for better flavor.)
- 2 cups mixed vegetables (like bell peppers, broccoli, and carrots) (Feel free to customize vegetables based on preference.)
- 1/4 cup honey (Can substitute with maple syrup if needed.)
- 3 cloves garlic, minced (Avoid burning; add after the kielbasa is browned.)
- 2 tablespoons soy sauce (Ensure it's gluten-free if necessary.)
- 1 tablespoon olive oil
- Salt to taste
- Pepper to taste
- 1Heat a large skillet over medium heat and add olive oil. Once the oil is hot, add the sliced kielbasa and cook for about 5-7 minutes, until it develops a nice golden-brown color.
- 2Add the minced garlic to the skillet and cook for an additional minute, just enough for the garlic to become fragrant.
- 3Stir in the mixed vegetables and cook for 5-8 minutes, or until they reach a tender-crisp texture.
- 4While the veggies are cooking, mix together honey and soy sauce in a small bowl.
- 5Pour the honey and soy sauce mixture over the kielbasa and veggies in the skillet, stirring everything together.
- 6Allow the dish to cook for an additional 2-3 minutes, letting the sauce bubble and thicken slightly.
- 7Season with salt and pepper to taste before serving.
Keywords: Family Recipe, Honey Garlic Kielbasa, Kielbasa Recipes, One Pan Meal, Quick Dinner
You’ll find the precise quantities for all the ingredients listed within the detailed recipe card. This allows for flexibility in understanding the foundational elements before diving into the exact measurements needed for success.
Variations
Tropical Twist: For an unexpected and delightful flavor profile, consider adding chunks of fresh pineapple to your skillet during the last few minutes of cooking. The caramelized sweetness of the pineapple will beautifully complement the honey garlic sauce, introducing a subtle tropical flair that makes this dish incredibly unique and refreshing. This addition transforms a weeknight staple into something a little more adventurous and exciting.
Spicy Sensation: If you’re a fan of a little heat, elevate this dish by incorporating a touch of spice into the honey garlic sauce. A teaspoon or two of sriracha, a pinch of red pepper flakes, or even a finely minced jalapeño can add a wonderful kick that balances the sweetness of the honey and enhances the savory notes of the kielbasa. Adjust the amount to your personal preference to create a truly customized spicy delight.
Hearty and Healthy Cabbage Boost: For an extra layer of texture and nutritional value, shredded cabbage is a fantastic addition. Add it to the skillet along with the other vegetables, allowing it to wilt slightly while retaining a pleasant crispness. The cabbage absorbs the delicious sauce wonderfully and adds a subtle sweetness that works exceptionally well with the other ingredients, making the meal feel more robust and satisfying.
Vegetarian Delight: To transform this into a completely vegetarian or vegan-friendly meal, simply swap out the kielbasa for a plant-based sausage alternative. Many excellent vegan sausages are available that offer a similar smoky flavor and satisfying texture. Pair this with a vegan honey substitute, like agave nectar or maple syrup, to maintain that signature sweet glaze, and you have a delicious meat-free version that everyone can enjoy. This adaptation makes the recipe incredibly inclusive.
Gluten-Free Goodness: For those managing gluten sensitivities or celiac disease, this recipe is easily adaptable. Ensure you use a gluten-free tamari or coconut aminos instead of traditional soy sauce. These substitutes provide that essential umami depth without the gluten, ensuring the flavor profile remains rich and satisfying. Always double-check the labels of all your ingredients to guarantee they meet your dietary requirements, making this a safe and delicious option for all.
How to Prepare Honey Garlic Kielbasa and Veggies
Step 1: The Grand Assembly of Ingredients
The initial phase of crafting this delightful dish is all about organization. Begin by ensuring all your components are prepped and ready to go before you even turn on the stove. This mise en place approach, a fundamental practice in professional kitchens, dramatically streamlines the cooking process and prevents any last-minute scrambling. You’ll want to slice your kielbasa into uniform, bite-sized pieces, typically about half-inch thick rounds or half-moons, which ensures even cooking and easy eating. Take your selection of mixed vegetables – perhaps vibrant bell peppers of assorted colors, sturdy broccoli florets, and crisp carrots – and chop them into similarly sized pieces. This uniformity in size is key to them cooking evenly and finishing at the same time as the kielbasa.
Next, meticulously mince your garlic cloves; the finer the mince, the more readily their pungent, aromatic oils will infuse into the dish. Measure out your honey and soy sauce precisely into a small bowl or ramekin. This pre-measurement is crucial for the sauce, as the balance of sweet to savory is essential for that signature honey garlic flavor. Having everything prepped and within easy reach on your countertop will allow you to move seamlessly through the cooking steps, transforming a potentially chaotic process into a calm, enjoyable culinary endeavor. It’s about setting yourself up for success by eliminating potential bottlenecks before they even arise.
The Best Part: This step is incredibly rewarding because it signifies the tangible beginning of your delicious meal creation. Seeing all the colorful ingredients lined up, ready to be transformed, builds anticipation and makes the actual cooking feel much less daunting. It’s a moment of preparation that pays significant dividends in the final outcome and the overall enjoyment of the cooking experience. You’re setting the stage for a flavor explosion, and the organized presentation makes it feel like a truly professional operation, even in a home kitchen.
Step 2: Building the Savory Foundation
With your ingredients meticulously prepped, it’s time to ignite the cooking process. Place a large, sturdy skillet – cast iron or a good quality non-stick pan works wonders here – over medium heat. Allow it to warm up for a minute or two, ensuring an even temperature distribution. Add your tablespoon of olive oil; it should shimmer slightly when it’s at the perfect temperature for searing. Once the oil is hot and ready, carefully introduce the sliced kielbasa to the skillet. You want to hear a gentle sizzle as the sausage hits the pan, indicating a good, even heat.
Let the kielbasa cook undisturbed for approximately 5 to 7 minutes. During this time, the magic of the Maillard reaction will occur, browning the edges of the sausage and developing a rich, complex flavor that is absolutely essential for the dish’s overall taste profile. Resist the urge to stir too frequently in these initial minutes; allowing the kielbasa to caramelize properly will create those irresistible crispy bits and a deeper smoky essence. The goal is to achieve a beautiful golden-brown hue across most of the kielbasa slices, signaling that its inherent savory qualities are being unlocked and amplified. This browning is not just about aesthetics; it’s a critical flavor-building step.
Key Insight: The browning of the kielbasa is non-negotiable for developing a robust flavor base. Don’t rush this step; patience here yields a significantly more delicious outcome. The rendered fat from the kielbasa also contributes wonderfully to the cooking medium for the subsequent ingredients, adding another layer of savory richness that cannot be replicated.
Step 3: The Aromatic Infusion of Garlic
As the kielbasa reaches its peak browning and is well on its way to savory perfection, it’s time to introduce the fragrant star of the sauce: garlic. Once the kielbasa has developed that desirable golden-brown crust, add your minced garlic directly into the skillet with the sausage. Be mindful of the heat at this stage; it should remain at a medium level to prevent the garlic from burning. Cook the garlic for just about one minute, stirring gently to ensure it’s coated by the rendered kielbasa fat and the residual oil in the pan.
This brief cooking period is crucial; it allows the garlic to release its potent, intoxicating aroma and flavor without turning bitter. You want to gently sauté it until it becomes fragrant and slightly softened, but it should not take on any significant color. The heat from the pan will quickly bloom the aromatic compounds in the garlic, infusing the oil and the kielbasa with its pungent essence. The scent that will fill your kitchen at this moment is truly divine and signals that the flavor profile of the dish is deepening considerably. This subtle step significantly elevates the overall taste experience.
The Scent of Success: The aroma of garlic hitting a hot pan is one of the most universally appealing kitchen smells. It’s an immediate indicator that something delicious is in the making and adds an exciting sensory dimension to the cooking process, making the anticipation for tasting even greater.
Step 4: Welcoming the Vibrant Vegetables
Now, it’s time to introduce the colorful and nutritious element to your skillet: the mixed vegetables. Carefully add your pre-chopped medley of vegetables directly into the pan with the browned kielbasa and fragrant garlic. Stir everything together gently, ensuring that the vegetables begin to mingle with the savory juices and rendered fat from the sausage. The goal here is to coat the vegetables lightly, allowing them to absorb some of the initial flavors while they begin to soften.
Continue to cook the vegetables for approximately 5 to 8 minutes, stirring occasionally. During this time, you’re aiming for a texture that is best described as ‘tender-crisp.’ This means the vegetables should be cooked through enough to be easily pierced with a fork, but they should still retain a slight firmness and a pleasant crunch. Overcooking them would result in a mushy texture, which would detract from the dish’s appeal, while undercooking would leave them too hard. This is the delicate balance you’re striving for, ensuring each bite offers a satisfying textural contrast to the softer kielbasa and sauce.
Why Tender-Crisp Matters: This specific texture is key because it allows the vegetables to absorb the flavors of the sauce without becoming limp and unappealing. It provides a delightful contrast to the kielbasa and the sticky glaze, making each mouthful more dynamic and interesting. It’s a textural element that makes the dish feel more complete and satisfying.
Step 5: The Harmonious Marriage of Honey and Soy
While your vegetables are reaching that perfect tender-crisp stage in the skillet, it’s the ideal moment to prepare the star of the show: the honey garlic sauce. In the small bowl you designated earlier, combine your measured honey and soy sauce. Whisk these two ingredients together thoroughly until they are completely integrated into a smooth, glossy mixture. The honey provides the essential sweetness and stickiness, while the soy sauce delivers that indispensable savory depth and a hint of saltiness.
This simple two-ingredient sauce is remarkably effective at transforming the entire dish. The ratio is important for achieving the signature balance; too much honey can make it cloyingly sweet, while too much soy sauce can overpower other flavors. The act of whisking them together ensures that when you pour this mixture over the kielbasa and vegetables, it will coat everything evenly and create that beautiful, lacquered finish. This preparation step is quick, requiring no cooking itself, but it is absolutely vital for building the characteristic flavor of the dish. It’s the flavor engine of the entire meal.
The Magic Ratio: The balance between sweet (honey) and savory (soy sauce) is what makes this sauce so universally appealing. It hits all the right notes on the palate, making the dish incredibly moreish and satisfying. Getting this ratio right is fundamental to the recipe’s success.
Step 6: The Enveloping Glaze
With the vegetables perfectly cooked and the honey-soy sauce mixture ready, it’s time to bring everything together. Carefully pour the prepared honey and soy sauce mixture directly over the kielbasa and vegetables in the hot skillet. As soon as the sauce hits the hot ingredients, you’ll notice it begin to bubble and sizzle, a promising sign that the flavors are starting to meld. Immediately begin to stir everything together gently but thoroughly. You want to ensure that every piece of kielbasa and every vegetable is coated evenly with the glossy, enticing sauce.
The stirring action helps to distribute the sauce, allowing it to cling to the ingredients and begin its transformation into a beautiful glaze. This is where the dish truly comes alive, visually and aromatically. The combined heat from the skillet and the ingredients will start to thicken the sauce slightly, creating that desirable sticky texture that is characteristic of honey garlic dishes. Continue stirring for a minute or two, just to ensure that the sauce has coated everything well and is beginning to reduce slightly. This initial coating is the foundation for the final glaze.
The Visual Appeal: Watching the sauce coat the ingredients and transform them into a glossy, appetizing mixture is one of the most satisfying parts of cooking. It’s a visual cue that the dish is nearing completion and looks incredibly inviting.
Step 7: Simmering to Perfection
Now that your kielbasa and vegetables are beautifully coated in the honey garlic sauce, allow the mixture to simmer gently in the skillet for an additional 2 to 3 minutes. This crucial simmering period allows the flavors to meld together more deeply and the sauce to thicken further into a luscious glaze. As the sauce bubbles and reduces, it becomes more concentrated, intensifying the sweet and savory notes and creating that irresistible sticky texture that clings perfectly to each bite. The heat from the skillet encourages the honey to caramelize slightly, adding another dimension of flavor and a beautiful sheen to the dish.
During this simmering time, continue to stir occasionally to prevent the sauce from sticking to the bottom of the pan and to ensure even thickening. You’re looking for a consistency that is thick enough to coat the back of a spoon but still pourable and not overly gloopy. This stage is where the magic truly happens, as all the individual components – the smoky kielbasa, the crisp-tender vegetables, and the sweet and savory sauce – come together in perfect harmony. It’s this final melding of flavors that elevates the dish from simply cooked ingredients to a truly cohesive and delicious meal.
The Essence of Fusion: This simmering phase is where all the distinct components truly fuse together, creating a unified flavor profile. It’s the point where the dish graduates from simply being a collection of ingredients to a well-integrated, delicious culinary creation.
Step 8: The Final Flourish of Seasoning
The very last step in bringing your Honey Garlic Kielbasa and Veggies to its full potential is the final seasoning. Once the sauce has thickened and all the flavors have had a chance to meld during the simmer, taste a small portion of the dish. Use this tasting to determine if any adjustments are needed with salt and freshly ground black pepper. While the soy sauce provides a significant amount of saltiness, individual preferences can vary, and a touch more might be needed to perfectly balance the sweetness of the honey and the inherent flavors of the kielbasa and vegetables.
Freshly ground black pepper adds a subtle warmth and pungency that cuts through the richness and sweetness, providing a well-rounded flavor profile. Don’t underestimate the impact of this simple step; proper seasoning is what truly elevates a good dish to a great one. It’s the final polish that brings all the other flavors into sharp focus, ensuring that every bite is perfectly balanced and incredibly satisfying. Once seasoned to your liking, give it one final gentle stir to distribute the seasonings evenly throughout the dish.
The Chef’s Secret: Always taste and season at the end. This allows you to adjust the flavor profile precisely to your liking and ensures the dish is perfectly balanced before serving. It’s a fundamental practice that ensures consistently delicious results.
Pro Tips for Honey Garlic Kielbasa and Veggies
Don’t Overcook the Veggies: The key to enjoying your vegetables in this dish is to maintain their tender-crisp texture. Add them after the kielbasa has had a chance to brown and cook them just until they are tender but still have a slight bite. This ensures they don’t become mushy and absorb the sauce beautifully while providing a pleasing textural contrast.
Mind the Garlic Heat: Garlic burns very quickly and can turn bitter if cooked for too long or at too high a temperature. Add your minced garlic only after the kielbasa has browned and sauté it for a very short period – about 60 seconds – just until it’s fragrant. This releases its flavor without burning.
Precise Sauce Measurements: The balance of honey and soy sauce is crucial for achieving that signature sweet and savory flavor. Use measuring spoons and cups to ensure you have the correct ratio. Incorrect measurements can lead to a sauce that is too sweet or too salty.
The Importance of Browning: Don’t skip the step of browning the kielbasa. This process develops deep, smoky, and savory flavors that form the foundation of the entire dish. The rendered fat also contributes to cooking the other ingredients, adding another layer of deliciousness.
High-Quality Kielbasa is Key: Opt for a good-quality kielbasa. The flavor of the sausage plays a significant role in the final outcome of the dish. Look for kielbasa with a good balance of meat and fat, and a satisfying smoky flavor.
Serving Suggestions for Honey Garlic Kielbasa and Veggies
Decoration
Garnish your Honey Garlic Kielbasa and Veggies with a sprinkle of toasted sesame seeds for a nutty crunch and visual appeal. Freshly chopped green onions or chives also add a vibrant burst of color and a mild, fresh oniony flavor that beautifully complements the richness of the dish. A few fresh cilantro leaves, if you enjoy its distinct taste, can add an unexpected herbaceous note that brightens the overall flavor profile significantly.
Side Dishes
This dish pairs wonderfully with steamed white or brown rice, which acts as a perfect neutral base to soak up the delectable honey garlic sauce. Alternatively, serve it alongside fluffy quinoa for a protein-rich and slightly nutty accompaniment. For a lighter option, a simple side salad with a vinaigrette dressing can provide a refreshing counterpoint to the richness of the kielbasa and sauce. Consider serving with some crusty bread or dinner rolls to ensure no drop of that amazing sauce goes to waste; they are perfect for dipping.
Creative Serving Ideas
Transform this into a vibrant noodle bowl by tossing the kielbasa and veggies with cooked ramen or udon noodles. For a fun appetizer, serve the mixture in small hollowed-out mini bell peppers or on top of mini pancakes or waffles for a sweet and savory brunch twist. You could also use it as a filling for savory crepes or as a topping for baked potatoes or sweet potatoes for a hearty and comforting meal. Its versatility allows it to be adapted to various meal formats and occasions with ease.
Preparation & Storage
Storing Leftovers
Once your Honey Garlic Kielbasa and Veggies has cooled down to room temperature, transfer any leftovers into an airtight container. This is essential for maintaining freshness and preventing the absorption of unwanted odors from the refrigerator. Store the container in the main compartment of your refrigerator. When stored properly, leftovers will retain their best quality and flavor for approximately 3 to 4 days.
Freezing
If you find yourself with a larger batch and want to preserve it for a longer period, freezing is an excellent option. Ensure the dish has completely cooled before portioning it into freezer-safe containers or heavy-duty resealable freezer bags. Leave a little headspace in the container, as liquids expand when frozen. Properly frozen, this dish can be enjoyed for up to 2 to 3 months, retaining much of its original flavor and texture.
Reheating
Reheating leftovers is quite straightforward. For refrigerated portions, place them in a microwave-safe dish and heat on medium power for 2-3 minutes, stirring halfway through to ensure even warming. If reheating from frozen, you can either thaw the dish overnight in the refrigerator and then reheat it as you would refrigerated leftovers, or reheat it directly from frozen. Reheating from frozen may take a little longer, so keep an eye on it and stir occasionally to ensure it heats through thoroughly without drying out. A brief stint in a skillet over medium-low heat with a splash of water can also be a great way to revive the dish.
Frequently Asked Questions
-
How long can I keep leftovers of Honey Garlic Kielbasa and Veggies?
Leftovers of Honey Garlic Kielbasa and Veggies can be safely stored in an airtight container in the refrigerator for up to 3 to 4 days. It’s important to ensure the dish has cooled completely before sealing the container to prevent condensation, which can affect texture and quality over time. Always check for any signs of spoilage, such as off-odors or mold, before consuming leftovers, though proper storage typically ensures freshness.
-
Can I make this dish ahead of time, and if so, how should I store it?
Yes, Honey Garlic Kielbasa and Veggies can absolutely be made ahead of time, making it a fantastic option for meal preparation. Once cooked and fully cooled, store it in an airtight container in the refrigerator. It will keep well for 3-4 days and can be reheated in the microwave or a skillet when you’re ready to serve. This convenience makes it perfect for busy work weeks or for having a quick meal ready to go.
-
What are the best vegetables to use in this recipe, and can I substitute them?
The recipe is highly versatile regarding vegetables. While bell peppers, broccoli, and carrots are commonly used and work wonderfully, you can easily substitute them with other vegetables you enjoy or have on hand. Excellent additions include zucchini, snap peas, green beans, onions, mushrooms, or even cauliflower. The key is to cut them into relatively uniform, bite-sized pieces so they cook evenly and maintain a pleasant tender-crisp texture. Feel free to mix and match based on seasonal availability or your personal preferences to create your perfect combination.