Deliciously Easy Homemade Fruit Snacks
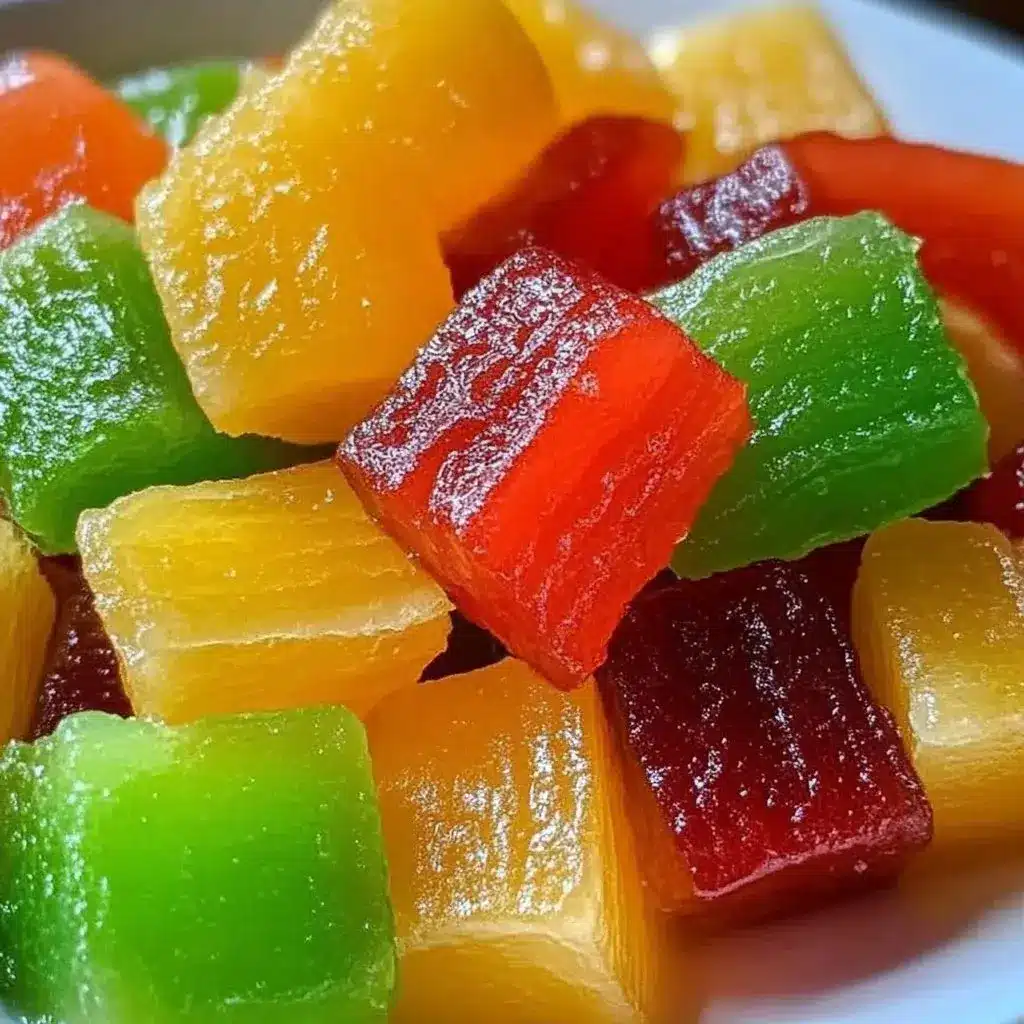
Are you on the hunt for a snack that’s not only delicious but also customizable and healthy? Look no further! The Deliciously Easy Homemade Fruit Snacks recipe combines fresh, vibrant flavors with simple preparation steps, making it a perfect treat for both kids and adults. They’re made from real fruit, free of artificial flavors or preservatives, and you can adjust the sweetness to your liking.
The beauty of these fruit snacks lies in their simplicity, inviting creativity to mix and match your favorite fruits. Whether you prefer tangy strawberries or sweet blueberries, you can tailor the flavor to suit your cravings or dietary preferences. This recipe is a fantastic way to create a guilt-free treat that still satisfies your sweet tooth, offering a delightful chewy, fruity sensation that melts in your mouth.
Why You Will Love This Recipe
- Healthy Ingredients: Made with real fruit, these snacks are a nutritious alternative to store-bought options loaded with artificial additives and preservatives, ensuring you know exactly what you’re consuming.
- Simple Preparation: With minimal steps and common pantry staples, making these fruit snacks is an absolute breeze, perfect for busy weeknights or a quick weekend activity with the family.
- Fully Customizable: You have complete control to choose your favorite fruits, adjust the sweetness level to your personal preference, and even adapt them for specific dietary needs, making them universally appealing.
- Fun for Kids: It’s a fantastic way to involve children in the kitchen, teaching them about healthy eating and allowing them to create their own colorful, tasty treats that they’ll be proud to share.
- Perfect for Any Occasion: Whether it’s a lunchbox surprise, a movie night indulgence, or a vibrant addition to a party platter, these fruit snacks are a guaranteed hit for all ages.
Ingredients You Need
The quality of your ingredients directly impacts the final flavor and texture of your Deliciously Easy Homemade Fruit Snacks. Opting for fresh, ripe fruits will yield the most vibrant and natural taste, ensuring each bite is bursting with fruity goodness. Selecting high-quality gelatin or agar-agar is also essential for achieving that perfect, chewy consistency that makes these snacks so satisfying.
Deliciously Easy Homemade Fruit Snacks

A customizable and healthy snack made with real fruit, perfect for both kids and adults. These fruit snacks are easy to make, free of artificial flavors or preservatives, and can be tailored to your preferred sweetness and fruit combinations.
- 2 cups fruit puree (e.g., strawberries, blueberries, or mixed fruit)
- 1 tablespoon honey or maple syrup (optional for sweetness)
- 2 tablespoons lemon juice
- 1 tablespoon gelatin or agar-agar (for a vegan option)
- 1Gather all your ingredients. Wash and prepare your preferred fruits, blending them into a smooth puree.
- 2In a saucepan, combine the fruit puree, honey or maple syrup (if using), and lemon juice. Heat the mixture over medium heat, stirring occasionally until it warms up.
- 3Once warm, slowly sprinkle the gelatin (or agar-agar) into the saucepan while stirring continuously until fully dissolved.
- 4Continue stirring until everything is well combined and the mixture is smooth.
- 5Carefully pour the fruit mixture into molds or a lined baking dish.
- 6Refrigerate for about 2-3 hours until they are firm to the touch.
- 7Once set, remove from the molds or cut into bite-sized pieces.
- 8Store in an airtight container in the refrigerator for freshness.
Keywords: customizable snacks, fruit snacks, Healthy Treats, homemade snacks, kids snacks
- fruit puree: a smooth blend of your chosen fruits, forming the flavorful base of the snacks.
- honey or maple syrup: an optional sweetener to enhance the natural fruit flavors, adjustable to your desired sweetness level.
- lemon juice: provides a crucial tangy balance to the sweetness and brightens the overall fruity taste.
- gelatin or agar-agar: the gelling agent that gives the fruit snacks their signature chewy texture, with agar-agar being a vegan alternative.
The precise quantities for these ingredients are conveniently listed within the provided recipe card, ensuring perfect results every time.
Variations
To elevate your homemade fruit snack game, consider experimenting with a tropical twist. Combining the vibrant sweetness of ripe mangoes with the subtle tang of fresh pineapple can transport your taste buds to a sunny paradise with every chew. This combination offers a delightful departure from traditional berry flavors, providing a refreshing and exotic snacking experience that’s perfect for summer days.
For those who adore the classic taste of berries but want a deeper flavor profile, a berry medley variation is an excellent choice. Imagine blending a mix of tart raspberries, sweet blueberries, and slightly acidic blackberries; this creates a complex and satisfyingly tangy treat. This blend not only offers a beautiful deep purple hue but also packs a powerful antioxidant punch.
A citrus splash variation offers a zesty and invigorating alternative. Incorporating freshly squeezed orange juice alongside your primary fruit puree, perhaps peaches or apricots, adds a delightful zing. This bright, tangy flavor cuts through sweetness beautifully, making the snacks incredibly refreshing and perfect for a palate cleanser or an energizing afternoon pick-me-up. You can explore even further by adding a hint of lime zest for an extra layer of aromatic complexity.
How to Prepare homemade fruit snacks
Step 1: Prepare the Fruit Base
The initial step in crafting your Deliciously Easy Homemade Fruit Snacks involves meticulously preparing your fruit base. Begin by selecting your favorite fruits, ensuring they are ripe and flavorful for the best possible outcome. Whether you choose sweet strawberries, juicy blueberries, or a combination of vibrant tropical fruits, their quality is paramount to the final product’s taste.
Once your fruits are selected, they need to be thoroughly washed and then processed into a smooth, lump-free puree. A high-powered blender or a food processor works wonders for this task, transforming whole fruits into a velvety liquid. If using frozen fruit, allow it to thaw slightly before pureeing to achieve a smoother consistency. The goal is a liquid that is easy to work with and free from any fibrous pieces.
Ensure you have approximately two cups of fruit puree for the recipe. If your initial puree is too thick, a tablespoon or two of water or even a splash of fruit juice can be added to achieve the desired consistency before proceeding to the next stage. This careful preparation sets the stage for perfectly textured and flavorful fruit snacks.
Step 2: Gentle Heating of the Fruit Mixture
In this crucial stage, you will gently heat the prepared fruit puree, combining it with your chosen sweetener and the brightening agent of lemon juice. Select a medium-sized saucepan and pour in your vibrant fruit puree. Add your optional honey or maple syrup, if you prefer a sweeter snack, and then incorporate the lemon juice; this addition is key to balancing the sweetness and enhancing the fruit’s natural flavors.
Place the saucepan over medium heat on your stovetop. It’s important to heat the mixture gradually, allowing the flavors to meld together harmoniously. Stir the contents of the saucepan occasionally with a whisk or a spoon to prevent sticking and ensure even heating. This slow warming process also prepares the mixture to receive the gelling agent effectively.
Continue heating until the mixture is warm to the touch but not boiling vigorously. You are looking for a gentle warmth that signifies the ingredients are ready to be combined fully in the next steps. This controlled heating is essential for activating the gelatin or agar-agar properly in the subsequent stages, ensuring a smooth and well-set final product.
Step 3: Incorporating the Gelling Agent
This step requires a bit of careful attention to achieve the perfect texture for your homemade fruit snacks. Once your fruit mixture has reached the desired warmth, it’s time to introduce the gelling agent. Slowly sprinkle the gelatin or agar-agar over the surface of the warm liquid in the saucepan. If you are using gelatin, it’s often referred to as “blooming” when sprinkled, though in this method, direct sprinkling into the warm liquid is effective.
As you sprinkle the powder, begin stirring the mixture continuously. This continuous stirring is absolutely vital to ensure that the gelatin or agar-agar dissolves completely and evenly throughout the fruit puree. Clumps of undissolved gelling agent can lead to an undesirable texture in your finished snacks. You want a smooth, consistent liquid free from any visible powder or lumps.
Continue whisking gently but persistently for several minutes. This process allows the gelling agent to fully hydrate and integrate into the fruit mixture. The mixture will start to thicken slightly as the gelatin begins to activate. A well-dissolved gelling agent is the secret to achieving that satisfyingly chewy, yet tender, consistency that defines a perfect homemade fruit snack. Patience here pays off significantly for the final outcome.
Step 4: Ensuring Complete Homogeneity
After the gelatin or agar-agar has been incorporated, your next focus is ensuring the mixture is perfectly homogeneous. Continue to stir the contents of the saucepan diligently for at least another two to three minutes. This extended stirring phase is critical for guaranteeing that every component of the mixture is thoroughly blended and that there are absolutely no remaining traces of undissolved powder or stubborn lumps.
The goal is to achieve a silky-smooth consistency that coats the back of a spoon uniformly. Observe the mixture closely; it should have a uniform color and texture throughout. If you notice any graininess or areas where the powder seems to be settling, continue stirring and gently heating for a brief additional period, always maintaining that gentle, consistent motion.
A well-combined mixture means that the gelling agent will distribute evenly, leading to consistent setting and texture in all your fruit snacks. This thorough blending is a cornerstone of creating high-quality homemade fruit snacks that look and taste professionally made. It’s a simple yet indispensable step for achieving superior results and a delightful mouthfeel.
Step 5: Transferring to Molds for Setting
With your perfectly blended fruit mixture ready, it’s time to transfer it into molds. This is where you can really let your creativity shine and prepare for the fun shapes your snacks will take. Carefully and slowly pour the warm fruit mixture from the saucepan into your chosen molds. Working deliberately helps to prevent spills and ensures each mold is filled evenly for uniform-sized snacks.
Silicone molds are highly recommended for this purpose because they are flexible and make unmolding incredibly easy, preserving the shapes perfectly. You can find silicone molds in a vast array of fun shapes, from animals and stars to letters and numbers, making them ideal for engaging children. Alternatively, you can pour the mixture into a shallow, parchment-lined baking dish if you prefer to cut your snacks into squares or rectangles later.
Ensure you don’t overfill the molds; leave a tiny bit of space at the top to account for any slight expansion as they set. If you are using a baking dish, spread the mixture evenly across the bottom for consistent thickness. The careful filling of molds or the dish is key to producing attractive and easy-to-handle fruit snacks that are ready for the next exciting step: chilling.
Step 6: The Chilling Process for Perfect Set
Now comes the patient part: allowing your fruit snacks to firm up. Once your molds or baking dish are filled with the fruit mixture, it’s time to place them in the refrigerator. Position the molds carefully on a stable shelf to prevent any sloshing or spills during the chilling process. The cool, consistent temperature of the refrigerator is essential for the gelatin or agar-agar to work its magic and set the mixture.
Allow the fruit snacks to chill undisturbed for a minimum of two to three hours. The exact time may vary slightly depending on the thickness of your mixture and the efficiency of your refrigerator. To check if they are ready, gently touch the surface of a snack; it should feel firm and slightly springy to the touch, with no wetness or stickiness. They should hold their shape when gently pressed.
Resisting the urge to rush this process is important. Adequate chilling ensures that the snacks have a perfect, chewy texture that is not too soft or too hard. A well-set fruit snack will release cleanly from its mold or be easy to cut into desired shapes without crumbling. This chilling phase is where your delicious creation truly takes form.
Step 7: Unmolding and Final Shaping
Once your fruit snacks have achieved the perfect set, it’s time for the satisfying moment of unmolding them or cutting them into bite-sized pieces. If you used silicone molds, gently peel the edges of the mold away from the fruit snack. Then, carefully push from the bottom of the mold or simply invert it onto a clean plate or parchment-lined tray to release the shaped snack.
Be gentle during this process to ensure the shapes remain intact and the snacks don’t tear. If you poured the mixture into a baking dish, carefully lift the parchment paper liner out of the dish, or if not lined, run a thin knife around the edges to loosen the fruit slab. Then, use a sharp knife or a pizza cutter to slice the slab into your desired shapes and sizes, such as small squares, rectangles, or fun strips.
Ensure your knife is clean and sharp for precise cuts, especially if you are aiming for small, uniform pieces. This step transforms the set mixture into the final, edible fruit snacks ready to be enjoyed. The visual appeal of these shaped treats, especially when made with colorful molds, adds to their overall delightfulness, making them incredibly appealing to both children and adults alike.
Step 8: Proper Storage for Freshness
The final crucial step after preparing your delicious homemade fruit snacks is to ensure they are stored correctly to maintain their freshness and delightful chewy texture. Transfer the unmolded or cut fruit snacks into an airtight container. This is your primary defense against them drying out or absorbing unwanted odors from other foods in the refrigerator.
Ensure that the container is indeed airtight; this might involve a container with a silicone seal or a well-fitting lid. If you have made a very large batch, you can layer the fruit snacks between sheets of parchment paper to prevent them from sticking together, although if they are properly set, this is often not entirely necessary.
Store the container in the refrigerator. When stored properly in an airtight container in the fridge, these delicious homemade fruit snacks can retain their optimal chewy texture and vibrant flavor for about a week. This allows you to have a healthy, homemade treat readily available for days to come, making snack time always a delight.
Pro Tips for homemade fruit snacks
Tip: Use a Combination of Fruits for Depth of Flavor. While single fruits are wonderful, blending two or three complementary fruits, such as strawberries and raspberries, or mango and peach, can create a more complex and interesting flavor profile. This layering of tastes adds an extra dimension that makes the snacks even more delightful.
Tip: Adjust Gelatin/Agar-Agar Based on Desired Chewiness. For a firmer, chewier snack, you can slightly increase the amount of gelatin or agar-agar by about half a teaspoon. Conversely, if you prefer a softer, more melt-in-your-mouth texture, use the amount specified or even slightly less. Experimentation is key to finding your perfect consistency.
Tip: Avoid Boiling the Mixture with Gelatin. Gelatin can lose its effectiveness if boiled. Ensure the fruit mixture is warm, not boiling, when you add the gelatin or agar-agar. Stirring it in gently and allowing it to dissolve is more important than intense heat. This preserves the gelling power for optimal setting.
Tip: Consider Adding a Touch of Vanilla or Spice. To further enhance the flavor, a tiny splash of vanilla extract can add warmth and sweetness without adding more sugar. Alternatively, a pinch of cinnamon or nutmeg can provide a cozy, comforting note, especially if you are using apple or pear purees.
Tip: For Clearer Snacks, Strain the Puree Thoroughly. If you are aiming for a very smooth and vibrant-looking fruit snack, straining the fruit puree through a fine-mesh sieve after blending can remove any small seeds or fibrous bits. This step ensures an ultra-smooth texture and a clean, unblemished appearance in your finished snacks.
Serving Suggestions for homemade fruit snacks
Decoration
For an extra touch of visual appeal, consider lightly dusting your finished fruit snacks with a fine coating of organic cane sugar or a sprinkle of edible glitter before they are fully set. This adds a subtle sparkle and a hint of sweetness that makes them look extra special. You can also arrange them in colorful patterns or create simple designs on a platter.
Another delightful decorative option is to lightly coat some of the snacks in shredded coconut or finely chopped nuts (if there are no allergies). This adds a textural contrast and a sophisticated look, transforming them into more gourmet treats. Ensure the coating adheres well before storing or serving them to guests.
For themed parties, use cookie cutters to create specific shapes after they have set in a baking dish, and then arrange them according to the party’s theme. Think stars for a space party or hearts for a Valentine’s celebration. The versatility in shape and potential for decorative touches makes these homemade snacks endlessly adaptable.
Side Dishes
These delightful fruit snacks pair wonderfully with a variety of complementary items, making them a versatile addition to any snack spread or meal. Serving them alongside a bowl of creamy Greek yogurt or a smooth, unsweetened almond yogurt provides a wonderful textural contrast and a balance of tanginess and sweetness. A dollop of yogurt can also serve as a creamy dip.
For a more substantial pairing, consider offering them with a selection of mild cheeses, such as mild cheddar, mozzarella balls, or cream cheese cubes. The slight saltiness of the cheese can beautifully complement the fruity sweetness of the snacks. This combination works exceptionally well for a balanced appetizer or a sophisticated children’s tea party.
Another fantastic pairing is with a small dish of natural nut butter, like almond or peanut butter, for dipping. This adds a welcome source of protein and healthy fats, making the snack more filling and providing a rich, nutty flavor that contrasts well with the fruit. Ensure the nut butter is smooth to allow for easy dipping.
Creative Serving Ideas
Elevate your homemade fruit snacks by incorporating them into more elaborate dessert presentations. Try layering them with yogurt and granola in parfait glasses for a beautiful breakfast or dessert option. The distinct colors and textures create an appealing visual, reminiscent of a deconstructed fruit parfait. This layered approach offers a delightful experience in every spoonful.
For a fun and interactive treat, thread the fruit snacks onto small skewers, alternating them with fresh fruit pieces like melon balls or grapes. This creates colorful fruit kebabs that are easy for guests to pick up and enjoy, making them perfect for parties and outdoor gatherings. They offer a playful and healthy alternative to traditional sweet skewers.
Consider using them as a vibrant garnish for cakes, cupcakes, or even ice cream sundaes. Their chewy texture and bright colors can add a playful and delicious final touch. Imagine a swirl of vanilla ice cream topped with a few colorful fruit snacks and perhaps a drizzle of chocolate sauce for an irresistible dessert experience.
Preparation & Storage
Storing Leftovers
To keep your Deliciously Easy Homemade Fruit Snacks tasting their best, proper storage is key. Once they have completely cooled and are firm to the touch, transfer them into an airtight container. This is the most crucial step in preventing them from drying out and losing their signature chewy texture.
Ensure the container has a tight-fitting lid or seal. If you are making a large batch and are concerned about them sticking together, you can place parchment paper or wax paper between layers of the fruit snacks within the container. This simple step helps maintain their individual integrity and prevents them from becoming a single mass.
Store the container in the refrigerator. When kept in this manner, these homemade fruit snacks can maintain their optimal quality, flavor, and texture for approximately one week. This makes them a perfect make-ahead snack for busy households or for meal prepping throughout the week.
Freezing
If you’ve prepared a larger batch than you can consume within a week, freezing is an excellent option for long-term storage. The process is straightforward and ensures you can enjoy these healthy treats at a later date. Ensure the fruit snacks are completely set and have reached room temperature before attempting to freeze them.
Arrange the individual fruit snacks in a single layer on a baking sheet lined with parchment paper. Place this baking sheet in the freezer for about one to two hours, until the snacks are firm and frozen solid. This initial freezing step, known as flash freezing, prevents the snacks from clumping together when you package them for long-term storage.
Once frozen solid, transfer the individual snacks into a freezer-safe airtight container or a heavy-duty freezer bag. Remove as much air as possible from the bag before sealing to prevent freezer burn. Properly stored, homemade fruit snacks can remain delicious and retain their texture for up to three months in the freezer.
Reheating
Reheating homemade fruit snacks is generally not necessary as they are designed to be enjoyed cold or at room temperature, and over-reheating can affect their texture. However, if you have frozen them and wish to thaw them more quickly than overnight in the refrigerator, there are simple methods.
The most recommended method for thawing frozen fruit snacks is to simply transfer them from the freezer to the refrigerator. Allow them to thaw overnight. This slow thawing process helps them retain their best texture and prevents them from becoming too soft or sticky. You can then enjoy them directly from the fridge.
If you are in a hurry, you can place the frozen snacks on a plate at room temperature for about 30-60 minutes. They should soften up sufficiently to be enjoyable. Avoid microwaving them, as this can lead to uneven heating and an undesirable mushy texture, compromising the chewiness that makes them so appealing.
Frequently Asked Questions
-
Can I prepare it ahead of time?
Yes, these Deliciously Easy Homemade Fruit Snacks can absolutely be prepared a few days in advance. Once they are fully set and have cooled to room temperature, store them in an airtight container in the refrigerator. They will maintain their delicious chewy texture and vibrant flavor for about a week, making them an ideal make-ahead treat for lunches or busy weeknights.
-
Can I freeze it?
Absolutely! Freezing is a fantastic option for preserving your homemade fruit snacks for longer periods. After ensuring they are completely set, you can freeze them individually by flash-freezing on a baking sheet, then transferring them to a freezer-safe airtight container or bag. They can be stored in the freezer for up to three months, offering a convenient healthy snack option whenever cravings strike.
-
How long does it last?
When stored correctly in an airtight container in the refrigerator, your Deliciously Easy Homemade Fruit Snacks will typically last for about one week. The key to their longevity is proper sealing to prevent moisture loss or absorption of other fridge odors. If frozen, they can last for up to three months, providing a longer-term healthy snack solution.