Focaccia Rezept einfach 5 Schritte zum perfekten Brot – Muma’s Kitchen
Focaccia stands as a cornerstone of Italian baking, a wonderfully rustic flatbread celebrated for its delightful textural contrast – a perfectly crisp exterior giving way to a soft, airy crumb. This particular focaccia recipe is designed with simplicity and accessibility in mind, allowing even novice bakers to achieve that authentic, deeply satisfying flavour without undue complexity. It’s the ideal companion for a myriad of meals, from elevating your grilled dishes to gracing your pasta table, or simply serving as a comforting snack anytime.
The magic of focaccia lies in its humble yet impactful ingredients, primarily its reliance on excellent olive oil and yeast to create that signature flavour and texture. This recipe aims to capture the essence of traditional Italian baking, making it a joy to create and even more of a joy to share, embodying the spirit of simple, delicious food.
Why You Will Love This Recipe
- Effortless Preparation: This recipe streamlines the focaccia-making process, ensuring you can create delicious, homemade bread with minimal fuss and advanced techniques.
- Incredible Versatility: From classic rosemary and sea salt to creative toppings like olives and sun-dried tomatoes, this focaccia is a blank canvas for your culinary imagination.
- Authentic Italian Taste: Experience the true flavours of Italy with a golden, crispy crust and a light, fluffy interior, all enhanced by the rich aroma of quality olive oil.
- Beginner-Friendly: Designed for ease, this recipe guides you through each step, making it accessible for anyone wanting to bake their first focaccia.
- Quick Baking Time: Once the dough has risen, the actual baking is relatively swift, meaning you can enjoy warm, fresh focaccia sooner rather than later.
Ingredients You Need
The beauty of this focaccia recipe lies in its carefully selected, simple ingredients, each playing a vital role in achieving that distinctive taste and texture. Using the freshest, highest-quality ingredients, especially the olive oil, will truly elevate your final bread.
Classic Focaccia Bread

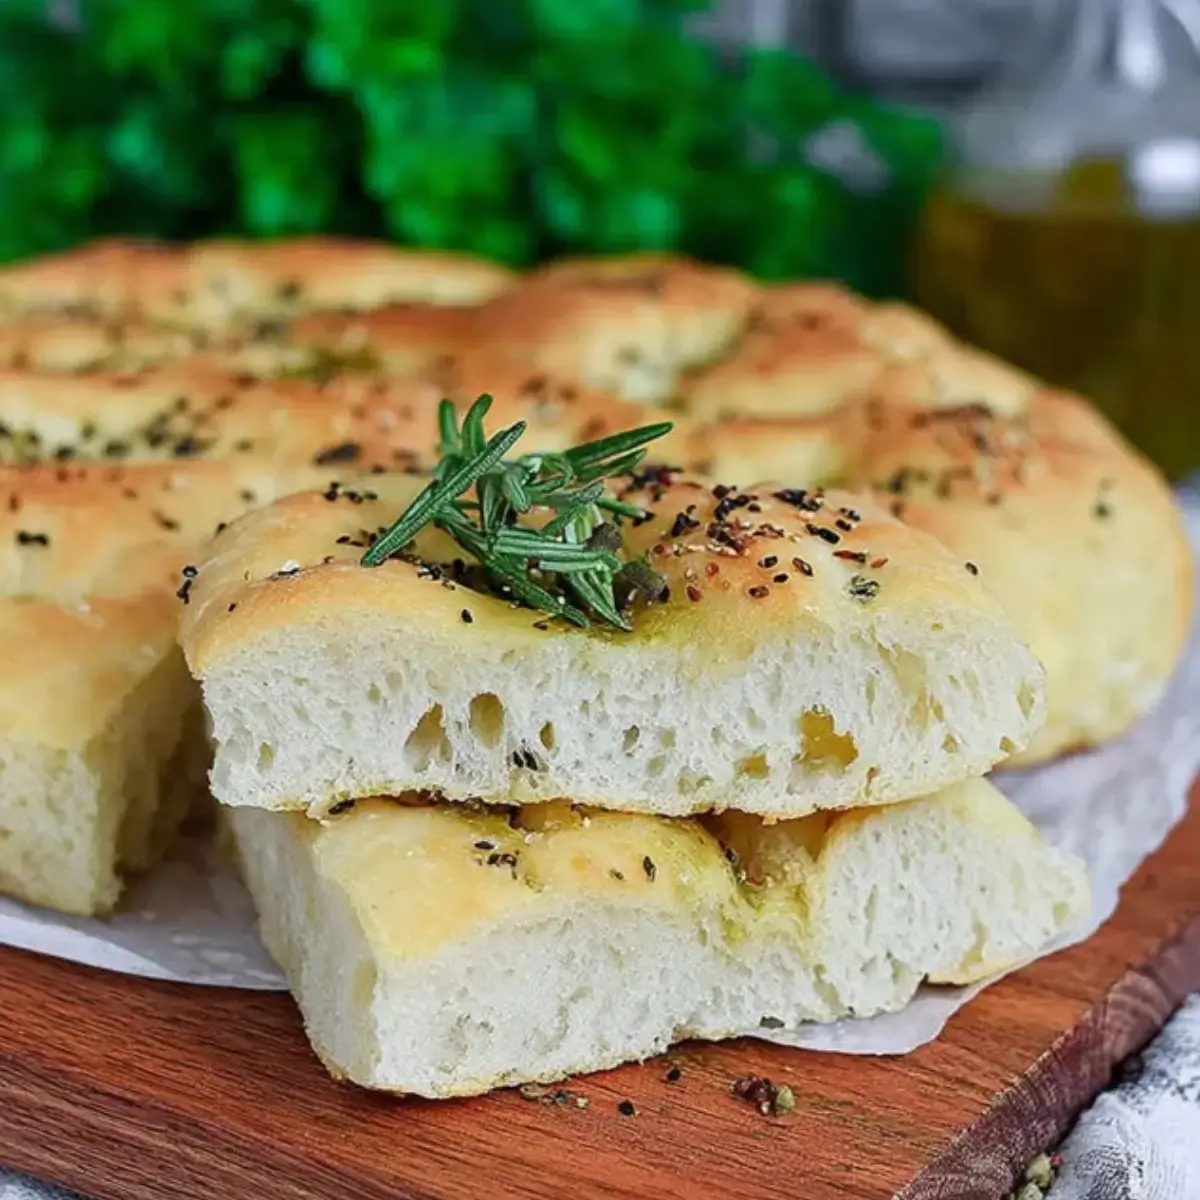
Focaccia is a classic Italian flatbread that delights with its crispy crust and airy interior. This simple Focaccia recipe is perfect for anyone who wants to bake aromatic bread at home with little effort. Whether as a side dish for grilling, with pasta, or as a snack – Focaccia impresses with its taste, versatility, and uncomplicated preparation.
- 480 g flour
- 7 g active dry yeast
- 45 ml olive oil
- 260 ml warm water
- 1.5 tsp salt
- 1 tbsp sugar, honey, or agave nectar
- 1 pinch coarse sea salt
- Fresh herbs (e.g., rosemary)
- 5 olives
- 5 sun-dried tomatoes
- 1In a large bowl, combine flour, active dry yeast, olive oil, warm water, salt, and sugar. Knead the dough for about 5 to 10 minutes until it is smooth and elastic. Ensure all ingredients are well combined and there are no dry spots.
- 2Cover the dough and let it rest in a warm place for about 30 minutes. During this time, the volume should increase significantly. This is crucial for the typical airy structure of the focaccia.
- 3Place the dough on a baking sheet and roll it out evenly or press it into shape with your hands. The dough should not be too thin to ensure the focaccia remains fluffy.
- 4Press small indentations into the dough with your fingers. These depressions are characteristic of focaccia and help the olive oil and seasonings to penetrate better.
- 5Evenly distribute the toppings such as olives, sun-dried tomatoes, and herbs over the surface. Drizzle generously with olive oil and sprinkle the focaccia with coarse salt.
- 6Bake the focaccia in a preheated oven at 220°C (425°F) for about 15 minutes, until the crust is golden brown and crispy, while the inside remains soft.
Keywords: Focaccia, Italian Bread, Flatbread, Baking, Vegetarian, Homemade Bread
The precise quantities for these essential components are all readily available within the recipe card above, ensuring you have everything you need for success.
Variations
The inherent flexibility of focaccia makes it a delightful base for endless flavour explorations. Consider a vegan twist by ensuring your recipe uses plant-based milk if any is called for, or simply by relying on the naturally vegan ingredients of flour, water, yeast, and olive oil, enhanced with aromatic herbs and vegetables. This approach creates a wonderfully satisfying bread that everyone can enjoy.
For those mindful of carbohydrates, a low-carb adaptation is achievable, though it requires a significant departure from the traditional flour base. While not a direct substitution for this specific recipe, exploring recipes that utilize almond flour or a blend of nut flours can yield a focaccia-like bread with a different, yet still delicious, texture and flavour profile. This allows for enjoyment even with dietary restrictions.
Another exciting avenue is to infuse your focaccia with sweet elements, turning it into a delightful dessert bread. Imagine pressing fresh grapes or figs into the dimpled dough before baking, perhaps with a drizzle of honey. This creative use transforms the savoury staple into a unique treat, perfect for after-dinner indulgence or a special brunch offering, showcasing the remarkable adaptability of this Italian classic.
How to Prepare focaccia recipe
Step 1: Crafting the Dough Foundation
Begin by gathering your primary dry ingredients into a spacious mixing bowl. You’ll want to combine the flour, which forms the structural backbone of your focaccia, with the dry yeast, the magical leavening agent that promises a wonderfully airy crumb. A pinch of salt is crucial here, not just for flavour, but to regulate yeast activity and strengthen the gluten structure as it develops.
Introduce the liquid elements to this dry mixture. Warm water, ideally around 105-115°F (40-46°C), is essential to awaken the yeast and initiate the fermentation process, while a touch of sugar or honey acts as a readily available food source for the yeast, encouraging a robust rise. A generous amount of good-quality olive oil is also incorporated at this stage, contributing moisture, richness, and that signature Mediterranean flavour that defines true focaccia.
Now, it’s time for the critical kneading process. Whether you’re using a stand mixer with a dough hook or your own two hands, you’ll want to knead this mixture vigorously for about 8 to 10 minutes. The goal is to develop the gluten network thoroughly, transforming the shaggy mass into a smooth, elastic, and slightly tacky dough that springs back when gently pressed. This step is paramount for achieving that characteristic light and airy interior.
Step 2: The Essential Rise
Once your dough has achieved that perfect smooth and elastic consistency, gently shape it into a ball. Lightly grease a clean bowl with a little olive oil, then place the dough inside, turning it once to coat the entire surface. This oil coating prevents the dough from drying out as it rests.
Cover the bowl snugly with plastic wrap or a clean kitchen towel. It’s vital to place the covered dough in a warm, draft-free environment. This could be a slightly warm oven (turned off, of course), near a sunny window, or simply in a cozy corner of your kitchen. The warmth is crucial for the yeast to actively ferment and produce carbon dioxide gas, which will cause the dough to expand.
Allow the dough to rise for approximately 1 to 1.5 hours, or until it has at least doubled in size. The exact time will depend on the ambient temperature of your kitchen. You’ll notice the dough becoming noticeably puffier and lighter in texture, a sure sign that the yeast has done its job wonderfully, setting the stage for that delightful focaccia structure.
Step 3: Shaping for Success
After the dough has beautifully risen, gently punch it down to release some of the accumulated gases. This process also helps to create a more even texture throughout the finished bread. Transfer the risen dough from the bowl onto your prepared baking sheet or a lightly floured work surface. You can use a standard baking sheet, a rimmed baking pan, or even a pizza stone for a crispier bottom.
Now, it’s time to shape your focaccia. Using your fingertips, gently press and stretch the dough outwards towards the edges of your baking pan. Aim for an even thickness across the entire surface, typically about 1/2 to 3/4 inch thick. Avoid tearing the dough; if it resists stretching, let it rest for a few minutes to relax the gluten before continuing. The aim is to create a rustic, free-form shape that fills the pan.
This stage is also where you create the iconic dimples characteristic of focaccia. Lightly oil your fingertips and press them firmly into the dough, creating small indentations all over the surface. These dimples are not just for aesthetics; they are functional, allowing the olive oil and any subsequent toppings to pool and seep into the bread, adding flavour and moisture as it bakes.
Step 4: Adding Aromatic Accents
With the dough beautifully shaped and dimpled, it’s time to dress it up with your chosen flavourings. This is where the true personality of your focaccia emerges. Drizzle a generous amount of high-quality extra virgin olive oil over the entire surface of the dough, ensuring it pools slightly in the dimples you created. Don’t be shy with the oil; it’s key to the bread’s moistness and distinctive flavour profile.
Next, sprinkle your selected toppings evenly across the dough. Classic choices include fresh rosemary sprigs, which release their pungent aroma as they bake, or coarse sea salt, which adds delightful little bursts of flavour and a pleasing crunch to the crust. Other popular additions include Kalamata olives, halved or sliced, which provide a briny counterpoint, or sun-dried tomatoes, rehydrated and chopped, offering a concentrated, sweet-tart flavour.
Beyond these staples, consider incorporating other Mediterranean favourites such as thinly sliced red onions, halved cherry tomatoes, or a sprinkle of dried oregano. For a heartier option, small pieces of feta or goat cheese can be scattered over the top, melting beautifully into the dough during baking. The key is to distribute these elements harmoniously so each bite offers a balanced taste experience.
Step 5: The Fiery Transformation
Preheat your oven to a hot temperature, typically around 400-425°F (200-220°C). A hot oven is crucial for achieving that signature crispy exterior and ensuring the focaccia bakes evenly and quickly. Place your prepared baking sheet with the focaccia into the centre of the preheated oven.
Bake for approximately 15 to 25 minutes. The exact duration will depend on the thickness of your focaccia and the specific temperature of your oven. You are looking for a beautiful golden-brown colour on the crust, indicating that it has crisped up perfectly. The aroma filling your kitchen at this stage will be absolutely divine, a testament to the simple yet profound transformation occurring.
Once baked to perfection, carefully remove the focaccia from the oven. For an extra touch of richness and sheen, you can optionally brush the hot focaccia with a little more olive oil immediately after it comes out of the oven. This adds an extra layer of flavour and helps to keep the crust tender even as it cools. Let it cool slightly on a wire rack before slicing and serving, allowing the internal structure to set.
Step 6: The Final Flourish
As soon as the focaccia emerges from the oven, and while it’s still warm, consider another light drizzle of excellent olive oil. This step enhances the bread’s flavour, adds a beautiful sheen, and helps maintain the desired texture. It’s a simple addition that makes a significant difference in the final sensory experience.
Allow the focaccia to cool for at least 10-15 minutes on a wire rack before you attempt to slice it. This resting period is essential; it allows the internal steam to dissipate slightly and the crumb structure to firm up. Cutting into it too soon can result in a gummy texture, whereas a brief rest ensures clean slices and a perfectly chewy interior.
Once cooled sufficiently, use a sharp serrated knife to cut the focaccia into desired portions. Whether you prefer generous squares, rustic wedges, or smaller bite-sized pieces, slicing is the final act before it can be enjoyed. The visual appeal of the dimpled surface, golden crust, and embedded toppings is often as enticing as its aroma.
Pro Tips for focaccia recipe
Invest in Quality Olive Oil: This is arguably the most crucial ingredient for authentic focaccia. Use a good extra virgin olive oil with a robust flavour, as its taste will be prominent in the finished bread. Cold-pressed varieties offer the most intense and nuanced flavour profile.
Don’t Rush the Knead: Thoroughly kneading the dough develops the gluten structure, which is essential for the light and airy texture of focaccia. Aim for at least 8-10 minutes of kneading until the dough is smooth, elastic, and passes the windowpane test, meaning you can stretch a small piece thin enough to see light through it without tearing.
Embrace the Rise Time: Allowing the dough sufficient time to rise in a warm environment is non-negotiable for achieving that signature fluffy interior. Resist the temptation to shorten this crucial period, as it’s when the yeast works its magic, creating air pockets and complex flavours.
Master the Dimples: The characteristic dimples aren’t just for show; they are functional. Press your oiled fingertips firmly into the dough to create these indentations. They serve as little reservoirs for olive oil and any other toppings, ensuring flavour penetrates deeply into the bread and the crust becomes wonderfully crisp in these areas.
Experiment with Toppings: While rosemary and sea salt are classic, don’t hesitate to get creative with your focaccia. Consider adding thinly sliced red onions, cherry tomatoes, olives, sun-dried tomatoes, or even different herbs like thyme or oregano. For a savoury twist, a sprinkle of grated Parmesan or small chunks of feta cheese work beautifully, transforming your focaccia into a flavourful centrepiece.
Serving Suggestions for focaccia recipe
Decoration
The visual appeal of focaccia is as important as its taste. After pressing your dimples, consider arranging fresh rosemary sprigs artistically across the surface, weaving them into the dough. Halved cherry tomatoes or whole Kalamata olives can be strategically placed to create colourful patterns. A sprinkle of coarse sea salt or flaky Maldon salt provides a beautiful crystalline finish, glistening under the light.
Side Dishes
Focaccia truly shines when served alongside a variety of dishes, acting as the perfect absorbent for delicious sauces and gravies. It makes an exceptional partner to hearty pasta dishes, soaking up rich tomato or creamy sauces. Alongside a fresh, vibrant salad, it offers a satisfying textural contrast. It’s also an indispensable accompaniment to grilled meats and seafood, its rustic charm complementing smoky flavours beautifully.
Creative Serving Ideas
Transform your focaccia into a delightful appetizer by cutting it into small, bite-sized squares and serving them with an assortment of dips. Think classic garlic aioli, creamy hummus, spicy baba ghanoush, or a zesty pesto. For a more substantial option, slice the focaccia horizontally and fill it with classic Italian ingredients like fresh mozzarella, ripe tomatoes, basil leaves, and a drizzle of balsamic glaze, creating a spectacular sandwich.
Preparation & Storage
Storing Leftovers
Once cooled completely, any leftover focaccia should be stored at room temperature in an airtight container or a resealable plastic bag. This helps to prevent it from drying out. Properly stored, focaccia can maintain its best quality for 2 to 3 days. While it remains edible for longer, its delightful crispness will diminish over time.
Freezing
Focaccia freezes exceptionally well, making it a great option for preparing ahead of time. Once the bread has cooled entirely, slice it into individual portions or serving-sized pieces. Wrap each piece tightly in plastic wrap, then place them inside a heavy-duty freezer bag, squeezing out as much air as possible to prevent freezer burn. Properly stored, focaccia can be kept frozen for up to 2 to 3 months.
Reheating
To revive leftover focaccia and restore its wonderful texture, reheating is key. If frozen, allow the pieces to thaw at room temperature first. Then, place the focaccia on a baking sheet and warm it in a preheated oven at around 350°F (175°C) for 5-10 minutes, or until it’s heated through and the crust has regained its crispness. You can also briefly toast slices in a toaster oven or even a dry skillet over medium heat.
Frequently Asked Questions
-
How can I ensure my focaccia is exceptionally light and airy?
Achieving that coveted light and airy texture in focaccia hinges on several factors. Firstly, the yeast needs adequate time and warmth to ferment and produce carbon dioxide, so don’t rush the rising process; allow the dough to at least double in volume in a cozy spot. Secondly, thorough kneading is crucial for developing a strong gluten network, which traps those precious gas bubbles. A well-kneaded dough will be smooth, elastic, and resilient. Finally, avoid overworking the dough after its first rise; a gentle punch-down and careful shaping are all that’s needed before baking to maintain the delicate structure that yeast has created.
-
Is it possible to make focaccia without using yeast, or are there alternatives?
While traditional focaccia relies on yeast for its characteristic airy and chewy texture, you can create a flatbread-like result using alternative leavening agents like baking powder or baking soda. However, it’s important to manage expectations; these alternatives will produce a bread that is denser and more cake-like or biscuit-like, rather than the light, open crumb of a yeast-leavened focaccia. If you’re aiming for that authentic Italian style, sticking with yeast is highly recommended. For those seeking a quick bread, a baking powder-based recipe might suffice, but it will be a fundamentally different baked good.
-
What is the best method for storing focaccia to maintain its freshness, and can it be frozen?
To keep your focaccia fresh for a few days, store it at room temperature in an airtight container or wrap it tightly in plastic wrap, followed by aluminum foil, or place it in a resealable bag. This prevents moisture loss and keeps it from becoming stale. Yes, focaccia freezes beautifully! Once completely cooled, slice it into individual portions, wrap each piece securely in plastic wrap, and then place them in a freezer-safe bag. Squeeze out any excess air to prevent freezer burn. Frozen focaccia will remain of good quality for up to 2-3 months and can be reheated directly from frozen or after thawing.