Irresistible Classic Mediterranean Roasted Vegetables

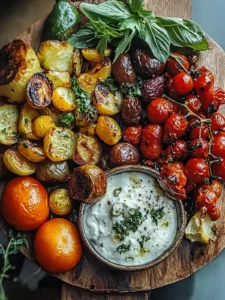
The first whiff of roasted vegetables brings a comforting warmth that instantly transforms any kitchen into a welcoming haven. Picture a vibrant Mediterranean bowl bursting with golden potatoes, sweet red bell peppers, and crispy chickpeas, all enhanced by an array of aromatic spices.
As someone who loves to explore flavors, I can’t help but get excited when a simple dish like this evolves into a satisfying feast. After a particularly hectic week of juggling errands and deadlines, this Classic Mediterranean Roasted Vegetable Bowl with Creamy Tzatziki has become my go-to remedy. It’s quick, healthy, and provides a delightful burst of color and flavor that has me forgetting all about fast food.
Why You Will Love This Recipe
- Wholesome Delight: This recipe is brimming with vibrant colors and bold flavors that will wow both your eyes and taste buds, making it a truly satisfying meal.
- Easy Preparation: With just a few simple steps and minimal active cooking time, you can create a wholesome and impressive meal that’s perfect for busy weeknights or relaxed weekends.
- Customizable Ingredients: Feel free to mix and match your favorite vegetables based on seasonality or what you have on hand, making it an incredibly versatile option for any palate.
- Healthy and Filling: Packed with protein, fiber, and essential nutrients from a variety of vegetables and chickpeas, this dish keeps you feeling satisfied and energized for hours.
- Versatile Pairing: Serve it alongside warm pita, fluffy quinoa, or even as a delicious salad base for a complete and well-rounded meal that can be adapted to any occasion.
- Guilt-Free Indulgence: With a creamy, homemade tzatziki that’s easy to whip up and packed with fresh ingredients, you can indulge in a flavorful sauce without any guilt, making this dish a must-try for everyone.
Ingredients You Need
The magic of Mediterranean cuisine lies in its fresh, high-quality ingredients, and this recipe is no exception. Opting for the freshest produce available will elevate the flavors and textures, ensuring a truly authentic and delightful culinary experience. We will focus on a vibrant medley of vegetables that roast beautifully, complemented by protein-rich chickpeas and a luscious, creamy tzatziki.
Classic Mediterranean Roasted Vegetables with Creamy Tzatziki
Experience the comforting warmth of Classic Mediterranean Roasted Vegetables, bursting with flavor and colors, served with a creamy tzatziki. This dish is a wholesome delight, easy to prepare, customizable, healthy, filling, versatile, and guilt-free.
- 1 can Chickpeas (drained and rinsed)
- 1 cup Red Bell Pepper (diced)
- 1 medium Red Onion (cut into wedges)
- 2 medium Potatoes (cut into ¾-inch cubes)
- 3 tablespoons Olive Oil (extra virgin)
- 1 teaspoon Paprika
- 1 teaspoon Dried Basil
- 1 teaspoon Garlic Powder
- 1 teaspoon Dried Oregano
- 1 teaspoon Dried Dill
- 1 teaspoon Dried Parsley
- 1 teaspoon Salt (kosher)
- 1 teaspoon Black Pepper (freshly cracked)
- 1 cup Plain Yogurt (Greek or plant-based)
- 2 cloves Garlic (fresh)
- 1 medium Cucumber (grated and moisture squeezed out)
- 2 tablespoons Fresh Dill (chopped)
- 1 tablespoon Red Wine Vinegar
- 1 tablespoon Lemon Juice
- 1Preheat your oven to 400°F (200°C).
- 2Cut potatoes into ¾-inch cubes, dice the red bell pepper, and cut the onion into wedges. Drain and rinse chickpeas.
- 3Mix paprika, dried basil, garlic powder, dried oregano, dried dill, dried parsley, salt, and black pepper in a small bowl.
- 4Toss prepared vegetables and chickpeas with olive oil and spice blend. Spread out evenly on a baking sheet.
- 5Roast in the oven for 40 minutes, stirring halfway through until golden brown and tender.
- 6Blend yogurt, soaked cashews, tofu, and garlic until smooth and creamy.
- 7Add grated cucumber, fresh dill, red wine vinegar, salt, black pepper, and lemon juice to the blended mixture. Stir well to combine.
- 8Spread tzatziki on serving plates and top with roasted vegetables and chickpeas. Serve immediately.
Keywords: roasted vegetables, mediterranean, tzatziki, healthy, vegetarian, dinner, side dish, vegan option
The quantities for these essential components are detailed in the recipe card, ensuring perfect proportions for a harmonious dish.
Variations
This Classic Mediterranean Roasted Vegetables recipe is wonderfully adaptable, allowing for a multitude of exciting variations to suit different dietary needs and taste preferences. One fantastic adaptation is a vegan version, which can be achieved by substituting the Greek yogurt in the tzatziki with a high-quality, unsweetened plant-based yogurt, such as coconut or soy yogurt, for a rich and creamy texture that’s entirely dairy-free. This swap maintains the characteristic tang and coolness of the tzatziki, making it indistinguishable from the traditional version for many.
For those following a low-carb lifestyle, you can easily modify this recipe by omitting the potatoes and focusing on other low-carbohydrate vegetables. Think an abundance of bell peppers in various colors, zucchini, eggplant, broccoli florets, and cauliflower. These vegetables roast beautifully and provide excellent texture and flavor, absorbing the aromatic spices wonderfully. You could also incorporate more Brussels sprouts or asparagus for added variety and nutritional benefits, ensuring a satisfying meal without the higher carbohydrate content of potatoes.
Another creative twist involves experimenting with different spice blends to introduce new flavor profiles. Consider adding a pinch of cumin and coriander for a subtle North African influence, or a touch of smoked paprika and chili flakes for a spicier, more robust taste. You could also incorporate fresh herbs like rosemary or thyme directly onto the vegetables before roasting for an even more intense herbal aroma. These simple adjustments can transform the familiar flavors into something entirely new and exciting, encouraging exploration within your own kitchen.
How to Prepare Classic Mediterranean Roasted Vegetables
Step 1: Preheat Oven and Prepare the Vegetables
The foundation of perfectly roasted vegetables begins with a properly preheated oven, ensuring even cooking and optimal caramelization. Aim for a temperature of 400°F (200°C), which is ideal for achieving that coveted tender interior and slightly crispy exterior for most vegetables. This temperature allows the natural sugars in the vegetables to caramelize beautifully, intensifying their sweetness and flavor.
Begin by preparing your star players: the potatoes, bell peppers, and red onion. For the potatoes, aim for uniform ¾-inch cubes; this ensures they cook at the same rate and achieve a consistent tenderness. If the cubes are too small, they might become mushy, and if they’re too large, they may not cook through by the time the other vegetables are ready. Wash your potatoes thoroughly before cubing, as the skin adds texture and nutrients, though you can peel them if preferred.
Next, dice the red bell pepper into bite-sized pieces, similar in size to the potato cubes. This will ensure they roast evenly alongside the other vegetables. Cut the red onion into wedges, making sure to separate the layers slightly so they roast and soften effectively. The goal here is consistency in size across the majority of your vegetables, creating a visually appealing and equally cooked medley that’s a joy to behold and eat.
Step 2: Prepare the Chickpeas and Spice Blend
While your vegetables are being prepped, it’s time to turn your attention to the humble yet mighty chickpea, which will add a delightful textural contrast and a boost of protein. It is crucial to drain and thoroughly rinse the canned chickpeas under cold running water. This step removes the briny liquid they are packed in, which can otherwise impart an unwanted salty flavor and prevent them from achieving that desirable crispiness during roasting. Thoroughly patting them dry with paper towels is another key technique to achieve a crunchy texture.
In a separate small bowl, create your aromatic spice blend that will infuse the vegetables with authentic Mediterranean flavors. Combine the paprika, dried basil, garlic powder, dried oregano, dried dill, and dried parsley. Ensure you are using dried herbs here as they hold their flavor well during the roasting process. These herbs are the backbone of the Mediterranean profile, offering a complex and herbaceous aroma that is both comforting and invigorating.
Don’t forget to add salt and freshly cracked black pepper to this spice mixture. The salt will help to draw out moisture and enhance the natural flavors of the vegetables and chickpeas, while the black pepper adds a subtle warmth and pungency. Whisk these spices together until they are well combined, allowing the individual aromas to meld together for a moment before they are introduced to the vegetables. This simple yet impactful blend is the secret to transforming ordinary produce into an extraordinary dish, worthy of a special dinner.
Step 3: Season and Toss the Vegetables
Now comes the exciting part where all the elements come together. In a large mixing bowl, add your prepared cubed potatoes, diced red bell pepper, red onion wedges, and the thoroughly drained and dried chickpeas. It’s important to ensure the bowl is large enough to comfortably accommodate all the ingredients and allows for easy tossing without spillage.
Drizzle a generous amount of extra virgin olive oil over the vegetables and chickpeas. Olive oil is essential for roasting; it not only prevents sticking but also helps to conduct heat, leading to beautifully roasted and slightly browned edges. Use a good quality extra virgin olive oil for the best flavor, as its fruity notes will complement the spices beautifully. Ensure there’s enough oil to lightly coat every piece of vegetable and chickpea.
Sprinkle the prepared spice blend evenly over the oiled vegetables and chickpeas. Using your hands or a large spoon, gently toss everything together until each piece is thoroughly coated with the oil and spices. Ensure an even distribution of the seasoning for consistent flavor throughout the entire batch. The aim is to have a vibrant, evenly spiced mix that is ready to embark on its culinary transformation in the oven.
Step 4: Roast to Perfection
Arrange the seasoned vegetables and chickpeas in a single layer on a large baking sheet. This is a critical step for achieving optimal roasting; overcrowding the pan will cause the vegetables to steam rather than roast, resulting in a less desirable texture. If necessary, use two baking sheets to ensure adequate space for each piece to brown and crisp up. Ensure there’s a little space between each vegetable piece for the hot air to circulate freely.
Place the baking sheet into the preheated oven at 400°F (200°C). Set a timer for approximately 40 minutes for the initial roasting period. During this time, the vegetables will begin to soften, caramelize, and develop those wonderful roasted flavors that are characteristic of Mediterranean cuisine.
About halfway through the cooking time, typically around the 20-minute mark, carefully remove the baking sheet from the oven. Using a spatula, stir the vegetables and chickpeas to ensure they are cooking evenly on all sides. This stirring action helps to prevent any single side from burning and promotes uniform browning and tenderness. Return the baking sheet to the oven to continue roasting until the vegetables are golden brown, tender when pierced with a fork, and the chickpeas are delightfully crispy.
Step 5: Prepare the Creamy Tzatziki Sauce
While the vegetables are roasting to perfection, it’s the ideal time to prepare the cooling, creamy tzatziki sauce that will provide a refreshing counterpoint to the warm, savory roasted elements. Begin by combining the plain yogurt, soaked raw cashews, and optional firm tofu in a high-speed blender. The cashews, which should be soaked in hot water for at least 30 minutes (or cold water for a few hours) and then drained, provide an incredible creaminess and richness, mimicking the texture of dairy without being overpowering. The firm tofu, if used, adds body and an extra protein boost, contributing to the sauce’s satisfying mouthfeel.
Blend these base ingredients until the mixture is completely smooth and luxuriously creamy. This might take a minute or two, depending on the power of your blender. Scrape down the sides of the blender as needed to ensure all the cashews and tofu are fully incorporated. The consistency should be thick and velvety, a perfect canvas for the remaining tzatziki flavorings. If the mixture is too thick, you can add a tablespoon of water or a little more yogurt to achieve your desired texture.
Once the base is smooth, add the fresh garlic cloves, grated cucumber (make sure to squeeze out as much excess moisture as possible to prevent a watery sauce), chopped fresh dill, red wine vinegar, a pinch of salt, a dash of black pepper, and a squeeze of fresh lemon juice. These ingredients introduce the classic bright, herbaceous, and tangy notes that define tzatziki. The fresh dill is essential for its distinct aroma, and the lemon juice adds a final touch of acidity that balances the richness of the yogurt and cashews.
Step 6: Combine and Serve
Once the roasted vegetables are out of the oven and have cooled slightly for a few minutes, they are ready to be assembled into a beautiful and satisfying bowl. This brief cooling period prevents the hot vegetables from making the tzatziki sauce warm, preserving its cool, refreshing quality and creamy texture. It also allows the flavors to settle slightly, resulting in a more harmonious final dish.
To serve, spread a generous dollop of the creamy tzatziki sauce onto the bottom of your serving plates or bowls. Create a vibrant bed of this cool, tangy sauce that will cradle the warm, flavorful roasted vegetables and chickpeas. This layering technique ensures that every bite gets a perfect combination of the warm roasted elements and the cool, refreshing sauce, creating a delightful contrast in both temperature and flavor.
Pile the beautifully roasted Mediterranean vegetables and crispy chickpeas generously over the bed of tzatziki. Arrange them artfully to showcase the vibrant colors and appealing textures of the dish. For an extra touch of Mediterranean flair and flavor, you can optionally drizzle a little more extra virgin olive oil over the top or sprinkle with a handful of fresh herbs like parsley or mint for added freshness and visual appeal. Serve immediately while the vegetables are still warm and the tzatziki is perfectly chilled for the ultimate dining experience.
Pro Tips for Classic Mediterranean Roasted Vegetables
Uniform Size is Key: Ensure all your vegetable pieces, particularly the potatoes and bell peppers, are cut to roughly the same size. This critical step guarantees that everything roasts evenly, preventing some pieces from becoming overcooked and mushy while others remain underdone. Consistency in size is paramount for a balanced texture in every bite.
Chickpea Crunch Factor: For exceptionally crispy chickpeas, make sure they are thoroughly patted dry with paper towels after rinsing. Excess moisture is the enemy of crispiness, so take the time to remove as much liquid as possible. Coating them well with olive oil and ensuring they are in a single layer on the baking sheet also significantly contributes to achieving that delightful crunch.
Cooling for Creaminess: Allow the roasted vegetables to cool for a few minutes before topping them with the tzatziki sauce. This prevents the hot vegetables from warming the delicate sauce, which can affect its creamy texture and refreshing coolness. Serving the tzatziki at its best ensures it provides a perfect counterpoint to the warm roasted elements.
Embrace Seasonal Swaps: Don’t be afraid to experiment with other seasonal vegetables. Zucchini, eggplant, broccoli florets, cauliflower, or even asparagus can be wonderful additions or substitutions. Just be mindful of their cooking times; denser vegetables like eggplant may need to be cut smaller or added to the pan a bit earlier than quicker-cooking ones like zucchini.
The Art of the Spice Blend: Feel free to adjust the dried herbs and spices to your personal preference. You might want to add a pinch of smoked paprika for depth, a touch of cumin for earthiness, or even a tiny bit of cayenne pepper for a gentle heat. Experimenting with different herb combinations can lead to unique and delightful flavor profiles.
Serving Suggestions for Classic Mediterranean Roasted Vegetables
Decoration
To add an extra layer of visual appeal and freshness, consider garnishing your Classic Mediterranean Roasted Vegetables with a scattering of fresh herbs. Finely chopped fresh parsley, mint, or even a few sprigs of dill are excellent choices that not only enhance the look but also provide a burst of aroma. A drizzle of high-quality extra virgin olive oil over the top can also add a glossy sheen and a subtle fruity note, making the dish look even more inviting and gourmet.
Side Dishes
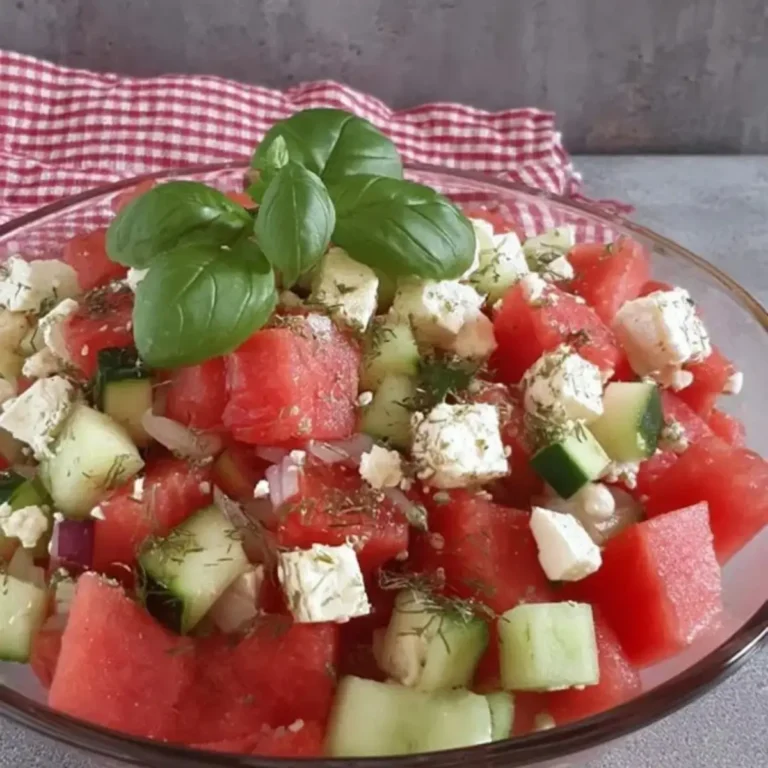
These roasted vegetables pair wonderfully with a variety of classic Mediterranean and Middle Eastern staples. Warm, fluffy pita bread is an absolute must; it’s perfect for scooping up the delicious roasted bits and creamy tzatziki. A side of light and flavorful quinoa salad, perhaps tossed with lemon juice and fresh herbs, offers a complete protein source and a fluffy texture that complements the roasted dish beautifully. For a refreshing contrast, a simple Greek salad with crisp cucumbers, ripe tomatoes, Kalamata olives, and creamy feta cheese adds a bright, acidic element.
Hummus is another fantastic accompaniment, providing a smooth, earthy, and nutty layer of flavor that harmonizes perfectly with the roasted vegetables. If you’re looking for something heartier, consider serving these vegetables alongside grilled halloumi cheese for a salty, savory kick, or with some perfectly cooked couscous for a light yet satisfying grain base. Even a simple side of grilled chicken or fish can transform this vegetarian dish into a complete meal for those seeking additional protein.
Creative Serving Ideas
Elevate your roasted vegetable experience by incorporating them into other dishes. Stuff them into warm pita pockets with extra tzatziki and perhaps some falafel for a delightful and filling sandwich. They also make a superb filling for savory crepes or can be layered into a hearty vegetable lasagna, adding depth and flavor to traditional Italian dishes. Consider transforming them into a vibrant nourish bowl, layering them over a bed of quinoa or brown rice, adding some greens, avocado, and a tahini dressing for a wholesome and complete meal.
Another creative idea is to use these roasted vegetables as a topping for homemade pizzas or flatbreads, adding a Mediterranean flair to your favorite Italian classics. They can also be blended into a rustic soup or stew base, adding complex flavors and textures. For a light lunch, toss them with mixed greens, a vinaigrette, and some crumbled feta cheese for a substantial and flavorful salad. The versatility of these roasted vegetables means they can be the star of a main course or a delightful supporting player in numerous other culinary creations.
Preparation & Storage
Storing Leftovers
Should you be fortunate enough to have any Classic Mediterranean Roasted Vegetables leftover, they store remarkably well. Place the cooled roasted vegetables in an airtight container. They will keep in the refrigerator for up to 3 days, retaining most of their delicious flavor and texture. It’s important to ensure the container is properly sealed to prevent the vegetables from drying out or absorbing other odors from your refrigerator.
The tzatziki sauce should be stored separately in a sealed container in the refrigerator as well. Due to its fresh ingredients, it is best consumed within 4 days. While it can last a bit longer, the freshness of the herbs and cucumber might start to diminish. Keeping them separate ensures that the roasted vegetables don’t become soggy from the sauce and that the tzatziki remains cool and creamy.
Freezing
Freezing these roasted vegetables is a convenient option for long-term storage, allowing you to enjoy them at a later date. Allow the roasted vegetables to cool completely before proceeding with the freezing process. Spread them out in a single layer on a baking sheet lined with parchment paper. This step is crucial as it prevents the vegetables from clumping together, ensuring you can easily separate them later.
Once the vegetables are frozen solid (this usually takes about 2-3 hours), transfer them to a freezer-safe bag or airtight container. They can be stored in the freezer for up to 3 months, maintaining good quality. It is advisable to label the bag or container with the date of freezing. However, it is generally not recommended to freeze the tzatziki sauce, as its creamy texture can be significantly altered upon thawing, potentially becoming watery or grainy.
Reheating
When you’re ready to enjoy your stored roasted vegetables, reheating them is simple and effective. The best method is to reheat them in the oven, spreading them on a baking sheet at around 350°F (175°C) until they are warmed through and have regained a little crispness. This method helps to revive their texture and flavor, making them almost as good as when they were freshly roasted.
Alternatively, you can reheat them in a skillet over medium heat, stirring occasionally until they are hot. This method also helps to bring back some crispness. For a quicker option, you can use a microwave, though the texture might be softer. It is best to add the tzatziki sauce fresh after reheating the vegetables to maintain its cool, creamy consistency and vibrant flavor. Simply serve the reheated vegetables alongside or topped with the freshly prepared or thawed tzatziki.
Frequently Asked Questions
-
What is the best way to select ripe vegetables for this recipe?
Absolutely! When selecting vegetables like red bell peppers and potatoes, look for ones that are firm to the touch and have vibrant, unblemished skin. For bell peppers, avoid any with soft spots or dark blemishes. For potatoes, choose ones that feel solid and have no green patches or sprouting eyes, as these can indicate spoilage or poor storage. Always prioritize freshness for the best flavor and texture, and when in doubt, give them a good wash before preparation.
-
How should I store leftovers of the roasted vegetables and tzatziki?
I often make a batch and store it for later, and it’s quite straightforward! Roasted vegetables stay fresh for up to 3 days when stored in an airtight container in the refrigerator. To maintain their best texture, consider reheating them in the oven or a skillet rather than the microwave. For the tzatziki, it will keep for about 4 days in a sealed container in the fridge. Just remember, don’t freeze the tzatziki, as the dairy or plant-based base may lose its creamy texture upon thawing.
-
Can I freeze the roasted vegetables?
Yes, you very much can freeze the roasted vegetables for longer-term enjoyment! To do so effectively, allow the roasted vegetables to cool completely. Then, spread them out in a single layer on a baking sheet and freeze them for about 2-3 hours until solid. After they are frozen, transfer them to a freezer-safe bag or airtight container. They can be stored in the freezer for up to 3 months, retaining good quality. When ready to eat, reheat them in the oven or on the stovetop for the best flavor and texture.