Homemade Cherry Cinnamon Rolls Recipe
There’s something inherently comforting and nostalgic about a warm, freshly baked cinnamon roll. Imagine waking up to the sweet, spicy aroma filling your home, a promise of a delightful treat to start your day or a perfect indulgence for an afternoon pick-me-up. These aren’t just any cinnamon rolls; they’re a vibrant twist on the classic, infused with the delightful tang and sweetness of cherries.
This Homemade Cherry Cinnamon Rolls Recipe brings together the familiar embrace of cinnamon sugar with the bright, juicy burst of cherry pie filling, creating a truly irresistible combination. They are designed to be accessible for home bakers, offering a touch of magic without overwhelming complexity. Get ready to experience a new favorite that will have everyone asking for the recipe.
Why You Will Love This Recipe
- Irresistible Flavor Fusion: The classic warmth of cinnamon is beautifully complemented by the sweet and slightly tart cherry filling, offering a unique and delightful taste experience that stands out from traditional cinnamon rolls.
- Achievable Homemade Goodness: This recipe is crafted with ease in mind, making it accessible for bakers of all skill levels, ensuring you can achieve delicious, bakery-quality results right in your own kitchen without needing advanced techniques.
- Perfect for Sharing: Designed to yield approximately 12 generous servings, these cherry cinnamon rolls are an ideal choice for family breakfasts, weekend brunches, holiday gatherings, or any occasion where you want to share a special treat with loved ones.
- Customizable Delight: While the cherry and cinnamon pairing is divine, this recipe provides a wonderful canvas for your creativity, allowing you to easily adjust sweetness, add nuts for texture, or even experiment with different fruit fillings for endless variations.
- Ultimate Comfort Food: There’s a profound sense of warmth and happiness that comes with biting into a soft, gooey, freshly baked cinnamon roll, and the addition of cherry elevates this comfort factor, making it a truly soul-satisfying treat.
Ingredients You Need
Crafting these delightful cherry cinnamon rolls begins with selecting quality ingredients, which form the foundation of their exceptional flavor and texture. Using fresh, good-quality components will significantly elevate the final product, ensuring each bite is a testament to simple, delicious baking. Pay attention to the details, like the temperature of your milk and the freshness of your yeast, as these seemingly small factors play a crucial role in the dough’s rise and overall success.
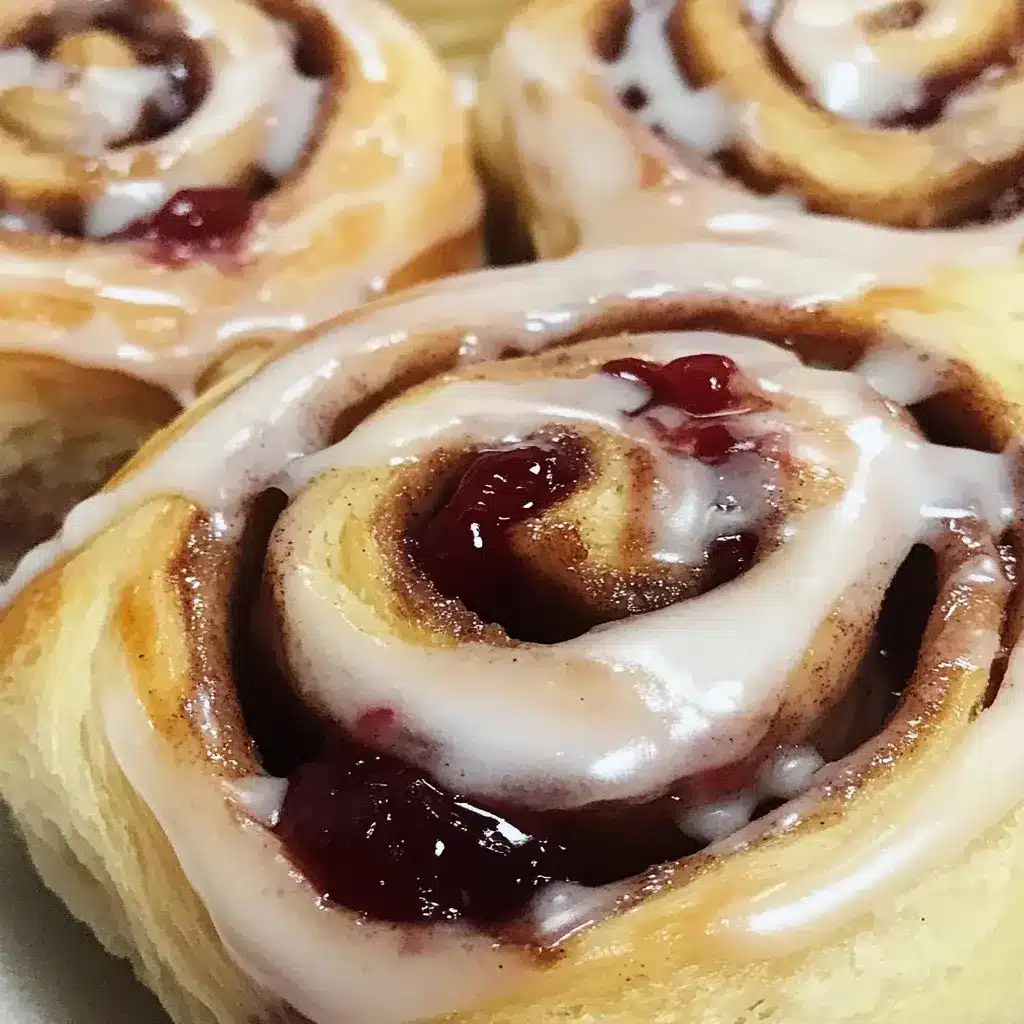
Homemade Cherry Cinnamon Rolls

Indulge in the warmth and sweetness of Homemade Cherry Cinnamon Rolls, a delightful breakfast treat perfect for any occasion. These soft, gooey rolls are filled with luscious cherry pie filling and fragrant cinnamon, creating an irresistible aroma that fills your kitchen.
- 1 package rapid rise yeast
- 1 cup warm milk
- 1 stick unsalted butter, melted
- 1 egg, beaten, at room temperature
- 3 – 4 cups flour
- 1 tsp cinnamon
- 1 cup cherry pie filling, pureed
- 1 cup powdered sugar
- 4 tsp milk
- 1Activate the yeast by combining warm milk and melted butter in a bowl, sprinkling yeast over top; let it sit for 5 minutes.
- 2Mix in the beaten egg and granulated sugar until well combined.
- 3Add salt and flour gradually until a slightly tacky dough forms.
- 4Transfer the dough to a greased bowl, cover, and let it proof for about 20 minutes.
- 5Preheat your oven to 375°F while you roll out the dough on a floured surface into a rectangle.
- 6Sprinkle cinnamon over the rolled dough and spread cherry pie filling evenly.
- 7Roll up tightly from one edge and slice into 12 equal pieces.
- 8Place rolls in a parchment-lined baking dish and bake for 40–45 minutes until golden brown.
Keywords: cinnamon rolls, cherry pie, breakfast, pastry, dessert, homemade
- rapid rise yeast: this special yeast is designed for quick dough rising, significantly reducing proofing times for your convenience.
- warm milk: serves as the liquid base for the dough, activating the yeast and contributing to a soft, tender crumb in the finished rolls.
- granulated sugar: provides sweetness to the dough and aids in yeast activation, creating a balanced flavor profile.
- unsalted butter, melted: adds richness, moisture, and tenderness to the dough, contributing to its delightful texture and flavor.
- egg, beaten, at room temperature: binds the ingredients together, adds richness, and contributes to the dough’s structure and color.
- salt: enhances all the other flavors in the dough and balances the sweetness, preventing it from becoming cloying.
- flour: the primary structure-builder of the dough, typically all-purpose flour is used for its versatility and reliable results.
- cinnamon: the quintessential spice for cinnamon rolls, providing that warm, aromatic, and slightly pungent flavor that is so beloved.
- cherry pie filling, pureed: this is the star of our unique twist, offering a burst of sweet-tart cherry flavor and a wonderfully gooey texture throughout the rolls.
- powdered sugar: the base for a simple and classic glaze, providing sweetness and a smooth finish.
- milk: used to thin the powdered sugar to create the perfect drizzling consistency for the glaze.
The precise quantities for these ingredients are readily available in the recipe card above, ensuring you have all the measurements needed for perfect results.
Variations
While the classic combination of cherry and cinnamon is already a winner, the beauty of homemade baking lies in its adaptability. These cherry cinnamon rolls offer a fantastic base for creative exploration, allowing you to tailor them to specific dietary needs or flavor preferences.
Consider a Vegan Cherry Cinnamon Roll version by substituting the butter with a plant-based alternative like vegan butter or coconut oil, and using a dairy-free milk such as almond or soy milk for both the dough and the glaze. For the egg, a flax egg (1 tablespoon flaxseed meal mixed with 3 tablespoons water, let sit for 5 minutes) or a commercial egg replacer can be used effectively to bind the dough.
For those mindful of carbohydrate intake, a Low-Carb Cherry Cinnamon Roll adaptation is certainly achievable. This would involve using a blend of low-carb flours like almond flour and coconut flour for the dough, along with a sugar substitute such as erythritol or stevia. The cherry filling might require a sugar-free cherry pie filling or a homemade version using low-carb sweeteners and fresh cherries.
You can also introduce exciting flavor enhancements by adding a touch of nutmeg or a pinch of ground cardamom to the cinnamon-sugar mixture for a more complex spice profile. Some individuals even like to incorporate a handful of chopped pecans or walnuts into the cherry filling for added crunch and a nutty undertone.
Another delightful variation involves swapping the pureed cherry pie filling for a mixed berry compote, perhaps featuring raspberries and blueberries alongside cherries, for a more intricate fruit flavor. The glaze can also be enhanced by adding a hint of lemon zest or a drop of almond extract for an extra layer of aromatic sophistication. These small tweaks can transform the already delicious rolls into something truly unique.
How to Prepare Cherry Cinnamon Rolls
Step 1: Activating the Yeast
The journey to perfect cherry cinnamon rolls begins with properly awakening the yeast. In a large mixing bowl or the bowl of your stand mixer, combine the warm milk and the melted unsalted butter. It’s crucial that the milk is warm to the touch but not hot; excessively hot milk will kill the yeast, preventing it from activating and causing your dough to be dense. Conversely, lukewarm milk is ideal for encouraging a healthy, vigorous rise.
Once the milk and butter are combined, gently sprinkle the rapid rise yeast over the surface. Allow this mixture to sit undisturbed for approximately 5 minutes. During this time, you should observe the yeast becoming foamy and bubbly, a clear indication that it’s alive and ready to work its magic on the dough. If you don’t see any activity, your yeast might be old or the milk was too hot, and it’s best to start again with fresh yeast and properly warmed milk.
This initial step is foundational for a light and airy dough. A well-activated yeast ensures that the dough will rise beautifully, creating those coveted soft and fluffy layers in your finished cinnamon rolls. It’s a simple process that sets the stage for a successful baking experience, guaranteeing a delightful texture.
Step 2: Mixing the Dough Ingredients
Once your yeast has happily bloomed, it’s time to incorporate the remaining wet ingredients and begin forming the dough. Into the same bowl containing the activated yeast mixture, add the beaten egg. Ensure the egg is at room temperature; this helps it incorporate more smoothly into the dough without chilling the other ingredients or affecting the yeast’s activity. Follow this with the granulated sugar, which not only adds sweetness but also feeds the yeast.
Gently stir these ingredients together using a whisk or a spatula until they are thoroughly combined. The mixture should be uniform, with no streaks of egg or undissolved sugar visible. This well-blended base ensures that the flavors and textures will be evenly distributed throughout the dough as it develops. It’s a brief but important step in creating a harmonious dough.
This stage is about creating a liquid foundation for your dough. The combination of the activated yeast, egg, and sugar creates a sweet and yeasty mixture that is ready to embrace the flour. It’s a critical phase where the fundamental components begin to meld, preparing them for the development of gluten and structure.
Step 3: Forming the Dough
Now, it’s time to introduce the flour and salt, transforming the liquid mixture into a cohesive dough. Add the salt to the bowl, ensuring it doesn’t come into direct contact with the yeast initially, as high concentrations of salt can inhibit yeast activity. Follow this with about 3 ½ cups of the all-purpose flour; you’ll reserve the remaining half cup for adjusting consistency later.
Using a sturdy spatula or the paddle attachment of your stand mixer on a low speed, begin to beat the ingredients together. Continue mixing until a dough starts to form that pulls away cleanly from the sides of the bowl. The dough should be slightly tacky to the touch but not excessively sticky. If the dough seems too wet and is sticking stubbornly to your hands or the bowl, gradually add more flour, a tablespoon at a time, until it reaches the desired consistency.
The goal here is to develop the gluten structure in the dough without overworking it. Over-kneading can lead to tough cinnamon rolls, so it’s important to stop mixing once the dough is smooth, elastic, and just slightly sticky. This slightly tacky nature ensures the rolls remain soft and moist after baking. A well-formed dough is key to a good rise and a tender crumb.
Step 4: Proofing the Dough
Once your dough has achieved the perfect consistency – smooth, slightly elastic, and just a bit tacky – it’s time to let it rest and rise. Lightly spray a large, clean bowl with cooking spray or add a teaspoon of oil and swirl it around to coat the inside surface. This prevents the dough from sticking as it expands.
Using a rubber spatula, carefully transfer the dough into the prepared bowl. Turn the dough a couple of times to ensure it’s lightly coated with the oil, which helps prevent a dry crust from forming on top. Cover the bowl tightly with plastic wrap or a clean kitchen towel. Place the covered bowl in a warm, draft-free spot in your kitchen and let the dough proof for approximately 20 minutes.
During this relatively short proofing period, the yeast will get to work, producing carbon dioxide gas that causes the dough to puff up slightly. You’re looking for the dough to become visibly puffier, though it doesn’t need to double in size like it would in a longer proofing process. This initial puff is crucial for creating a tender structure within the rolls. This step is all about giving the dough a head start before shaping.
Step 5: Preparing for Rolling
While your dough is undergoing its initial brief proofing, preheat your oven to 375 degrees Fahrenheit (190 degrees Celsius). This ensures the oven is at the correct temperature and ready for baking by the time your rolls are assembled. It’s always a good practice to preheat your oven in advance so it reaches and maintains the desired temperature consistently throughout the baking process.
Prepare your work surface by lightly flouring it. A clean, flat surface like a countertop or a large cutting board works best. You don’t need a lot of flour, just enough to prevent the dough from sticking as you roll it out. Some bakers prefer to use a silicone baking mat for this step, as it offers a naturally non-stick surface and is easy to clean.
Once the dough has had its 20-minute rest and appears slightly puffed, carefully turn it out onto the floured surface. Gently knead the dough for just a minute or two until it feels smooth and pliable. This brief kneading helps to develop the gluten further, creating a dough that is easier to roll out thinly and evenly, setting the stage for perfectly formed spirals.
Step 6: Rolling Out the Dough
Now comes the satisfying part of shaping your cinnamon rolls. Take your lightly floured rolling pin and begin to roll out the dough. Work from the center outwards, applying even pressure to create a uniformly thick rectangle. The goal is to achieve a rectangle that measures approximately 20 inches in length and 15 inches in width.
Don’t worry if your rectangle isn’t perfectly precise; slight imperfections are part of the charm of homemade baking. The key is to get it as even as possible to ensure all parts of the roll bake at a similar rate. As you roll, if the dough starts to feel sticky, lightly dust your rolling pin and the surface with a little more flour, but be careful not to add too much, which can make the dough dry.
Once the dough is rolled into the desired rectangle, sprinkle the ground cinnamon evenly across the entire surface. Use your fingers or a pastry brush to ensure a consistent layer of cinnamon. This fragrant spice mixture is what gives cinnamon rolls their iconic flavor and aroma, so don’t be shy with it. The warmth from the baking process will further enhance the cinnamon’s delicious scent.
Step 7: Adding the Cherry Filling
With the cinnamon evenly distributed, it’s time to add the star of this recipe: the pureed cherry pie filling. Using a rubber spatula or an offset spatula, carefully spread the pureed cherry pie filling evenly over the cinnamon-coated dough. Ensure you cover the entire surface of the dough rectangle, right to the edges, but try to avoid going too far over, as this can make rolling difficult.
The pureed filling ensures that the cherry flavor is distributed smoothly throughout each roll, rather than having large chunks. If your cherry pie filling is very thick, you might need to spread it with a bit more pressure, but aim for a consistent layer. This sweet and slightly tart cherry layer is what makes these rolls a unique and exciting twist on the traditional.
The contrast between the warm spice of the cinnamon and the bright fruitiness of the cherries creates a flavor profile that is both comforting and invigorating. This step is where the magic truly begins to happen, transforming a simple rolled dough into a delicious, fruit-filled pastry. A well-applied filling guarantees that every bite will be bursting with cherry goodness.
Step 8: Rolling It Up
This is a crucial step for creating those beautiful spiral shapes. Starting from one of the long edges of the dough rectangle, begin to gently and tightly roll up the dough. Use your hands to guide the dough, ensuring it stays compact and doesn’t unfurl as you roll. The tighter the roll, the more defined and appealing the spirals will be when the rolls are sliced and baked.
As you roll, keep an eye on the edges of the dough. If you notice any excess cherry filling trying to ooze out, you can gently tuck it back in or carefully trim it away with a knife to help seal the roll more effectively. This not only keeps your work surface cleaner but also helps to ensure the filling stays contained within the dough during baking.
Once you reach the end of the rectangle, pinch the seam firmly to seal the roll. This seal is important to prevent the roll from unraveling during baking. The resulting long, tightly rolled log of dough is now ready to be transformed into individual cinnamon rolls. This creates a beautiful, layered pastry that is both visually appealing and deliciously satisfying.
Step 9: Slicing into Rolls
Now it’s time to cut your long dough log into individual cherry cinnamon rolls. For the cleanest cuts, it’s highly recommended to use a sharp knife or even unflavored dental floss. If using dental floss, slide a piece under the dough log, bring the ends up and cross them over the top, then pull to slice through the dough – this method often results in less squishing.
Aim to cut the dough log into 12 equal pieces. This will result in roughly 1-inch thick rolls. Try to make your cuts as uniform as possible, as this will ensure that all the rolls bake at a similar rate and cook evenly. If your rolls are uneven, some may be undercooked while others are overcooked, which can impact the overall quality of your batch.
Once sliced, carefully arrange each roll in your prepared baking dish. A 13×9 inch baking dish is typically ideal for this quantity. Line the dish with parchment paper for easy cleanup and to prevent sticking. Place the rolls cut-side up, allowing them a little space between each one as they will expand slightly during baking. This careful placement ensures they bake to perfection.
Step 10: Baking Your Rolls
With your cherry cinnamon rolls nestled snugly in their baking dish, it’s time to bake them to golden-brown perfection. Place the dish in your preheated oven, which should be set at 375 degrees Fahrenheit (190 degrees Celsius). Bake for approximately 40 to 45 minutes.
It’s a good idea to start checking on the rolls around the 25-minute mark. The baking time can vary slightly depending on your oven and the thickness of your rolls. You’re looking for them to be beautifully golden brown on top and cooked through. If the tops start to brown too quickly before the insides are cooked, you can loosely tent the dish with aluminum foil to prevent further browning.
The aroma that will fill your kitchen during this time is absolutely divine, a sweet and spicy perfume that signals the deliciousness to come. Once they are baked to perfection, remove them from the oven and let them cool slightly in the dish before glazing. The warmth enhances their gooey texture and makes them utterly irresistible, making them a truly wonderful treat to enjoy.
Pro Tips for Cherry Cinnamon Rolls
Achieving bakery-quality cherry cinnamon rolls at home is within reach with a few expert insights. Paying attention to small details can make a significant difference in the final outcome, ensuring your rolls are perfectly textured and bursting with flavor.
Ensure Yeast Viability: Before you even start, make sure your rapid rise yeast is fresh and active. Test it by dissolving it in warm milk with a pinch of sugar; it should become foamy within 5-10 minutes. If it doesn’t, discard it and use a new packet, as dead yeast will result in flat, dense rolls.
Dough Consistency is Key: When adding flour, do so gradually. The dough should be slightly tacky, not dry and stiff, nor overly sticky. Too much flour results in dry, tough rolls, while too little can make them spread too much. Adjust as needed, a tablespoon at a time.
Don’t Over-Proof: For this recipe, the proofing time is relatively short (20 minutes). Over-proofing can cause the dough to become too gassy and collapse during baking, leading to a less desirable texture. Watch for a slight puffiness, not a doubling in size.
Even Filling Distribution: Ensure the pureed cherry pie filling is spread evenly across the dough rectangle. This guarantees that every bite of your cinnamon roll will have that delightful cherry flavor, without any dry patches or overly concentrated areas of filling.
Sharp Knife for Clean Cuts: Using a very sharp knife or unflavored dental floss to slice the dough log prevents the rolls from getting squished. This helps maintain their shape and ensures they bake up beautifully, showcasing those lovely spirals of cherry and cinnamon.
Cool Slightly Before Glazing: Allow the rolls to cool for about 10-15 minutes after baking before adding the glaze. Glazing too soon will cause the icing to melt and become watery, rather than setting into a delightful frosting.
Serving Suggestions for Cherry Cinnamon Rolls
Decoration
The visual appeal of your cherry cinnamon rolls can be just as delightful as their taste. A simple drizzle of the powdered sugar glaze provides a classic, sweet finish, creating elegant white lines across the golden-brown tops.
For an extra touch of elegance, consider adding a few fresh cherries or a sprinkle of finely chopped pistachios on top of the glaze while it’s still wet. This not only adds color but also a hint of texture and freshness. You can also pipe the glaze in decorative patterns for a more intricate presentation.
A dusting of powdered sugar through a fine-mesh sieve can create a delicate, snowy effect, reminiscent of a winter wonderland. For a bolder look, a thin swirl of cream cheese frosting can be added, offering a tangy counterpoint to the sweet rolls and cherry filling.
Side Dishes
To complement the sweetness and richness of these cherry cinnamon rolls, consider pairing them with a variety of side dishes. A plate of fluffy scrambled eggs offers a savory contrast and adds a protein boost to your breakfast or brunch.
A vibrant fruit salad, featuring seasonal berries, melon, and citrus fruits, provides a refreshing and palate-cleansing element. For something a bit more substantial and equally delicious, oven-baked sausages or crispy hash browns offer a hearty and satisfying accompaniment that balances the sweetness beautifully.
A simple side of Greek yogurt with a drizzle of honey and a sprinkle of granola can add a healthy, creamy texture that contrasts wonderfully with the soft rolls. For a lighter option, a refreshing smoothie, perhaps made with spinach, banana, and almond milk, can round out the meal with vitamins and minerals.
Creative Serving Ideas
Elevate your cherry cinnamon roll experience with some creative serving ideas that go beyond the traditional. Imagine serving them warm, straight from the oven, alongside a scoop of creamy vanilla bean ice cream for a decadent dessert that combines warm pastry with cold, sweet indulgence.
Another delightful idea is to serve them as part of a brunch buffet, perhaps alongside other pastries and breakfast items, allowing guests to create their own perfect plate. They also make a wonderful addition to a holiday dessert spread, offering a unique and festive flavor combination.
Consider making miniature versions of these rolls for a charming appetizer or a delightful treat for a children’s party. You can also incorporate them into a bread pudding base, soaking them in a custard mixture before baking for an extra-gooey, comforting dessert. Don’t hesitate to experiment with different glazes, such as a lemon glaze for a citrusy kick or a maple glaze for an extra layer of warm sweetness.
Preparation & Storage
Storing Leftovers
If you happen to have any leftover cherry cinnamon rolls, proper storage is key to maintaining their deliciousness. Once the rolls have cooled completely, transfer them to an airtight container. This will help to prevent them from drying out and protect them from absorbing any unwanted odors from other foods in your refrigerator.
You can also wrap the cooled rolls individually in plastic wrap, then place them together in a zip-top bag or an airtight container. This method ensures each roll stays fresh. Stored correctly in the refrigerator, your leftover cherry cinnamon rolls should stay fresh and enjoyable for up to 3 days.
When you’re ready to enjoy them again, a gentle reheating will bring back their delightful soft and gooey texture. Be sure to let them come to room temperature slightly before reheating for the best results.
Freezing
Cherry cinnamon rolls freeze exceptionally well, making them a perfect candidate for making ahead. To freeze, ensure the rolls are completely cooled after baking. Once cooled, you can freeze them individually or as a batch.
For individual freezing, wrap each roll tightly in plastic wrap, ensuring no air is trapped. Then, place the individually wrapped rolls into a freezer-safe zip-top bag or an airtight container. For freezing a batch, arrange the cooled rolls in a single layer in a freezer-safe container, cover tightly with plastic wrap, and then seal the container or place it in a freezer bag.
Properly stored, these cherry cinnamon rolls can be kept frozen for up to 2 months. This allows you to have a batch of delicious, homemade treats ready to go whenever a craving strikes, or for unexpected guests.
Reheating
Reheating your cherry cinnamon rolls is a simple process that will bring them back to their warm, gooey glory. The best method often depends on your preference and the equipment you have available.
Oven Reheating: Preheat your oven to 350°F (175°C). Arrange the cooled rolls on a baking sheet and loosely cover them with aluminum foil. This helps to trap moisture and prevent the tops from drying out or burning. Heat for about 10-15 minutes, or until the rolls are warmed through and delightfully soft.
Microwave Reheating: For a quicker option, place a single roll on a microwave-safe plate. Cover it loosely with a damp paper towel to help retain moisture. Heat in 15-second intervals, checking after each interval until the roll is warmed to your desired temperature. Be cautious not to overheat, as microwave reheating can sometimes make pastries a bit chewy if overdone.
Stovetop Reheating: You can also reheat them gently on the stovetop. Place the rolls in a skillet over low heat. Cover the skillet with a lid to trap the heat and moisture. Gently heat for about 5-10 minutes, or until warmed through. This method can sometimes result in a lovely soft texture.
Frequently Asked Questions
-
How do I make my Homemade Cherry Cinnamon Rolls Recipe more flavorful?
To enhance the flavor of your Homemade Cherry Cinnamon Rolls, consider incorporating additional spices like a pinch of nutmeg or a hint of ground cardamom into the cinnamon-sugar mixture. Using dark brown sugar instead of granulated sugar for the filling or glaze can also add a richer, more caramelized sweetness. For an even more intense cherry flavor, you could reduce a portion of your cherry pie filling on the stovetop before pureeing it, concentrating its natural sweetness and tartness. Some bakers also find that adding a teaspoon of vanilla extract to the dough or the glaze can significantly boost the overall aromatic and taste complexity of the rolls.
-
Can I use fresh cherries instead of cherry pie filling in my Homemade Cherry Cinnamon Rolls Recipe?
Absolutely! Using fresh cherries is a fantastic way to achieve a bright, natural cherry flavor in your cinnamon rolls. You’ll want to pit about 2 cups of fresh, ripe cherries and then roughly chop them. It’s a good idea to toss these chopped cherries with a tablespoon or two of granulated sugar (or a sugar substitute if you’re going low-carb) and a teaspoon of cornstarch or tapioca starch to help thicken the juices released during baking. Spread this fresh cherry mixture evenly over the cinnamon-dusted dough, just as you would the pie filling. Be aware that fresh cherries might release more liquid than canned filling, so ensure your dough is rolled tightly and sealed well.
-
How long will my Homemade Cherry Cinnamon Rolls Recipe stay fresh?
When stored properly, your Homemade Cherry Cinnamon Rolls will remain fresh and delicious for a considerable time. After they have completely cooled, store them in an airtight container at room temperature for up to 2 days, especially if you plan to eat them quickly. For longer storage, refrigeration is recommended; in an airtight container in the refrigerator, they can last for up to 3 to 4 days. If you wish to keep them for an even more extended period, freezing is the best option, where they can be stored for up to 2 months when wrapped and sealed properly.