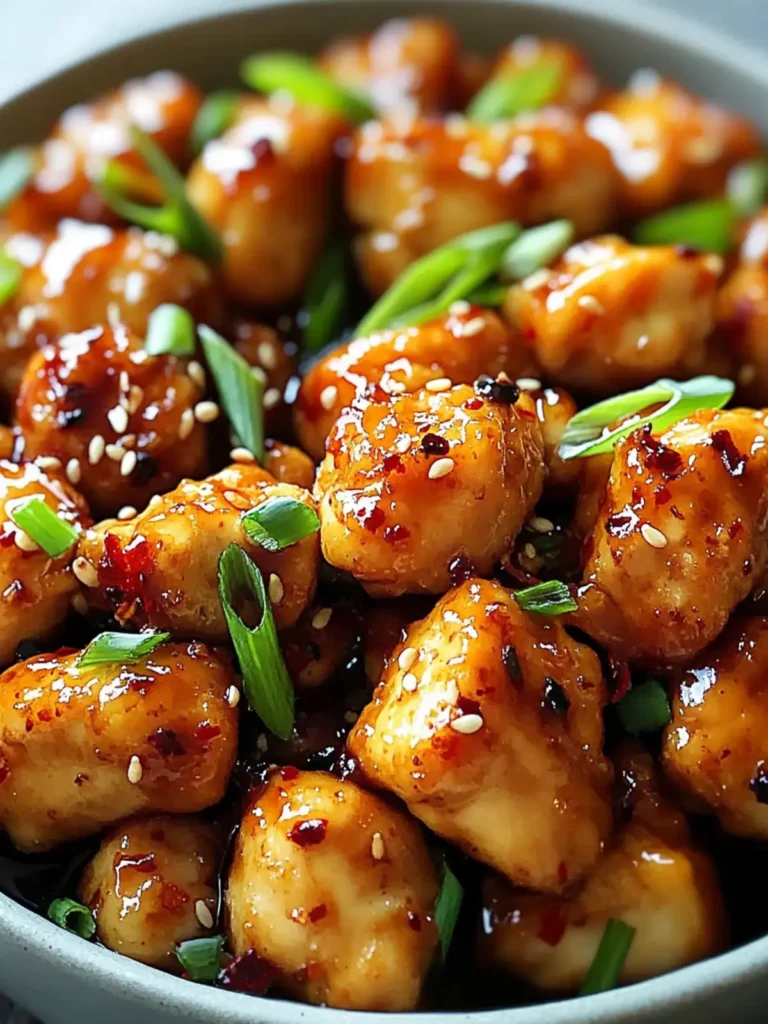
Irresistible Dill Pickle Chicken Wings: A Crunchy Delight
When life feels a little stale, sometimes a burst of flavor is all you need to shake things up. Enter Dill Pickle Chicken Wings—the unexpected twist on a classic that has won over my taste buds. While rummaging through my fridge, I stumbled upon a half-empty jar of dill pickles that sparked inspiration, leading me to wonder about infusing those zesty flavors into crispy chicken wings.
The result is a finger-licking delight that’s perfect for game nights, family gatherings, or just a cozy evening at home, proving that simple ingredients can create extraordinary meals. Marinated in tangy pickle juice, these wings become incredibly juicy and take on a bold flavor that’s hard to resist, all while coming together with minimal effort.
So, if you’re looking to elevate your dinner routine or impress friends without the usual fast food fare, these Dill Pickle Chicken Wings might just become your new go-to recipe, offering a unique and satisfying culinary experience. Let’s get cooking and discover this delightful twist on a beloved appetizer, ready to be shared with loved ones or savored solo.
Why You Will Love This Recipe
- Flavor Explosion: These wings boast an unforgettable tangy kick derived from the dill pickle juice, transforming every single bite into a delightful and zesty adventure that tantalizes the taste buds.
- Easy to Prepare: With a set of simple ingredients and remarkably straightforward steps, even novice cooks will confidently feel like culinary pros in their own kitchens.
- Crispy Perfection: A secret blend of perfectly chosen spices, combined with a clever baking method, consistently ensures that the wings emerge from the oven ultra-crispy every single time.
- Versatile Dish: Whether served as a tantalizing appetizer, a satisfying game day snack, or even a flavorful main dish, these wings are guaranteed to disappear quickly from any plate.
- Crowd Pleaser: Perfectly seasoned and unbelievably flavorful, these Dill Pickle Chicken Wings are sure to have your friends and family eagerly begging for the secret recipe.
Ingredients You Need
The foundation of any truly memorable dish lies in the quality of its ingredients. For these Dill Pickle Chicken Wings, selecting fresh, high-quality components will ensure the most vibrant flavors and textures are achieved. Using a good quality dill pickle brine is paramount as it’s the star that infuses the chicken with its signature tanginess. Selecting fresh chicken wings ensures a juicy interior, which is essential for a satisfying bite.
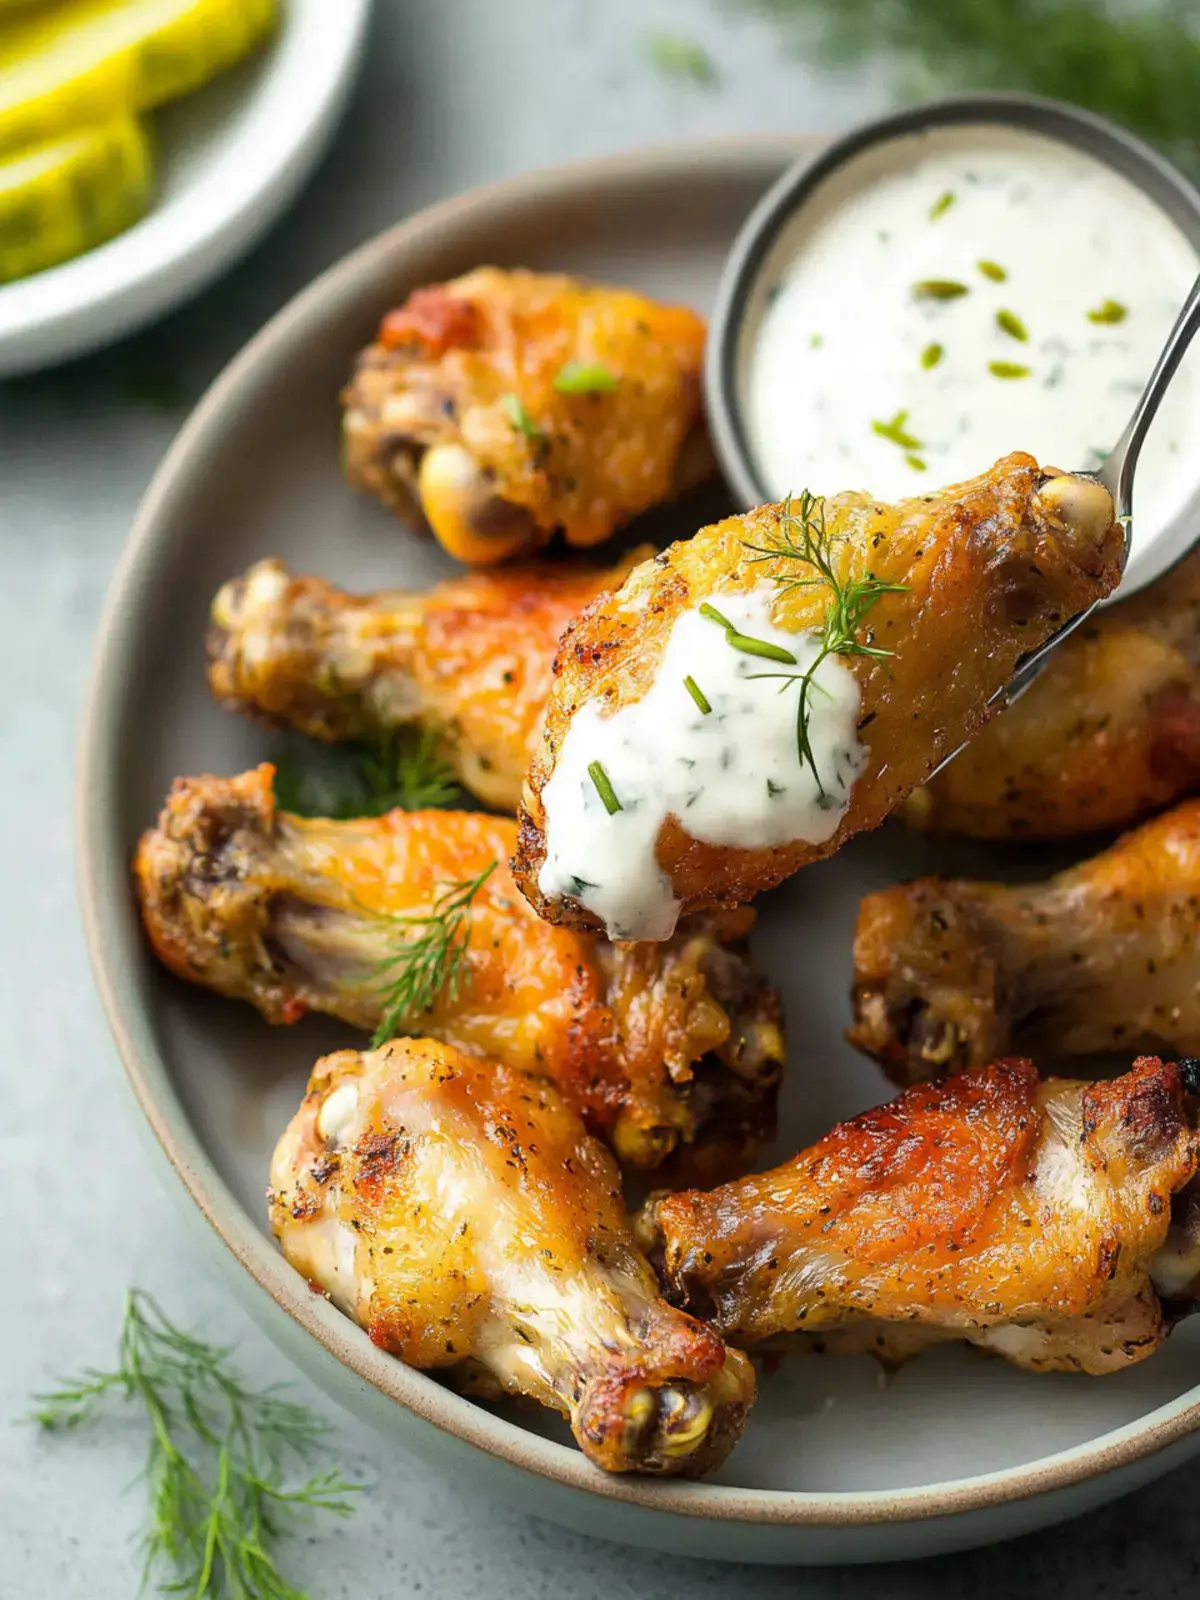
Dill Pickle Chicken Wings

These Dill Pickle Chicken Wings offer a tangy twist on a classic recipe, perfect for any gathering. They are marinated in tangy pickle juice, resulting in incredibly juicy and flavorful wings with a bold taste that's hard to resist. The recipe combines simple ingredients and straightforward steps for a crispy, crowd-pleasing dish.
- 4 lbs chicken wings
- 4 cups dill pickle juice
- 5 tsp baking powder
- 2 tsp dried dill
- 1 tsp garlic powder
- 3/4 tsp salt
- 1/8 tsp white pepper (optional)
- PAM/Oil spray
- 1Place the chicken wings in a shallow dish or resealable plastic bag. Pour the dill pickle juice over the wings, ensuring they are fully submerged. Cover and refrigerate for 1-4 hours.
- 2Remove the wings from the fridge. Rinse them under cool water and pat them dry with paper towels.
- 3Preheat your oven to 250°F and position the racks on the upper and lower levels. Line a rimmed baking sheet with aluminum foil.
- 4In a small bowl, whisk together the baking powder, dried dill, garlic powder, salt, and optional white pepper.
- 5Ensure the chicken wings are thoroughly patted dry.
- 6Place the wings into a large mixing bowl or a zipper-lock plastic bag. Add the spice mixture and coat every wing evenly.
- 7Lay the seasoned wings in a single layer, skin side up, on a wire rack sprayed with PAM or oil on the prepared baking sheet.
- 8Bake the wings on the lower rack for 30 minutes. Then, move them to the upper rack, raise the temperature to 425°F, and bake for another 40-45 minutes until golden and crispy, rotating the pan halfway.
- 9Remove the wings from the oven and let them rest for 5 minutes before serving.
Keywords: dill pickle chicken wings, baked chicken wings, tangy chicken wings, crispy chicken wings, game day food, appetizer, easy chicken recipe
- chicken wings: 4 lbs, choose fresh wings for the juiciest results and optimal texture.
- dill pickle juice: 4 cups, this magical ingredient infuses a tangy kick into the wings, acting as both marinade and flavor enhancer.
- baking powder: 5 tsp, aluminum-free guarantees a guilt-free crunch and helps achieve that signature crispy exterior.
- dried dill: 2 tsp, enhances the dill flavor for a fragrant aroma that complements the pickle brine beautifully.
- garlic powder: 1 tsp, adds depth and a savory note to each bite, rounding out the overall flavor profile.
- salt: 3/4 tsp, enhances the overall taste without overpowering the pickle flavor, balancing the other ingredients.
- white pepper (optional): 1/8 tsp, provides a subtle heat for those who like it spicy, adding another layer of complexity.
- PAM/Oil spray: a light coat ensures crispy wings without excess oil, promoting a healthier cooking method while maximizing crispiness.
The specific quantities for all these wonderful ingredients can be found in the detailed recipe card provided below, ensuring you have everything you need for success.
Variations
Spicy Kick: For those who crave a bit of heat, an exciting variation involves adding 1-2 teaspoons of cayenne pepper directly into the dry spice mix. This fiery twist will undeniably take your Dill Pickle Chicken Wings to a whole new exhilarating level of flavor intensity.
Garlic Lover’s Delight: If you’re a true aficionado of garlic, simply increase the amount of garlic powder to 2 teaspoons in the spice blend. For an even more aromatic and deeply savory punch, consider roasting fresh garlic cloves and mashing them into the mixture for an authentic flavor boost that sings.
Herb Garden Blend: To introduce a fragrant and earthy dimension, incorporate a mix of dried herbs like oregano or thyme into the spice blend. This thoughtful addition gives your wings a delightful herbal nuance that dances on the palate, creating a complex and satisfying taste experience.
Smoky Barbecue Essence: Achieve a wonderful smoky undertone by swapping half of the baking powder for smoked paprika in the coating mixture. This clever variation imparts a subtle yet distinct barbecue essence, beautifully enhancing the overall flavor profile of your chicken wings.
Zesty Citrus Zing: Brighten up the flavor profile by adding the zest of one fresh lemon or lime directly into the spice mixture. This simple addition provides a refreshing zing that beautifully balances the inherent tanginess of the pickle, creating a more vibrant taste.
Buffalo-Style Fusion: For a classic flavor with a pickle twist, toss your perfectly baked Dill Pickle Chicken Wings in your favorite buffalo sauce after they come out of the oven. This extra layer of tangy, spicy coating makes these already addictive wings even more irresistible and perfect for dipping.
How to Prepare Dill Pickle Chicken Wings
Step 1: Marinate for Maximum Flavor Infusion
Begin by selecting a shallow dish or a large, resealable plastic bag. Carefully place your chicken wings into this chosen container, ensuring they have enough space. Generously pour the dill pickle juice or brine over the wings, making sure that each and every wing is fully submerged in the tangy liquid. This is a crucial step for allowing the pickle flavor to deeply penetrate the meat, ensuring a truly zesty outcome.
Once the wings are coated in pickle juice, cover the dish tightly or seal the plastic bag securely. Place the marinating wings into the refrigerator. Allow them to marinate for a minimum of 1 hour, but for the most impactful flavor, aim for 2 to 4 hours. This extended period is essential for soaking in all that delicious tangy goodness that defines these wings, preparing them for their transformation.
The Importance of Brine: The dill pickle brine is not just a marinade; it’s a flavor powerhouse that tenderizes the chicken and imparts a unique tanginess. Don’t skip this step, as it is fundamental to achieving the signature taste of these Dill Pickle Chicken Wings, setting them apart from any other wing recipe you might have tried before.
Step 2: Rinse and Dry for Ultimate Crispiness
After the marination period is complete, it’s time to prepare the wings for the baking process. Remove the chicken wings from the refrigerator and carefully take them out of the pickle juice. Rinse them thoroughly under cool, running water. This rinsing step is important to wash away any excess brine that might be clinging to the surface of the wings, preventing them from becoming overly salty or greasy during baking.
Following the rinse, the next critical step for achieving perfectly crispy wings is to ensure they are completely dry. Use clean paper towels to pat each wing individually. It’s vital to remove as much moisture as possible from the skin; any residual water can steam the wings in the oven instead of allowing them to crisp up beautifully. Take your time here; thorough drying is key to a delightful crunch.
The Science of Crispiness: Moisture is the enemy of crispiness in baked goods, including chicken wings. By thoroughly drying the wings, you are allowing the heat of the oven to directly crisp the skin, rather than evaporate excess water. This meticulous drying process directly contributes to the satisfying texture that makes these wings so addictive.
Step 3: Preheat Oven and Prepare Baking Sheet
Now that your wings are prepped, it’s time to get the oven ready for action. Preheat your oven to a low temperature of 250°F (120°C). This initial low-temperature bake is part of the secret to achieving incredibly tender and juicy wings from the inside out. Position your oven racks so that one is in the lower third of the oven and another is in the upper third. This strategic placement will allow for even cooking when the temperature is later increased.
While the oven is preheating, prepare your baking sheet. Line a sturdy, rimmed baking sheet with aluminum foil. This serves a dual purpose: it will catch any drips or rendered fat from the chicken, making cleanup significantly easier, and it provides a stable surface for the wire rack. Ensure the foil is smoothed out to prevent any uneven baking spots.
The Two-Stage Bake: This recipe employs a two-stage baking method, starting at a low temperature to cook the wings through gently, then increasing to a high temperature to achieve that coveted crispy skin. This technique ensures that the wings are cooked perfectly, without sacrificing either tenderness or crispiness, making them a standout dish.
Step 4: Mix the Flavorful Coating
In a small, clean bowl, it’s time to combine the magic ingredients for the dry coating. Whisk together the baking powder, dried dill, garlic powder, salt, and the optional white pepper. Ensure that all these spices are thoroughly combined to create a homogenous mixture. This blend will not only add flavor but also help in creating a wonderfully crispy texture on the wings during the baking process.
The baking powder is a crucial element here; it acts as a leavening agent, creating tiny air bubbles that puff up the skin as it cooks, leading to an incredibly light and crispy exterior. The dried dill and garlic powder provide the aromatic and savory notes that perfectly complement the tangy pickle brine, creating a well-rounded flavor profile for these exceptional wings.
The Role of Baking Powder: It’s important to use baking powder and not baking soda. Baking powder contains both an acid and a base, creating a leavening effect that is ideal for crisping. This ingredient is key to achieving that satisfying crunch that diners expect from well-made chicken wings, differentiating them from simply baked chicken.
Step 5: Coat the Wings Evenly
Now that the wings are thoroughly dried and the spice mixture is ready, it’s time for them to get coated. Transfer the patted-dry chicken wings into a large mixing bowl or a spacious zipper-lock plastic bag. If using a bowl, ensure it’s large enough to comfortably toss the wings without them piling up too high. This ensures each wing gets adequate coverage from the coating mixture.
Sprinkle the prepared spice mixture over the wings. If you’re using a bowl, use your hands (or tongs) to gently toss the wings, ensuring every single wing is evenly coated with the flavorful blend of baking powder and spices. If using a plastic bag, seal it tightly and shake it gently to distribute the coating evenly. This even coating is vital for consistent crispiness and flavor across all the wings.
The Best Part: The aroma that fills your kitchen as you toss these wings is incredible, a promise of the deliciousness to come. Ensure no dry spots remain; a thorough coating is key to unlocking the full potential of this Dill Pickle Chicken Wings recipe, making every bite a delight.
Step 6: Arrange and Bake to Perfection
Carefully arrange the seasoned chicken wings in a single layer on the prepared wire rack. Make sure the skin side of the wings is facing upwards. This arrangement is critical for allowing air to circulate around each wing, promoting even cooking and crisping. Spray the wire rack lightly with PAM or oil spray before placing the wings to prevent any sticking, ensuring a clean release after baking.
Place the baking sheet with the arranged wings onto the lower oven rack. Bake for 30 minutes at the initial temperature of 250°F (120°C). After 30 minutes, carefully move the baking sheet to the upper oven rack, and increase the oven temperature to 425°F (220°C). Continue baking for another 40-45 minutes, rotating the pan halfway through this second stage for even browning and crisping.
The Grand Finale: As the wings bake at the higher temperature, watch them closely. They should become beautifully golden brown and develop that irresistible crispy texture. The aroma filling your home will be a testament to the delicious transformation happening in the oven, signaling that a culinary treat is almost ready to be enjoyed.
Step 7: Rest and Serve with Flair
Once the baking time is complete and your Dill Pickle Chicken Wings have achieved a gorgeous golden-brown hue and that perfect crispy texture, carefully remove the baking sheet from the oven. Resist the urge to dig in immediately; allowing the wings to rest for about 5 minutes before serving is an important step. This resting period allows the juices within the chicken to redistribute, resulting in more tender and moist wings.
After the short rest, your Dill Pickle Chicken Wings are ready to be devoured! Serve them hot, and consider offering your favorite dipping sauces alongside them for an extra layer of flavor and fun. These wings are so flavorful on their own, but a good ranch, blue cheese dressing, or even a little extra pickle juice can elevate the experience even further, making them a true crowd-pleaser at any gathering.
Optional Garnish: For an extra touch of pickle-infused delight, serve a few fresh dill pickle chips on the side. This simple addition reinforces the main flavor profile and provides a refreshing, crunchy contrast to the warm, crispy wings, making for a truly cohesive and delightful appetizer experience.
Pro Tips for Dill Pickle Chicken Wings
Marinating Time Matters: To achieve the perfect infusion of dill pickle flavor, aim for a marinating period of 1 to 4 hours. While shorter times will provide some flavor, allowing them to soak longer ensures the tangy brine deeply penetrates the chicken, resulting in a more pronounced and satisfying taste in every single bite.
Pat Dry for Crispiness: After rinsing the marinated wings, it is absolutely crucial to thoroughly pat them dry with paper towels. Any lingering moisture on the skin will prevent it from crisping up properly in the oven, leading to a less desirable texture. This step is a non-negotiable for achieving that perfect, satisfying crunch.
Use Aluminum-Free Baking Powder: When selecting baking powder for your spice coating, opt for an aluminum-free variety. This choice not only enhances the crisp texture of the wings but also importantly avoids any potential metallic aftertaste, thereby elevating the overall flavor experience of your Dill Pickle Chicken Wings and ensuring a pure, clean taste.
Even Spacing is Key: When arranging the seasoned wings on the wire rack, ensure they are placed in a single layer with adequate space between each wing. Overcrowding can cause the wings to steam rather than bake, hindering their ability to crisp up beautifully. Give them room to breathe!
Watch Temperature Changes Carefully: As you transition the wings from the initial low oven temperature to the higher one, keep a close eye on them. This adjustment is essential for developing that ideal golden-brown color and achieving the perfect crispy exterior without inadvertently burning them, ensuring a beautiful presentation.
Serving Suggestions for Dill Pickle Chicken Wings
Decoration
To elevate the visual appeal of your Dill Pickle Chicken Wings, consider a few simple yet effective decorative touches. A scattering of fresh dill sprigs over the platter adds a vibrant splash of green and reinforces the herb’s presence in the flavor profile. Thinly sliced dill pickles, arranged artfully around the wings, not only look appealing but also serve as a delightful edible garnish that beckons guests to indulge.
For a pop of color and a hint of zest, a light sprinkle of paprika can add a warm reddish hue, suggesting the subtle spice within. If you’ve opted for a spicy variation, a few small, finely chopped jalapeño slices can add a visual cue to the heat level. Ultimately, presentation should be inviting, showcasing the beautiful golden-brown crispiness of the wings.
Side Dishes
These tangy and crispy wings pair wonderfully with a variety of sides that complement their unique flavor. A creamy, cool coleslaw provides a refreshing textural contrast and balances the richness of the chicken, making it an ideal companion. Crispy, golden French fries are a classic pairing, offering a familiar comfort and a perfect vehicle for any leftover dipping sauce.
For a heartier meal, consider a classic potato salad, its creamy texture and savory notes offering a satisfying counterpoint to the zestiness of the wings. Garlic bread, with its warm, buttery aroma and soft interior, complements the savory profile of the wings beautifully. Buffalo cauliflower bites offer a lighter, vegetarian option that echoes the bold flavors, making for a well-rounded appetizer spread.
Creative Serving Ideas
Beyond the traditional platter, think outside the box for serving these versatile wings. Consider presenting them as part of a gourmet slider bar, where guests can assemble their own mini sandwiches with the wings as the star. For a more interactive experience, set up a “wing flight” with various dipping sauces, allowing guests to explore different flavor combinations. These Dill Pickle Chicken Wings can also be a fantastic addition to a charcuterie board, offering a unique savory element among cheeses and cured meats.
Another creative idea is to incorporate them into a hearty salad, perhaps as a protein topping for a mixed greens salad with a tangy vinaigrette. For game day, arrange them in a festive pattern on a large board, perhaps resembling a football or team logo, adding a fun, thematic touch. The key is to think about how the unique pickle flavor can be a conversation starter and a delightful surprise in any culinary context.
Preparation & Storage
Storing Leftovers
To keep your delicious Dill Pickle Chicken Wings fresh and flavorful after the initial feast, proper storage is essential. Once the wings have cooled down completely to room temperature, transfer any leftovers into an airtight container. This type of container is crucial for preventing the wings from drying out and for keeping them from absorbing any unwanted odors from other foods in your refrigerator. Properly stored, these wings will remain enjoyable for up to 3 days.
It’s important to avoid storing them while they are still warm, as this can create condensation within the container, potentially making the crispy skin a bit soggy. Ensure the container is sealed tightly before placing it in the refrigerator. This simple step ensures that you can enjoy the delightful taste and texture of these wings again, even days after they were first prepared.
Freezing
For longer-term storage, freezing Dill Pickle Chicken Wings is an excellent option, allowing you to enjoy them at a later date. After the wings have been baked and have cooled down completely, the best method for freezing is to lay them out in a single layer on a baking sheet. Make sure they are not touching each other; this prevents them from clumping together into one large frozen mass.
Once the wings are frozen solid on the baking sheet (this usually takes about 1-2 hours), you can then transfer them into a heavy-duty zip-top freezer bag or an airtight freezer-safe container. Removing as much air as possible from the bag before sealing will help prevent freezer burn. Properly frozen, these wings can maintain their quality for up to 3 months, offering a convenient way to have a delicious snack ready whenever the craving strikes.
Reheating
Reheating Dill Pickle Chicken Wings properly is key to restoring their delicious crispiness and ensuring they are safe to eat. The best method for reheating is back in the oven. Preheat your oven to 375°F (190°C). Place the wings (whether thawed or straight from the freezer) in a single layer on a baking sheet, ideally on a wire rack set within the baking sheet to allow for air circulation on all sides.
If reheating from frozen, bake for approximately 25-30 minutes, or until they are heated through and the skin has regained its crispiness. If reheating already thawed wings, the time might be slightly less, around 15-20 minutes, but the crucial factor is to ensure they reach an internal temperature of 165°F (74°C) for food safety. Avoid reheating in the microwave if possible, as this tends to make the skin soggy and diminish the desirable texture.
Frequently Asked Questions
-
How do I choose the best chicken wings for this recipe?
Absolutely! For the most satisfying results with your Dill Pickle Chicken Wings, you’ll want to select fresh, plump chicken wings that have a good amount of skin and a visible layer of fat. Fresh wings are paramount because they will yield the juiciest and most flavorful meat, providing a delightful eating experience. You can typically find excellent quality wings at your local butcher shop or well-stocked grocery stores; simply inspect them to avoid any wings that show signs of discoloration or dark spots on the skin, as these might indicate older or less fresh product.
-
How should I store leftover Dill Pickle Chicken Wings?
Storing your leftover Dill Pickle Chicken Wings is quite straightforward and ensures they remain delicious for future enjoyment. After the wings have completely cooled down to room temperature, the best approach is to place them into an airtight container. This type of container is essential for maintaining their texture and preventing them from drying out or picking up unwanted flavors from other items in your refrigerator. When stored correctly in an airtight container in the refrigerator, these flavorful wings can be kept fresh and appealing for up to 3 days.
-
Can I freeze Dill Pickle Chicken Wings?
Certainly, you can absolutely freeze your delicious Dill Pickle Chicken Wings to enjoy at a later time! The ideal method is to first allow the baked wings to cool down entirely. Once they are completely cooled, spread them out in a single layer on a baking sheet and place them into your freezer until they are frozen solid. After they have frozen firm, you can then transfer them into a heavy-duty zip-top freezer bag or a suitable airtight freezer container for long-term storage, which can extend their quality for up to 3 months.
-
What’s the best way to reheat frozen wings?
To reheat your frozen Dill Pickle Chicken Wings and bring back their delicious crispiness, the oven is your best bet. Preheat your oven to a temperature of 375°F (190°C). Arrange the frozen wings directly on a baking sheet, preferably on a wire rack set inside the sheet to promote air circulation. Bake them for about 25 to 30 minutes, or until they are thoroughly heated through and the skin has regained its satisfying crispness. If you’re reheating wings that have already been thawed, the reheating time will be shorter, but always ensure they reach an internal temperature of 165°F (74°C) for safety.
-
Can I make these wings gluten-free?
Absolutely! Making these Dill Pickle Chicken Wings gluten-free is quite simple and requires just a little attention to your ingredients. The primary thing to ensure is that all your chosen ingredients are certified gluten-free, with particular attention paid to the baking powder you use, as some brands may contain gluten. By selecting gluten-free versions of your ingredients, you can confidently prepare and enjoy these delicious wings without any concerns about gluten content, allowing everyone to partake in this flavorful treat.
-
Are there any dietary restrictions I should be aware of?
It’s a great question to consider! As these Dill Pickle Chicken Wings are primarily made with chicken, they are inherently not suitable for individuals following a vegetarian or vegan diet. For those with specific allergies, it is always prudent to carefully review the labels of all your ingredients, especially items like garlic powder and baking powder, to avoid any potential cross-contamination issues that could be problematic for sensitive individuals. Ensuring ingredient transparency is key for inclusive dining.