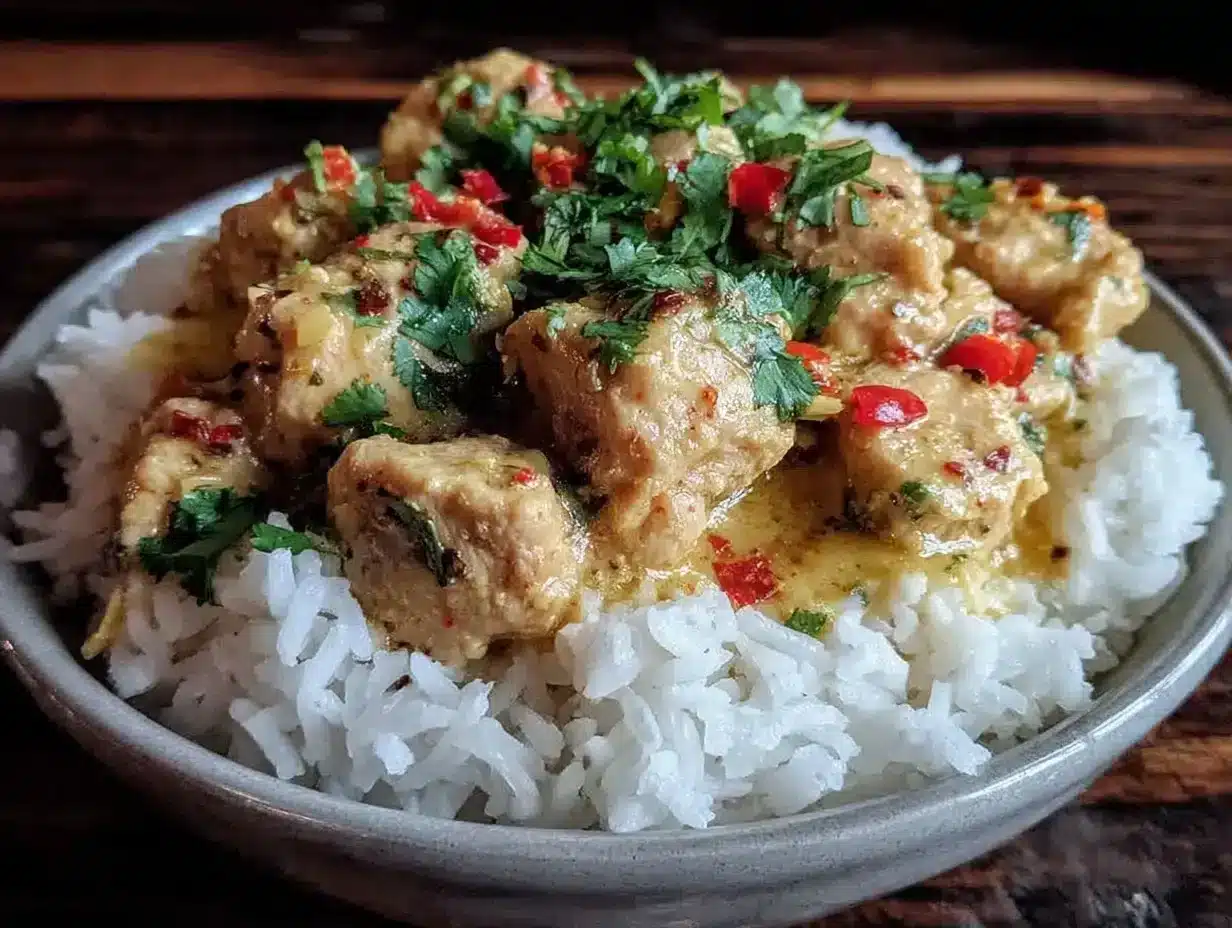
Dairy-Free Creamy Coconut Chicken Curry Recipe Easy Weeknight Dinner
Last Wednesday, after a grueling day juggling work calls and a mountain of laundry, I stared blankly into my fridge wondering what on earth I could whip up for dinner without losing my sanity. That’s when I remembered a coconut milk can hiding behind the salad dressings and a bag of frozen chicken breasts in the freezer. I threw together what turned out to be the creamiest, most comforting dairy-free coconut chicken curry I’ve ever made, and honestly, it saved my sanity that night.
This recipe is my secret weapon for busy weeknights when I want something warm, satisfying, and quick—but without the usual heavy cream or yogurt. The coconut milk makes it silky smooth and naturally dairy-free, while the spices give it a gentle kick that wakes up the senses without overwhelming the soul. I’ve made this dairy-free creamy coconut chicken curry more times than I can count, tweaking it just enough each time to get that perfect balance of flavors and ease.
Why You Will Love This Recipe
- Quick Preparation: From chopping to plating, the entire process takes about 35 minutes, making it perfect for your favorite dinner rush.
- Dairy-Free Creaminess: Using full-fat coconut milk creates a luscious, velvety texture that rivals any restaurant-style curry without using a drop of heavy cream.
- One-Pan Magic: You only need a single skillet to prepare this meal, which means significantly less cleanup and more time for yourself at the end of the day.
- Highly Adaptable: Whether you want to add extra garden vegetables or adjust the spice levels for your family, this recipe easily molds to your specific mood and pantry needs.
- Meal Prep Friendly: This curry stores and reheats beautifully, making it an ideal candidate for your weekly lunch rotations.
Ingredients You Need
Creating a restaurant-quality meal at home relies entirely on the quality of your components, so try to use fresh aromatics and full-fat canned coconut milk for the best results. These ingredients work in harmony to build a complex flavor profile that feels far more indulgent than its simple preparation suggests. Please note that exact quantities are listed in the recipe card below.
Dairy-Free Creamy Coconut Chicken Curry
A quick and comforting dairy-free coconut chicken curry made with full-fat coconut milk and fragrant spices, perfect for busy weeknights.
- 1.5 lbs (680g) chicken breasts, cut into bite-sized pieces
- 1 can (13.5 oz / 400ml) full-fat canned coconut milk
- 1 medium yellow onion, finely chopped
- 3 large garlic cloves, minced
- 1-inch piece fresh ginger, grated
- 2 tablespoons red curry paste
- 1 teaspoon turmeric powder
- 1 teaspoon ground coriander
- 1 teaspoon ground cumin
- 1 tablespoon fresh lime juice
- A small handful fresh cilantro, chopped (optional)
- 1 medium bell pepper, sliced (optional)
- 2 cups baby spinach (optional)
- 2 tablespoons cooking oil (coconut oil or neutral vegetable oil)
- 1Prep your ingredients: chop the onion, mince the garlic, grate the ginger, slice the bell pepper if using, and cut the chicken into bite-sized pieces.
- 2Heat 2 tablespoons of oil in a large deep skillet over medium heat. Add the chopped onion and sauté until translucent and soft, about 3-4 minutes.
- 3Add the garlic and ginger to the skillet and cook for another minute until fragrant.
- 4Add the chicken pieces in a single layer. Let them sear without moving for 2 minutes to get a golden crust, then stir and cook for 4-6 more minutes until mostly cooked through.
- 5Sprinkle in turmeric, ground coriander, cumin, and salt. Stir well to coat the chicken and aromatics.
- 6Add the red curry paste and mix thoroughly to bloom the spices.
- 7Pour in the full can of coconut milk and stir to combine. Add sliced bell pepper if using.
- 8Bring to a gentle simmer, then reduce heat to low and cover. Cook for 15 minutes, stirring occasionally, until chicken is tender and sauce thickens slightly.
- 9Remove the lid, stir in fresh lime juice and baby spinach if using. Cook until spinach wilts, about 1-2 minutes.
- 10Taste and adjust salt or lime juice as needed.
- 11Serve the curry over steamed jasmine rice, basmati rice, or cauliflower rice for a low-carb option. Garnish with chopped fresh cilantro.
Keywords: dairy-free, coconut chicken curry, easy dinner, weeknight meal, gluten-free, creamy curry, coconut milk, chicken recipe
- chicken breasts: lean protein that absorbs the fragrant spices perfectly.
- full-fat canned coconut milk: the essential ingredient for achieving a rich, creamy sauce consistency.
- yellow onion: provides a necessary natural sweetness and foundational depth.
- garlic cloves: fresh minced garlic adds the required aromatic punch to the base.
- fresh ginger: grated ginger brings a bright, zesty warmth to the overall dish.
- red curry paste: the core of the flavor, providing heat and complexity.
- turmeric powder: adds a vibrant golden hue and a subtle earthiness.
- ground coriander: introduces a citrusy, floral note that balances the richness.
- ground cumin: delivers a warm, savory depth to the spice blend.
- salt: balances and enhances the individual flavors of the herbs and spices.
- fresh lime juice: a bright finish that cuts through the coconut richness.
- fresh cilantro: an optional garnish for a pop of color and freshness.
- bell pepper: an optional addition for extra crunch and sweetness.
- baby spinach: a nutrient-dense green that wilts perfectly into the hot sauce.
- cooking oil: coconut or neutral oil used for sautéing the aromatics.
Variations
The Vegan Twist: If you prefer a plant-based meal, simply swap the chicken for firm tofu or protein-packed chickpeas. Press your tofu thoroughly to remove excess moisture and cube it before frying to ensure a satisfying, crispy texture in every bite.
Low Carb Living: To keep this dish light, omit any starchy sides and serve the curry over cauliflower rice or zucchini noodles. You can also increase the vegetable content by adding broccoli florets or snap peas during the final five minutes of simmering.
Herbaceous Notes: For a completely different flavor profile, swap the traditional red curry paste for Thai green curry paste. This variation offers a fresher, more herbaceous taste that pairs incredibly well with extra lime zest and fresh basil leaves.
How to Prepare dairy free coconut chicken curry
Step 1: Prep your ingredients
Efficiency is key when it comes to quick weeknight cooking. Start by finely chopping your onion and mincing the garlic cloves as directed.
Prepare the protein by cutting your chicken breasts into uniform, bite-sized pieces to ensure they cook evenly. Grate your fresh ginger using a microplane or small grater to release all the essential oils.
Organize your workspace by having your measuring spoons and spices ready to go near the stove. This simple act of preparation makes the actual cooking process feel smooth and stress-free.
Step 2: Sauté aromatics
Begin by heating two tablespoons of oil in your large, deep skillet or sauté pan over medium heat. Once the oil shimmers, add the chopped onion and sauté for about three to four minutes.
Observe the texture of the onions; they should be translucent and soft before you move to the next stage. Now, toss in the freshly minced garlic and ginger, cooking them for another minute until they become highly fragrant.
Watch the heat closely during this step to ensure the garlic doesn’t burn, as bitter garlic can ruin the base flavor. This aromatic stage is the soul of the dish, so do not rush it.
Step 3: Cook the chicken
Add the chicken pieces to the skillet in a single, even layer to promote browning. Let them sear undisturbed for about two minutes to develop a beautiful golden crust.
Stir the mixture gently and continue to cook for another four to six minutes until the chicken is mostly cooked through. Remember that the chicken will finish its cooking process once it simmers in the coconut milk sauce.
Avoid overcooking the chicken at this early stage, as you want the meat to remain tender and juicy later. If you are using a baked lemon chicken approach in other recipes, you might be used to longer times, but here, speed is your ally.
Step 4: Add spices and curry paste
Sprinkle the turmeric, ground coriander, cumin, and salt directly over the chicken and aromatics. Stir the mixture well to ensure every piece of chicken is thoroughly coated in the spice blend.
Incorporate the paste by adding two tablespoons of red curry paste to the pan. Mix everything together thoroughly so that the paste begins to dissolve and bloom in the warm oil.
Embrace the aroma as the heat releases the complex oils from the curry paste and spices. This step intensifies the depth of your final sauce significantly.
Step 5: Pour in coconut milk and simmer
Pour the full can of coconut milk over your chicken mixture and stir until combined. If you are using sliced bell peppers, add them now so they soften within the liquid.
Bring the mixture to a gentle simmer, then reduce the heat to low and cover the pan. Let the curry cook for approximately fifteen minutes, stirring occasionally to prevent sticking.
Check the sauce density during this simmer; the coconut milk will thicken as the flavors meld together. By the end, the chicken should be fully tender and the sauce should have a luxurious, coating consistency.
Step 6: Finish with lime and greens
Remove the lid from your skillet to reveal the beautiful, golden-red curry. Stir in the fresh lime juice and add the baby spinach until it wilts into the sauce.
Taste your creation carefully and adjust the salt or lime juice if you feel the flavors need more balance. The lime adds a necessary acidic brightness that cuts through the heavy richness of the coconut milk.
Serve immediately by spooning the curry over your choice of side dishes, like steamed jasmine rice. Sprinkle a generous amount of fresh cilantro over the top for that final touch of color and brightness.
Pro Tips for dairy free coconut chicken curry
The Aromatics Rule: Never rush the process of sautéing your onions, garlic, and ginger, as they are the flavor backbone of the entire meal. Cooking these ingredients low and slow allows them to release their sugars and oils, providing a much deeper flavor profile.
Choose Quality Milk: Always use full-fat canned coconut milk rather than the “light” or carton versions. Full-fat milk is the secret to achieving that luscious, restaurant-style mouthfeel, and it prevents the sauce from becoming watery or thin.
Master the Heat: Adjust your red curry paste based on your personal heat tolerance by starting with one tablespoon and tasting as you go. Remember that the spice level often intensifies as the sauce reduces, so it is easier to add more heat than it is to remove it.
Texture Control: If you prefer a thicker sauce, simply simmer the curry uncovered for the final five minutes of cooking. If you happen to overcook the sauce and it becomes too thick, stir in a splash of water or vegetable broth to reach your desired consistency.
Serving Suggestions for dairy free coconut chicken curry
Decoration
To make the dish look professional, garnish the curry with freshly chopped cilantro leaves and a wedge of lime placed on the side of the bowl. You can also sprinkle a few toasted coconut flakes on top to emphasize the primary flavor profile and add a subtle crunch.
Side Dishes
Steamed jasmine rice or fluffy basmati rice are the traditional choices that soak up the creamy sauce perfectly. For those interested in a breakfast-inspired twist or a lighter meal, serving this alongside warm, dairy-free naan or a crisp cucumber salad works wonders.
Creative Serving Ideas
Try serving the curry inside a hollowed-out roasted sweet potato or over a bed of roasted cauliflower for a hearty, low-carb feast. If you want to impress guests, serve it alongside a fresh mango salsa to provide a sweet, fruity contrast to the savory, spiced curry sauce.
Preparation & Storage
Storing Leftovers
Leftover curry can be stored in an airtight container in your refrigerator for up to four days. The flavors often meld and improve overnight, making this an even better meal for your second-day lunch.
Freezing
This dish freezes exceptionally well for up to three months when placed in a freezer-safe, airtight container. To prepare for freezing, let the curry cool completely to room temperature before portioning it out to ensure no ice crystals form.
Reheating
Reheat the curry gently on the stovetop over low heat, stirring occasionally to keep the sauce smooth. If the coconut milk appears to separate during the process, simply whisk it vigorously to bring the emulsion back together before serving.
Frequently Asked Questions
- Can I substitute the chicken with another protein source?
Yes, you can easily swap the chicken for firm tofu, chickpeas, or even shrimp. If using tofu, ensure you press it well to remove liquid before cubing and frying, as this gives it a superior texture that holds up well against the creamy sauce. - Why is my coconut milk separating into an oily layer?
Separation usually occurs when the sauce is boiled too rapidly or heated unevenly. Always maintain a gentle, low-heat simmer rather than a hard boil, and whisk the sauce periodically during the cooking process to keep the fats emulsified. - Is it possible to make this recipe without the red curry paste?
The red curry paste is essential for the authentic depth and heat, but you can approximate it by using a blend of chili powder, grated ginger, garlic, and a touch of paprika or tomato paste. While the result will be different, it still yields a flavorful, comforting chicken dish that fits the dairy-free profile.