Condensed Milk Coconut Cake
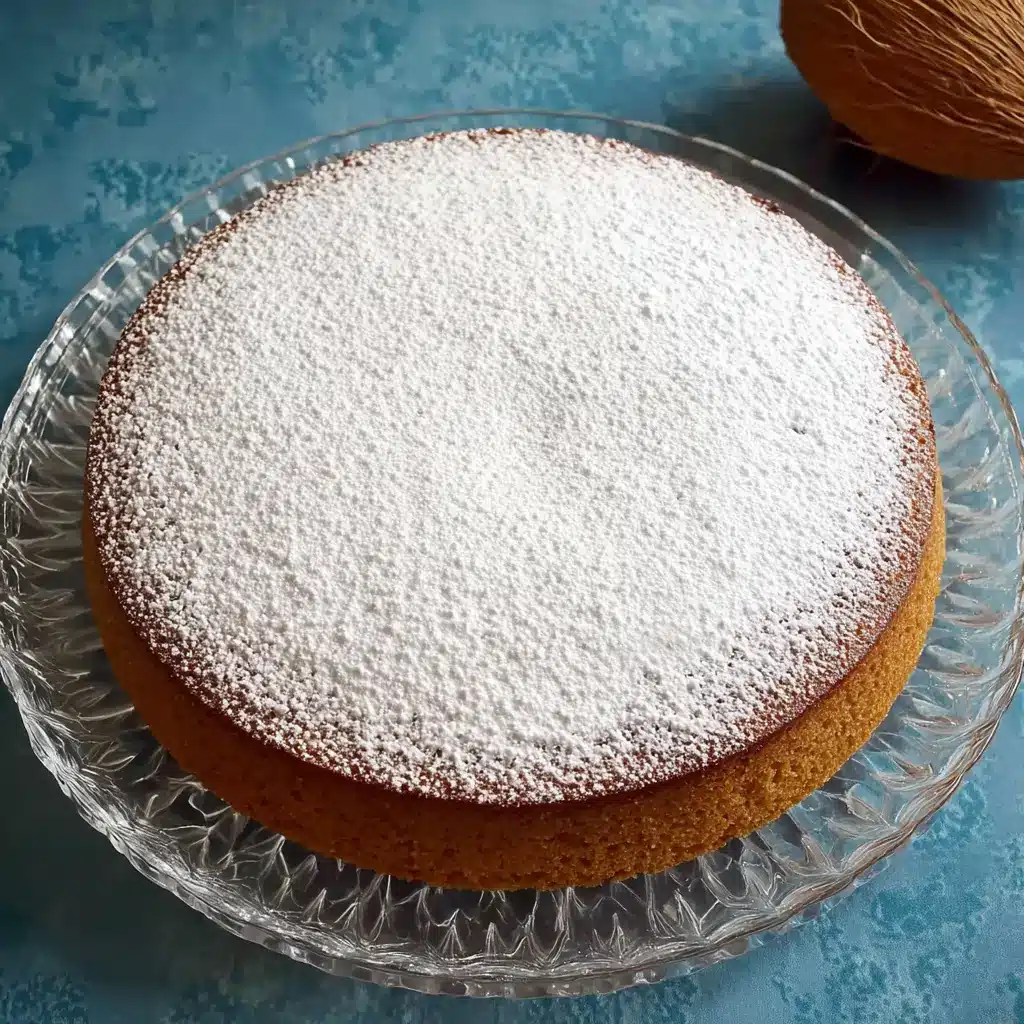
Creamy, tender, and wonderfully simple, Condensed Milk and Coconut Cake brings together sweetened condensed milk, coconut milk, and a soft buttery crumb for a fuss-free dessert that feels special enough for guests and easy enough for everyday baking. This is the kind of cake that fits beautifully into real life.
You can mix everything in one bowl, pour it into the pan, and let the oven do the work while you handle the rest of your day. The flavor is gentle but memorable, with the condensed milk giving the cake its smooth sweetness and the coconut milk and extract adding that mellow tropical note that makes each bite feel extra soft and fragrant. It also happens to be a very reliable bake, with no complicated layering, frosting, or special decorating skills needed – a light dusting of powdered sugar is all it takes to finish it beautifully.
Why You Will Love This Recipe
- Effortless Preparation: This cake is designed for simplicity, requiring just one bowl and straightforward mixing for minimal fuss.
- Luxurious Texture: The combination of sweetened condensed milk and full-fat coconut milk creates an incredibly moist, tender, and rich crumb.
- Delicate Tropical Flavor: Subtle yet distinct notes of coconut, enhanced by coconut extract, make each bite delightfully aromatic and satisfying.
- Visually Appealing Finish: A simple dusting of powdered sugar provides an elegant, bakery-quality look without any advanced decorating techniques.
- Versatile Enjoyment: Perfect as a stand-alone dessert, it also pairs wonderfully with fresh berries, whipped cream, or a warm beverage, making it suitable for any occasion.
Ingredients You Need
The success of this Condensed Milk and Coconut Cake hinges on using quality ingredients that contribute to its unique texture and flavor profile. Opting for full-fat coconut milk is crucial for achieving that signature richness and moisture, while room-temperature eggs ensure a smoother, more uniformly baked batter. Using fresh, good-quality extracts will also amplify the delightful coconut aroma and taste.
Condensed Milk and Coconut Cake

A tender, richly flavored cake prepared with sweetened condensed milk and coconut elements for a soft crumb and delicate sweetness. Once cooled, it is finished with a light dusting of powdered sugar for an elegant presentation.
- 4 room-temperature eggs
- 9 ounces sweetened condensed milk
- 2 tablespoons coconut flour
- 2/3 cup full-fat coconut milk
- 1 teaspoon coconut extract
- 1 cup plain all-purpose flour
- 3.5 tablespoons unsalted butter, melted
- 1/2 teaspoon baking powder
- 2 tablespoons white granulated sugar
- Powdered sugar, for finishing
- 1Grease a 22 cm (9-inch) springform pan thoroughly with butter or cooking spray. Lightly flour the interior so the cake releases cleanly after baking.
- 2Place all of the ingredients into the bowl of an electric mixer. Beat on medium speed until the mixture is fully blended, smooth, and free from lumps.
- 3Preheat the oven to 180°C (355°F). Transfer the batter to the prepared springform pan, then bake for 40 minutes, or until a toothpick inserted into the center comes out clean.
- 4Remove the cake from the oven and allow it to cool completely in the pan. Once cooled, carefully release it from the springform pan and finish with a dusting of powdered sugar before serving.
Keywords: Condensed Milk and Coconut Cake
- eggs: crucial for binding and structure, ensuring a tender crumb.
- sweetened condensed milk: provides exceptional sweetness, moisture, and a silky smooth texture.
- coconut flour: adds a subtle depth of coconut flavor and helps create a pleasing cake consistency.
- full-fat coconut milk: essential for richness, moisture, and a wonderfully tender interior.
- coconut extract: amplifies the coconut essence, ensuring a fragrant and pronounced flavor.
- all-purpose flour: the foundational element for the cake’s structure and stability.
- unsalted butter (melted): contributes a delicate buttery richness and enhances the overall flavor balance.
- baking powder: aids in achieving a light and airy crumb, preventing the cake from becoming too dense.
- granulated sugar: balances sweetness and contributes to the cake’s perfect texture during baking.
- powdered sugar: for a simple, elegant finishing touch that enhances presentation.
The specific quantities for each ingredient are detailed within the accompanying recipe card.
Variations
For those with specific dietary preferences, this versatile cake offers several exciting avenues for modification. You can easily adapt it to suit a vegan lifestyle by substituting the eggs with a flax egg or commercial egg replacer, and ensuring your butter choice is plant-based.
To create a lower-carbohydrate version, consider experimenting with a blend of almond and coconut flour in place of all-purpose flour, and employ a sugar substitute that bakes well, like erythritol or xylitol, adjusting sweetness to your preference. Be mindful that these substitutions may slightly alter the texture, so a test bake is always recommended.
Adding a touch of citrus zest, such as lime or lemon, can provide a bright counterpoint to the rich coconut and condensed milk flavors. Alternatively, a handful of toasted shredded coconut folded into the batter before baking will intensify the tropical notes and add a delightful crunch.
How to Prepare Condensed Milk and Coconut Cake
Step 1: Prepare Your Baking Vessel
Begin by selecting a quality springform pan, ideally one around 22 cm or 9 inches in diameter, which is perfect for this cake’s size. Thoroughly grease the entire interior surface of the pan. This step is paramount for ensuring that your delicate cake will release cleanly without sticking or breaking once it’s baked and cooled.
After greasing, apply a light coating of flour to the greased surfaces, tapping out any excess. This double-layer of protection—grease and flour—acts as a barrier, preventing the moist cake batter from adhering to the metal. For an even more foolproof release, you can also line the bottom of the pan with a circle of parchment paper after greasing, then flour the sides.
Ensure the flour is evenly distributed, coating every nook and cranny that the batter will touch. This preparation is a small but vital step that guarantees the beautiful presentation of your finished cake, preserving its tender edges and smooth sides.
Step 2: Crafting the Cake Batter
In the bowl of your electric mixer, combine all the primary batter ingredients as specified in the recipe. This includes your room-temperature eggs, the sweetened condensed milk, the carefully measured coconut flour, the full-fat coconut milk, coconut extract, all-purpose flour, melted unsalted butter, baking powder, and granulated sugar. Using room-temperature eggs is important here, as they emulsify more easily with the fats and liquids, creating a smoother, more homogenous batter. This leads to a more even rise and a finer crumb structure in the final cake.
Beat the mixture on a medium speed. The goal is to achieve a batter that is completely smooth and fully blended, with no visible streaks of flour or lumps of egg. Avoid overmixing at this stage; once the ingredients are just combined and the batter appears uniform, stop the mixer. Overworking the gluten in the flour can result in a tougher cake, which is something we want to avoid for this tender recipe. The batter should have a thick yet pourable consistency, indicative of the rich ingredients incorporated.
Scrape down the sides and bottom of the bowl once or twice during mixing to ensure all ingredients are incorporated uniformly. This simple action guarantees that every part of your batter is consistent in texture and flavor, leading to a perfectly baked cake every time. The aroma of coconut and sweet condensed milk should already be beginning to fill your kitchen.
Step 3: Baking to Perfection
Preheat your oven to precisely 180°C (355°F). It’s essential that the oven has reached its target temperature before the cake goes in; this ensures even baking from the moment it starts to cook. Place an oven rack in the center position to allow for optimal heat circulation around the cake.
Once the oven is preheated and the batter is ready, carefully pour the prepared batter into the springform pan. Use a spatula to scrape out every last bit of batter from the mixing bowl, minimizing waste and ensuring all that deliciousness makes it into the cake. Gently smooth the top of the batter with the back of the spatula or an offset spatula. This will help the cake bake with a level surface, preventing uneven doming and ensuring a more attractive final presentation.
Place the pan into the preheated oven. The baking time is approximately 40 minutes, but this can vary slightly depending on your oven. Keep an eye on the cake as it bakes; you want the top to be golden brown and set. The aroma will intensify beautifully during this time, filling your home with a comforting, sweet fragrance.
Step 4: The Crucial Cooling Process
As the baking time nears its end, perform a toothpick test to check for doneness. Insert a clean toothpick or a thin skewer into the center of the cake. If it comes out clean, or with only a few moist crumbs attached, the cake is perfectly baked. If there is wet batter on the toothpick, continue baking for a few more minutes and test again. Be careful not to overbake, as this can lead to a dry cake.
Once the cake is deemed baked, carefully remove the springform pan from the oven. This is where patience becomes your greatest virtue. Allow the cake to cool completely within the pan itself. This step is absolutely critical for a tender cake like this. While still warm, the cake’s structure is delicate and prone to crumbling if handled too soon. The gradual cooling within the pan allows the internal structure to stabilize and firm up properly.
Resist the urge to release the springform ring immediately after taking it out of the oven. Let it sit undisturbed on a wire rack for at least 30 to 45 minutes, or until it’s nearly at room temperature. This extended cooling period in the pan is fundamental to achieving clean slices later on and preventing any heartbreak when you go to serve your masterpiece.
Step 5: Releasing and Finishing Touches
Once the cake has cooled thoroughly in the springform pan, it’s time for the reveal. Carefully run a thin knife or an offset spatula around the inner edge of the springform pan to loosen any parts that might still be slightly adhered to the sides. This step ensures a clean separation between the cake and the pan’s rim, preventing tearing of the delicate crumb.
Gently release the springform ring by unclipping it and lifting it away from the cake. If you’ve prepared the pan correctly with grease and flour, the ring should lift away smoothly, leaving the cake intact. The sides of the cake should appear evenly golden brown and set, with a tender texture visible upon close inspection.
Allow the cake to cool for a little longer on the pan’s base on a wire rack, or until it’s completely at room temperature. This final cooling stage is important before adding any garnishes. Once fully cooled and ready for presentation, place the cake onto your serving plate or stand. You can then proceed to the final decorative step.
Step 6: The Elegant Dusting
The final touch for this delightful Condensed Milk and Coconut Cake is a simple yet elegant dusting of powdered sugar. Using a fine-mesh sieve or a small sifter, lightly and evenly dust the entire surface of the cooled cake. This creates a beautiful, matte finish that enhances the cake’s visual appeal, giving it a professional, bakery-quality look.
Ensure the sieve is held at a consistent height above the cake to achieve a uniform layer of sugar. If you apply too much in one spot, it can become clumpy or melt into the cake; a light, airy dusting is ideal. This powdered sugar finish complements the sweet, creamy flavors without adding an overwhelming amount of extra sweetness.
This simple topping allows the cake’s natural flavors and textures to shine through, making it perfect for any occasion. You can then proceed to slice and serve your beautiful creation, enjoying the fruits of your simple yet rewarding baking effort. The cake is now ready to be enjoyed by all who appreciate its delicate sweetness and soft texture.
Pro Tips for Condensed Milk and Coconut Cake
Ensure Ingredients are Room Temperature: For the smoothest batter and the most even bake, make sure your eggs and coconut milk are at room temperature. This allows them to emulsify beautifully with the other ingredients, preventing curdling and promoting a cohesive, tender crumb.
Don’t Overmix the Batter: While you want all ingredients well combined, overmixing can develop the gluten in the flour too much, leading to a tougher cake. Mix just until the batter is smooth and uniform; stop as soon as this consistency is achieved.
Patience is Key with Cooling: It’s tempting to slice into this cake as soon as it’s out of the oven, but allowing it to cool completely in the springform pan is crucial. The cake is very moist and tender when warm; it needs to set fully to avoid breaking apart when you try to remove it from the pan or slice it.
Accurate Flour Measurement: Coconut flour, in particular, can absorb a lot of moisture. Measure it carefully to avoid a dry or crumbly cake. If you don’t have a kitchen scale, spoon the flour into your measuring cup and level it off with a straight edge, rather than scooping directly from the bag.
Oven Temperature Accuracy: Use an oven thermometer to ensure your oven is truly at 180°C (355°F). Ovens can vary, and an inaccurate temperature can significantly affect baking time and the final texture of your cake.
Serving Suggestions for Condensed Milk and Coconut Cake
Decoration
The classic and most popular decoration for this cake is a simple dusting of powdered sugar. Use a fine-mesh sieve to apply it evenly for a beautiful, professional finish that enhances the cake’s visual appeal without adding excessive sweetness. For a touch more texture and visual interest, you could sprinkle a little finely shredded, toasted coconut over the powdered sugar. Alternatively, a few fresh mint leaves or edible flowers can add a pop of color and freshness to the top of the cake.
Side Dishes
This cake is wonderfully versatile and pairs well with several accompaniments. Fresh berries, such as raspberries, strawberries, or blueberries, provide a bright, slightly tart contrast to the cake’s sweetness and creamy texture. A dollop of lightly sweetened whipped cream or a swirl of vanilla bean crème fraîche can elevate the dessert to a more decadent experience, adding an extra layer of creaminess.
For a beverage pairing, a hot cup of coffee or a fragrant cup of tea complements the cake’s subtle coconut notes beautifully. An iced coffee or a chilled glass of milk also works exceptionally well, making it a delightful treat any time of day. Consider pairing it with a scoop of good quality vanilla or coconut ice cream for an ultimate tropical dessert indulgence.
Creative Serving Ideas
Transform individual slices into elegant parfaits by layering crumbled pieces of the cake with whipped cream and fresh berries in clear glasses. This not only looks stunning but also offers a delightful textural experience with each spoonful. Another idea is to serve slightly warmed slices with a warm, spiced fruit compote, such as mango or pineapple, for a delightful tropical fusion dessert.
For a more casual gathering, serve bite-sized cubes of the cake as part of a dessert platter alongside other small treats like cookies or mini tarts. You could also consider transforming leftover cake into delightful cake pops by crumbling it, mixing with a binder like cream cheese or frosting, and coating them in melted chocolate for a fun and festive option. The inherent moistness of the cake makes it ideal for these kinds of creative re-imaginings.
Preparation & Storage
Storing Leftovers
Once fully cooled, this Condensed Milk and Coconut Cake can be stored at room temperature for up to 24 hours if your kitchen is not too warm. For optimal freshness and to prolong its shelf life, it is best to store it in an airtight container in the refrigerator. Properly stored, leftovers can remain delicious for up to 4 days.
Ensure the cake is completely cool before sealing it in the container. If storing in its original springform pan, wrap the pan tightly with plastic wrap before covering it with the lid or foil. This prevents the cake from drying out and absorbing any unwanted odors from the refrigerator.
The texture of the cake often improves slightly after a day, becoming even more moist and flavorful as the ingredients meld together. So, don’t hesitate to bake it a day in advance of serving.
Freezing
This cake freezes exceptionally well, making it a perfect candidate for preparing ahead of time or for enjoying at a later date. To freeze, ensure the cake is completely cooled. You can freeze the entire cake or individual slices.
Wrap the cake or slices tightly first in a layer of plastic wrap, ensuring no air can get to it. Then, add a second layer of protection by wrapping it in aluminum foil or placing it in a freezer-safe airtight container. This double-layer method is crucial for preventing freezer burn.
The cake can be stored in the freezer for up to 2 months. When you are ready to enjoy it, remove it from the freezer and allow it to thaw slowly in the refrigerator overnight. For quicker thawing, it can be left at room temperature for a few hours, but be mindful of condensation.
Reheating
This cake is designed to be enjoyed at room temperature or slightly chilled, so reheating is generally not necessary and can sometimes dry out the delicate crumb. However, if you prefer a warmer, softer bite, you can gently reheat individual slices.
The best method is to place a slice on a microwave-safe plate and heat it in the microwave on a very low power setting for short intervals of about 10-15 seconds. Check its warmth frequently to avoid overheating. Alternatively, you can warm slices in a low oven (around 150°C/300°F) for a few minutes until just warmed through.
Always allow the cake to cool slightly after reheating before serving. Remember to add any powdered sugar topping after thawing or reheating to maintain its fresh, pristine appearance.
Frequently Asked Questions
-
Can I substitute the coconut flour with regular all-purpose flour?
While you can technically substitute it, it will significantly change the texture and flavor profile of the cake. Coconut flour is highly absorbent and has a unique structure that contributes to the cake’s tender, moist crumb. If you must substitute, you would need to use a much larger quantity of all-purpose flour and potentially adjust the liquid ingredients, which can be tricky. It’s best to use coconut flour as specified for the intended outcome, or to find a recipe that specifically calls for all-purpose flour if you don’t have coconut flour on hand. The original recipe relies on the specific properties of coconut flour to achieve its characteristic texture and subtle flavor enhancement.
-
Why does my cake have a slightly gummy or dense texture?
A gummy or dense texture in this cake can usually be attributed to a few common issues. Overmixing the batter after adding the flour is a primary culprit, as it overdevelops the gluten, resulting in a tough, dense cake. Ensure you are mixing only until the ingredients are just combined. Another possibility is an inaccurate measurement of flour, especially if using coconut flour, which can absorb liquid differently. If the cake is removed from the oven before it’s fully baked, the center might remain dense and gummy. Always perform the toothpick test to confirm doneness; a few moist crumbs are okay, but wet batter indicates it needs more time.
-
What are the best ways to enhance the coconut flavor in this cake?
To intensify the coconut flavor, start by using a high-quality, full-fat canned coconut milk, as this provides a richer, more pronounced coconut essence compared to lighter varieties. Using coconut extract is also key, as it’s a concentrated form of flavor that holds up well during baking. For an even more robust coconut presence and a delightful textural contrast, consider toasting some finely shredded or desiccated coconut and folding a tablespoon or two into the batter before baking. You could also experiment with adding a touch of coconut cream to the batter for added richness and flavor. A light dusting of toasted shredded coconut on top after the powdered sugar can also boost the coconut aroma.