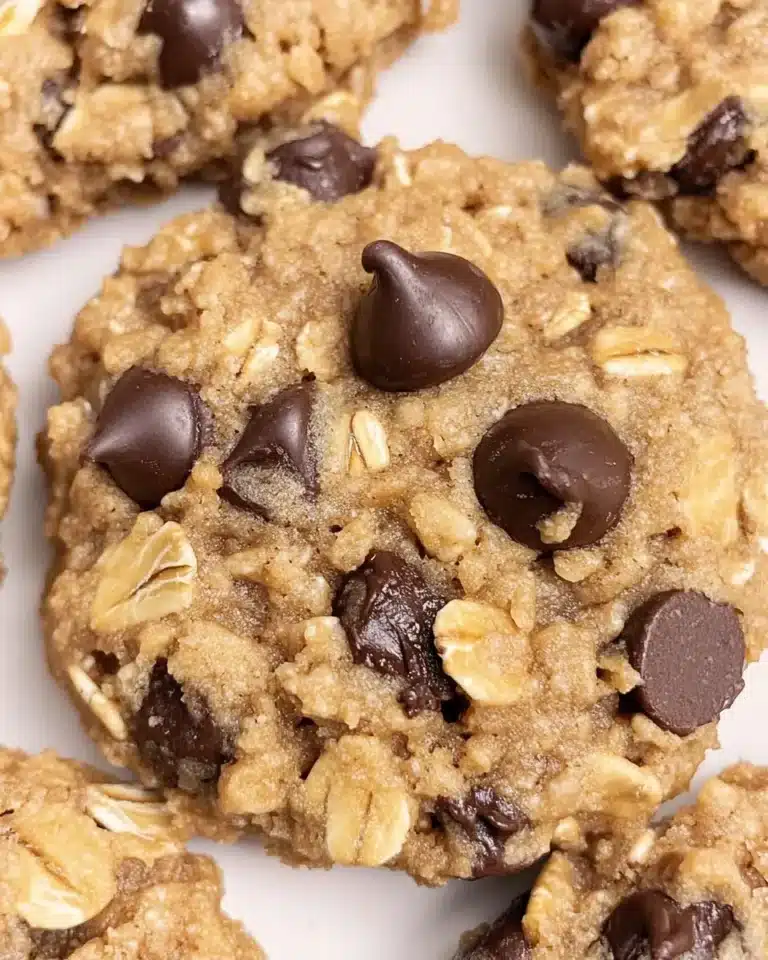
Pineapple Angel Food Cake
Pineapple angel food cake is a delightful dessert that truly lives up to its name, offering a cloud-like texture and a subtle tropical essence. It’s the perfect choice when you desire something sweet but light, making it an excellent option for any occasion, from casual gatherings to more elegant celebrations.
This cake is a testament to simplicity and flavor, showcasing how a few well-chosen ingredients can combine to create something truly special. Its airy crumb and bright pineapple notes ensure each bite is a refreshing experience, leaving you feeling satisfied yet unburdened. The ease of preparation also makes it a fantastic project for novice bakers looking to impress without the stress.
Why You Will Love This Recipe
- Effortless Preparation: This cake comes together with minimal effort, making it ideal for busy weeknights or when you need a last-minute dessert. The simple mixing process means less time in the kitchen and more time enjoying the final product.
- Light and Airy Texture: The hallmark of angel food cake is its incredibly light and airy texture, and this pineapple variation is no exception. It’s like eating a sweet, fruity cloud.
- Subtle Tropical Flavor: The inclusion of crushed pineapple infuses the cake with a gentle, refreshing tropical taste that is both sweet and invigorating. It’s a delightful departure from richer, heavier desserts.
- Versatile Presentation: Whether served plain, with a dollop of whipped cream, or adorned with fresh fruit, this cake is visually appealing and easily adaptable to your desired level of indulgence. It’s a beautiful canvas for your creativity.
- Make-Ahead Friendly: This recipe is perfectly suited for preparing in advance, allowing you to reduce day-of stress. It holds up beautifully when chilled, making it a prime candidate for potlucks and parties.
Ingredients You Need
The beauty of this pineapple angel food cake lies in its straightforward ingredient list, emphasizing quality and simplicity. Each component plays a crucial role in achieving the cake’s signature airy texture and delicate flavor profile. Using good quality ingredients will always elevate your baking results, ensuring a delightful outcome every time you prepare this treat. The combination of pantry staples and a touch of tropical fruit creates a dessert that is both comforting and exciting.
Pineapple Angel Food Cake
This pineapple angel food cake is a quick, light dessert with an airy texture and gentle tropical flavor. It's beginner-friendly and perfect for potlucks, spring gatherings, or make-ahead serving.
- 1 can crushed pineapple with all of its juice
- 1 package angel food cake mix
- Whipped cream or whipped topping (optional for serving)
- Pineapple pieces or fresh fruit (optional for garnish)
- 1Preheat the oven to 350°F and set out an ungreased 9x13-inch glass baking dish.
- 2Add the cake mix to a large bowl, then pour in the crushed pineapple with all of its juice. Stir gently until the dry mix disappears and the batter looks evenly combined. Avoid overmixing.
- 3Spread the batter into the prepared dish, smoothing it lightly.
- 4Bake for 25 to 30 minutes, until the top is golden and the cake looks set.
- 5Let the cake cool completely for about 1 hour before adding toppings.
- 6Once cooled, finish with whipped cream or whipped topping and garnish with pineapple or other fresh fruit if desired.
Keywords: Pineapple Angel Food Cake, angel food cake, pineapple cake, easy dessert, light dessert, quick dessert, potluck dessert
The precise quantities for all ingredients are detailed within the provided recipe card, ensuring you have all the necessary information for a successful bake. Remember that using the crushed pineapple with its natural juice is key for moisture and flavor. Optional toppings can be selected based on personal preference and desired presentation.
Variations
This pineapple angel food cake is wonderfully adaptable, allowing for numerous creative twists to suit different dietary needs and flavor preferences. One delightful variation is a vegan version, where dairy-based whipped cream is replaced with a luscious coconut whipped cream. You can also experiment with folding in a teaspoon of lemon or lime zest along with the pineapple for an extra bright citrus note that complements the tropical fruit beautifully.
For those following a low-carb lifestyle, while a traditional angel food cake mix isn’t suitable, you could explore creating a gluten-free and low-carb angel food-style cake using almond flour, a sugar substitute like erythritol, and a binder like psyllium husk. This would require significant recipe adjustment, but the goal would be to mimic the airy texture with alternative ingredients. Consider adding a touch of vanilla extract or even a hint of almond extract to enhance the flavor profile.
Another exciting avenue to explore is a fruit-forward variation, perhaps incorporating a small amount of finely chopped fresh mango or passion fruit pulp into the batter alongside the pineapple. Ensure any added fruit is not excessively wet, or it might alter the cake’s consistency. This would create a more intensely tropical dessert experience, perfect for summer gatherings or themed parties. Each variation allows you to put your personal stamp on this already delightful cake.
How to Prepare Pineapple angel food cake
Step 1: Oven and Pan Preparation
Begin by preheating your oven to a steady 350 degrees Fahrenheit (175 degrees Celsius). This initial step is crucial for ensuring the cake bakes evenly and achieves the desired golden-brown perfection. It’s also vital to select an ungreased 9×13-inch glass baking dish for this recipe.
The choice of an ungreased glass dish is not arbitrary; it’s a fundamental aspect of angel food cake baking. The batter needs something to adhere to as it rises, clinging to the sides of the pan to gain its signature height. Without this grip, the cake may not achieve its full, glorious volume, potentially resulting in a denser texture.
Using glass is often recommended for angel food cakes as it distributes heat evenly, promoting consistent baking. The 9×13-inch size provides ample space for the batter to spread and bake without overflowing. This preparation ensures the foundation is set for a light and airy cake.
Step 2: Combining Wet and Dry Ingredients
In a generously sized mixing bowl, place the contents of the angel food cake mix. This dry foundation is ready to embrace the moisture and flavor that will soon be introduced. Ensure you have a large enough bowl to comfortably mix the ingredients without spillage.
Next, carefully pour in the entire can of crushed pineapple, including all of its precious juice. This juice is not just liquid; it’s a vital source of moisture and the sweet, tangy flavor that defines this cake. Do not drain the pineapple, as the juice is integral to the batter’s consistency and taste. It’s important to have the pineapple well-drained if you were using fresh, but the canned version with juice is specifically designed for this purpose.
Begin to stir these two components together. The goal at this initial stage is simply to combine them until the dry cake mix is no longer visible and the batter appears uniformly moist. Gentle mixing is key, preventing the development of gluten which could toughen the delicate crumb of the angel food cake.
Step 3: Gentle Mixing for Airiness
Resist the urge to overmix the batter at this point. The objective is to achieve a cohesive mixture, but not to develop a heavy, dense dough. Overworking the batter can knock out the air you want to preserve for a light, fluffy cake. Think of it as coaxing the ingredients together rather than aggressively beating them.
The batter should transition from separate dry and wet components into a smooth, blended mass. You’ll notice the pineapple pieces interspersed throughout the batter, promising bursts of flavor in every bite. The consistency should be pourable but not watery, holding its shape slightly when lifted with a spoon.
This careful, minimal mixing is what allows the leavening agents in the cake mix to work effectively during baking, contributing to the cake’s magnificent rise and its signature ethereal texture. It’s a delicate balance, ensuring both flavor integration and structural integrity.
Step 4: Spreading the Batter
Once your batter is gently combined, carefully transfer it into the prepared, ungreased glass baking dish. Use a spatula or the back of a spoon to evenly distribute the batter across the entire surface of the dish. A smooth, even layer is important for uniform baking.
Avoid pressing down too firmly on the batter. The aim is to spread it gently, creating a relatively level top without compacting the air that has been incorporated. The batter will naturally fill in any minor imperfections as it bakes and rises. Minimal fussing is the motto here; let the batter do its work.
Ensure the batter reaches all the corners of the dish. This helps to guarantee that the entire cake bakes evenly and achieves a consistent texture throughout. An even spread means no one gets a piece that is too thick or too thin, leading to a more satisfying dessert experience for everyone.
Step 5: Baking to Golden Perfection
Place the baking dish into the preheated oven. The baking time for this cake typically ranges from 25 to 30 minutes. Keep a close eye on it, especially as it nears the end of the baking period, as ovens can vary.
You are looking for the top surface of the cake to turn a beautiful golden-brown color. This visual cue indicates that the exterior has set and developed a lovely crust. The cake should also appear firm and set to the touch, without significant jiggling in the center when gently nudged.
It is normal for the center of an angel food cake to have a very slight jiggle right out of the oven, as it continues to set as it cools. However, it should not look wet, loose, or uncooked. If it seems underbaked, add a few more minutes, checking frequently to prevent over-browning.
Step 6: Complete Cooling and Garnishing
Once baked to perfection, remove the cake from the oven and place the dish on a wire rack. It is absolutely essential to allow the cake to cool completely, which typically takes about 1 hour. Rushing this step can lead to a gummy texture or the cake falling apart.
During this cooling period, the cake’s structure solidifies, ensuring it holds its shape beautifully. Resist the temptation to add toppings while the cake is still warm, as this can cause them to melt or slide off. Patience here will be richly rewarded with a perfectly finished dessert.
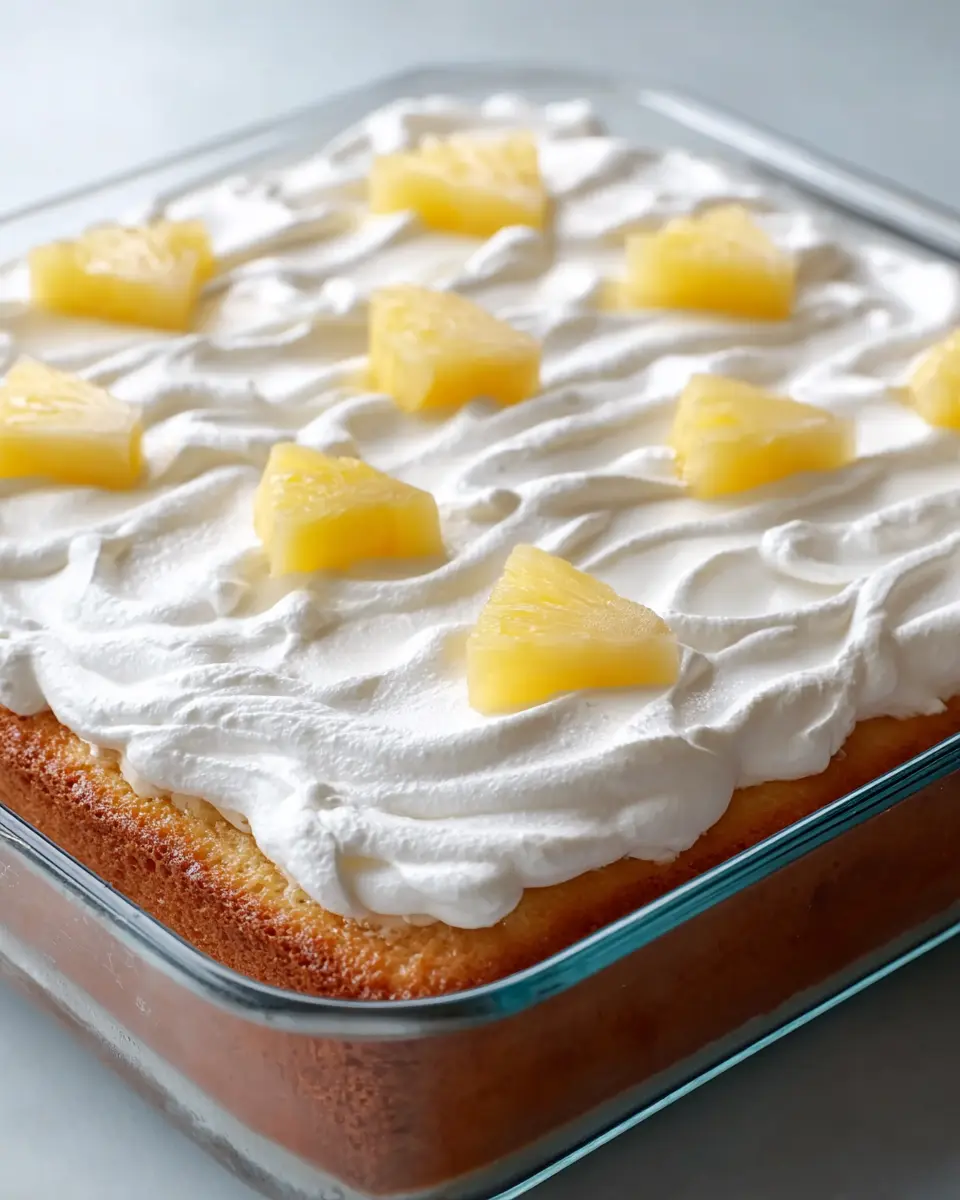
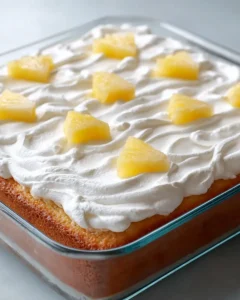
After the cake has cooled thoroughly, you can then adorn it with your chosen toppings. A generous spread of whipped cream or whipped topping is a classic choice, adding a creamy contrast to the airy cake. For added color and freshness, garnish with pineapple pieces or other fresh fruits like strawberries, blueberries, or kiwi slices. This final flourish elevates the simple cake into a truly stunning dessert.
Pro Tips for Pineapple angel food cake
Gentle Folding is Key: When combining the cake mix and crushed pineapple, fold and stir just until everything is combined. This gentle approach preserves the air bubbles crucial for a light texture, preventing a dense outcome. Overmixing will deflate the batter, resulting in a less airy cake.
Mind the Bake Time: Keep a close watch on the cake as it bakes, particularly in the last 10 minutes. You’re aiming for a beautifully golden surface and a center that is set, not undercooked or overly dark. An oven thermometer can help ensure your oven’s temperature is accurate.
Cooling is Non-Negotiable: Always allow the cake to cool completely in the pan before attempting to add any toppings. This ensures the cake’s structure is stable and prevents delicate toppings like whipped cream from melting. A fully cooled cake is also easier to slice cleanly.
Frosting After Cooling: If you plan on frosting or topping the cake with whipped cream or a similar confection, wait until it is completely cool. This is essential for the topping to remain fluffy and stable, creating a visually appealing finish. Warm cake will cause your topping to weep or melt.
Flavor Enhancements: While the pineapple provides a lovely flavor, consider adding a teaspoon of vanilla extract or a touch of lemon zest to the batter for an extra layer of complexity and brightness. These subtle additions can make a noticeable difference in the overall taste profile.
Serving Suggestions for Pineapple angel food cake
Decoration
Elevate the visual appeal of your pineapple angel food cake with simple yet stunning decorative touches. A generous swirl or smooth spread of lightly sweetened whipped cream or a store-bought whipped topping provides a soft, creamy contrast to the airy cake crumb. For a vibrant burst of color and natural sweetness, arrange fresh pineapple chunks or wedges artfully on top of the whipped cream. Consider adding other complementary fruits like sliced strawberries, plump blueberries, or vibrant kiwi slices to create a beautiful mosaic of colors and textures. A dusting of confectioners’ sugar can add a delicate, snowy finish, especially if the cake is served during the holiday season.
Side Dishes
This light and airy cake pairs wonderfully with a variety of beverages, enhancing the overall dessert experience. For a classic pairing, serve it with a refreshing glass of iced tea, either sweetened or unsweetened, to balance the cake’s sweetness. A cold cup of coffee or a frothy iced latte also complements the dessert beautifully, offering a richer counterpoint. For a more festive option, especially during warmer months, a tall glass of homemade lemonade or a sparkling citrus beverage can provide a zesty and invigorating accompaniment. The cake’s delicate nature means it doesn’t require heavy side dishes, allowing the refreshing drinks to shine.
Creative Serving Ideas
Think beyond a simple slice by getting creative with how you present and serve this delightful cake. Individual portions can be made by cutting the cooled cake into squares and topping each with a dollop of whipped cream and a few berries, perfect for parties where guests might want to mingle. Consider serving it alongside a small scoop of vanilla bean ice cream for a classic combination of warm-weather treats. Another idea is to layer crumbled pieces of the cake with whipped cream and fresh fruit in parfait glasses for an elegant, layered dessert presentation. This adds a touch of sophistication and makes the cake easily transportable for picnics or potlucks. You can also use it as a base for more elaborate desserts, perhaps pairing it with a tropical fruit salsa or a light passion fruit coulis for an added exotic flair.
Preparation & Storage
Storing Leftovers
To keep your pineapple angel food cake fresh and delicious, proper storage is essential. If the cake is plain (without any whipped cream or fresh fruit topping), it can be stored at room temperature in an airtight container for up to two days. However, for optimal freshness and to prevent it from drying out, refrigerating the plain cake is often the best approach.
Once the cake has been topped with whipped cream or fresh fruit, it absolutely must be refrigerated. Cover the baking dish tightly with plastic wrap or aluminum foil, or transfer individual slices to an airtight container. Properly stored, the cake will maintain its best quality in the refrigerator for up to 3 to 4 days. Always check for any signs of spoilage before serving leftovers.
Freezing
Freezing pineapple angel food cake is possible, though the texture is undeniably best when enjoyed fresh or within a few days of baking. If you decide to freeze it, it’s highly recommended to freeze the cake *before* adding any whipped toppings or fresh fruit. This will help preserve the integrity of those delicate elements.
To freeze, wrap the cooled, untopped cake tightly in a layer of plastic wrap, followed by a layer of aluminum foil. You can also freeze individual slices using the same method. Store the wrapped cake or slices in an airtight container or freezer bag to prevent freezer burn. Frozen cake can be kept for up to 1 month for the best quality, though it might be safe to consume longer if properly stored.
Reheating
Pineapple angel food cake is traditionally served cold or at room temperature, as its light and airy texture is most appealing in its chilled state. Therefore, reheating is generally not necessary and can, in fact, alter the desirable texture, potentially making it dense or rubbery.
If you prefer your cake not to be chilled, simply allow a slice to sit at room temperature for about 15-30 minutes before serving. This will gently bring it to a more neutral temperature without compromising its delicate structure. Avoid any methods that involve significant heating, such as microwaving or baking, as these can negatively impact the cake’s airy quality.
Frequently Asked Questions
-
Can I use fresh pineapple instead of canned for this pineapple angel food cake?
While fresh pineapple is delicious, this recipe is specifically formulated to use canned crushed pineapple with its juice. The canned variety provides a consistent moisture level and sweetness that is critical for the angel food cake mix to bake correctly. Fresh pineapple can contain more enzymes that might interfere with the cake’s structure, and its juice content can vary significantly, potentially leading to a denser or underbaked cake. If you are determined to use fresh pineapple, ensure it is finely diced and perhaps lightly drained, but be prepared for potentially different baking results and consider a slight adjustment in other liquid ingredients if the batter seems too wet.
-
Why is it crucial to use an ungreased baking pan for angel food cake?
The requirement for an ungreased pan is fundamental to the success of angel food cake. The batter needs to cling to the sides of the pan as it bakes and rises. This adherence provides the necessary structure and traction for the cake to achieve its characteristic tall, airy volume. If the pan is greased, the batter will be too slippery to grip the sides effectively, leading to a cake that may collapse, bake unevenly, or fail to rise to its full potential, resulting in a heavier, denser texture. The ungreased surface allows the batter to climb and expand upwards, creating that ethereal, cloud-like consistency.
-
How can I ensure my pineapple angel food cake remains light and fluffy, and doesn’t become tough or dense?
Achieving a light and fluffy texture in angel food cake hinges on a few key techniques. Firstly, avoid overmixing the batter once the wet and dry ingredients are combined; mix just until incorporated. Overworking the batter develops gluten, which leads to a tough, dense cake. Secondly, be sure to use the crushed pineapple *with* its juice as specified, as this provides the correct moisture balance for the cake mix. Lastly, ensure your oven temperature is accurate and that you do not overbake the cake. Overbaking can dry out the cake and make it dense, while underbaking can leave it gummy. A slight jiggle in the center when removed from the oven is often acceptable, as it will continue to set as it cools.