Fresh Basil Pesto in Blender

Whipping up a batch of homemade pesto in your blender is one of the most satisfyingly simple kitchen triumphs you can achieve. It transforms ordinary meals into something truly special with minimal effort, infusing vibrant flavors and a beautiful, fresh aroma into every dish it touches. This recipe is designed for ultimate ease, ensuring even novice cooks can create this Italian-inspired staple with confidence.
The beauty of making pesto in a blender lies in its speed and the incredibly smooth texture it achieves. You’ll be amazed at how a few humble ingredients, processed quickly, can yield such a complex and delightful sauce. It’s the perfect accompaniment to a variety of dishes, proving that gourmet taste doesn’t always require gourmet effort. Let’s dive into making this versatile condiment.
Why You Will Love This Recipe
- Effortless Preparation: Forget complex mortar and pestle techniques; a blender does the hard work in minutes, delivering a perfectly smooth and vibrant pesto every time.
- Incredible Freshness: Using fresh basil, quality pine nuts, and good Parmesan results in a flavor profile that is bright, herbaceous, and deeply satisfying, far superior to store-bought options.
- Remarkable Versatility: This pesto isn’t just for pasta; it’s a fantastic spread for sandwiches, a flavorful dip for vegetables, a topping for grilled meats, and an enhancer for soups and grain bowls.
- Quick Meal Upgrade: Having a jar of this homemade pesto on hand means you can instantly elevate any simple meal, turning an ordinary weeknight dinner into a culinary delight with just a spoonful.
- Customizable Texture: Whether you prefer a slightly chunky pesto for spreading or a super-smooth sauce for tossing with noodles, you have complete control over the final consistency.
Ingredients You Need
The key to an exceptional pesto lies in the quality of its ingredients. Opting for the freshest basil will give you that vibrant green color and lively herbaceousness. Toasted pine nuts are essential for their subtle sweetness and buttery texture, which add a wonderful depth to the sauce. Freshly grated Parmesan cheese provides the signature salty, umami punch that makes pesto so irresistible and also helps to thicken the sauce beautifully. Good quality extra-virgin olive oil is crucial for achieving that silky, emulsified consistency. Don’t underestimate the power of fresh garlic and a touch of sea salt and freshly ground black pepper to enhance all the other flavors.
Pesto in a Blender
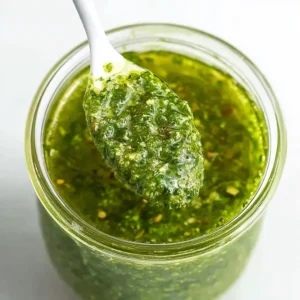
A vibrant, herb-forward pesto prepared in a blender or food processor, featuring toasted pine nuts, fresh basil, Parmesan, and olive oil for a smooth, aromatic sauce. This quick and beginner-friendly method results in a silky texture that instantly elevates pasta, sandwiches, and more.
- 1/2 cup extra-virgin olive oil
- 3 small garlic cloves, peeled
- 2 ounces Parmesan cheese, freshly grated
- 1/2 teaspoon freshly ground black pepper
- 3 ounces packed basil leaves
- 1.75 ounces pine nuts, toasted until golden
- 1/2 teaspoon sea salt
- 1Add the basil leaves, grated Parmesan, toasted pine nuts, garlic cloves, sea salt, and black pepper to a blender or food processor. Pulse several times until the mixture is thoroughly chopped and begins to come together into a coarse paste.
- 2With the machine running, slowly pour in the extra-virgin olive oil. Continue blending until the pesto becomes smooth and evenly combined. Stop as needed to scrape down the sides, then pulse again to fully incorporate any bits clinging to the bowl or blender jar.
- 3For a looser texture, blend in a little more olive oil until the desired consistency is reached.
- 4Use the pesto immediately with pasta, sandwiches, or fresh vegetables. To store, spoon it into an airtight container and refrigerate for up to 3 days, or freeze for up to 3 months.
Keywords: Pesto, Blender, Basil, Pine Nuts, Parmesan, Italian, Sauce, Quick, Easy, Vegetarian
- extra-virgin olive oil: a good quality oil forms the base of the sauce, ensuring a smooth and rich texture.
- garlic cloves: freshly minced garlic provides a pungent kick that is characteristic of authentic pesto.
- Parmesan cheese: freshly grated Parmesan is superior, offering a complex salty and nutty flavor.
- freshly ground black pepper: adds a subtle warmth and aroma that complements the other ingredients.
- fresh basil leaves: the star ingredient, providing its iconic fresh, green, and slightly peppery notes.
- pine nuts: toasting them brings out their natural oils and enhances their sweet, nutty flavor, adding depth.
- sea salt: a pinch of sea salt enhances all the other flavors without being overpowering.
You’ll find the exact quantities for each ingredient listed within the recipe card above, ensuring perfect balance in your pesto.
Variations
This classic basil pesto is a fantastic foundation, but it’s also incredibly adaptable. For a delicious vegan twist, simply omit the Parmesan cheese and add a tablespoon or two of nutritional yeast for a cheesy, umami flavor. You can also incorporate soaked cashews or sunflower seeds for creaminess and richness, mimicking the texture that cheese provides. Ensure you use a good quality olive oil to maintain that smooth consistency, and adjust seasonings to your preference.
If you’re looking for a low-carb or paleo-friendly option, consider swapping out the pine nuts for macadamia nuts or blanched almonds. These nuts offer a creamy texture and healthy fats that work wonderfully in pesto. You might also want to increase the amount of basil or add a touch more garlic to intensify the flavors, as some nuts can have a milder profile. Adjusting the olive oil content can also help achieve your desired thickness without added carbohydrates.
Experimenting with different herbs is another exciting way to create unique pesto flavors. Instead of or in addition to basil, try incorporating parsley, mint, arugula, or even cilantro for a completely different aroma and taste profile. Each herb brings its own character, allowing you to tailor your pesto to specific dishes. For instance, a mint and parsley pesto would be delightful with lamb or grilled fish, while an arugula pesto offers a peppery bite perfect for steak.
How to Prepare Pesto in a Blender
Step 1: Initial Ingredient Combination
Begin by gathering all your dry ingredients into the blender jar. This includes the toasted pine nuts, the freshly grated Parmesan cheese, the peeled garlic cloves, a pinch of sea salt, and a generous grinding of fresh black pepper. Adding these components first allows the blender blades to begin breaking them down into smaller pieces before the liquid is introduced. This initial pulsing step is crucial for creating a good base texture.
Pulse the ingredients several times. You want to achieve a coarse, crumbly mixture. Think of it as starting to break down the larger pieces into smaller, more manageable fragments. The goal here isn’t a smooth paste yet, but rather to ensure that all the solid ingredients are well-combined and partially processed. This ensures even blending in the subsequent stages, preventing large chunks of garlic or unevenly distributed cheese.
If any of the ingredients stick to the sides of the blender jar during this initial pulsing, don’t worry. It’s perfectly normal. You’ll have an opportunity to address this in the next step. For now, focus on getting a consistent coarse grind from all your dry components. This sets the stage for the vibrant flavors to meld harmoniously.
Step 2: Adding the Greens and Initial Processing
Now, it’s time to add the star of the show: the fresh basil leaves. Make sure your basil is clean and thoroughly dried to prevent the pesto from becoming watery. Gently pack the basil leaves into the blender jar, on top of the pulsed dry ingredients. You might need to do this in batches if your blender jar is not very large, ensuring you don’t overfill it, which can hinder efficient processing.
Once the basil is in, it’s time to give everything another pulse. This action will start to chop the basil and incorporate it with the nut and cheese mixture. Continue pulsing until the basil is roughly chopped and begins to form a cohesive mass with the other ingredients. You should see the vibrant green color starting to dominate the mixture. This step is about breaking down the bulk of the basil leaves.
During this phase, it’s highly recommended to pause the blender and scrape down the sides of the jar using a spatula. This is a critical step that many people overlook. Bits of basil, cheese, or nuts can cling to the walls, preventing them from being fully incorporated into the sauce. By scraping down, you ensure that every part of the mixture gets blended evenly, leading to a smoother and more homogeneous final product.
Step 3: Incorporating the Olive Oil
With the basil and dry ingredients roughly chopped and combined, it’s time to introduce the extra-virgin olive oil. This is where the magic of emulsification truly begins, transforming the chopped ingredients into a luscious sauce. You should begin drizzling the olive oil in slowly, ideally in a thin, steady stream. This gradual addition is key to achieving a smooth and creamy texture, rather than a separated or oily one.
As the olive oil is added, keep the blender running on a low to medium speed. The blades will continuously chop and mix the ingredients while the oil emulsifies them together. Watch the consistency of the pesto carefully. You are looking for the mixture to start coming together, thickening and becoming smoother as the oil is incorporated. This process transforms the coarse paste into a more fluid, yet still substantial, sauce.
The rate at which you add the oil will significantly impact the final texture. Adding it too quickly can result in a greasy or oily pesto that hasn’t properly emulsified. Conversely, adding it slowly allows the oil to bind with the other ingredients, creating that signature silky mouthfeel characteristic of perfectly made pesto. This step is where patience pays off handsomely.
Step 4: Achieving the Perfect Consistency
Once the olive oil has been fully incorporated, the pesto will likely be quite smooth and have a thick, spoonable consistency. However, the “perfect” consistency is really a matter of personal preference. Some people prefer their pesto slightly chunky, with visible pieces of basil and pine nuts, especially if they plan to use it as a spread or dip. Others desire a completely smooth, almost creamy sauce, ideal for coating pasta evenly.
If you find your pesto to be too thick for your liking, this is the stage where you can adjust it. Simply add a little more extra-virgin olive oil, a tablespoon at a time, and blend again. Continue this process, checking the consistency after each addition, until you achieve your desired texture. Remember that the pesto will thicken slightly as it cools, so it’s sometimes wise to err on the side of slightly looser than too thick.
Conversely, if your pesto is accidentally too thin, you can try adding a little more Parmesan cheese or a few more toasted pine nuts and pulse them in. However, it’s generally easier to thin pesto than to thicken it, so be cautious with the initial oil addition. The goal is a smooth, vibrant sauce that coats the back of a spoon beautifully.
Step 5: Tasting and Seasoning Adjustments
Before you deem your pesto complete, it is absolutely essential to taste it and make any necessary seasoning adjustments. Flavors can vary greatly depending on the freshness of your basil, the saltiness of your Parmesan cheese, and even the inherent saltiness of your pine nuts. This final tasting is your chance to fine-tune the flavor profile to perfection.
Carefully dip a clean spoon into the pesto and taste a small amount. Does it need more salt to bring out the bright flavors of the basil and cheese? Perhaps a bit more freshly ground black pepper for a gentle warmth? You might also find that it needs a tiny splash more olive oil to loosen the texture or enhance the richness. Add these adjustments incrementally, blending briefly after each addition.
Remember, it’s easier to add more seasoning than to take it away. Start with small amounts – a quarter teaspoon of salt, a few grinds of pepper. Blend and taste again. Continue this process until the pesto sings with flavor. A perfectly seasoned pesto should be a harmonious blend of herbaceous, nutty, salty, and slightly peppery notes, with a rich olive oil finish.
Step 6: Storing Your Fresh Pesto
Once your pesto has reached its ideal consistency and flavor profile, it’s time to store it properly. For immediate use, you can transfer it to a serving bowl. However, for longer storage, an airtight container is your best friend. Spoon the pesto into a clean jar or container, ensuring there are no air pockets. This helps to preserve its freshness and vibrant green color.
To further protect the pesto and prevent oxidation, which can cause the top layer to darken, add a thin film of extra-virgin olive oil over the surface before sealing the container. This creates a barrier against air exposure. Gently smooth the oil across the top of the pesto with the back of a spoon. This simple step makes a significant difference in maintaining the pesto’s bright, appealing color.
Seal the container tightly and refrigerate. Properly stored, homemade pesto can last for up to 3-5 days in the refrigerator. If you plan to keep it for longer periods, freezing is an excellent option, which we will discuss in more detail later. Proper storage ensures that your delicious homemade pesto remains a convenient and flavorful addition to your meals.
Pro Tips for Pesto in a Blender
Toast Your Pine Nuts: Never skip the step of toasting your pine nuts. Spread them in a dry skillet over medium heat and toast them for just a few minutes, stirring constantly, until they are golden brown and fragrant. This simple step unlocks a depth of flavor and a subtle sweetness that un-toasted nuts simply cannot provide. Be careful not to burn them, as burnt pine nuts can impart a bitter taste to your pesto.
Use Fresh, High-Quality Ingredients: The flavor of your pesto is directly dependent on the quality of its components. Opt for the freshest, most vibrant basil you can find. Use good quality extra-virgin olive oil, as its flavor will be prominent in the finished sauce. And always choose freshly grated Parmesan cheese; pre-grated varieties often contain anti-caking agents that can affect the texture and flavor of your pesto.
Control the Oil Drizzle: When adding the olive oil, do so very slowly while the blender is running. This allows the oil to emulsify properly with the other ingredients, creating a smooth, cohesive sauce. Pouring it in too quickly can lead to a greasy or separated pesto. You want the oil to be gradually incorporated, binding everything together into a rich, glossy sauce.
Don’t Over-Blend: While you want a smooth consistency, over-blending can actually generate heat, which can dull the fresh, bright flavor of the basil and even give it a slightly cooked taste. Blend only until the pesto reaches your desired texture. It’s often better to stop a little early and then pulse a few more times if needed, rather than blend continuously for too long.
Adjust Consistency with Pasta Water: If you’re tossing your pesto with hot pasta, don’t forget the magic of starchy pasta water. Reserve some of the water the pasta was cooked in. When you’re ready to mix, add a splash of this water to your pesto and pasta. The starch in the water helps the pesto emulsify further, creating a beautiful, silky sauce that coats every strand of pasta perfectly and thins the pesto without diluting its flavor.
Serving Suggestions for Pesto in a Blender
Decoration
To elevate the visual appeal of any dish featuring your homemade pesto, consider a few simple garnishes. A few fresh basil leaves, artfully placed on top, add a burst of vibrant green and a hint of freshness. You can also sprinkle a little extra freshly grated Parmesan cheese over the top, letting it melt slightly into the warm pesto. For a touch of color and texture, a few whole toasted pine nuts make an attractive and complementary garnish.
Side Dishes
Your pesto is a fantastic flavor enhancer for a variety of side dishes. It pairs wonderfully with roasted vegetables like broccoli, asparagus, or zucchini, adding a bright, herbaceous note that complements their sweetness. Toss some warm, steamed or roasted potatoes with a dollop of pesto for a simple yet elegant side. It can also be stirred into cooked grains like quinoa or farro to give them a zesty, flavorful boost, making them a more exciting accompaniment to your main course.
Creative Serving Ideas
Beyond pasta, pesto is incredibly versatile. Spread it generously on crusty bread or baguette slices to make a quick and flavorful crostini. Mix it into your favorite sandwich or wrap filling, perhaps with grilled chicken or fresh mozzarella, for an instant flavor upgrade. Spoon a small amount onto grilled or pan-seared fish or chicken just before serving to impart a fresh, zesty finish. It can also be swirled into soups, like a creamy tomato or a hearty vegetable soup, for an added layer of complex flavor and aroma.
Preparation & Storage
Storing Leftovers
Once your delicious pesto is made, it’s important to store it correctly to maintain its freshness and vibrant color. The best method is to transfer the pesto into an airtight container. For optimal preservation, gently press the pesto down to eliminate any air pockets, and then pour a thin layer of extra-virgin olive oil over the entire surface before sealing the lid. This oil layer acts as a protective barrier, preventing oxidation and keeping the pesto looking bright green.
When stored this way in the refrigerator, your homemade pesto can typically last for about 3 to 5 days. Always ensure the container is truly airtight. If you notice any discoloration or an off smell, it’s best to discard it. Properly stored, however, it will remain a fantastic flavor enhancer for multiple meals throughout the week. Always use clean utensils when scooping out pesto to avoid introducing any contaminants.
Freezing
Pesto freezes exceptionally well, making it a perfect candidate for making ahead and stocking your freezer. For the most convenient thawing experience, consider freezing the pesto in small portions. Ice cube trays are ideal for this; simply spoon the pesto into the compartments, freeze until solid, and then transfer the frozen pesto cubes to a freezer-safe bag or container. This way, you can thaw only the amount you need for a single meal.
Alternatively, you can freeze larger portions in small, freezer-safe containers or even in a sturdy freezer bag, pressing it flat for easier storage and quicker thawing. When properly sealed and stored in the freezer, pesto can maintain its quality for up to 3 months. Make sure to label the containers with the date of freezing for easy tracking.
Reheating
Pesto, especially basil pesto, is generally not ‘reheated’ in the traditional sense, as it’s best served at room temperature or slightly warmed through when tossed with hot dishes. If you’ve frozen your pesto, simply remove the desired amount from the freezer and allow it to thaw. The best way to thaw it is gradually in the refrigerator overnight. For quicker thawing, you can place the container at room temperature for an hour or two.
Once thawed, you might notice that the texture has slightly changed or that it appears a bit thicker than when it was fresh. This is perfectly normal. Stir the pesto thoroughly to recombine the ingredients. If it seems too thick, you can loosen it up by stirring in a little extra-virgin olive oil, or, if you are using it for pasta, a small splash of warm pasta water. Gently warming it by tossing with hot pasta is the most common way to serve it.
Frequently Asked Questions
-
Can I make pesto in a blender instead of a food processor?
Yes, absolutely. A blender works very well for making pesto, especially if you prefer a smoother, more emulsified sauce. While a food processor might offer a slightly more rustic texture, a blender can achieve a beautifully smooth consistency. You might need to pause and scrape down the sides of the blender jar a few more times than you would with a food processor to ensure all ingredients are evenly incorporated. Just be patient, and the end result will be just as delicious and vibrant.
-
What should I do if my pesto is too thick?
If your pesto turns out thicker than you prefer, don’t worry; it’s easily rectified. The simplest solution is to add a little more extra-virgin olive oil, a tablespoon at a time, and blend again until you reach your desired consistency. If you are preparing to use the pesto with pasta, you can also thin it out by adding a spoonful or two of warm pasta water. The starch in the water helps to create a silky sauce that coats the pasta beautifully without diluting the intense flavor of the pesto.
-
How do I keep basil pesto from turning dark?
The key to keeping basil pesto from turning dark, or oxidizing, is to minimize its exposure to air. Once the pesto is made, transfer it to an airtight container. Before sealing the lid, smooth a thin layer of extra-virgin olive oil over the entire surface of the pesto. This creates a protective barrier that prevents the basil from coming into direct contact with oxygen, thus preserving its bright green color for longer. Proper storage in the refrigerator and using clean utensils also contribute to maintaining its freshness.