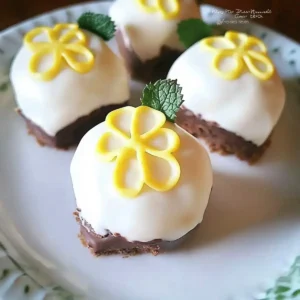
Irresistible Lemon Cake Balls for a Delicious Mother's Day

As I was savoring the last bite of a joyfully zesty dessert, I couldn’t help but feel the warmth of sunshine flooding my senses. Today, I’m excited to share my 19 Delightful Mother’s Day Dessert Ideas, with a special spotlight on one of my absolute favorites: Lemon Cake Balls. These little treats are not just easy to whip up but also striking in their bright, cheerful appearance—perfect for celebrating the woman who means the world to you.
Not only do they deliver a refreshing burst of flavor, but they also offer a delightful gluten-free option that everyone can enjoy. So, whether your mom loves something light and citrussy or you’re looking to impress with a creative twist, you’re bound to find a dessert that will make her day extra special. Ready to dive into flavors that will leave both you and Mom smiling? Let’s explore!
Why You Will Love This Recipe
- Irresistible Flavor: Each bite is packed with bright, lemony goodness that refreshes and delights, making them a truly memorable treat.
- No-Bake Simplicity: Quick and easy to prepare, these cake balls are perfect for those busy days leading up to any special occasion, offering a delightful dessert without much fuss.
- Gluten-Free Option: Made with gluten-free ingredients, these treats cater to everyone at your celebration, ensuring inclusivity and enjoyment for all your guests.
- Stunning Presentation: Their vibrant color and sweet drizzle make for an eye-catching dessert that’s sure to impress, adding a festive flair to any gathering.
- Crowd-Pleaser: Ideal for parties or intimate gatherings, these cake balls are guaranteed to disappear in no time, becoming a fast favorite among your friends and family.
Ingredients You Need
For those eager to create delightful Lemon Cake Balls, here’s everything you need to achieve that perfect balance of sweet and tart. The quality of your ingredients will directly impact the final taste and texture, so choosing fresh and vibrant components is key to a truly exceptional dessert. From the zesty lemons to the creamy white chocolate coating, each element plays a crucial role in crafting these miniature masterpieces.
Zesty Lemon Cake Balls
Delightful gluten-free treats offering a refreshing burst of flavor that melt in your mouth. Perfect for any occasion, these cake balls are easy to make and a crowd-pleaser.
- For the Cake Mixture:
- 2 tablespoons Lemon Zest
- 1/4 cup Lemon Juice (freshly squeezed)
- 2 cups Gluten-Free Flour (almond flour is a great alternative)
- 1 cup Granulated Sugar
- 1/2 cup Butter (softened or coconut oil for dairy-free)
- For the Coating:
- 8 ounces White Chocolate (or dark chocolate for richer taste)
- 1 cup Sprinkles (colorful)
- 1 cup Coconut Flakes (to coat)
- 1Prepare the Ingredients: Gather all ingredients. Preheat oven to 350°F (175°C) if baking a cake base. Zest and juice lemons. Measure out gluten-free flour, granulated sugar, and softened butter.
- 2Make the Cake Mixture: In a large bowl, combine softened butter and granulated sugar until light and fluffy (2-3 minutes). Gradually add lemon zest and juice, mixing until incorporated. Fold in gluten-free flour until just combined, avoiding overmixing.
- 3Bake the Cake Base (Optional): If baking, pour batter into a greased cake pan. Bake for 20-25 minutes, or until a toothpick inserted comes out clean. Cool completely on a wire rack.
- 4Crumble the Cake: Once cooled, crumble the cake into fine crumbs. Add a little more lemon juice if the mixture seems dry and mix thoroughly.
- 5Form the Cake Balls: Roll small portions of the mixture into 1-inch balls. Place on a parchment-lined tray. If sticky, chill for 15 minutes.
- 6Melt the Chocolate Coating: In a microwave-safe bowl, melt white chocolate in 30-second intervals, stirring until smooth. Let cool slightly.
- 7Coat the Cake Balls: Dip each cake ball into melted chocolate, letting excess drip off. Place back on the parchment-lined tray. Add sprinkles or coconut flakes before the chocolate sets.
- 8Chill and Set: Refrigerate the tray for at least 30 minutes, or until the chocolate coating has hardened.
- 9Serve and Enjoy: Arrange on a platter or in a box for gifting. Store in an airtight container in the fridge for up to a week.
Keywords: lemon, cake balls, gluten-free, dessert, no-bake, Mother's Day, sweet, treat
- lemon zest: adds a vibrant, zesty flavor essential for that citrus burst, providing an aromatic and tangy foundation for the cake balls.
- lemon juice: freshly squeezed juice brightens the flavors and keeps the cake moist, contributing essential moisture and a concentrated citrus note.
- gluten-free flour: perfect for making these cake balls gluten-free; almond flour is a great alternative, offering a slightly nutty undertone and delicate texture.
- granulated sugar: balances the tartness of the lemons, enhancing the overall sweetness and contributing to the cake’s tender crumb structure.
- butter: provides moisture and richness; consider using coconut oil for a dairy-free option, ensuring a smooth and decadent texture.
- white chocolate: melts beautifully to create a sweet coating; dark chocolate can be used for a richer taste, offering a delightful contrast to the lemon flavor.
- sprinkles: add a festive touch; colorful sprinkles bring joy and brightness to the presentation, making each cake ball a miniature work of art.
- coconut flakes: envelop the cake balls for added texture and a tropical twist, providing a pleasant chewiness and a subtle tropical aroma.
Quantities for each ingredient can be found within the recipe card.
Variations
For those seeking a delightful vegan twist, simply substitute the butter with a high-quality coconut oil or vegan butter alternative. Ensure your white chocolate coating is also dairy-free, as many brands now offer excellent vegan options. This ensures that everyone, regardless of dietary preferences, can enjoy these zesty delights without compromise.
Craving a low-carb indulgence? Swap the granulated sugar for a keto-friendly sweetener like erythritol or stevia. For the cake base, consider using almond flour or a blend of coconut and almond flour to significantly reduce carbohydrate content while maintaining a lovely texture. This adaptation allows for a guilt-free enjoyment of the bright lemon flavor.
To add an extra layer of indulgence and visual appeal, consider a double chocolate variation. Use a chocolate cake base and dip the balls in melted dark or milk chocolate instead of white. You could also swirl two types of melted chocolate together for a marbled effect. These variations offer exciting new flavor profiles and stunning presentations.
Infuse your cake balls with other citrus fruits for a complex flavor profile. Orange zest and a touch of lime juice can complement the lemon beautifully, creating a symphony of bright, refreshing notes. This can be done in both the cake mixture and the coating, offering a multi-dimensional citrus experience that is both unique and invigorating for your palate.
For a textural contrast, incorporate finely chopped nuts such as pistachios, almonds, or even macadamia nuts into the cake mixture before rolling. These nuts will provide a satisfying crunch that beautifully complements the soft, cakey interior and the smooth chocolate coating. Ensure the nuts are toasted lightly for enhanced flavor and aroma before adding them.
How to Prepare Lemon Cake Balls
Step 1: Prepare the Ingredients
Begin by meticulously gathering all the necessary ingredients for your Lemon Cake Balls. This initial step is crucial for a smooth and efficient preparation process, ensuring you have everything at your fingertips when needed. Preheat your oven to 350°F (175°C) if you plan to bake a cake base, which provides a wonderful, tender foundation for your cake balls.
Carefully zest your lemons, aiming to capture the fragrant oils from the peel without getting into the bitter white pith. Next, juice your lemons, ensuring you have a sufficient amount of fresh, bright liquid ready to amplify the taste of your cake balls. It’s always best to use freshly squeezed juice for the most vibrant lemon flavor possible.
In separate, clean bowls, measure out your gluten-free flour, granulated sugar, and softened butter. Having these measured and ready will streamline the mixing process significantly. If you are opting for a dairy-free version, ensure your coconut oil is at the right consistency, typically softened to room temperature but not completely melted.
Step 2: Make the Cake Mixture
In a generously sized mixing bowl, combine the softened butter and granulated sugar. Begin beating them together using an electric mixer or a sturdy whisk until the mixture achieves a light and fluffy consistency. This creaming process, typically taking about 2-3 minutes, is essential for incorporating air, which contributes to the cake’s tender crumb.
Gradually add in the freshly grated lemon zest and the freshly squeezed lemon juice to the creamed butter and sugar mixture. Continue mixing until these wet ingredients are fully incorporated, ensuring that the citrus oils from the zest are evenly distributed throughout. The aroma at this stage should already be wonderfully invigorating.
Slowly fold in the gluten-free flour until just combined, exercising caution to avoid overmixing. Overmixing can develop the gluten structure in the flour (even in gluten-free blends), leading to a tougher cake. A gentle folding motion with a spatula ensures the flour is incorporated without compromising the desired tenderness.
Step 3: Bake the Cake Base (Optional)
If you have chosen to bake a cake base for your Lemon Cake Balls, carefully pour the prepared batter into a greased and floured cake pan. A standard 8×8 inch pan works well for this purpose, providing enough surface area for even baking. Ensure the pan is well-greased to prevent sticking.
Bake the cake in your preheated oven at 350°F (175°C) for approximately 20-25 minutes. The cake is ready when the top is lightly golden brown and a toothpick inserted into the center comes out clean. This indicates that the inside is fully cooked and no longer wet.
Once baked, allow the cake to cool completely on a wire rack before proceeding to the next step. Attempting to crumble a warm cake will result in a sticky, unmanageable mess. Patience here is key to achieving perfectly formed cake balls later on.
Step 4: Crumble the Cake
Once the cake is entirely cooled, it’s time to transform it into fine crumbs, which form the essential base for your Lemon Cake Balls. You can use your hands to gently break apart the cake, or a fork for a more uniform crumb. The finer the crumbs, the smoother your final cake balls will be.
This crumbling step is absolutely crucial as it creates the pliable mixture needed for shaping. The texture should resemble damp sand or breadcrumbs. If the mixture appears too dry and crumbly, you can add a tablespoon or two more of lemon juice or a splash of milk to help bind it together more effectively.
Mix the crumbs thoroughly, ensuring that any added moisture is evenly distributed. The goal is a cohesive mixture that holds its shape when squeezed but isn’t overly sticky. This consistency is vital for easy rolling and for the cake balls to maintain their form during the coating process.
Step 5: Form the Cake Balls
Using your hands, take small portions of the cake mixture, approximately a tablespoon’s worth, and gently roll them into balls about one inch in diameter. Aim for consistency in size so that they all coat evenly. You can use a small cookie scoop to ensure uniformity if desired.
Place each perfectly formed cake ball onto a baking sheet lined with parchment paper, ensuring there’s a small space between each one to prevent them from sticking together as they sit. The parchment paper makes for easy removal and clean-up later.
If you find the mixture is proving too sticky to handle, don’t despair. Simply pop the entire bowl into the refrigerator for about 15 minutes. This chilling period will firm up the cake mixture, making it significantly easier to roll into smooth, well-defined balls and helping them to maintain their shape. This is a common trick for sticky doughs.
Step 6: Melt the Chocolate Coating
In a microwave-safe bowl, carefully melt the white chocolate. This is best done in short intervals, typically 30 seconds at a time. Stir the chocolate thoroughly between each interval until it is completely smooth and free of any lumps. Microwaving chocolate too quickly can cause it to seize or burn.
This melting process usually takes about 1-2 minutes in total, depending on your microwave’s wattage. Once melted, remove the bowl from the microwave. It’s important to let the melted chocolate cool for a minute or two before dipping the cake balls.
Allowing the chocolate to cool slightly prevents it from being too hot, which could otherwise melt the cake balls themselves as you dip them. A slightly cooler, but still fluid, chocolate coating ensures a smooth and even shell that adheres beautifully to the cake structure.
Step 7: Coat the Cake Balls
Now for the most satisfying part: dipping each cake ball into the luxuriously melted white chocolate. Use a fork or a specialized dipping tool to fully submerge each ball, ensuring it is completely covered with the smooth, sweet coating. Gently swirl the ball to achieve an even layer.
Carefully lift each chocolate-covered cake ball out of the bowl, allowing any excess chocolate to drip back into the bowl. This prevents thick, uneven edges and ensures a neat finish. Place the coated balls back onto the parchment-lined tray, ensuring they don’t touch one another.
While the white chocolate is still wet, this is your prime opportunity to add festive touches. Immediately sprinkle your colorful sprinkles or toasted coconut flakes over the surface of the wet chocolate. The coating will hold these toppings securely as it begins to set, creating a beautifully decorated and texturally interesting cake ball.
Step 8: Chill and Set
Once all your cake balls have been lovingly coated and decorated, it’s time to let them firm up. Carefully transfer the tray of coated Lemon Cake Balls to the refrigerator. Allow them to chill for at least 30 minutes, or until the chocolate coating has hardened completely.
This chilling step is absolutely essential for several reasons. Firstly, it ensures that your delightful treats hold their shape and don’t become misshapen. Secondly, it allows the chocolate to fully set, providing that satisfying snap when you take a bite. It also prevents the coating from melting onto your fingers.
The cool temperature of the refrigerator solidifies the cocoa butter in the chocolate, creating a firm, pleasant shell. The contrast between the firm coating and the soft cake interior is a key element of the enjoyable texture of these Lemon Cake Balls, making the wait well worth it.
Step 9: Serve and Enjoy
Once the chocolate coating has completely hardened and the cake balls are perfectly set, they are ready to impress your friends, family, or that special mom in your life. Arrange them artfully on a decorative platter, perhaps nestled in colorful cupcake liners, or pack them into a festive gift box for a thoughtful homemade present.
These delightful treats can be enjoyed immediately, offering a burst of sunshine and sweetness with every bite. Alternatively, they can be stored in an airtight container in the refrigerator for up to a week, making them perfect for sharing over several days or for having a ready supply of delicious snacks. Their enduring appeal makes them a versatile dessert.
The bright, zesty flavor of the lemon combined with the sweet coating makes these cake balls incredibly moreish. They are a testament to how simple ingredients can be transformed into something truly special with a little bit of care and creativity. Enjoy sharing these little bursts of joy!
Pro Tips for Lemon Cake Balls
Use Fresh Ingredients: Always opt for fresh lemons for both the zest and juice. The zest contains fragrant oils that provide intense lemon aroma, while fresh juice offers a brighter, more vibrant flavor compared to bottled alternatives, which can sometimes taste metallic or flat. This makes a significant difference in the final taste.
Chill the Mixture if Sticky: If your cake mixture feels too sticky to handle when you start rolling, don’t hesitate to refrigerate it for about 15 minutes. This will firm up the dough, making it much easier to roll into smooth, uniform balls. It’s a simple step that prevents frustration and ensures a neater final product.
Don’t Overbake the Cake Base: If you’re baking a cake base, be mindful not to overbake it. A slightly underbaked or perfectly baked cake will crumble more easily and result in a moister cake ball. Always perform the toothpick test; a few moist crumbs clinging to the toothpick is ideal, indicating a tender texture.
Achieve the Perfect Coating: Ensure the white chocolate is smooth and slightly cooled before dipping. If it’s too hot, it can melt the cake balls. If it’s too cool, it will be too thick to coat evenly. Aim for a fluid consistency that coats without being runny or thick. A double boiler method can also provide more control than microwaving.
Creative Variation Ideas: Don’t be afraid to experiment with different toppings and flavor infusions. Consider crushed pistachios for a pop of green and nutty crunch, a drizzle of dark chocolate for visual contrast and deeper flavor, or even a dusting of edible glitter for extra sparkle. These small additions can elevate your cake balls to a new level of elegance and excitement.
Serving Suggestions for Lemon Cake Balls
Decoration
Elevate your Lemon Cake Balls with simple yet stunning decorations. A classic choice is to drizzle them with contrasting chocolate, like dark or milk chocolate, over the white coating for a beautiful marbled effect. You can also use a toothpick to create elegant swirls. Edible gold leaf or silver dragees add a touch of luxury for special occasions, making each bite feel truly decadent and celebratory.
Consider using vibrant, colorful sprinkles that complement the yellow of the lemon. Options range from classic jimmies to tiny nonpareils or even fun shapes like stars or hearts. For a more sophisticated look, use finely chopped pistachios or toasted coconut flakes for a textural and visual contrast. Even a simple dusting of powdered sugar can give them a delicate, frosted appearance.
Fresh citrus zest, finely grated, can be sprinkled on top before the coating sets for an extra punch of lemon aroma and flavor. You could also create a delicate lace effect by piping thin lines of melted chocolate or royal icing over the hardened coating. These decorative touches transform each cake ball into a miniature work of edible art.
Side Dishes
Complement the bright zestiness of your Lemon Cake Balls with a selection of refreshing accompaniments. Fresh berries, such as strawberries, blueberries, or raspberries, provide a burst of natural sweetness and vibrant color that perfectly balances the cake’s tartness. A simple fruit salad featuring seasonal produce also works wonderfully.
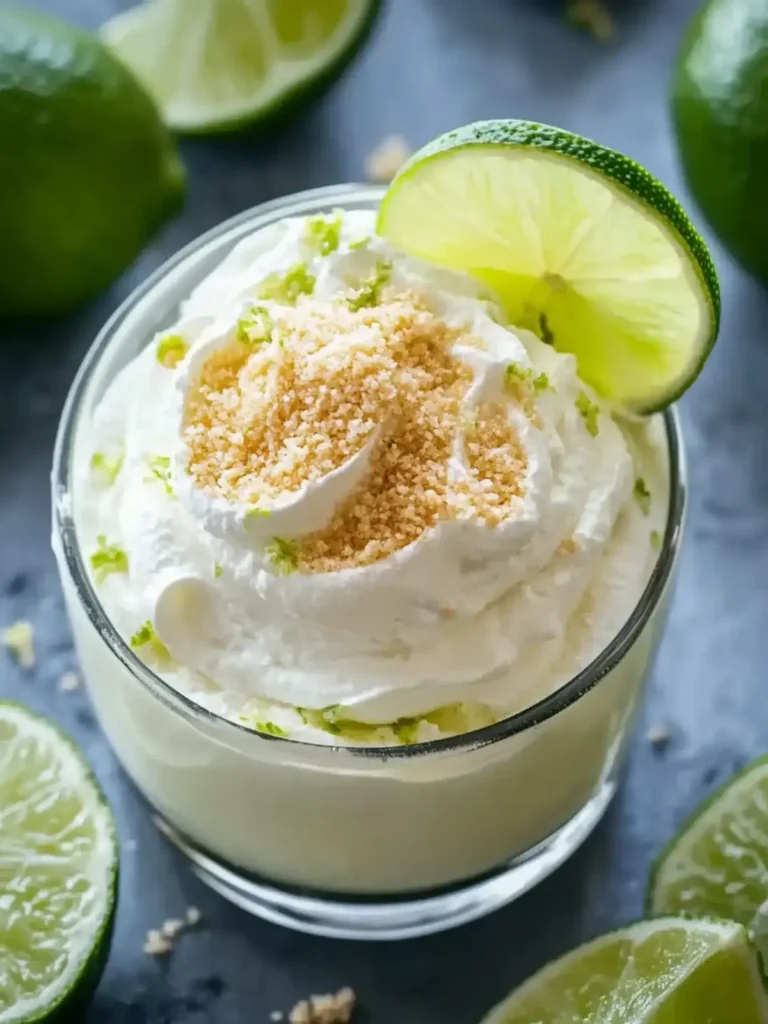
A dollop of lightly sweetened whipped cream or a scoop of creamy vanilla bean ice cream creates a delightful contrast in both temperature and texture. The rich, smooth creaminess of the ice cream is a classic pairing that enhances the overall dessert experience. For a dairy-free option, coconut whipped cream is an excellent choice.
For a beverage pairing, consider a glass of chilled sparkling water with a slice of lemon or lime, or a delicate iced tea. A light, fruity white wine or a sparkling wine also makes for an elegant pairing for more adult gatherings. These refreshing drinks cut through the sweetness and cleanse the palate beautifully.
Creative Serving Ideas
Present your Lemon Cake Balls in miniature candy cups or arrange them in a tiered display for a visually striking dessert table. For a more rustic charm, serve them on a wooden board or slate platter, perhaps interspersed with fresh flowers or lemon slices. This adds an organic, natural element to your presentation.
Package them in small cellophane bags tied with ribbon as charming party favors or gifts. Attach a small tag with a handwritten note to make them extra special. This makes them perfect for occasions like bake sales, bridal showers, or thank-you gifts for friends and family. They are miniature treasures ready to be shared.
Consider a “lemon-themed” dessert bar where these cake balls are the star, surrounded by other complementary treats like lemon bars, lemon cookies, or lemon-infused madeleines. This cohesive theme creates a memorable and delightful experience for your guests. The variety ensures there’s something for everyone’s sweet tooth.
Preparation & Storage
Storing Leftovers
To keep your Lemon Cake Balls fresh and delicious, store them in an airtight container in the refrigerator. The cool environment helps maintain their shape and prevents the coating from becoming too soft. They will typically remain at their best for up to one week when stored properly, offering a delightful treat whenever the craving strikes.
Ensure the container is truly airtight to prevent the cake balls from absorbing any unwanted odors from other foods in the refrigerator. This also helps to maintain their ideal moisture level, preventing them from drying out or becoming stale. Check for condensation inside the container, as excessive moisture can affect the coating.
If you notice any slight condensation, you can place a small piece of paper towel at the bottom of the container to absorb excess moisture. Always allow the cake balls to come to room temperature for a few minutes before serving, as this enhances their flavor and texture, making them more enjoyable.
Freezing
For longer-term storage, Lemon Cake Balls freeze exceptionally well. First, arrange them in a single layer on a baking sheet lined with parchment paper and place them in the freezer until they are firm. This usually takes about 1-2 hours, preventing them from sticking together in a clump.
Once frozen solid, transfer the cake balls to a freezer-safe airtight container or a heavy-duty freezer bag. Squeeze out as much air as possible from the bag before sealing it. Properly stored, they can maintain their excellent quality for up to 2 months, making them a perfect make-ahead option for future gatherings or unexpected guests.
When you are ready to enjoy your frozen treats, it is best to allow them to thaw slowly in the refrigerator overnight. This gentle thawing process helps to maintain their texture and prevents the chocolate coating from cracking or becoming soft due to temperature shock. Avoid thawing at room temperature, which can lead to a less desirable consistency.
Reheating
Typically, Lemon Cake Balls do not require reheating, as they are best enjoyed chilled or at room temperature. However, if you prefer a slightly softer texture or if they have been frozen and thawed, you can gently warm them. Place the thawed cake balls on a parchment-lined baking sheet and warm them in a preheated oven at a very low temperature, around 200°F (95°C), for just a few minutes.
Alternatively, you can gently warm them in a microwave on the lowest power setting for very short bursts of 10-15 seconds. Be extremely cautious, as overheating can cause the chocolate coating to melt completely and the cake inside to become gummy or dry. The goal is just to take the chill off, not to cook them.
It is generally recommended to let them come to room temperature naturally after thawing for the best sensory experience. The subtle warmth that develops as they sit out enhances the release of flavors and aromas, making them truly delightful to consume. Patience is key to enjoying their perfect texture.
Frequently Asked Questions
-
How do I select ripe lemons for my Lemon Cake Balls?
Absolutely! Look for lemons that feel firm and heavy for their size, with smooth, shiny skin. Avoid any lemons that have dark spots, soft patches, or appear shriveled, as these might indicate they are past their prime or beginning to spoil. Fresh, ripe lemons will yield the most juice and fragrant zest, which are crucial for achieving that intense, authentic lemon flavor that makes these cake balls so irresistible.
-
How should I store leftover Lemon Cake Balls?
I highly recommend keeping your finished lemon cake balls in an airtight container placed in the refrigerator. This method helps maintain their delicious moistness and vibrant zesty flavor for up to one week. If you find yourself with more than you can enjoy within that timeframe, there’s a fantastic and easy way to freeze them for even longer freshness, ensuring you can savor them at a later date.
-
Can I freeze Lemon Cake Balls?
Yes, you absolutely can freeze your lemon cake balls! To do so, first arrange them in a single layer on a baking sheet lined with parchment paper and place them in the freezer until they are solid, which usually takes about 1-2 hours. Once they are frozen firm, carefully transfer them into a freezer-safe bag or airtight container. Stored properly, they will keep well for up to 2 months, and when you’re ready to enjoy them, simply let them thaw overnight in the refrigerator for the best texture and flavor.
-
What should I do if my cake mixture is too sticky?
If you find your cake mixture is too sticky to handle easily when you try to roll it into balls, don’t worry. A simple solution is to place the bowl with the mixture in the refrigerator for about 15 minutes. This chilling period will firm up the dough significantly, making it much easier to work with and roll into smooth, well-formed balls. Additionally, avoid overmixing the cake batter itself, as this can also contribute to a stickier end result.
-
Are there any dietary considerations I should keep in mind?
Certainly! These Lemon Cake Balls can be easily adapted for various dietary needs. For a gluten-free version, simply use a good quality gluten-free flour blend as specified. If you or your guests have specific allergies, it’s always wise to double-check the ingredients of your white chocolate and any toppings you choose, such as sprinkles or coconut flakes, as they may contain hidden allergens. Opting for high-quality, carefully selected ingredients will ensure a safe and delicious dessert for everyone to enjoy.