Irresistible White Chicken Enchiladas
Have you ever craved a cozy and comforting dish that brings the whole family together? If you haven’t tried White Chicken Enchiladas yet, you’re missing out on a delightful culinary experience. This dish embodies the perfect balance of flavors, from the tender chicken to the creamy sauce, making it a staple in households everywhere.
White Chicken Enchiladas are more than just a meal; they are a cherished experience that is both simple and satisfying. The combination of shredded chicken, rich sour cream, and zesty green enchilada sauce creates an irresistible flavor profile that will leave your taste buds singing. Plus, it’s a fantastic option for weeknight dinners, gatherings, or even special occasions, offering a truly versatile culinary adventure.
Why You Will Love This Recipe
- Flavorful Delight: The harmonious blend of tender shredded chicken, creamy sour cream, and tangy green enchilada sauce creates an incredibly satisfying flavor profile that is both comforting and complex.
- Effortless Preparation: This recipe is designed for ease, with simple steps that make it perfect for busy weeknights or when you’re entertaining guests without spending hours in the kitchen.
- Highly Customizable: Enjoy the freedom to adapt the recipe to your personal tastes by easily swapping out ingredients or adding your favorite vegetables and spices.
- Family Favorite: Universally adored by both children and adults, these enchiladas are guaranteed to be a hit at any family dinner or social gathering, fostering happy memories around the table.
- Convenient Make-Ahead Option: Save time on the day of serving by assembling the enchiladas in advance, allowing you to simply bake them just before your guests arrive or your family sits down to eat.
- Excellent for Meal Prep: This dish freezes beautifully, making it an ideal choice for preparing meals ahead of time and enjoying delicious leftovers throughout the week with minimal effort.
Ingredients You Need
The quality of your ingredients plays a pivotal role in the final taste of your White Chicken Enchiladas. Opting for fresh, high-quality components will elevate this simple dish into something truly spectacular. Don’t hesitate to explore different varieties of cheese or even consider homemade enchilada sauce for an even more gourmet touch.
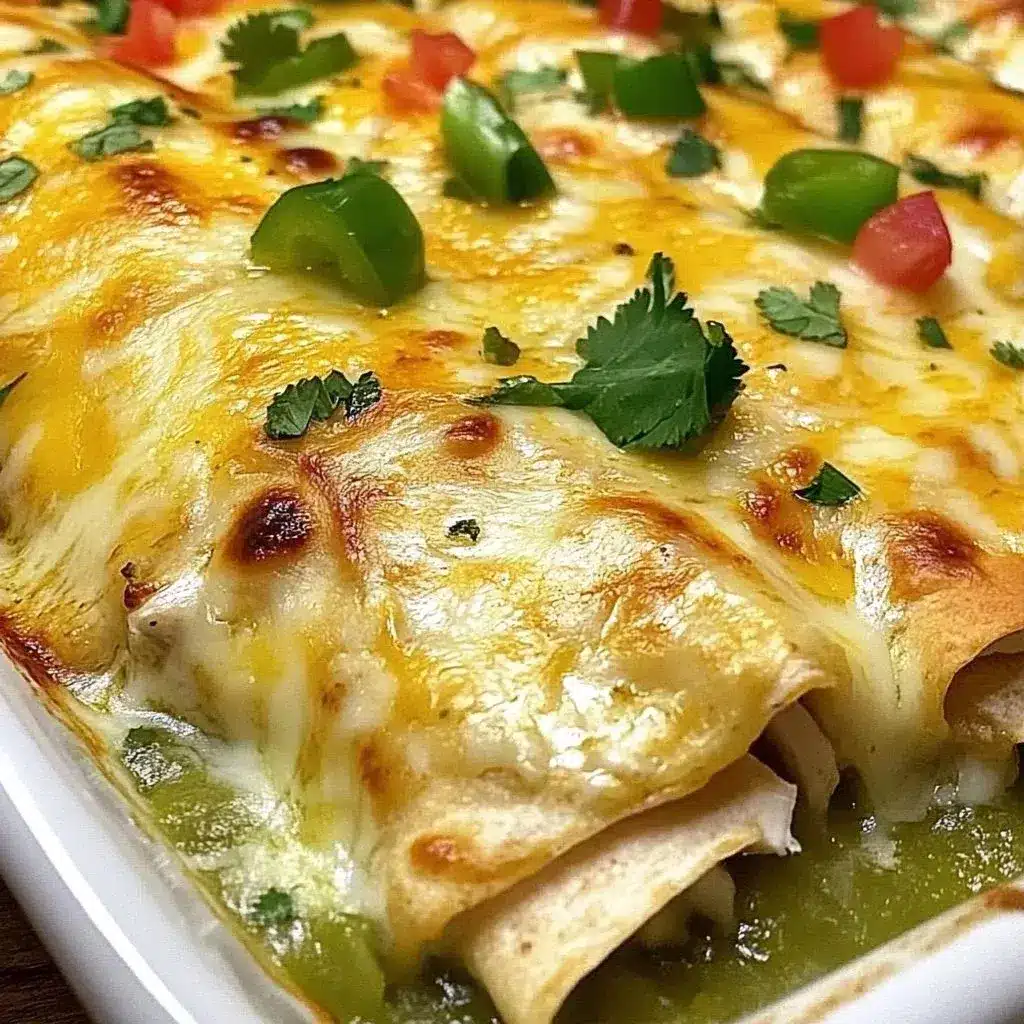
White Chicken Enchiladas

Warm tortillas filled with a creamy chicken mixture, baked to perfection and topped with gooey cheese, making it a comforting family dish.
- 2 cups cooked, shredded chicken
- 1 cup sour cream (Can substitute with Greek yogurt)
- 1 cup shredded cheese (e.g., Monterey Jack or Cheddar)
- 1 can green enchilada sauce (10 oz)
- 8 flour tortillas (Can substitute with corn tortillas for a gluten-free option)
- 1/2 cup diced green onions
- 1 teaspoon garlic powder
- Salt and pepper to taste
- 1Gather all your ingredients, ensuring chicken is cooked and shredded.
- 2In a mixing bowl, combine the shredded chicken, sour cream, half of the cheese, green onions, garlic powder, salt, and pepper. Mix well.
- 3Spoon a generous portion of the chicken mixture onto the center of each tortilla, roll tightly, and place seam side down in a greased baking dish.
- 4Preheat your oven to 350°F (175°C).
- 5Spread some enchilada sauce on the bottom of the baking dish before arranging the filled tortillas.
- 6Pour the remaining enchilada sauce over the filled tortillas and sprinkle with the remaining cheese.
- 7Bake in the preheated oven for 20-25 minutes until the cheese is bubbling and golden.
Keywords: Comfort Food, easy dinner, Family Recipe, meal prep, White Chicken Enchiladas
- cooked, shredded chicken: ensure your chicken is fully cooked and easily shreddable for a tender filling.
- sour cream: provides a rich, creamy base for the sauce and filling, adding a delightful tang.
- shredded cheese (e.g., Monterey Jack or Cheddar): a blend of cheeses melts beautifully, creating a gooey topping.
- green enchilada sauce: this key ingredient brings a vibrant flavor and slight heat to the dish.
- flour tortillas: pliable tortillas are perfect for rolling up the chicken mixture without tearing.
- diced green onions: adds a fresh, mild onion flavor and a pop of color to the filling.
- garlic powder: a convenient way to infuse a consistent garlic flavor throughout the creamy filling.
- salt and pepper: essential seasonings to enhance and balance all the other flavors in the dish.
The precise quantities for these ingredients can be found within the recipe card for your convenience.
Variations
For those seeking a delightful plant-based alternative, consider transforming this recipe into a vegan masterpiece. Instead of chicken, you can use shredded jackfruit, which mimics the texture of pulled meat remarkably well. Another excellent vegan protein option is firm or extra-firm tofu, crumbled and seasoned to perfection before being incorporated into the creamy sauce base. Ensure your enchilada sauce and any other added ingredients are also vegan-friendly.
If you’re following a low-carb lifestyle, a few simple adjustments can make these enchiladas compliant. The most straightforward modification is to replace the traditional flour tortillas with low-carb alternatives, such as those made from almond flour or coconut flour. Alternatively, you could skip the tortillas altogether and create a deconstructed enchilada casserole by layering the chicken and sauce mixture with cheese in a baking dish, similar to a baked dip or strata.
Adding extra vegetables to the filling can boost both nutrition and flavor. Finely chopped sautéed mushrooms, spinach that has been wilted and squeezed dry, or corn kernels add delightful textures and earthy undertones. For a touch of vibrant color and sweetness, consider adding finely diced bell peppers, such as red or yellow, which can be lightly sautéed before being mixed into the creamy chicken filling.
How to Prepare White Chicken Enchiladas
Step 1: Prepare Your Ingredients
Begin by ensuring all your components are ready for assembly. This involves having your cooked and shredded chicken conveniently available, typically from a roasted chicken, rotisserie chicken, or chicken breasts boiled until tender. Measure out your sour cream, cheese, and green onions so they are easily accessible. Having everything prepped and within reach is a key strategy for a smooth and enjoyable cooking process.
Preheating your oven to the specified temperature is a crucial early step. This ensures that the moment your enchiladas are assembled and ready to bake, they can go directly into a hot oven, promoting even cooking and optimal texture development. A properly preheated oven is the foundation for achieving that desirable bubbly cheese topping and perfectly heated filling without any risk of undercooking.
Gathering all your seasonings, such as garlic powder, salt, and pepper, is also part of this initial preparation phase. Having them measured and ready allows for quick incorporation into the filling mixture. This systematic approach to ingredient preparation significantly streamlines the entire enchilada-making process, making it less stressful and more enjoyable.
Step 2: Create the Creamy Chicken Filling
In a generously sized mixing bowl, combine the perfectly shredded chicken with the rich sour cream. This forms the creamy base of your enchilada filling. Ensure the chicken is evenly distributed within the sour cream to avoid pockets of plain chicken or overly dense sour cream mixtures. The goal is a cohesive and luscious blend that will coat each strand of chicken beautifully.
Next, incorporate half of your shredded cheese into this mixture. This cheese not only adds to the creaminess but also begins to bind the filling together, contributing to a delightful texture. Stir in the diced green onions, garlic powder, salt, and pepper to season the filling thoroughly. Taste a small portion to adjust seasonings if needed, ensuring a balanced and savory flavor profile that hints at the deliciousness to come.
Mix everything thoroughly until all the ingredients are well incorporated. The resulting filling should be creamy, flavorful, and have a consistency that is easy to spoon into tortillas without being too loose or too stiff. This step is where the foundational flavors of your enchiladas are truly built, setting the stage for a wonderfully satisfying dish.
Step 3: Assemble the Enchiladas
Lay out your flour tortillas, one at a time, and spoon a generous portion of the prepared chicken filling onto the center of each one. Be careful not to overfill, as this can make rolling difficult and potentially cause the tortillas to tear. Aim for a balanced amount of filling that will allow for neat and tidy rolling.
Once filled, carefully roll each tortilla up tightly, ensuring the seam is on the underside. This seam-side-down placement is crucial for keeping the enchiladas intact during the baking process. Place each rolled enchilada snugly into a greased baking dish, ensuring they are close together but not so crowded that they cannot heat evenly.
Continue this process for all the tortillas and filling, arranging them in a single layer in the prepared baking dish. The close proximity of the enchiladas helps them to steam slightly as they bake, enhancing their tenderness and ensuring they all cook uniformly. This organized arrangement is key to a beautifully presented and evenly cooked final dish.
Step 4: Preheat Your Oven
As you are in the process of assembling your enchiladas, it’s an ideal time to preheat your oven. Set your oven to 350 degrees Fahrenheit (175 degrees Celsius). Allowing the oven to reach its target temperature before the enchiladas go in is critical for even cooking and achieving the perfect gooey cheese topping.
A properly preheated oven ensures that the moment the enchiladas enter, they begin to bake immediately and consistently. This prevents the tortillas from becoming soggy or the filling from remaining lukewarm. It’s a fundamental step that significantly impacts the final texture and overall success of the dish. Don’t underestimate the importance of this seemingly simple step.
Having the oven ready means that once your enchiladas are sauced and cheesed, they can be transferred directly into the heat. This minimizes any waiting time, which could otherwise lead to the fillings cooling down or the tortillas losing their intended texture before they even begin to cook. This dedicated step ensures your oven is at its optimal temperature for baking perfection.
Step 5: Add the Sauce Layer
Before arranging your filled tortillas, it’s essential to create a base layer of green enchilada sauce at the bottom of your greased baking dish. This first layer of sauce serves multiple purposes. It prevents the bottom tortillas from sticking to the dish, which is a common and frustrating problem. Furthermore, it infuses the tortillas with flavor from the very beginning of the baking process.
Ensure this initial sauce layer is spread evenly across the entire bottom surface of the baking dish. You don’t need an excessive amount, just enough to coat the bottom adequately. This simple step of adding sauce first is a game-changer for both the ease of serving and the overall taste experience of your White Chicken Enchiladas, contributing to their moistness and delightful flavor.
This foundational sauce layer acts as a protective buffer, keeping the tortillas tender and preventing them from becoming dry or tough during their time in the hot oven. It’s a small detail that makes a significant difference in the final outcome, ensuring your enchiladas are perfectly moist and bursting with flavor from the bottom up. This proactive approach to moisture and flavor is a hallmark of great cooking.
Step 6: Arrange the Tortillas
Carefully place the filled and rolled tortillas into the baking dish, ensuring they are arranged seam-side down. This orientation is crucial for keeping the enchiladas neatly formed during baking and preventing the filling from spilling out. Tuck them in snugly, allowing them to nestle together, which helps them retain their shape and steam gently as they cook.
Arrange the enchiladas in a single layer if possible, maximizing even cooking and sauce coverage. If your dish is not large enough for a single layer, you can slightly overlap them, but try to keep them as separated as practical. The goal is to create an inviting and well-organized bed of enchiladas ready for their flavorful topping.
This methodical arrangement ensures that each enchilada receives adequate heat exposure and sauce distribution. The close placement helps to create a cohesive dish, making it easier to serve and enjoy. Take a moment to ensure they look appealing before moving on to the next, equally important step of adding the final sauce and cheese.
Step 7: Top with Sauce and Cheese
Once your tortillas are perfectly arranged in the baking dish, it’s time to apply the crowning glory: the remaining green enchilada sauce. Pour this flavorful sauce evenly over the tops of all the enchiladas, ensuring they are well-covered. This not only adds a wonderful layer of flavor but also helps to keep the tortillas moist and tender throughout the baking process.
After the sauce has been generously applied, sprinkle the remaining shredded cheese over the top. Distribute it evenly so that every enchilada gets a good amount of this delicious, melty topping. This is where the magic happens, as the cheese will bubble and turn a beautiful golden brown, creating that irresistible, gooey finish that makes enchiladas so beloved.
This combination of sauce and cheese creates the signature appearance and taste of baked enchiladas. The visual appeal of a bubbling cheese crust atop a saucy bed of enchiladas is mouthwatering. This is the final step before they enter the oven, and it sets the stage for a truly delightful culinary creation that will satisfy everyone around the table.
Step 8: Bake to Perfection
Carefully place the prepared baking dish into your preheated oven. Allow the enchiladas to bake for approximately 20 to 25 minutes. During this time, the flavors will meld together beautifully, the chicken will heat through, and the cheese will melt into a bubbly, golden blanket.
You’ll know the enchiladas are ready when the cheese on top is fully melted, starting to bubble around the edges, and has achieved a lovely golden-brown hue. This visual cue indicates that the dish has reached its optimal temperature and is perfectly cooked. The aroma filling your kitchen at this stage will be incredibly enticing, promising a delicious meal.
Once they’ve reached this state of perfection, carefully remove the baking dish from the oven. Allow the enchiladas to rest for a few minutes before serving. This brief resting period helps the enchiladas set, making them easier to serve and preventing them from falling apart. This final step ensures each serving is neat and delicious, ready to be enjoyed.
Pro Tips for White Chicken Enchiladas
Tip: For an extra layer of flavor complexity, consider adding a pinch of cumin or smoked paprika to your chicken and sour cream mixture. These spices can introduce a subtle smokiness and depth that complements the creamy sauce beautifully, adding a gourmet touch to your home-cooked meal.
Tip: When shredding your chicken, aim for pieces that are not too large or too small. Medium-sized shreds will distribute evenly within the creamy filling and hold their texture well after baking. Overly fine shreds can sometimes become lost in the sauce, while very large chunks might be awkward to eat.
Tip: Don’t be afraid to experiment with different types of cheese! While Monterey Jack and Cheddar are classic choices, a blend that includes some Pepper Jack for a little heat, or even a sprinkle of Cotija for a salty finish, can add exciting dimensions to your enchiladas.
Tip: For a vibrant garnish that adds freshness and a burst of color, consider topping your baked enchiladas with a dollop of sour cream or crema, a sprinkle of fresh cilantro, sliced avocado or guacamole, or even some pickled jalapeños for a spicy kick. These finishing touches elevate the presentation and the overall flavor profile.
Tip: Ensure your flour tortillas are fresh and pliable. If they seem a bit stiff, a quick warm-up in a dry skillet or microwave for a few seconds can make them more flexible and less likely to crack when you roll them. This small step significantly improves the rolling process and the final appearance of your enchiladas.
Serving Suggestions for White Chicken Enchiladas
Decoration
Garnishing your White Chicken Enchiladas is an essential part of presenting a visually appealing and delicious dish. A swirl of extra sour cream or Mexican crema on top adds a beautiful creamy contrast to the golden cheese. Freshly chopped cilantro provides a vibrant green color and a fresh, herbaceous note that cuts through the richness of the dish.
For those who enjoy a bit of heat and a creamy texture, sliced avocado or a spoonful of guacamole makes a fantastic topping. A sprinkle of finely diced red onion or chives can offer a sharp bite and a pop of color. Consider also adding a few thinly sliced jalapeños for those who prefer an extra spicy element to their meal.
The combination of these garnishes not only enhances the visual appeal but also adds complementary flavors and textures that elevate the entire enchilada experience. Think of them as the final brushstrokes that complete your culinary masterpiece, making each bite as delightful to the eye as it is to the palate.
Side Dishes
To complement the rich and creamy nature of White Chicken Enchiladas, simple yet flavorful side dishes are ideal. A classic pairing is Mexican rice, which can be seasoned with tomatoes, onions, and herbs to create a perfectly balanced side. Refried beans, either plain or seasoned with cheese and spices, offer a hearty and traditional accompaniment that diners love.
A fresh, crisp salad can provide a refreshing contrast to the warm, cheesy enchiladas. Consider a simple mixed greens salad with a lime vinaigrette, or a more elaborate salad featuring corn, black beans, and avocado. This adds a healthy element and a bright, zesty flavor profile to the meal.
For a truly authentic Mexican-inspired feast, chips and salsa are always a welcome addition. Offer a variety of salsas, from mild pico de gallo to spicier options, allowing guests to customize their experience. These simple sides ensure that the enchiladas remain the star while providing a complete and satisfying dining experience.
Creative Serving Ideas
Transform your White Chicken Enchiladas into a delightful appetizer by cutting them into smaller, bite-sized portions after baking. Serve them on a platter with various dipping sauces, such as a mild salsa verde or a spicy ranch. This makes them perfect for parties or casual get-togethers, offering a delicious finger food option.
Consider a deconstructed enchilada bowl for a lighter, more customizable meal. Layer the shredded chicken and creamy sauce mixture over a bed of cilantro-lime rice or cauliflower rice. Top with your favorite enchilada garnishes like cheese, avocado, and salsa for a healthy and flavorful bowl that can be enjoyed hot or cold.
Another creative idea is to serve individual enchilada casseroles in small ramekins or oven-safe bowls. This allows each person to have their own perfectly portioned dish, making serving easier and adding a touch of elegance to a family meal. It also ensures everyone gets an equal share of the crispy edges and gooey cheese.
Preparation & Storage
Storing Leftovers
To store leftover White Chicken Enchiladas, allow them to cool slightly after baking. Once cooled to room temperature, transfer them to an airtight container. This is crucial for maintaining their freshness and preventing them from drying out in the refrigerator. Ensure the container is sealed tightly to lock in moisture and prevent the absorption of any unwanted odors.
Leftovers can typically be stored in the refrigerator for up to 3 to 4 days. It’s best to keep them in a single layer if possible, or ensure they are packed snugly to prevent them from becoming overly disturbed. Proper storage is key to enjoying the delicious flavors of your enchiladas even after the initial meal, making them a convenient option for future lunches or quick dinners.
When you’re ready to enjoy them again, simply reheat them following the instructions in the reheating section. The goal is to warm them thoroughly without overcooking, which can lead to a mushy texture. With proper storage, these comforting enchiladas can be a delightful repeat performance.
Freezing
Freezing White Chicken Enchiladas is an excellent strategy for meal prep and ensuring you always have a delicious meal on hand. To freeze, assemble the enchiladas as you normally would, but do not bake them if you plan to freeze them before baking. Alternatively, you can freeze already baked and cooled enchiladas.
For unbaked enchiladas, cover the baking dish tightly with a layer of plastic wrap, followed by a layer of aluminum foil. If freezing individual portions, wrap them securely in plastic wrap and then place them in a freezer-safe bag or container. Label with the date to keep track of how long they have been stored.
Baked enchiladas can also be frozen. Allow them to cool completely, then wrap individual servings or the entire dish tightly. They can remain in the freezer for up to 2 to 3 months, retaining good quality. Thawing them overnight in the refrigerator before reheating is the recommended method for best results.
Reheating
Reheating White Chicken Enchiladas can be done effectively in either the oven or the microwave, depending on your preference and the amount you are reheating. For the oven, place the leftover enchiladas in an oven-safe dish and cover them loosely with foil to prevent the cheese from burning before the enchiladas are heated through. Bake at a moderate temperature, around 350°F (175°C), for about 15-20 minutes, or until they are hot and bubbly.
If using the microwave, arrange a portion of enchiladas on a microwave-safe plate. Cover them loosely with a damp paper towel to help retain moisture. Heat on medium power in 30-second to 1-minute intervals, checking for doneness, until they are heated through. Be cautious not to overheat, as this can make the tortillas gummy.
For frozen enchiladas, it’s best to thaw them completely in the refrigerator overnight before reheating. This ensures they heat more evenly and maintain a better texture. Reheating them from a frozen state can be done in the oven, but it will require a longer cooking time, potentially 30-40 minutes, covered.
Frequently Asked Questions
-
Can I make White Chicken Enchiladas ahead of time?
Absolutely! Assembling the enchiladas a day in advance is a fantastic way to save time, especially when hosting guests. Once assembled in the baking dish, cover them tightly with plastic wrap and refrigerate. When you’re ready to serve, simply remove the plastic wrap, add the top layer of cheese if you held some back, and bake according to the recipe instructions, though you might need to add a few extra minutes to the baking time to ensure they are heated through properly.
-
How do I freeze White Chicken Enchiladas?
You have a couple of options for freezing. You can freeze the unbaked, assembled enchiladas. After placing them in your baking dish, cover them very tightly with a layer of plastic wrap, then a layer of aluminum foil, and freeze. Alternatively, you can bake the enchiladas, let them cool completely, and then wrap individual portions or the whole dish tightly before freezing. Frozen enchiladas are best enjoyed within 2 to 3 months for optimal quality.
-
What can I use instead of chicken?
This recipe is wonderfully versatile. For a vegetarian option, consider using black beans mixed with corn and some sautéed vegetables like bell peppers and onions as your filling. Shredded turkey is a great substitute if you have leftover roast turkey. For a plant-based meal, shredded jackfruit or firm tofu that has been pressed and crumbled can work exceptionally well to mimic the texture of chicken.